Poses

I often, as you know, write about what I have been photographing recently, and that has been a number of sessions with a regular and excellent model, Kim – so I shall do one more post on this today.

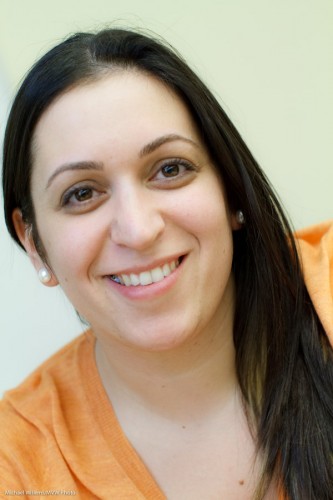
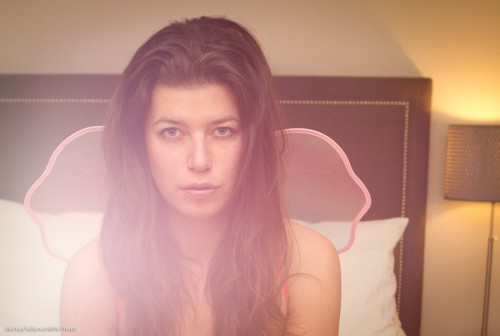
When shooting a model, or fashion, or art portraits – anything creative –  it is important to try different poses all the time. A good model changes his or her pose every two or three seconds. It is the photographer’s duty to go with that; even to encourage that with less experienced models.

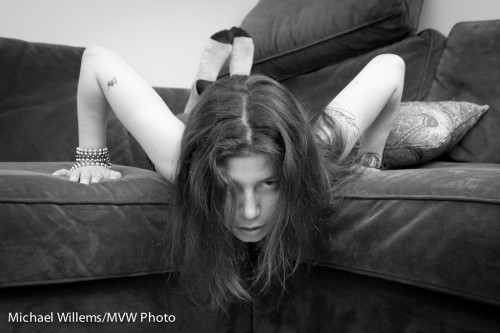
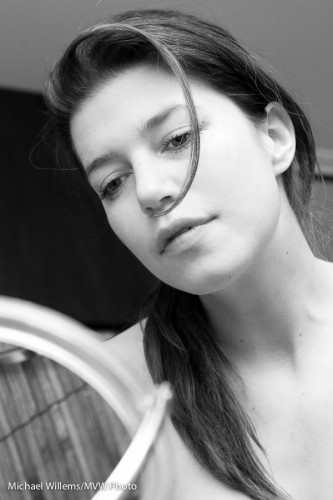
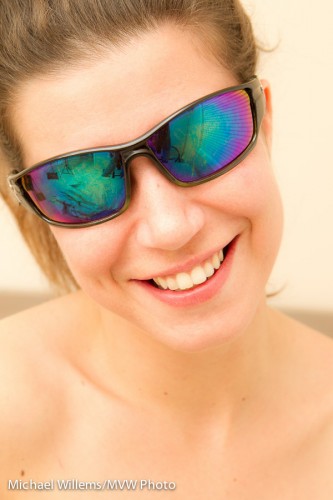
So in seconds you go from this – and all these are from yesterday, all shot within minutes:

Kim-by-Michael-Willems

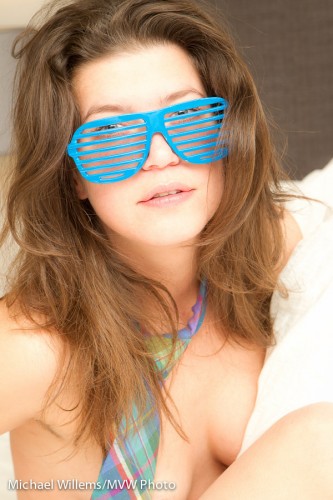
To this:

Kim-by-Michael-Willems

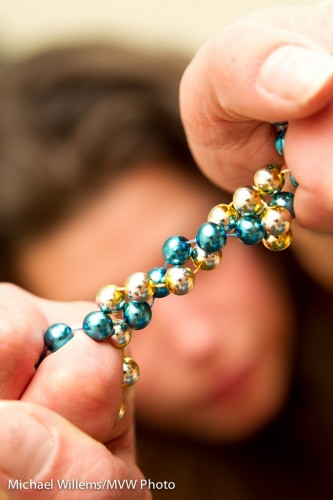
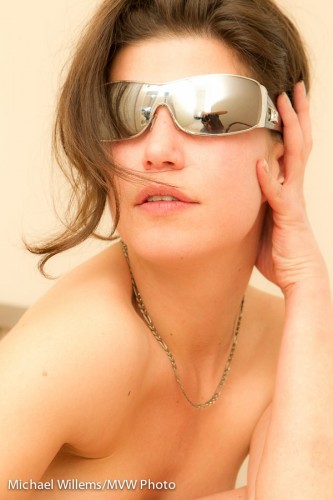
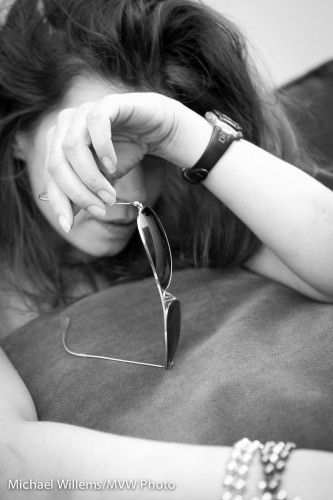
To this:

Beads and girl (Photo: Michael Willems)

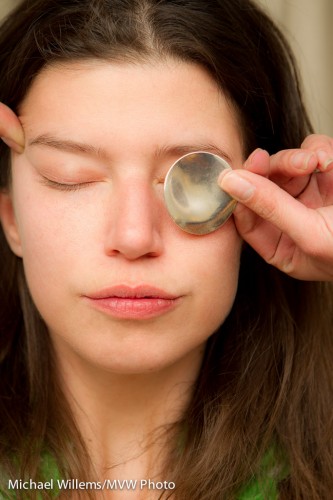
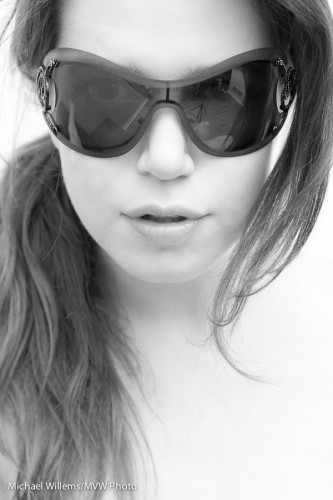
To this:

Kim Gorenko - (Photo: Michael Willems)

And so on… all in seconds. Try different poses, angles, look, zoom angles.

That is difficult sometimes, because in a shoot like that, you have to shoot quickly. No time to meter, to set up lights. So I:

  • Know my camera very well.
  • Use a zoom lens (24-70 in this case)
  • Use very simple lighting – two flashes, one on camera bounced, one off camera bounced or direct.
  • Set my flashes to TTL flash control
  • Vary looks, vary zooms, vary apertures, vary angles – sometimes you do not know what works until you see it.

By doing it this way, I can react quickly to the different areas and poses. And that, in this kind of shoot, is key

So when you shoot anything, think “what type of shoot is this”. In this type of shoot, quick reactions are key. In other types of shooting, I can spend ten minutes setting up lights for each shot – both are valid ways of shooting. Know which one you are doing and shoot accordingly.

 

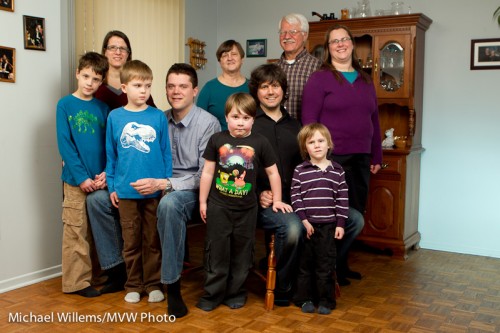
I did a family shoot this weekend: what a wonderful family of engineers. Great people:

How do you do this?

  • Emptied the room.
  • Lit by three speedlights: one bounced, one umbrella’d, and one gelled and flagged, using Honl Photo modifiers.
  • Fired by Pocketwizards.
  • The families are sitting, standing, leaning.
  • Tallest people sit.
  • People angled.
  • Grouped in pyramids and triangles.
  • Settings match ambient light to flash: 1/60 sec at f / 5.6, ISO 250.

…and then you take 50 shots, since four boys are not always easy to shoot – it takes a little effort to get them all to look at the camera!


Look in my eyes

..or, do not!

What I mean is this: for a character portrait, you do not necessarily need eye contact.

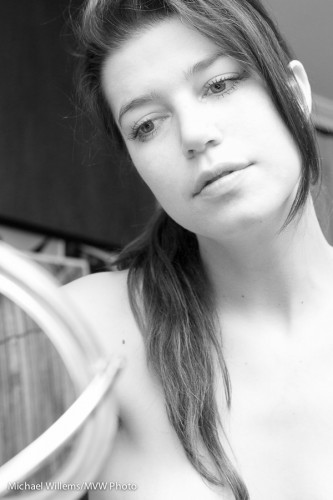
In fact, often, there is more of a story – more intrigue, more for viewers to work out for themselves, i.e. a more successful picture – if there is no eye contact. Like here (still from that shoot a few days ago):

Kim and Mirror (Photo: Michael Willems)

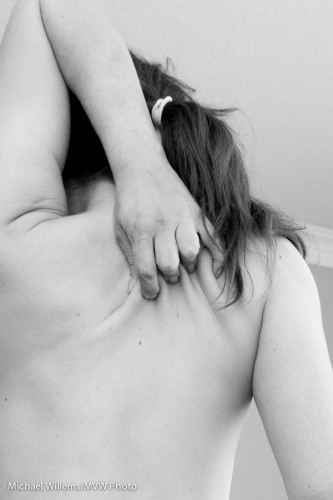
Or, let’s go crazy and not even incorporate the face at all:

Kim's Back Scratch (Photo: Michael Willems)

Can you see that these are good people shots?

Now of course I am not saying “never show eyes looking into the camera” – of course not.  But do try to not just shoot people looking into your eyes.

If you want homework: do a portrait without eye contact – one that makes me work out the story.


Quick fixes are sometimes good

As I mentioned the other day, converting a portrait to black and white can be good if it is not optional in the first place. It is an “easy fix”. Not that my friend, model Kim, pictured below in a shoot Thursday night, needs these fixes much…  but of course she, like everyone, has normal human skin.

As I said the other day, I am not a fan of altering people. But removing temporary blemishes, and de-emphasizing permanent ones, is not different from applying make-up and is better for the skin.

Kim Gorenko (Photo: Michael Willems)

But it is more than that. As I have mentioned here before,

  • Colour can distract in portraits, while black and white removes those distractions.
  • Mixed light (eg tungsten and unmodified flash) is problematic, but in black and white, light is just light.
  • You can emphasize or de-emphasize various colours when converting colour to black and white. To make that yellow shirt darker, or to make that green wall lighter.
  • And yes, you can fix sin, or make it smoother, by converting to black and white and then increasing the brightness of red in the mix (equivalent to using a red filter on a film camera). A blue filter would do the opposite – make skin look really, really bad.

How to do black and white?

  • Shoot in colour, in RAW format.
  • Then convert later – in Lightroom using the B&W option, where you can vary all colours individually, thus creating any filter effect you want. Experiment by dragging the various channels up and down.
  • If (and only if) you are shooting in RAW, you can set your camera’s “picture style” to Black and White. That way by looking at the on-camera preview you get an idea of what the converted image may look like – but since RAW saves all the colours, you are still going to do the conversion later, on your computer.

For better skin, as said, drag the RED channel UP (+).  This makes blemishes brighter (i.e. they disappear). Dragging Orange up makes all of the skin brighter, which also of course makes it look better by reducing both blemishes and shadows.

OK, one more image.. here, the colours of the walls etc would definitely distract from the message of the photo:

Kim Gorenko (Photo: Michael Willems)


Colour

As you have seen in recent posts, I often do portraits in black and white. It’s just better that way in portraits: distractions (like colourful clothing) are removed.

But sometimes you have to recognize that colour is called for. Like in this shot of the same model:

Model Kim Gorenko (Photo: Michael Willems)

I mean, that screams colour, doesn’t it? When a shot has prominent colour like that, use that colour.

As does the following shot, because of the matching cool glasses and Ralph Lauren tie. If we did not use colour here, that match would be lost.

Model Kim Gorenko (Photo: Michael Willems)

That reminds me: Props are important.


Reader Question – exposure

“Use manual”, I say. Easier said that done eh? A new student asks me this:

Michael – indoor, dimly light (one table lamp), ISO 200, f/3.5, shutter 2.5″. Just when I have my shutter speed set to get meter at zero, I am still getting a warning that the conditions are not right. When I move the shutter up to 1/50, the warning disappears and then the meter moves to the end of the negative scale. Help!

Ah. OK. So when you set the meter to zero, which may give you an OK picture, the warning says “your shutter is too slow for a steady picture”.

Take the picture. What do you see? The exposure is in fact OK (“the brightness is OK”), but the pic is totally blurred. But the exposure is OK. So your method in fact worked!

But the way you did this (slower shutter, 2.5 seconds) is not ideal: the exposure is OK, but this extremely slow shutter speed gives you blur.

What are the four ways to get a brighter picture?

  1. Turn on more lights
  2. Slower shutter
  3. Wider aperture (“lower f-number”)
  4. Higher ISO

So you tried only number 2 and it worked but had a drawback. So instead of a slower shutter, try a lower f-num,ber.

Oh wait. Your lens does not allow a lower f-number.

Well then… apart from buying a better lens (with a lower F-number), what’s left? More lights or higher ISO. You may even need a combination!

Once you understand it, exposure is simple – very simple. But to get to that understanding you need to do exactly the kind of experimentation you are doing here!


To improve or not to improve?

What I mean by that is: in portraits, do I “photoshop” (usually, “Lightroom”) the images to make people look better? So that everyone can look like Kim, my model here in yesterday’s shoot?

Kim Gorenko (Photo: Michael Willems)

Well, it depends, but in general, my strategy is this.

  • Light well. This is very important… post-production is not needed as much if you light well in the forst place. For smooth skin, soft, straight, bright lighting de-emphasises facial features such as wrinkles.
  • First, I do edit out any temporary issues (like pimples or bruises) with the healing tool.
  • As for permanent issues, I typically do not remove those, but I de-emphasize them (healing tool with, say, 25% opacity).
  • I do a general very slight Clarity decrease (in the Presence section of the Basic pane). Maybe -15. This is a wonderful control, if used well (it decreases contrast in skin tones, using what I imagine is very complex math).
  • Using the HSL pane, I sometimes increase the luminance of red and orange: this de-blotches blotchy skin.
  • And finally, I may consider going to black and white – which is more forgiving. There too, I increase red and orange brightness levels.

So while I shy away from making people into what they are not, I do try to de-emphasize minor blemishes and in general make people look as good as possible.

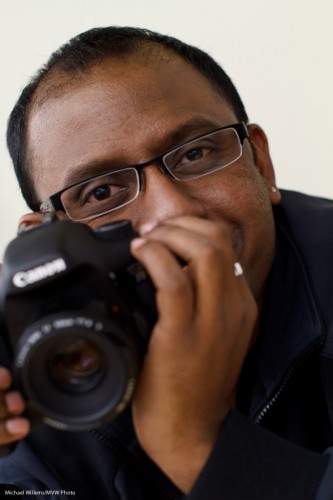
In the picture above, do you see the photographer – that would be me – and how he is holding his flash?


Your light meter is not perfect

Your camera’s light meter is a reflected light meter.

Here’s how it works. And you need to simply accept and remember the following:

The in-camera light meter is designed to give a good reading when aimed at a mid-gray (“18% grey”) subject.

By implication, this means that when you aim at a non-midtone subject (like a dark subject or a light subject) the image will be incorrectly exposed.

In other words, because the camera “thinks” that it is looking at mid-grey it will try to render the subject as mid-grey.

One solution is to set your exposure manually while looking at a grey card; then using that exposure for your subsequent pictures taken in that light. That way I get pictures that are right regardless of the subject’s brightness.

Like these two taken at yesterday’s Sheridan College class, of two of my students:

[1] Darker subject, coat, camera:

[2] NBow a lighter subject, dress, wall:

Both were correct at the metered settings of 1/125th second, f/2.8, at 800 ISO. Which I measured off a gray card!


Flare!

As a private pilot, this used to means something good that I did I did upon landing (don’t flare and you bump into the runway hard).

But as a photog, it is a bad thing, that I have mentioned before. To avoid it, use a lens hood, do not use filters, and point away from that incoming light. But as you recall from the post a few days ago, it can nevertheless sometimes be good, remember:

Kim Gorenko (Photo: Michael Willems)

So let’s talk a little more about techniques to do this:

  1. I aim a light (the sun? a flash? In my case here it was a 430EX off-camera flash) into the lens while keeping it out of the actual shot.
  2. I may remove the lens hood – that is there, after all, to prevent flare
  3. I do remove filters: I want flare to be controlled by me, not by  optical mistakes that happen as a result of the bouncing of light between my filter and my lens elements.
  4. And most importantly: I try various angles – very close to the lens I may see lens elements and aperture shapes etc.
  5. If I see Aperture artefacts, then I think about my aperture: small or large? If not fully open, these artefacts, of they show, will takle on the shape of the aperture (a pentagon or hexagon, usually).

Final question: Why not do in in post-production?

Sure – you can of course do this in Photoshop – but it is often more fun, and less work, to do it in person than to try and recreate it later.


QTOTD: Music

Or “Quick Tip Of The Day”:

I am setting up for a portrait shoot, and his reminds me to mention to you the following quick tip:

Always have some music on the in the background when shooting a portrait. Age- and person- and shoot-appropriate music. This way you set the mood, you relax, and you avoid awkward silences.

Now to that portrait shoot and talk to you in a few hours.