What is that flash thingie for?

You know when you buy a speedlight, you get the little foot thingie? Yes, check the flash bag – it’s in there. So what is it for?

First, you can simply mount the flash on that foot and then set it on a table, say, and use it as a remote flash that way. All major camera makers have that ability – you may (on a Canon 5D, say) or may not (on a Canon 60D, 7D or on most Nikon cameras) need another flash on top of the camera to fire the remote flash.

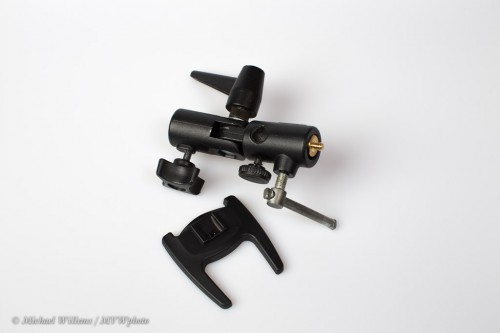
Second, you can attach your flash to a light stand with it. Using this:

The down side of the foot screws onto the gold-coloured screw on top of the mount, and the entire mount now goes onto a light stand. It angles and turns, and it has a holefor an umbrella.

So for a pro umbrella shot, all you would need is:

  1. A camera, possibly with a high-end master flash on it, like an SB900 or a 600EX;
  2. A remote flash;
  3. the foot in the picture above;
  4. The mount in the picture above;
  5. A light stand;
  6. An umbrella.

And of course some simple knowledge – that is what this site is for, and you can complement that with some personal training – a few hours and you know all you need to know. Do that before the festive season and you get pro festive season pictures this year!


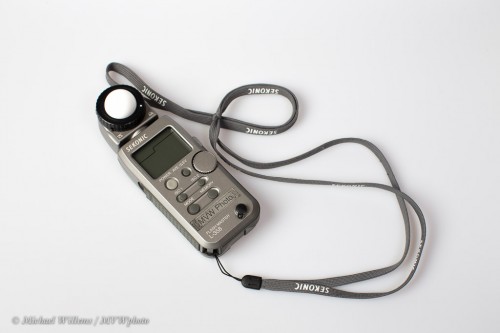
Flash Meter

If you want to do “studio type” shooting, set your flash power manually. On strobes you have to do it that way; on speedlights you can. Then use a flash meter.

How? Here’s how.

  1. Set your camera to the desired settings. For instance, 100 ISO, 1/125th second, and f/8. These are pretty typical studio settings.
  2. Verify that a shot taken like this without the flash is all black. That means ambient light will play no role. If not, go to 1/200th second.
  3. Now set up your flash or flashes. Set the power to, say, quarter power for a start – or whatever you think might be roughly right. With experience, you will get this just about right.
  4. Holding down the the MODE button, set your meter to flash metering mode (the lightning symbol; not the sun symbol, which is ambient metering). Your meter now reacts only to flash.
  5. Set the meter to 100 ISO and to 1/125th second (if those are your desired values).
  6. Hold the meter, with the white dome extended, where the subject will be.
  7. Reset the meter with the side button – it now reads “0” for aperture.
  8. Fire the flashes.
  9. Read the value. If the value is higher than f/8 (eg f/11), reduce the flash power or move the flashes away. If the meter reads lower (eg f/4), then increase the power or move the flashes closer.
  10. Repeat steps 7-9 until the meter says f/8.

That is how you meter a studio, type shot like the one above. I usually meter each light separately and allow for that (e.g. two lights that both say f/5.6 will give you a total of f/8, if light from both hits the subject.).


Video (2)

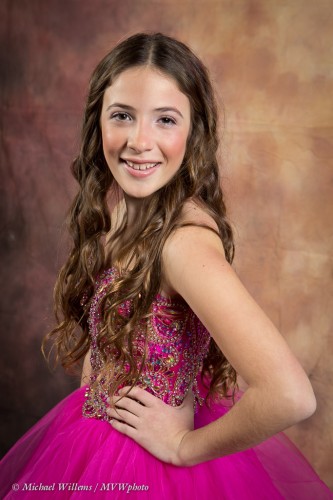
Another note about video. Last night I shot an event: a Bat Mitzvah party – here’s a sample of the beautiful Bat Mitzvah girl:

The event was also filmed by a videographer. And that’s something I admire.

One reason people like me, i.e. stills photographers, tend to shy away from video is the time it takes. Like right now… I am importing a 15-minute drive video into iMovie. 30 fps 720p. This import is taking around 72 minutes – that’s 72 minutes during which my iMac is doing, well, basically nothing else.

And after that I need to edit. For a “real” video, that would include:

  • Choosing clips
  • Adding establishing shot
  • Making them into a coherent story
  • Transitions between clips
  • Intro, outro
  • Adding any text
  • Editing sound, adding sound, adding soundtrack
  • Then exporting
  • Then uploading (to Youtube, say).

This process could easily take a day or more, even with very simple tools like iMovie.

This is in addition to the setup work. The JVC camera makes it a lot of work: every time before starting I need to:

  1. Mount and power up the camera
  2. Select “Power supply” (as opposed to USB data)
  3. Format the camera card
  4. Reset it to 15 minutes rolling video
  5. Exit the menu
  6. Start recording

Steps 2-5 could easily be removed by JVC – hope you are listening, JVC, and I await the new firmware with interest.

In any case, video means serious work. But it’s worth doing, because at the end you get an experience which complements the stills videos very nicely. It does not replace stills at all, and it never will – stills give you the power to contemplate a moement in time, while video means these moments are ephemeral and pass by as quick as they appear. The two are complementary, and if you are interested in doing both, then learn the basics skills you need. Establishing shot, B-roll, transitions: all these are things you need to know. And especially “cutting room floor”: shoot ten times more than you use!


JVC Video Action Cam – short review

Those of you who know me know that I do not do a lot of video. Stills, mainly! Why? Because video takes rather too long for my liking to produce. Hours just to load, edit, convert, and so on, even for relatively small clips.

Still, I keep my hand in there! One way is by using a new dash cam I just bought for my car (you never know). It’s a JVX GC-XA1 “Adixxion” action camera:
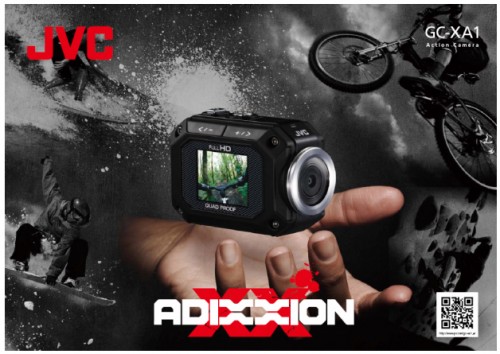
This is the kind of camera  that you can tie to your bike or helmet or whatever: small, light, one hour battery life (though you can use a USB power cable as well). It is shockproof, waterproof, freeze-proof and dustproof – a step up from the usual small cameras.

It shoots high-def video, of course, up to full 1080p, with a simple wide-angle lens. Remember, wide angle is good because it is easy w.r.t. shaking and it is easy w.r.t. focusing.

Even better, I was able to buy it locally in Oakville, ON – I like to see what I am buying. My friend Steve Jones pointed me to a car-related company that sells these: Johnston Research & Performance at 2344 South Sheridan Way in Mississauga, ON.

So is it suitable as a dash cam? Yes it is, and more than I thought.

  • It is tiny (and well built).
  • It comes with a couple of mounts, suitable for sticking it, as I did, to the car windscreen. The use of a standard tripod socket means you can mount it in myriad ways.
  • It has image stabilization.
  • The wide angle is perfect for dash cam use.
  • It has features even the store was unaware of, including the ability to just record a rolling 15 minutes, where just the last 15 minutes are saved – this can be kept going.
  • The camera can also be used upside down – in my case it is, because it is stuck at the top of the windscreen. Perfect!
  • It has a screen to monitor what you are doing.
  • It links to iPhones, iPads, Android devices, and personal computers. It has many connection and streaming options.

I just tested it during an actual drive. Here’s a 40 second HD link:

http://www.youtube.com/watch?v=IyNY8g8BoaI&hd=1

Note, this is not the highest quality this camera can do – rolling 15 minutes (and USB -powered operation, which requires it) is restricted to 720p at 30 fps  – which as you can see is pretty great (on that subject, a few encoding tips from Youtube here.)

So is there anything this camera could do better? Well, that’s a value judgment, but if I were to respectfully give the engineers at JVC some tips on how to make it even better, especially as a dash cam, I would say:

  1. Make the USB port accessible for power without having to keep the cover open.
  2. Do not ask every time a USB plug is  inserted whether it is for connecting to a computer or for connecting to power! This is a pain: I should be able to set my preference and be done with it until that changes.
  3. Display upside down while recording upside down! Instead, the camera displays upside down, but as soon as you press record and turn the camera around, it displays the normal way (but fortunately, still records upside down).
  4. The computer app is available only for Windows. Mac app would be nice.
  5. There is no way to save your favourite settings as a “personalized setting”; this, too, would be a useful addition.
  6. Recording while using USB power is only allowed in 15-minute rolling recording mode. Why, JVC?
  7. It would also be useful to have a mode where the camera automatically turns on when USB power comes on (when the key is turned in the ignition).

This is a list of features that I hope will be added in future firmware: I already upgraded the firmware after buying the camera. JVC, please keep me informed of firmware updates on this excellent little camera. Also,  please fix typical “Japanese”: errors in English (“Inversed” is not English; “Inverted” is).

And for your benefit, I shall try some more video in the coming weeks. I am pleasantly surprised by the fact that even with slow North American Internet speeds, uploading video is becoming practical at least for clips. And I am impressed by this great little camera.

Oh, and why a dash cam? Because it is a good way to do some more video.. and also this: go to http://carcrashes.altervista.org/ to find out. Protection in case of insurance claims – or even scams. Try and explain to the cops what happened without video evidence! And I don’t think I ever want to drive in Russia.

 

Ratios

Say you do a shoot. Say, you set up lights, have a model or setting, and spend a few hours shooting, and you end up with 300 images.

The question? How many are good when a pro is shooting?

The answer is: it depends on the shoot. Sometimes I make 4 exposures and 3 are great. But typically, I take as many angles as I can, which results in a few hundred images.

I then rate them:

  • One star: technically lousy
  • Two stars: technically passable but not a great shot
  • Three stars: suitable for sharing with client
  • Four stars: Great shot in this shoot
  • Five stars: Portfolio shot

You may be surprised that for me, a typical shoot has something like 300 shots, of which:

  • One star: 3 shots
  • Two stars: 35 shots
  • Three Stars: 230 shots
  • Four stars: 30 shots
  • Five stars: zero to two shots

So while almost all shots are technically good and most are also suitable for going to the client, fewer are great shots and I am delighted if one or two are portfolio shots.

So do not feel discouraged if you do not get 150 great killer shots out of every shoot. I tend to share many shots as you all know, but most photographers only share their very very best only. You may be better than you think!


Exposure Exposé

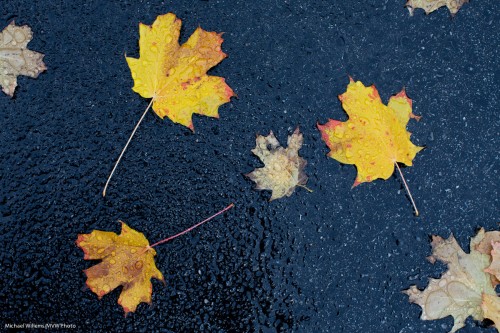
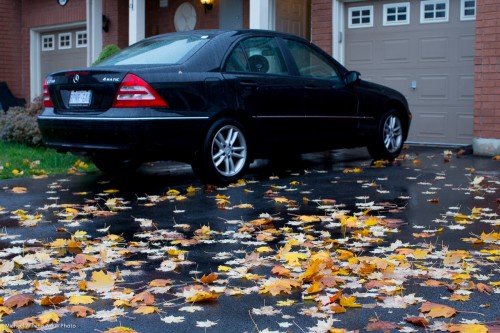
So how do you expose a shot like this (yesterday, on my car):

You will remember that your built-in light meter gives you an exposure based on an “18% gray scene” – the same reflectivity a gray card gives you. This scene, however, is “bright plus dark”, but not “18% gray”. A challenging shot, then – for which you have the following options (roughly in order of expected exposure accuracy):

  1. Use an external meter – an incident light meter. Hold it above the leaf aiming up, then meter. Set those values in your camera.
  2. Spot meter off something gray – i.e. hold a gray card in the same light and set your camera’s exposure scale to zero while pointing your (spot-) meter at that.
  3. Use normal evaluative metering and adjust later in post-production.
  4. Spot meter off the leaf and set the scale not to zero (grey subject), but to +1 (lighter than grey subject).
  5. Using manual exposure, set your meter to a value you think might be overall right, then take a test shot and adjust to taste – using the histogram.

I did the latter – I always use manual mode when the light is steady, as it was here. Once set, it is set, and all future exposures will be right. And with a little experience, you can get very quick at this.

I used 1/50th second, 400 ISO, f/7.1. (On a side note, the “sunny sixteen rule” failed miserably here – just to try, I used 125 ISO at 1/125th second at f/4 – that should work, but it was at least two or three stops too dark. Such rules are guidelines!)

And finally: 1/50th of a second using a non-stabilized lens pointed half way down is a challenge in itself. Why? Motion blur. The best way to handle this? A tripod. But failing that, do what I did: take the shot five times. One or two will be razor sharp.


Opportunity Knocks

Opportunity abounds this season – in many ways!

You can have me teach you – at Vistek Mississauga, at Sheridan College, and in the form of workshops (A Toronto Photo Club tonight; Las Vegas in November) or of private or small group coaching, which is usually the best way to quickly tie all the loose ends together and fill the gaps. Contact me if you are interested before the holidays!

You can have portraits made – family portraits are on special until December, so that you can have anything from a quick portrait to an extensive session done at a special rate, to use over the holidays.

And you can go shoot! This season is great, because it offers challenges. Dreary days. Bad light (if like me you are in the Northern Hemisphere). Food. Parties. Macro Studio. Effects.  Lights. Let your imagination run wild and learn some technique to capture this season. There’s so much to shoot!

And to prove my point I just walked outside and took a few snaps outside my front door (and yes it is cold and rainy): 50mm lens, 400 ISO, 1/125th sec, f/5.6:

In the next weeks I will expand on some of these possibilities. Meanwhile.. have fun.


Wide Angle Pic of the Day

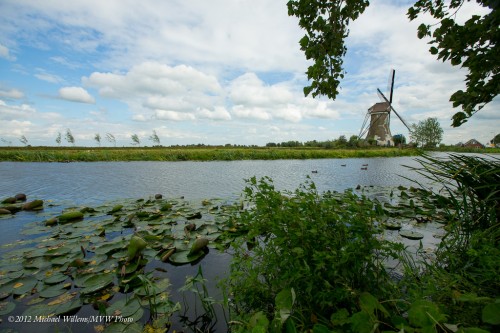
Taken in Haastrecht, the Netherlands, late August 2012.

The wide angle makes nature “wrap around” the subject. Look at the waterlilies and how they seem to all aim at the windmill.

The use of framing (by way of the branches) calls more attention to the windmill and balances the composition.

The trees trying to remain standing in the incessant easterly wind add a nice touch.


All you need is a little…

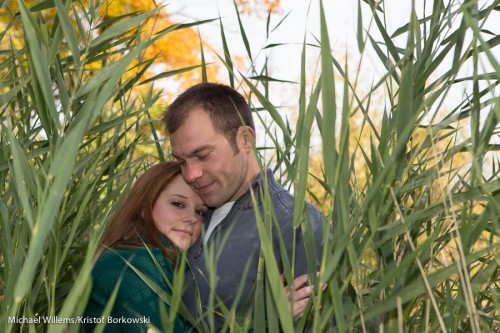
…a little flash, that is. Often, at least for the photo, that is enough, like in the image above. Here, colleague Kristof positioned the couple in the tall grass. But to get the shot, I needed a little flash to light up the couple – if I had used just ambient, the yellow fall colours behind them would have been lost. Direct flash is OK for this if you have to.

For this, since the flash is just adding a little fill light, you can use a Flash Exposure Compensation (Flash Exp Comp) setting of -1 to -2 stops.

Careful though:

  • Canon cameras using TTL will do this by themselves if they detect enough ambient light to “guess” that you are using fill flash.
  • On Nikon cameras, if you use Exp Comp, that also sets Flash Exp Comp.

Often, those small engineering decisions, largely undocumented, can make your life difficult.

Oh – and you also need a little love in life. Ask the happy couple above!


Portraits can be.. simple.

Take a studio portrait like this, of my son Daniel last night:

A studio shot.. but taken without a studio in, oh, one minute. Here’s how:

  1. Camera on manual; 1/125th sec, f/8.0, 400 ISO. (These settings are to ensure that the ambient light does nothing: it’s all flash. I could easily have used the usual 100 ISO, but I am using a speedlight, and want to ensure it has enough power).
  2. Speedlight on the camera, on TTL.
  3. Speedlight aimed 45 degrees up, 45 degrees behind me, to bounce off the ceiling.
  4. Subject positioned against an even light-coloured wall.
  5. Flash Exp. Comp. set to +1 stop.
  6. Tried various poses: right, left; shooting from above; from below.  Took several shots in each position. Watched for shadows and catchlights as well as for expression and shape of face.
  7. Picked one.
  8. Converted it to B/W in Lightroom.
  9. Increased orange a little in the conversion to smooth and lighten skin.
  10. Done! Exported as JPG.

That is how you use studio techniques even without a studio. It’s not the gear: it’s the knowledge.

___

This is what I teach – and teaching photography is what I do at least as well as doing photography. Contact me (michael@michaelwillems.ca) to hear more. To those of you in or around Mississauga: Basic and Advanced DSLR courses at Vistek tomorrow: sign up right now!