RIP Ian Fuller

Word has reached me that Ian Fuller, a.k.a. frequent contributor “bkkphotographer” from Bangkok, has unexpectedly died. His wife confirms this from his email address, as do several friends.

This leaves me profoundly sad, and I wish his family and his other friends strength, and extend my condolences. Ian was a good man, and was just 53. As so often, it is entirely the wrong people who die too young.

I had wondered why he had gone radio silent: I had thought perhaps he was taking a vacation. Alas, the news was much, much sadder than that.

Soon, the book

The book is progressing well. The only thing that is slowing down is all this work!

But it is delightful work. Last weekend, birthday shoots. This week, spot news. Thursday to Sunday: teaching. Tomorrow, a series of on-location executive portraits. Great and varied work.

On a forum recently, I asked some other pros what they would use in a given lighting situation. One of them wrote back: “You do this for a living so you shouldn’t have to ask. Do you want your clients to google you and find that you are asking questions”?

This person misunderstands the Internet and misunderstands the collaborative world we live in today.  Of course I ask, share, debate, weight: the moment you think you know it all, you stop developing.

So if you have questions here, please ask and let’s kick some ideas around. Whether you are just starting to develop as a photographer or whether you are a pro: never be afraid to ask.

Fun with gels

Tonight, I had some fun trying various new gels.

For those of you new to photography: a gel is a coloured material that you put in front of a flash to change the coour. You typically use these for background colours.

Usually I use a slight correction gel (1/2 CTO, 1/4 CTB, etc) to perhaps warm a background up a bit or to give a corporate shot that slight blue tint in the background. But tonight I thought I’d play with some great new colours.

My system for the test shots below was:

  • A key light to camera left, in a softbox on a Bowens 400 Ws monolight
  • A fill light to camera left, into an umbrella, using an Opus 250 Ws monolight
  • A Hair light, also into an Opus light, and snooted
  • A background light: a Canon 430 X flash with the various gels. I used the excellent Honl system: the speedstrap on the flash, plus gels conveniently Velcro’d on.

So for these gels I used some basic colours and the new Honl “Autumn” and “Hollywood” gel sets. Great colours. Here we go, and look how each gives you a very different shot:

[1] The new “Autumn” kit:

Egg Yolk Yellow:
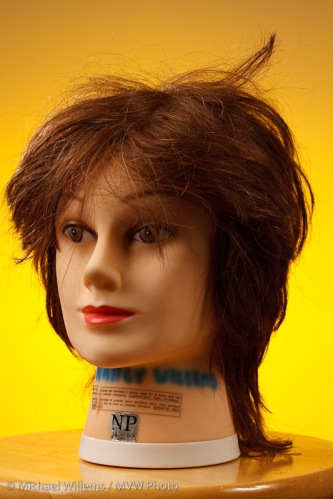
Chocolate:
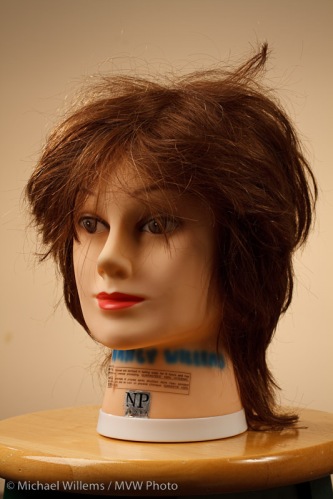
Rust:

Dark Salmon:

Medium Blue-Green:

[2] The new “Hollywood”-kit:

Follies Pink

Steel Green:

Rose Purple:

Smokey Pink:

Pale Lavender:
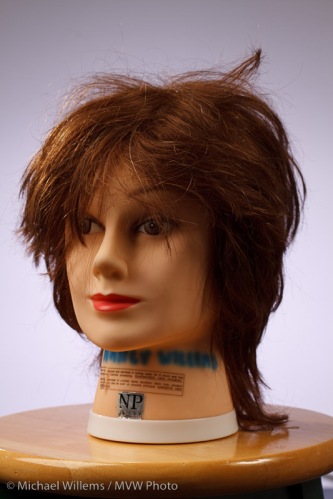
And for comparison, some basic primary colours: Red, Green, Blue and Yellow:

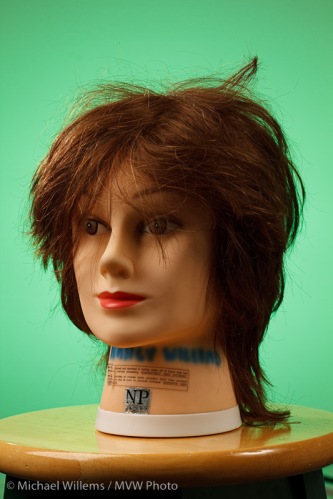
And finally, what it looked like with no background light, white background light, and “heavy frost” background light:

Note: When you play with gels, do not forget to set your white balance to “F;ash”, so your canera does not try to adjust the colour away.

Now to see these colours side by side, check them on one page: http://www.mvwphoto.com/gels/

Fluorescent

A word about shooting in fluorescent light.

Unlike Tungsten light, which stays on and glows in between cycles, Fluorescent flashes on and off 60 times a second or more.

This means two things to photographers:

  1. Light may vary during a cycle
  2. If the flashes are short, your shutter needs to be all open when they occur. Meaning you need to stay well below your flash sync speed.

The second is most obvious.

Look at these images, shot at 1/320th second just now:

See what’s happening? They vary and from top to bottom the brightness is different in both. This is because the (vertical!) shutter is not all open when the brief flash happens.

So when shooting fluorescent,

  • stay well below the sync speed
  • if possible, stay at a discrete multiple of the light flash frequency.

If you do not know what “discrete multiple” means (how would you – you’re not an engineer!) then just stay at 1/30th second (and often 1/60th will work as well). and you are safe in both cases!

Shooting hockey? Well then just shoot a lot, and you’ll get lucky for some images. Fortunately, hockey lights flash at a higher frequency, so the problem is much less common.

Misc

Backgrounds and sharpness and white balance: oh my!

I thought I would chat about some of the things that go through my mind when doing a portrait, like this one last night:

Questions like:

  • What camera and lens? In this case, the Canon 7D and a 50mm f/1.4 lens.
  • What settings? Well, manual at 100 ISO, 1/125th second, f/5.6 is my standard start point, as it was here.
  • What lighting setup? In this case, a standard two main lights (softbox main light on camera left, umbrella fill light on camera right) with a snooted hair light behind left, and a gridded gelled background light. Note that while the main lights were monolights, the background light was a small speedlite fired by a pocketwizard through a Flashzebra hotshoe cable.
  • What lighting ratio? In this case pretty flat, but usually more like a 3:1 key:fill ratio.
  • What body position? Usually angled, in this case toward the softbox.
  • What head position? In this case, straight on since the subject wanted it that way.
  • What colour background? In this case I used a blue-green gel from the new Honl Photo “Autumn” colour gel set.
  • What viewpoint? I carefully choose this by moving myself left and right, up and down, until the person looks best to me for the portrait wanted. If in doubt, I take multiple views and choose later.
  • What white balance? I set it to “Flash”, even when shooting RAW, just so I get OK views on the back of the camera.

That’s all there is to a quick snap like this, which took a few minutes – if that.

Eyeball it

You shoot RAW, perhaps (at least I hope you do). That means you need not worry about setting white balance while shooting.

So how do you set white balance in post-production?

Ideally, you include a grey card and use the dropper tool in Lightroom (if that is what you are using) to take a neutral reading off this. But if you do not have a grey card in the photo?

Look at a student who kindly agreed to be the subject of a test picture. One: the original photo

Two: after I take a white balance off the eyeballs:

Three: as a personal preference, since I like warmer light I then always drag the colour temperature slider to a slightly higher temperature (a slightly warmer light):

And hey presto – done.

This is quicker than doing it on the camera, and more accurate, and you do not waste your subject’s time.

Power Travel Tip

And I mean power. Battery power.

What happens if you are travelling to Africa and are not sure how much access you will have to reliable power? How will you charge your batteries?

My tip of the day: bring a small 12V DC to 115V AC power inverter. You can buy these at your local hardware store (Home depot, Canadian Tyre).

Because guess what. You will always have access to, or be driving around in, cars, and these cars have cigarette lighter outputs. You can bring a small inverter like this – small is key, and to charge camera batteries or a PC you need little power. So charge your spare battery while you are driving!

Problem solved.

Tip of the morning

Look at my lens here:

Do you notice two things? Apart from the fact that this is my favourite long lens, the superb 70-200 f/2.8L IS, I mean.

  1. It has a lens hood. Always use the lens hood. Yes, even indoors. It affords protection for both damage and stray light causing “flare”.
  2. The dot is on top, even though Canon would rather I put the dot at the bottom. Why do you put the dot on top? Because it is then obvious if the hood is not on all the way (which would lead to vignetting in the corners).

There you go, another little tip to make you a better photographer – if ever so slightly.

Sim. Pli. Fy.

Here’s a snapshot (of a student the other day, who kindly let me take this image to demonstrate how not to do it):

Not bad.. but look at all the distraction.  This person has doorhandles growing out of his head. A chair growing out of his neck.  This is a typical “Uncle Fred” snapshot.

The solution?

  1. Look. Observe the antennas growing out of heads; the garbage cans in the background. Only after seeing them can you work on removing them.
  2. Move. By moving yourself a few inches you can make a huge difference to your subject’s background. A circle has 360 degrees, not one. And not every shot has to be taken from 5.5 ft above the ground.
  3. Zoom in: “fill the frame”. Get closer.
  4. Blur the background if it is distracting.

And then you get this:

Rather better, no?