Gearing up…

…for the Henrys Digital Imaging show! It will be held 15-17 October at the International Centre right by Toronto’s Pearson airport.

See the show web site (scroll down and you’ll see my name). I shall be presenting short versions of workshops throughout all three days.

This show is great: just about the entire imaging industry turns up and you get to hear interesting speakers, see new releases, try out all the cameras and lenses you might be interested in, and I am sure there will be deals also. Also – there are so many experts that any question can be answered.

If you are interested in photography, this is a must-see. Worth spending an entire day: I hope to see those of you who can get there, there. Come say hello!

A shot from the course

At the Mono “Creative Light” workshop,  we do different portfolio shots every time.

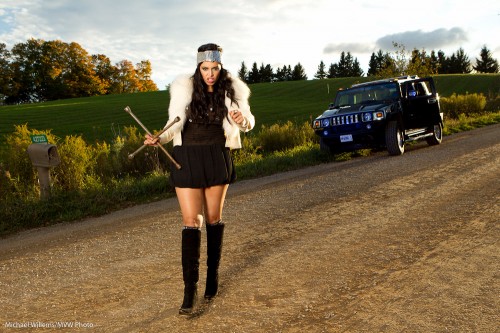
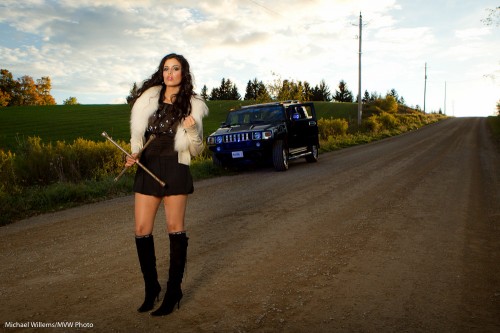
So imagine our delighted on Sunday when a student turned up in a Hummer. This was immediately put to use by model Tara:

Tara Elizabeth and Hummer

Tara Elizabeth and Hummer

That was lit how?

This is how: with a softbox, to our left. And a small speedlight to our left aimed straight at the car – with a blue Honl gel. Both were fired using pocketwizards (the speedlite using a Flashzebra cable). Metered using a light meter, of course.

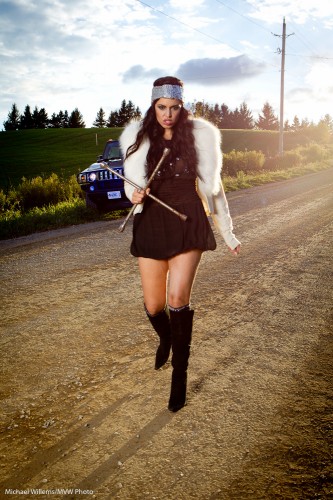
Here is an alternate take:

Angry Tara Elizabeth, with Hummer

Angry Tara, with Hummer

That was taken just a few minutes before. Can you see how every minute counts when shooting in beautiful late day light?

Okay, one more. Just to show that lens flare – which should normally be avoided – can sometimes be OK:

Angry with tire iron

Angry with tire iron

You avoid flare by:

  • Using a lens hood
  • Shielding the lens with your hand
  • Avoiding lens filters
  • Pointing slightly away from the light source

Have fun!

Yum

Today, I have a quick starting point for food photography for you.

Food Photography

Food Photography

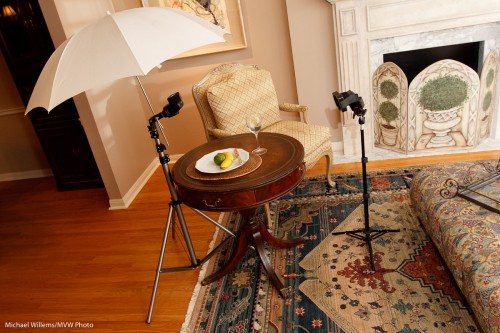
  • Lighting: small speedlights are good.
  • Use one umbrella on top, and one gridded light from behind to add accent (and to light the steam. If there is steam, try to use a dark background)
  • You may want to shoot from a low angle.
  • Blur out backgrounds.
  • These backgrounds can contain a cup or glass, cutlery, etc.
  • Prepare the food: If you have no food stylist, you are it. Every detail counts. Make it look great. Add some “green stuff”. Use a brush with oil to make surfaces shiny and yummy.

And do not forget to eat the food, afterward.

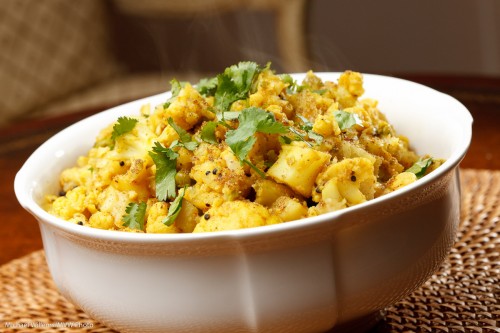
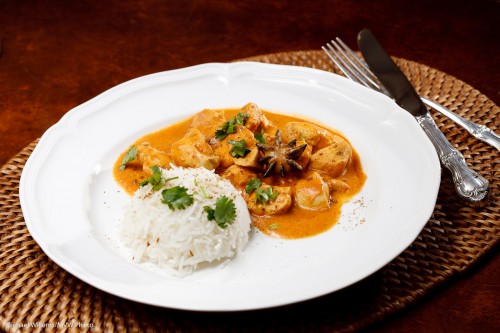
Indian Food Photography

Indian Food Photography

(Although you would be surprised how many food shoots use fake food. Ouch!)

One more, for good measure (I shot these for West of the City magazine early this year).

Indian Food Photography

Indian Food Photography

Glasses

When you photograph someone with glasses, especially in a studio, watch out for a couple of things.

  • If they make the eyes look smaller, be careful not to turn the head too much. If you do, you will cut chunks off the face. In that case, a more head-on view will often work better.
  • Reflections! Tilt the head down a bit, or move the light source up or sideways slightly more. Always check after a shot that the reflection gremlin has not got you.
  • Some photographers use glass-less frames to avoid these. Today, I do not think that is necessary.

By observing these simple precautions, you can get good photos of someone wearing glasses. Not complicated: as so often it is in the “paying attention”.

Gearing up…

….to another Creative Lighting workshop tomorrow in Mono, an hour north of Toronto.

Joseph and I are coming up with the shots as we speak. Professional model, make-up artist, lunch, equipment, teachers: check. Couple of spots left, check. Fun will be had: check.

http://www.cameratraining.ca/Mono-Day-2.html

A shot from last time, to whet your appetite, should it need whetting:

Model Lyndsay Biernat in Mono

Model Lyndsay Biernat in Mono

Of course the emphasis is on creative light. Check back soon to see how we used creative light this time.

Dragging the shutter

A quick note for you today (and this is the kind of thing my students learn at length in my advanced courses, like the one tomorrow in Mono – there’s still some space).

Every had your camera react unpredictably when using flash? Yeah, I thought so. You flash and then the shutter stays open for a second and it’s all a blur. Or you flash and the background is dark black.

Why?

When you shoot indoors, say, and use your flash, your camera behaves differently in different modes – and this behaviour varies per camera.

Aperture mode (A/Av):

  • Canon: the shutter will be as slow as needed to expose the background too (caution: this may lead to very long shutter speeds if ambient light is low).
  • Nikon: the shutter is restricted to 1/60th of a second or faster (this can be set).  But… if you also engage “SLOW” mode, the shutter will be as slow as needed to expose the background too (caution: this may lead to very long shutter speeds if ambient light is low).

Program mode (P):

  • Canon: the shutter is restricted to 1/60th of a second or faster.
  • Nikon: the shutter is restricted to 1/60th of a second or faster (this can be set).  But… if you also engage “SLOW” mode, the shutter will be as slow as needed to expose the background too (caution: this may lead to very long shutter speeds if ambient light is low). .

So

  • Canon is simple: Av = long shutter speeds, P = 1/60th or faster.
  • On Nikon cameras, both modes are restricted to 1/60 or faster normally, but either mode can be freed from this by using the “SLOW” setting.

So what is the best mode when using flash indoors?

Ah, that would be Manual. That way the camera does exactly what you want. But we will get to this again another day.

TIP: if you want to try Manual indoors flash, start at 400 ISO, 1/30th second, f/4. And bounce your flash off the ceiling/wall behind you.

Guess what.

Two techniques today that I have pointed out before, and I will do it again until everyone uses them regularly.

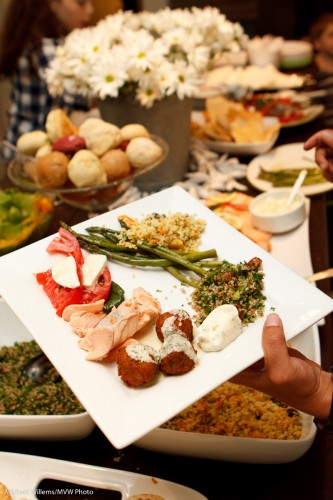
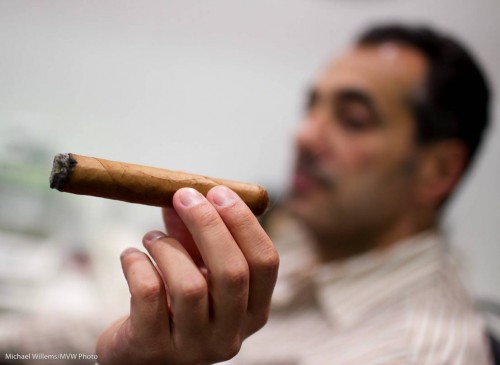
  1. Close-Far
  2. Selective focus with supporting background elements

Like here:

Food, and food

Food, and food

And here:

Cigar and person

Cigar and person

These pictures:

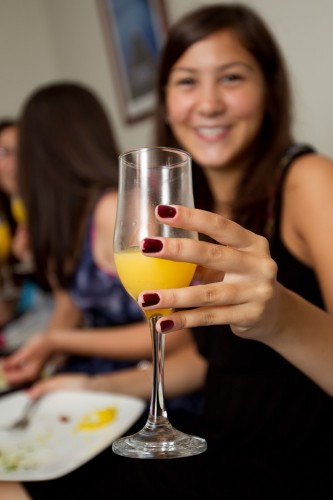
  • Make the foreground subject really stand out
  • Achieve perspective (close-far: get close to your close object!) and
  • Provide environment, or context, where theuser has to put two and two together to create the story. The eye goes to close object – background – back to close object.

One more example – then go out and shoot some!

Cheers (Teen with orange juice)

Cheers (Teen with orange juice)

Instuctions, should you need them:

  1. Wide lens, often the wider the better
  2. Get close!
  3. Focus on the close object.
  4. Use the largest aperture (smallest “f-number”).

Have fun!