Monday: 5 Tips for beginners

Due to popular demand, below are a few beginners’ tips for today.

Michael Willems, March 2011

Michael Willems, March 2011

I occasionally throw in some of these, in case any of my readers may have missed one of these.

  • “Focus” means “where it is sharp”. Focusing means “setting the distance at which the picture is maximally sharp”. Focus does not mean exposure! “I focused on the tree, so why is it too dark” is meaningless (unless you are using your spot meter linked to your chosen focus spot, but that is an advanced topic).
  • The “mode” dial on the top of your camera sets the exposure mode, but not the flash mode. So “manual” means that aperture and shutter are set manually by you. Your flash has a manual setting too, but unless you engage that, the flash is still metered separately and set automatically!
  • In any case, there are many “manual” settings on your camera and they are entirely unrelated. Manual exposure. Manual focus. Manual flash power. Manual ISO setting. Manual focus spot selection. The list goes on – and these have nothing to do with one another. Hence “I am using manual” is not enough information!
  • Use one focus spot. Do not let the camera choose which focus spot: you choose it, and then aim that focus spot at your subject.
  • Use AF-S/One Shot (as Nikon/Canon call them) focus modes, unless you are shooting moving objects; then, consider AF-C/AI Servo.

Photography is not “about” this technical stuff. It merely needs to be done. So I will throw in one more, about composition:

Avoid putting your subject dead centre in your photos. Instead, use the “rule of thirds” more often than not.

Grain

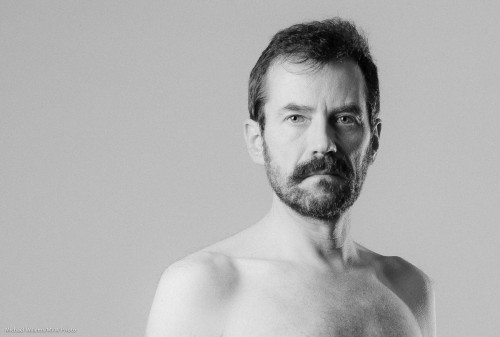
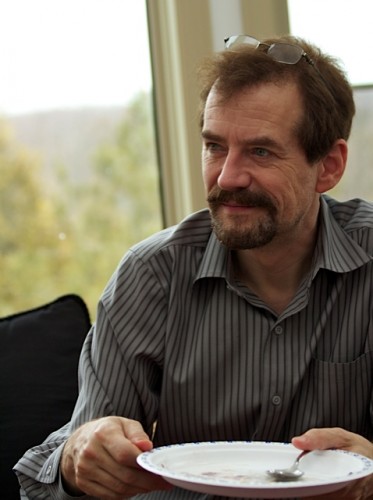
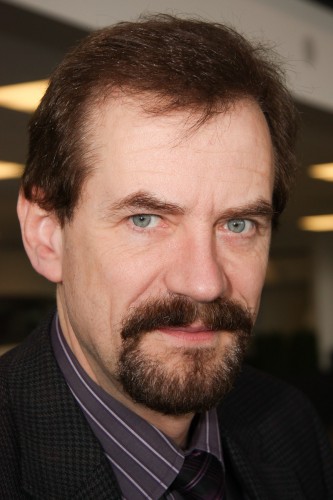
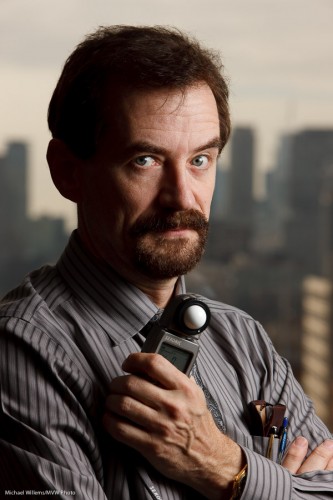
I recently, while preparing for a commercial shoot, took a few self-portraits. Including this one:

Michael Willems, Photogrpaher (self portrait, December 2010)

Michael Willems, Photographer (self portrait)

As always, click to see it large. (You really do need to see this one at original size to see the full effect.)

To do a portrait like this, I did the following – and I thought it might be useful for me to share the thought process:

  • I decided I wanted black and white, and to shoot it that way.
  • I set up the right studio lighting. I used a softbox on camera left; an edge light on camera right at the back; and a fill light using an umbrella on camera right in front.
  • I metered for these lights, with a fairly high key:fill ratio. In other words, I wanted the less-lit part of my face to be much less lit. To get this, I set the fill light around three stops darker than the main light.
  • That in turn allowed me to set up an edge light, to show the contours of my face.
  • I set up a white background.
  • I positioned myself at a distance from the background that would ensure a grey (rather than black or white) background.
  • I set up the main light, in a softbox, such that I would get nice catch lights in my eyes.
  • I pre-focused (on a chair), then set the camera to manual, and then used the camera’s timer to take the shot.
  • I used a horizontal layout, to create enough “negative space”, by using the rule of thirds (i.e I did not put myself in the “Uncle Fred” position right in the middle).

Finally, in post-production I added some film grain. This is one of Lightroom 3’s Develop module’s “Effects”, and it is one I really like. Tri-X film, anyone?

I am about to set up the same setups for Saturday’s workshop. Deciding on lighting is a photographer’s major job!

Workshop Weekend

This past weekend was Workshop Weekend in Mono.

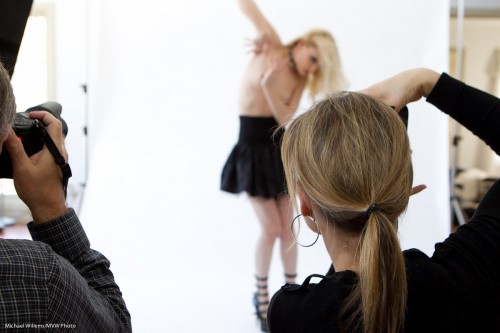
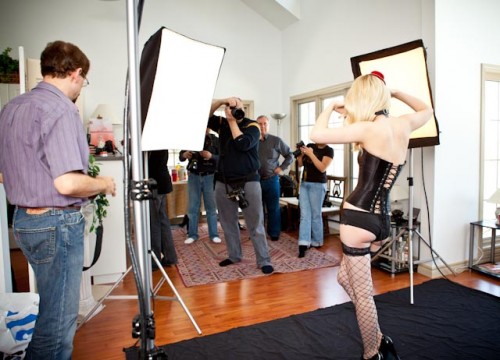
As you know, Saturday was “The Art of shooting Nudes” with Joseph Marranca. A group of students learned about theory and practice of this timeless type of photography:

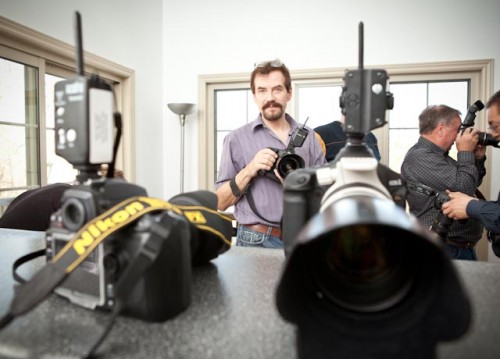
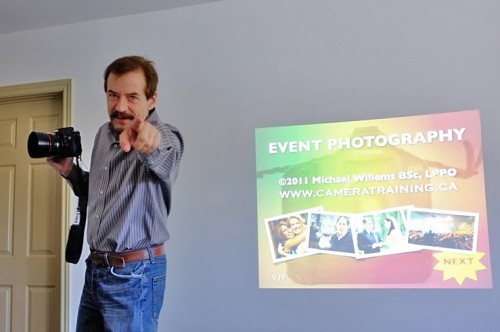
Sunday’s workshop was “Michael Willems’s Event Photography” – watch for this as a series of forthcoming specials at Henry’s School of Imaging, as well.

(Photo courtesy of Albert Wong and his sexy new camera – the Fuji X100 – I need one!)

Remember yesterday’s moody dark shot? Here’s how we took it:


Now, on to events.

When you shoot events, you need to be ready for anything, for three reasons:

  1. Events are, by definition, not under your control.
  2. There are no retakes.
  3. You may in the course of one event be called upon to shoot product, “grip and grins”, photojournalism, portraits, and fashion.

That means events can be very stressful. There is never enough light, time or space.

The secret to overcoming this? You remove the stress by preparing well. You do this in the following ways:

  1. Commercial preparation (Do you know the objective of the shoot? Names of important people? Phone number of your client?)
  2. Pre-shoot and location preparation. (Have you scoped out the location? Can you park? Do you have enough gas in the car?)
  3. Equipment choice and preparation (Do you have the right lenses? Enough spare batteries? Spares for all equipment, too?)

Tip 1 for today: make check lists. You should make three check lists: a preparation checklist, an equipment checklist, and a shoot checklist. These are individualized, and different per shoot type. And you should really make these, and fill them in when you prepare for, and do, a shoot.

Tip 2 for today: make sure you know the names of all the important people you must photograph. Verify these on paper. Name and why they are important. (E.g. “Mr Frank Smith, Uncle of Bride”, or “Ms Melody McGroom, CFO of the holding company”). This will make your life as an event shooter easier.

Tip 3 for today: shoot indoors flash in manual mode. Set the exposure to -2 stops indicated on the meter, then try a test shot. Aim your flash behind you and bounce off walls and ceilings.

(Photo: Michelle Bobechko)


Off to sleep, now. More tips in the next days, as always. Do read the June 2011 issue of Photo Life, Canada’s best photography magazine, for an article on Event Photography, with “10 problems, 20 solutions”.

Yesterday’s workshop

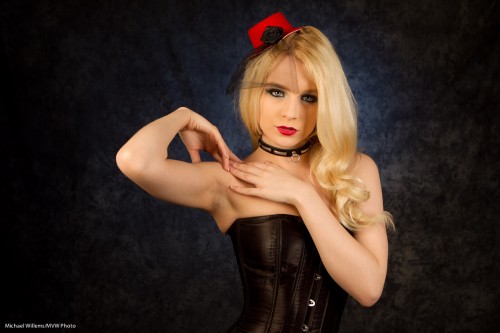
Yesterday’s workshop was “the art of shooting nudes”. Joseph Marranca and I and a roomful of students went through theory and practical tips first, then made a number of shots. Like this one:

Kassandra Love (Photo: Michael Willems)

Mono, Ont., 2 April 2011: Kassandra Love

This pretty picture makes me want to mention a few points, namely:

  • Yes. You can use a muslin background. It can be cool. A lot of people think “Oww, that’s Sears, and boring, and for old people. Not so… but you need to light it properly. That means “not light it all over”. You keep it dark, mainly.
  • Then you light a little with a gridded light. That’s the circle of light behind Kassandra.
  • That gridded light is gelled blue – blue goes well as a contrasty colour against white (really, “orange”) skin.
  • White balance is important. That skin should be the colour you want it. In this case I made it warm. A “desaturated” look (where, using Lightroom’s HSL pane in the Develop module you desaturate red and orange) would also have done well. Matter of taste.
  • The eyes must be sharp.
  • We shot at f/8, 1/125th second, 100 ISO.
  • Props and the subject are important also. The hat with the lipstick work well here.
  • The model is lit with softboxes, thus ensuring soft light and soft shadows.
  • They are positioned so as to give me a nice catch light in the eyes.

Simple light (three strobes: one on each side with a softbox, and one with a grid to light the background)can make interesting and artistic images.

Flash and ambient mixed

My friend (and Mercedes salesman) Steve Jones took a picture of me today, at the car dealership. Here is that picture:

I went through his camera setup for a flash picture with Steve, and I thought I would share that here.

  • What mode should we be in? Manual, for full control. The flash is still metered, of course, but background is manual.
  • What settings? In this case, in a big garage with much light, we will not go with the standard 400 ISO, 1/60th sec, f/4. Instead we will look at the light meter.
  • We want the background to be two stops, say, below the ambient light. So the meter should point to “-2”.
  • To get this, it needed 200 ISO, f/5.6, 1/200th second. With those settings the meter pointed to “-2”.
  • The flash had a Sto-Fen type diffuser on it for a bit of light softening, and it was pointed forward (to make the light emitting area larger).
  • White Balance was set to “Flash”.

And that’s it – that is how it is done: took a few seconds, means a nice shot.

BREAKING NEWS

MAJOR BREAKING PHOTOGRAPHY NEWS: BBC Reports that Sendai-based Nikon is to suspend all SLR production for one year, following the earthquake/tsunami.

(Better buy that SLR right now, IF you can still find it in the stores. I’ve seen lineups at Henrys in Oakville and Mississauga.)

….
FOOTNOTE: I would have thought the lineups and the date would have tipped people off! Glad to say Nikon will weather the storm fine, folks. Although – grain of truth: some production is indeed halted temporarily.

A product shot or two

Today I taught Merav, a student, a few product photography tricks. Perhaps I can share one or two insights here and take you through how to do this.

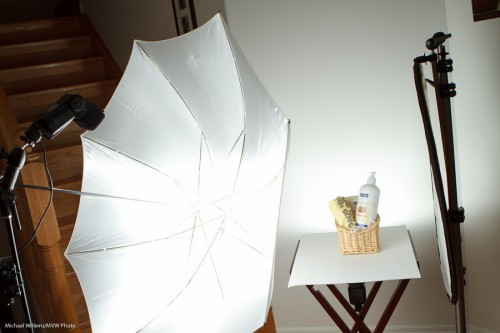
The brief was: shoot some products using simple means. “Simple” to me means speedlights (bad knee – don’t ask). So the setup I decided on was simple: a table, a white cover, and the product. The white wall serves as a backdrop.

And the lights?

  • We used one main light, a 580EX flash controlled through a Pocketwizard, through an umbrella. (A Flashzebra cable was used to connect the Pocketwizard to the SB-900 flash).
  • The fill light was simply a reflector. Held in place with a stand.
  • We lit the wall behind the product with a Nikon SB-900 flash in SU-4 mode.

The setup was thus:


You can make out the background flash behind the product.

  • You first set the camera to f/8, 1/125th sec, 100 ISO.This means the ambient light does little or no work, just the way you want it.
  • Then try the main flash at, say, 1/4 power. Meter using a light meter set to flash mode, 100 ISO and 1/1/25th second.
  • The light meter showed a close-enough value (f/6.3). Moving the main light closer made it f/8.
  • The reflector was just moved closer to make the light nice.
  • The background light was set at 1/8th power, so the background blew out completely (but only just). A bit of trial and error and the “blinkies” on the camera LCD display was enough to get this done: no metering was needed.

Bingo, end of setup.

  • Now make sure every product is the same distance away (even an inch farther = darker!)
  • Focus carefully, using one focus spot.
  • Use a tripod to ensure all images will have the same layout.
  • Do not forget to minimize distortion by using a long-ish lens (70mm on a crop camera, in this case).

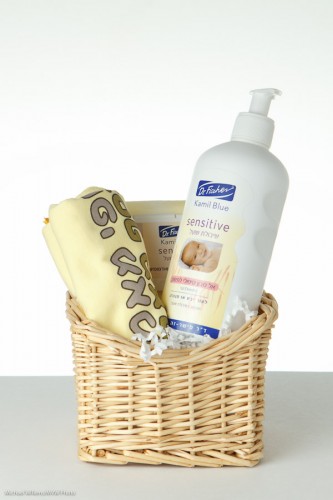
The resulting shots looked like this:

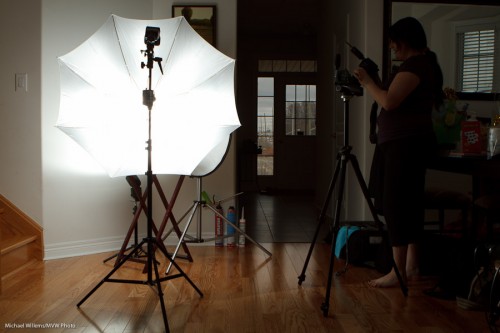
Easy, and portable. And it can all be done in a living room:

If you have never done product photography, please give it a go. It is fun and rewarding.