Subscribers, note:

Subscribers to this daily training site, please note: I am deleting three quarters of my subscriber list. Alas for some countries, it appears that 100% of all “users” from Poland, Russia and Romania are fake. So are many French users and many, many others. I have no idea what spammers want with registrations that do nothing except send them daily articles, but whatever.

I delete by inspection of email address and name. Any users called “khsadjkhef” with email addresses like “dyewufe@mail.ru” of “fre.d.the.ma.n@backlink.org” gets deleted. If I delete you by mistake, reregister and add your actual name.

Or better still: come here to read the articles.


About A Shoot

Often, people who do not know photography think it is simple. Just press the button.

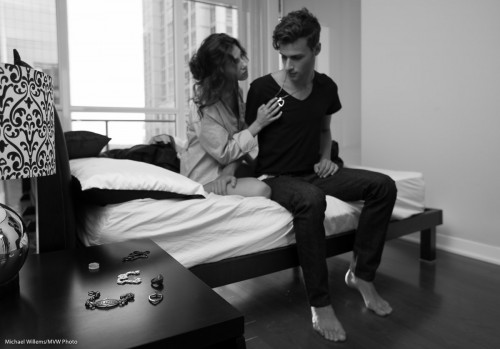
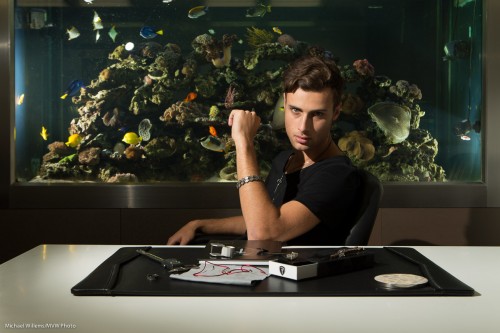
Alas, not so. Yesterday, I did a lifestyle/male jewellery shoot:

Not so. I didn’t – not alone. I was helped by another excellent photographer, my colleague and friend Kristof, but also by, among others:

  • Business owner and stand-in creative director.
  • His assistant
  • Male model
  • Female model
  • Clothing providers and coordinators (3)
  • Jewellery coordinator
  • Make-Up Artist
  • Hair Stylist
  • General assistant

In all, about 15 people were involved. And we took about eight hours to get what amounts to something like eight shots at three locations. Make-up and clothing can easily take as long as the shooting. And this was an awesome shoot: fun, and everyone worked exceedingly well together. Not always the case: here, it easily was.

As for the work: that is a lot – but it is not all. Those chosen shots are then finished meticulously. The post work takes as long as the shoot. Cropping, fixing, simplifying, adjusting perspective – all this takes time.

In technical terms of course it is not just the camera. It is the camera and lenses and lights – two off-camera speedlights in the shot above, and four, fitted with modifiers such as snoots and grids, in this shot:

So while the final click may only take 1/200th second, the preparing, packing, carrying many things from site to site, setting up, make-up, clothing, coordination, creative, post work, logistics, and so on take much work from many people. That is why photography takes time and costs money.

For these shots I used off-camera flash; manual flash with Pocketwizards for the first shot above. and TTL flash for the second shot. The camera was in manual. In the first shot, to give pretty good exposure – almost enough – using ambient; in the second, to give a totally dark room.


Update notes

A few software update notes for you today.

Software and firmware updates can be important. They can even be fun. But are they always necessary?

  1. If you use Lightroom, as I hope you do, then do update to version 4.2. (Yes, Aperture is good too).
  2. Always do printer driver updates when they are presented by your PC or Mac as options.
  3. Regularly check the firmware level on your camera. Just google “Firmware update for XXX camera”. If there is new firmware, check its functions: I always do all updates – but not until a week after the new firmware is released, just in case. Use a 100% full battery for these, and be patient. It can take time.
  4. Do not update your PC or Mac operating system on production machines. The OS update could break important things. I usually wait until I have a spare machine, update that, test it against all my software, and only then update the machine – if at all.

If you follow these simple rules, you will get new functions, bugfixes, but with the minimum of trouble. Life is too short for trouble!


Welcome to new readers

Welcome to all my new readers. As you will see here, I am a Toronto-based full time photographer and teacher of photography – I teach my signature “Advanced Flash” and “Event Photography” seminars and courses worldwide and I do private coaching as well.

This site is free. All I ask is that you tell all your friends. I write an article here every day (yes, I must be a masochist) with a photography tip, a technique explained, or a technology clarified. Often about speedlighting -flash rocks once you know intimately how it works – but can be about everything. Aimed at every level from beginners to pros.

Speedlighting is my forte, and has been for years; but I engage in every type of photography. I shoot everything from news to art nudes to weddings to family pictures to food and product to corporate headshots. That keeps me as fresh as an amateur. “Amateur” is not a bad word by the way – it means someone who loves something. Amateurs have the best of all worlds in that there is no pressure and they can shoot what they like. As a photographer, I always try the same: to shoot what I like, and to keep it varied.

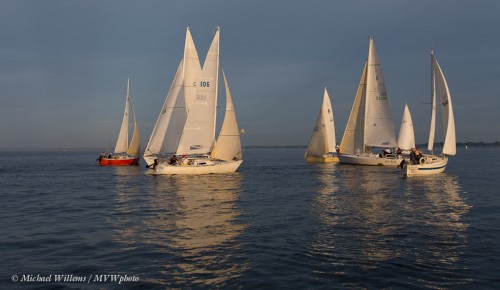
So today, then, a quick word or two about my recent Lake Ontario sailing pictures. Shot during the last three Wednesdays.

Pictures like this one:
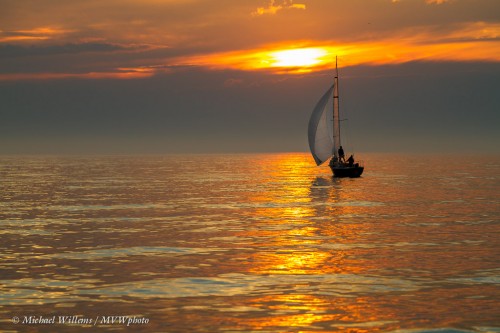
That used – unusually for me – a long (70-200mm) lens. And on a 1.6 crop camera, to make it 110-320mm.

Why? For two reasons:

  1. The obvious: boats can be far!l
  2. The less obvious: lake sunsets are often small, and the long lens ensures that I get “all of it”.
  3. The reflections are essential-  they too would be too small without the long lens.

Key is to keep the exposure time fast enough, even with a stabilized lens. Boats move!

Of course sometimes the sunset throws its light wider – then, the 16-35mm lens is called for:
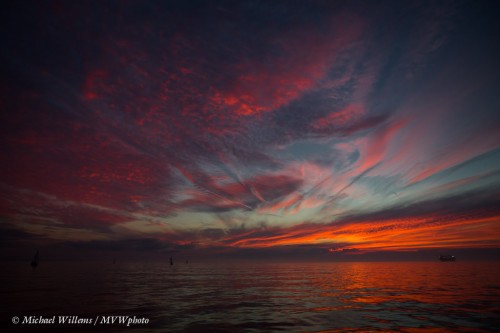
Now it’s not about the barely-visible boats, but all about the sky and reflection.

The key element in this image? Time. I had literally two minutes to capture that sky before it turned dull again. I was using two cameras: there was insufficient time for lens changes – plus, who wants to change lenses on the water?

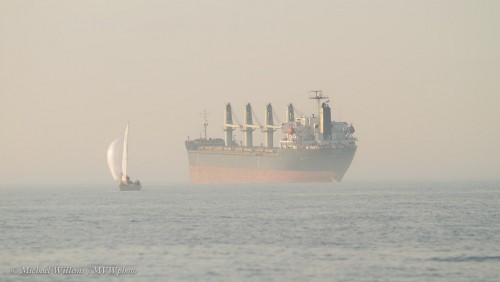
Fog is always good. Not every picture needs to be high contrast:
For crew pictures on a sail boat, a super wide lens is a must. The 16-35mm (on the full-frame 1Dx again) gives me this:
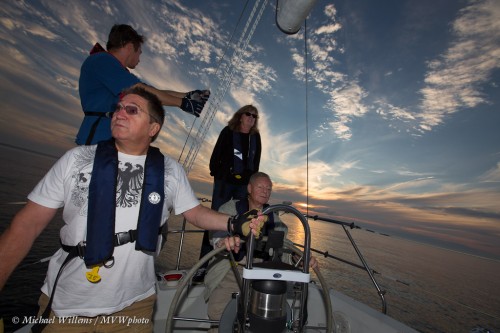
I tilted phe picture to give it a dynamic look, as well as to get everyone in. And you see the fill flash, of course? My flash is always on the camera when shooting, and is often used.

Do not forget to use the flash wide angle adapter when using the 16mm lens (that is the clear flap that pulls out of the front of the flash. As readers here know, that is not a “softening adapter” – it is merely a wide angle adapter!)

Going back to sunsets: sometimes, for a minute or so, they get spectacular like this:
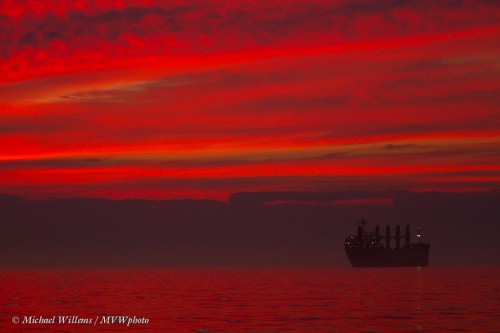
Important in that image is the long lens and good exposure. Making the image too bright makes it less saturated.

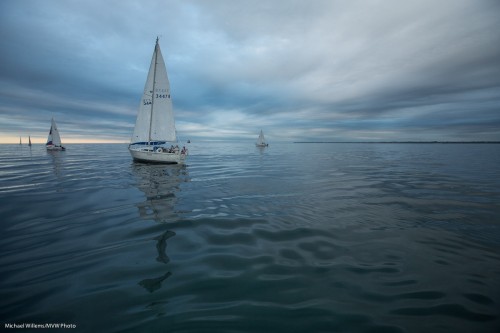
With a wide lens, skies and lakes can be great even when not lit up in red: the super wide lens (16mm on the full-frame camera) makes this all about the shape; the world bending in, wrapping around the centre.
Finally, one more to show the effect of flash.
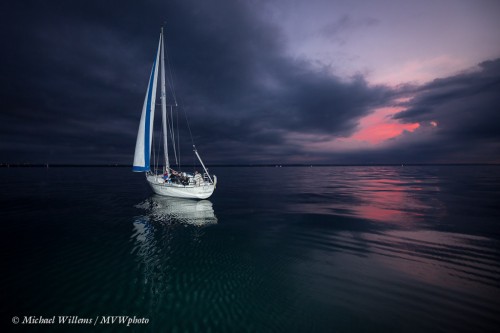
With tow notes:

  1. I exposed for a dark background.
  2. I then used the flash (a 600EX) to light the boat.
  3. I zoomed the flash in manually to 100mm to get the range I needed – if the flash had been sending its light as wide as the lens was looking (ca 24mm), most of its light would have been wasted and not enough would have been left to light the boat, even at f/4.0 at 400 ISO.
  4. I turned the flash slightly to the left, since my subject is not in the centre!

Now go enjoy sunsets and lakes while you can – on the Northern Hemisphere there’s little time left.


Portrait note

Two notes for you today.

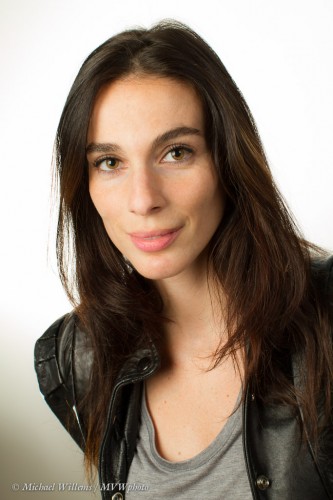
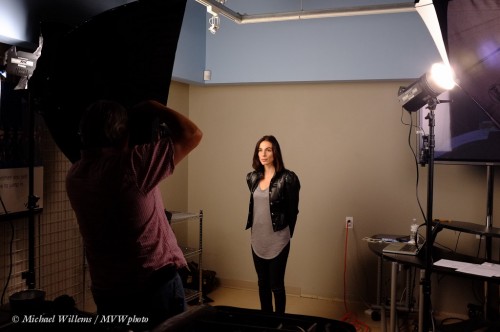
When you are doing a portrait, first, always at some stage take a pull-back shot. So when you shoot something like this (of a very beautiful student, as shot in the course I taught at Vistek last Saturday afternoon):

Shoot this also, so you remember how you did it:

Then the second note. The background. Think about what you want.

  • If you want a full white background, start white and blast it with light.
  • If however you want a saturated colour, do not overexpose: first ensure that little or no no light from the other flashes falls onto the background, then shoot it not too bright with gels.
  • Or if you want a nice falloff, like I often use, and as I used in the picture above, then merge the two. Start dark, light up in a selected area, perhaps using a close-by flash, if necessary with a grid. Sideways lighting gets you a parabola (remember your cone cuts in math).

We often forget to think about the background, concentrating instead on the foreground only. The background is a very important part of the image… think about what you want, then try to get that.


You can do this too.

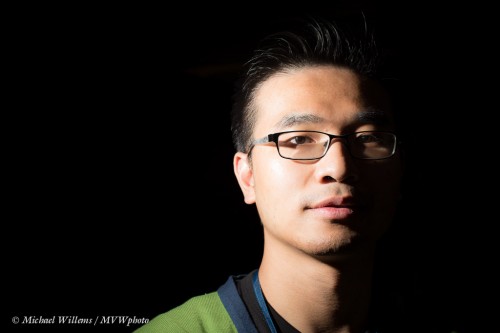
Here’s a quick portrait of Ivan, the manager of Mississauga’s Vistek store.

Took about… oh, all of one minute.

Here’s how.

  1. Set camera to manual exposure.
  2. Select values for Aperture, ISO and Shutter Speed that will make the room go dark. Here, that was 1/160th sec, f/8 at 100 ISO.
  3. Put a flash on the camera in MASTER mode (a Canon 600EX here, set to using light, not radio, as a master). (You can use the popup flash on a Nikon or on modern Canons like the 7D, 60D, etc.)
  4. Make sure that this master flash will not fire during the shot – it fires only commands (“morse code”) to slave flashes, prior to the shot. Set this on your flash or camera.
  5. Hold a slave flash (in my case a 430EX in slave mode) in your left hand.
  6. Ensure that this flash in in TTL slave mode on the same channel as your master flash.
  7. If the room is very small, put a grid (eg a Honl Photo 1/4″ grid) on the slave flash.
  8. Aim that flash directly at the subject (really).
  9. Focus, recompose
  10. Shoot!

It really was as quick as that. When you learn good technique, you too can be quick with creative shots like this.


About that portrait

Several of you asked “How do you take a portrait such as the one you posted yesterday? Looks like you’ve photoshopped her in.

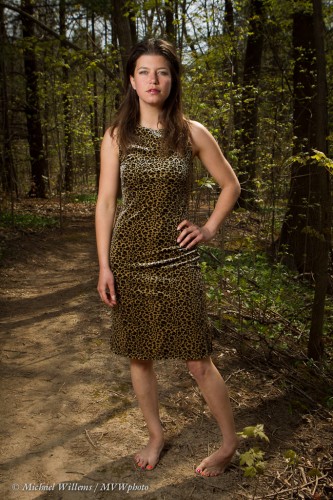
You mean this one:

And nope, no photoshopping or Lightrooming done at all.

Here in a nutshell is my technique. I have mentioned these things before but they bear repeating, often:

  1. I set my camera to manual exposure.
  2. I select a low ISO – 100 ISO in this case.
  3. Next, I select a location where the sun, coming in from behind, provides a hair/rim light for the model.
  4. Now, I will want to darken the background, in order to (a) get saturated colours and (b) make my subject “the bright pixels”.
  5. I am looking for perhaps -2 stops on the meter (evaluative metering, wide angle) in this shot.
  6. To achieve this, first I go to my flash sync speed, in this case 1/250th second. That way I am not stealing my flash power.
  7. I then do further darkening with aperture. This photo needed f/5.6. Perfect.
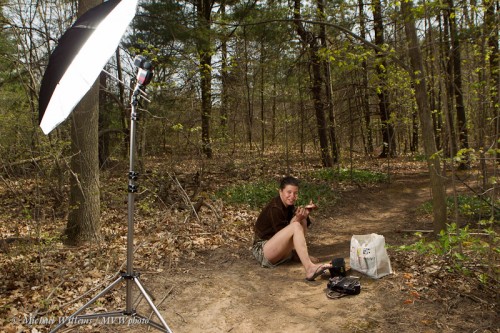
  8. I now set up my umbrella. On the left in this case.

That looks like this:

An umbrella with an off-camera speedlight. A small one: a Canon 430EX.

I now meter the flash – or I use TTL. Depends on how much time I have. TTL is much faster and very convenient,. but can be tricky in terms of consistency. In my courses I teach you all about it.

I position the umbrella 45 degrees of centre and 45 degrees up.

And I shoot.

And I’m done.

___

Everyone can learn to do this! Of course there’s a lot of subtlety here (like, why go to the synch speed first, exactly?), and in my flash courses, I teach you all you need to know to do this. Contact me to learn more.


A couple of Q&A notes for you all!

For new readers especially, allow me to share a few Q&A notes with you…

Q: Why do you do this teaching site? And why is it free? A: because I believe in giving back. I teach photography, as you know, all over the world, from Toronto to Las Vegas to Europe; I teach at Sheridan College; at Vistek in Mississauga, and I teach and coach privately. This daily article is an extension of that. Free, because I am giving back. But also because I hope you will all tell your friends to follow this. And because I know that some of you will then use my services.

Q: what services do you provide? A: Photography and teaching. Teaching, because just a few lessons will help you master those aspects of craft of photography that you really need to learn. And photography: I shoot events (weddings, parties, bar/bat mitzvahs, christenings, corporate events, and so on); portraits (engagement shoots; corporate portraits; portraits for your LinkedIn, web site, of Facebook; family portraits, and so on). I also shoot industrial and product. With my wide range of equipment and skills, I can manage anything. See www.michaelwillems.ca for more information.

For wedding and family photos go here:

Q: Why is flash so prominent in your writing? A: Because it is my specialist subject – I teach people flash all over the world – but mainly because it is beautiful light once you know how it works. As in this photo of my frequent model; taken with one camera, one lens, and one off-camera small flash in an umbrella. Very very simple, and good right out of camera.


Q: Do you really do a daily post? A: yes. I may sometimes miss a day or two, but in that case I make up for it later by posting more. A post for every single day of the year so far. If I get tired of that I will slow down, but who gets tired of photography? It’s fun!

Q: Any special offers? A: glad you asked. Yes, I have autumn specials on right now for both individual teaching, group teaching, and photography. Contact me to hear trhe details.

Q: Can I repost this material? A: I will typically give you permission but only if I am fully credited; and it does depend on the purpose, location, etc. Just drop me an email to ask!

Q: Can I ask you a question? A: Yes please. I welcome your questions (send email to michael@michaelwillems.ca) and if interesting to others, will answer them on speedlighter.ca! Please also feel free at any time to comment on my posts (the little link at the bottom).

___

Back to regular programming!