Long or wide?

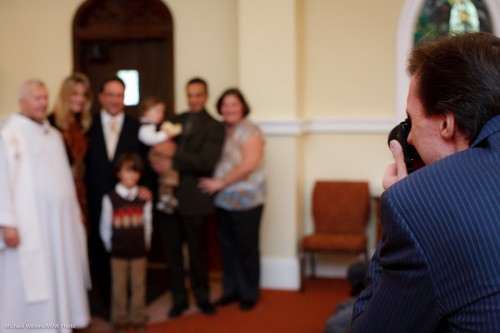
When I shoot an event, like last Saturday’s Christening, I usually shoot with both long and wide lenses.

So here I had:

  1. A Canon 1Ds3 with a 50mm f/1.2 lens
  2. A Canon 1D4 with a 70-200mm f/2.8 lens (meaning really a 90-260, since the 1D has a 1.3 crop factor).

I shoot the 50mm lens when I need:

  • More light – if I shoot at f/2.0 I let in a stop more than the 70-200 f/2.8 can, and at f/1.4 another stop. This can come in handy.
  • Consistency.
  • Super Blurry backgrounds.

And I use the long lens when I need:

  • Grabbed shots of expressions: “candids”.
  • Distance – because I cannot come too close during a solemn ceremony without spoiling the mood for everyone.

An example of the long lens:

And one of the 50mm lens:

Could you shoot an event with just one lens? Sure. That just means you will be shooting one type of photo. not all types of photo. If you only bring a wide lens, for instance, you will need to forgo the candids and get closer, instead. But of course it can be done. Do not get into gear too the extent that you think the gear determines how good you are. It doesn’t – it just helps bring it out by extending the range of options at your disposal.


Dark

Sometimes it is dark. And yet you need to make it look light, like this, from last weekend’s christening shoot:

Church (Photo: Michael Willems)

I shot that with a 50mm f/1.2 lens, at these settings:

  • RAW
  • 1600 ISO, f/1.4, 1/100th second
  • And then I had to push it in post-processing (and remove the resulting noise)

So imagine. At f/2.0 that would have been 1/50th sec, and at f/2.8 barely 1/30th second. Which is too slow to avoid motion blur. And worse, many of them I had to shoot at 1/30th second. That would have been 1/8th sec at f/2.8 – not doable at al.

The lesson: some situations are really really dark, and if you cannot use flash (either because you cannot bounce, or because you are not allowed to use it) you have to either go to very high ISO values (like 3200 and above), or use very fast lenses, or push process. Only fast lenses and flash do not affect quality.

Affect quality:

  • Push processing
  • High ISO (1600 and beyond, depending on the camera)

Do not affect quality:

  • Flash (except light quality)
  • Fast lenses (except depth of field)

So… I love fast prime lenses, and now you know why.


Photoshop, Elements or Lightroom?`

An often-heard question, here at Willems Central: which one should I use?

  • Adobe Photoshop Creative Suite, at around $1,000?
  • Adobe Photoshop Elements, around $ 100?
  • Adobe Lightroom, around $300?
  • Apple Aperture, around $150?

Actually, that’s a comparison of Apples to Oranges. They are different and address different needs.

Photoshop and Photoshop Elements address the need for “deep editing” single images. Getting Vogue front page and want to move a nose? Stretch legs? Turn red into green? You probably want to use Photoshop.

Lightroom and Aperture address a different set of needs. They offer:

  • Asset management. Great tools for comparison between images. Ranking, rating, organizing, searching, sorting, filtering, keywording, and so on. Amazing tools.
  • Quick editing – much quicker than in Photoshop. Not as deep, but as deep as a photographer usually needs.
  • Non-destructive editing – your original images never get touched.

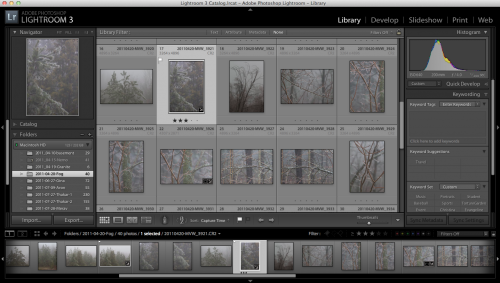
You can see Lightroom here:

Other differences:

  • Lightroom and Aperture can be learned in a few days. Photoshop will take you months to fully master.
  • Aperture is more Apple-like in that it wants to organize where your files are; Lightroom is more free in that it more readily leaves it to you.
  • Aperture is for Apple only; Lightroom is for Apple or Windows.
  • Photoshop CS contains “everything”; Elements is “for photographers”.

So what did I choose:

Both.

I work in Lightroom 99% of the time. LR saved me 75% of my post-production (finishing) time. ‘Nuff said! But occasionally I need to pop from LR into Photoshop. If you have more tan one image to finish, I recommend you start with Lightroom (or Aperture); and add PS/Elements later.


Rule of Thirds

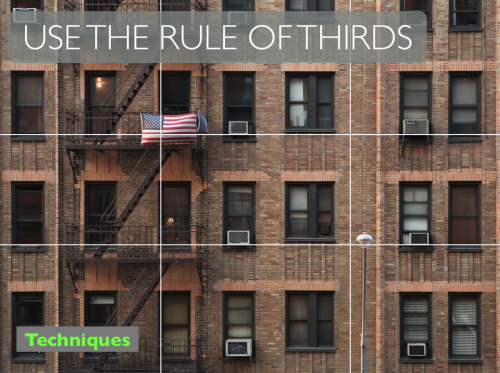
One day I’ll talk abou the rule of threes – but today, I’ll repeat the rule of thirds.

Like in the image above, taken from my room in the Chelsea Hotel in New York City a few years ago.

Simply said:

  • Divide your picture into three columns and three rows.
  • Put lines (like people, buildings the horizon) near the lines.
  • Put objects (like the flag) on the intersection of lines.

That usually makes your pictures look much more pleasing. Don’t be Uncle Fred who puts every object in the centre of the image. Off-centre composition, using the Rule of Thirds, makes your images more pleasing.

Of course if you have a reason to centre your subject: do. But in the absence of such reason: use the Rule of Thirds.


Make it RAW

If you are shooting with a digital camera, your camera may give you the option to shoot in JPG format or in RAW format. All SLRs have this option; many compact camera do, too. Check the menu.

Why shoot RAW? It has drawbacks!

  1. A RAW file is three times larger than a JPG, so fewer images will save on your card, and it will take longer to download them. And you will need more hard disk space.
  2. A RAW file is in a camera-maker’s proprietary format and you may need extra software installed to read it. You cannot take it into the camera store for a print unless you first convert it to JPG.

Yes, true.

But it also has advantages, which greatly outweigh the drawbacks.

First, a RAW file contains much more information about light than the JPG that you will eventually make from it. That is a key part of your understanding: eventually, a JPG file will be generated. If doing this in camera, this means that the image is processed a certain way by your camera. While if you do it later, on your computer, then if you have under- or over-exposed a RAW image, for instance, you can “fix” it before you make that JPG.

And second: When a JPG is made, many settings are applied. Settings like:

  • Should it be a colour or black and white image?
  • How much sharpening should be applied?
  • How much extra saturation should be applied?
  • How much extra contrast should be applied?
  • What white balance should be applied?
  • What colour space should the JPG be encoded in, sRGB or AdobeRGB?

Believe it or not, you have settings in your camera for all of the above, so whether you are aware of it or not, whenever you take a picture, you are always making all these decisions. And if you are making a JPG in the camera, all these settings are applied to the image. So they are final. While a RAW file also contains your settings, but only as suggestions, and all the original data is part of the file. So if you want to change your mind: no problem. One click in Lightroom, Aperture, Photoshop, or whatever software your camera maker gave you, and you can change any of these settings, without any loss of quality.

So if you set your camera to black and white and you create a JPG, not all the king’s horses, or all the king’s men can bring the colours together again. But if instaed you shot RAW, one click and bingo, colour is back.

That is why I only shoot RAW images, ever.

“But it’s extra work, Michael!”

No it isn’t! IF your exposure and all the above settings were all correct in the camera, your software will follow them and create the right JPG for you – correct first time. No extra work.

It’s only extra work if you choose to not set it all while shooting. I often don’t  worry about white balance while shooting, for instance, since it saves me time while shooting – one click later at home will set the white balance. So in choose to not spend time worrying unduly about white balance while shooting, so I can concentrate on composing. That’s a choice!

SO if you are not yet shooting RAW images: you should be. Unless all your camera settings are all correct whenever you shoot. In that case, hats off to you, and carry on with JPGs!


Hazy? Solution here!

I have asked this before… what do you do when it is hazy? Like in this shot of Hong Kong?

Hong Kong (Photo: Michael Willems)

No-one will be impressed.

So you can take the image into Lightroom, and drag “blacks” to the left and “exposure” to the right. Or do a “Levels” adjustment in Photoshop.

True. But as said before, you can make the drawback into a benefit. Male lemonade out of the lemons. And I thought I would show you another “improved” example. Here:

Hong Kong (Photo: Michael Willems)

So you find a sharp object to put in front. Simple – now the haze becomes a benefit. Making lemonade out of lemons.


OS X Lion: Apple’s Vista? No – worse.

I’m an Apple user, and I have been for a while – happily so far.

But the more I see OS X Lion, Apple’s new OS, the less I like it. No – the more I hate it. It is a dumb downgrade, designed to make your powerful computer into a dumb iPad.

Apart from the many cosmetics, the silly seven-finger (or whatever – after three I stop counting) swiping gestures, the “Full screen nonsense”, the “Launch pad”, the “App store”  – in general, the drive to use a computer as an iPad, not as a powerful work computer – there are many big issues that stop me from switching.

The lack of a “save as” function, and the fact that Apple in its app now always saves multiple versions of files unasked, is a show-stopper for me. The lack of a scroll bar, the unnatural scroll direction, and in general the dumbing down and the emphasis of scroll pads and de-emphasis of anything mouse-related are big factors too.

It seems to me that Lion was made for people with an IQ of 85 – unfortunately, those of us who know things are now reduced to the same level. It’s like you make a Boeing 747 that is able to be flown by Granny – that unfortunately means that a real pilot is going to be severely restricted in what he can do.

And to top it off, now I was told by Apple that iCloud will be unavailable if you do not use Lion or iOS 5. This is a cynical abuse of power – upgrade or lose your email address and any calendar synching, and so on. So Apple does not want people to use Lion because they like it – they will instead force you to use Lion if you want synching (which is 100% central to my life in the case of synching Calendar events). For no reason other than bullying, Apple now says “switch to Lion or use that ability”.

I didn’t think I would ever say this, but this may very well drive me back to Windows or Linux. The “save as” function is deeply ingrained in my workflow – it has been a staple function since early computers – and iWeb runs all my web sites.

When I was just telling Apple advisor “Yashika” this on Live Chat, she abruptly cut the connection. It seems that Apple staff, like scientologists, do not like to have anyone interfere with their reality distortion field.

So either I live with a severe dumbing down and a permanent impoverishment of my computing, or I switch to Windows, which has some pretty severe drawbacks of its own. Or to Linux, which lacks the apps.

Don’t take my word for it. Many pundits agree with me. Here’s a few:

http://gizmodo.com/5819418/mac-os-x-lion-this-is-not-the-future-we-were-hoping-for

http://todmaffin.com/lionsucks

http://smilingmac.wordpress.com/2011/09/06/personal-thought-dont-upgrade-to-lion/

http://www.reghardware.com/2011/09/07/apple_mac_os_x_lion_the_nanny_os/

Well – I have until June 2012 to decide on other options. What wil be my new operating environment? Ideas?


Tools

As I recently said here, you need to do what you need to do with whatever tools do it. And sometimes those are not the ideal tools.

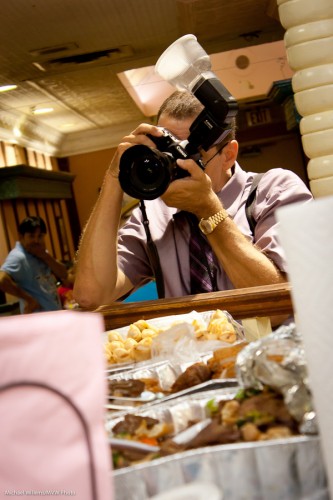
And once again, let me say that the tool of last resort for me is the Gary Fong Lightsphere. I can be seen here using it at a recent shoot:

That is needed in an environment where it is hard to bounce. So then I get acceptable pictures by all acounts: not art but not bad either:

As you see. a shadow, but not a hideous one. This is light I can live with, and you will see me using this kind of light in events regularly – but only until I can find a place to bounce.


Hidden worlds

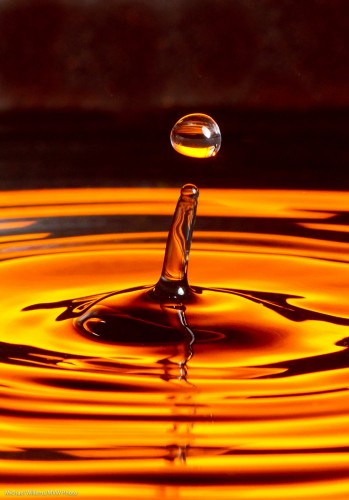
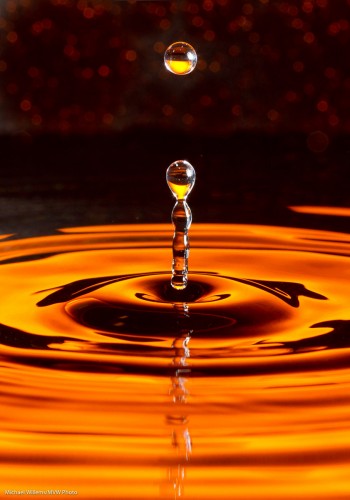
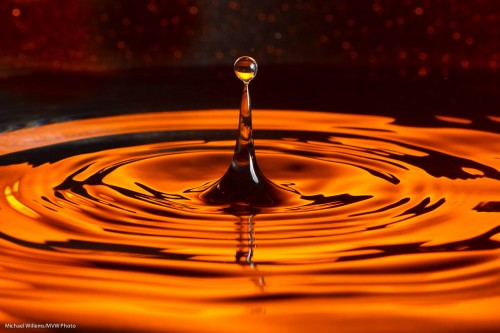
There is a hidden world in water’s surface tension. A world like this:

Water Drop (Photo: Michael Willems)

Is that difficult to photograph? Depends on how much patience you have.

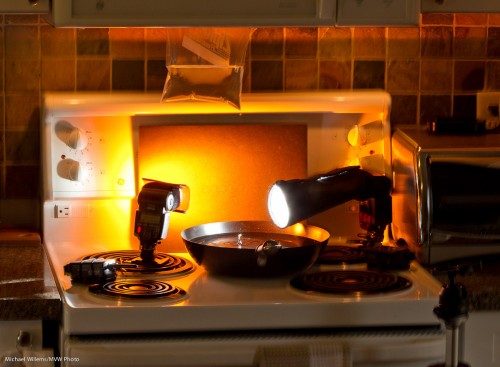
Here’s how I just took this picture:

  • Camera on a tripod, equipped with a suitable lens – I used a 100mm macro lens but a 50mm or a telephoto lens may also do.
  • I set the camera to 320 ISO, f/11, 1/250th second.
  • A black background, lit up with a gelled flash – or just a coloured background.
  • A tray with water – also preferably black. I used a wok since I had nothing else, plus a wok is round, so you get circular waves.
  • A plastic bag with water. I hung it from my microwave. Poke a very small hole in it with a pin.
  • A for the background – I used a 430EX with a Pocketwizard driving it. The flash set to manual 1/4 power and equipped with a Rust gel from Honlphoto.
  • Another flash aimed at the drops from the side. Also driven by a Pocketwizard, this flash was equipped with a Honl snoot. Also set to manual 1/4 power.

This looked like this:

Water Drop (Photo: Michael Willems)

See the ziplock stuck in my microwave door? And see the tripod on the right?

And given enough patience you will get pictures like the one above. Yes, patience is required – I just shot 500 pictures to get 10 great ones.

Gotchas to watch out for:

  • Too big a hole will give you streams of water – not flattering. You want slow-moving, large drops. Small pin hole achieves this (else, wait until the pressure lessens).
  • Like in any macro photo, you may need to clean up your picture to remove the dust you lit up with the flash.
  • You will also want to crop the image.
  • Watch for reflections of the waves in the bottom of the pan – shoot as horizontal as you can.
  • Watch for reflections elsewhere too – I got a reflection in the side of the pan; some of this I had to remove in post-production.
  • Focus manually; prefocus where the drops fall.
  • You want fast flashes – and since a flash’s power is set by its duration, this means not full power, so make sure the flashes are close.

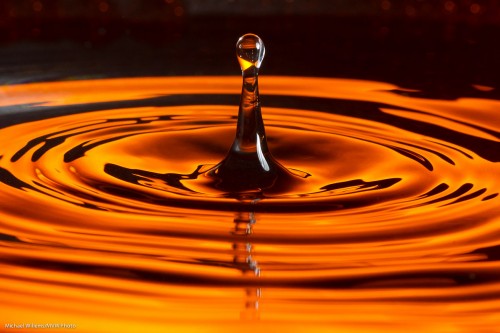
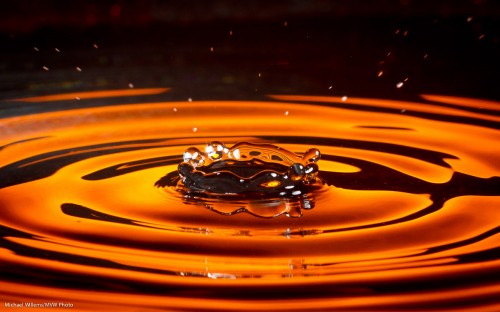
A few more samples:

Water Drop (Photo: Michael Willems)

Water Drop (Photo: Michael Willems)

Water drops (Photo: Michael Willems)

Water drops (Photo: Michael Willems)


Productivity tools

Whether you are a pro (i.e. you do photography for a living) or an amateur (you do it for the love of it), there are always chores; things to be done. And how quickly you do them determines how quickly you get back to what you want to really be doing.

So here, in case it helps you, are a dozen of my main productivity tools:

  1. Adobe Lightroom. Lightroom is software for photo asset management, editing and production. It has cut 75% off my post-production time. (If you have a Mac, like me, then Apple Aperture is also an option).
  2. Apple iPad. My iPad is my business tool, my portfolio, my email and web device. I could not live without it anymore.
  3. OmniFocus – a task manager/organizing/ To Do tool for Apple, iPhone and iPad. I have it for iPad and am loving it – the first task manager that actually works for me.
  4. Numbers. Apple’s spreadsheet tool for the iPad is, once you learn it, an amazing productivity tool. I run my business using this spreadsheet tool; a spreadsheet that uses the screen interface well.
  5. My Brother QL-570 Label Printer. No kidding. Mail always used to pile up; now I click and a label is produced , and I actually mail the envelope.
  6. USB memory sticks. Now that these can cost under $10, I send my customers their shoots on a USB stick nowadays. No more waiting for failed DVD writes.
  7. ConstantContact. To send emails with info and offers to prospects and clients.
  8. WordPress. My blog runs on WordPress. Simple, to the point, etc.
  9. iWeb. Apple’s simple web editing tool may not be important to Apple – it is essential to me. How else could I quickly write my sites, like www.michaelwillems.ca?
  10. 1and1.com – I host all my web sites there. ‘Nuff said.
  11. Google Apps – my emails all run on Google Apps – my own “personal Gmail”.
  12. The Mac. Since switching from PCs to Macs some years ago, my productivity has gone up immensely. With a Mac, you do not, like with a Windows PC, spend your time making it work well. You spend your time actually working. A lot of this is due to the fact it runs on UNIX – the real OS, the same OS that powers mainframes (and that has so successfully been made into Linux as well).

Your mileage will vary, but this gives you some idea of what I use to make my life more efficient. As far as my “a mile a minute” personality will allow, of course!