Exposure metering basics

In the continuing series on flash and its complexities that I started yesterday, time for the next basic subject. And that is “metering” and “exposure compensation” while not using a flash. (Yes, to understand flash you need to first understand non-flash exposure basics. So bear with me in this series.)

What does your light meter do?

When you press down the button half way while pointing at your subject, you activate the light meter – and the camera now does one of two things:

  1. If in manual exposure mode (M), it merely shows you a light meter in the viewfinder. You can now adjust aperture, ISO and/or shutter speed, and when you achieve “meter in the middle” this means “well exposed (if the subject is mid-grey)”.
  2. Or when you are in an automatic mode (P, A/Av or S/Tv), the camera itself sets aperture and/or shutter to make the meter go to the middle. The picture will therefore be well exposed (if the subject is mid-grey).

Let’s look at that qualification: “well exposed (if the subject is mid-grey)”.

  1. Your light meter –  a reflective light meter – is calibrated to give you the “zero” reading when your subject is exposed to look mid-grey, i.e. neither very dark nor very bright. That’s just how it was decided it should work. Because most of the world is like that.
  2. So as long as what you are shooting is neither dark nor bright, all is well. Aim at zero and shoot, and all well.

So what if you are shooting dark or light subjects?

Let’s start with what happens if you are aimed at a dark subject:

  1. Setting the meter to zero gives you a light grey subject – not a black subject!
  2. So you need to somehow make the meter point at minus – say, minus two for a black subject.
  3. That way the subject will not look grey, but darker.
  4. Which is good – because since it is darker, it needs to look darker!

And what if you are aimed at a bright subject?

  1. Setting the meter to zero gives you a light grey subject – not a white subject!
  2. So you need to somehow make the meter point at plus – say, plus two for a totally white subject.
  3. That way the subject will not look grey, but lighter.
  4. Which is good – because since it is lighter, it needs to look lighter!

Your light meter does not know whether you are shooting a coalmine in the dark (total black)  or a snow-hill on a bright day (total white). It cannot know. So you will always need to compensate for this.

How do you adjust?

If you are using manual, you adjust aperture or shutter or ISO until the mater moves to the desired setting. If in an automatic mode like P, Tv/S, or Av/A, you use exposure compensation (“the plus-minus button”) and set that to minus or plus – the camera now adjusts aperture, shutter or ISO.  So the adjustment

Real-life example 1:

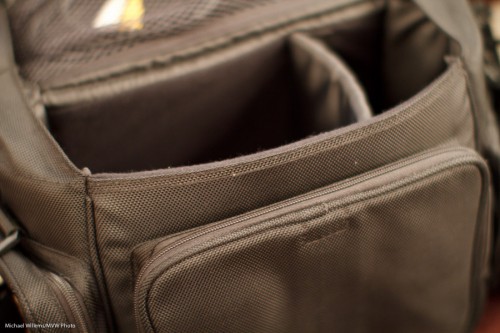
Here, a viewfinder-filling black bag with the camera on “P” (or on “M” where we make the meter go to “zero”):

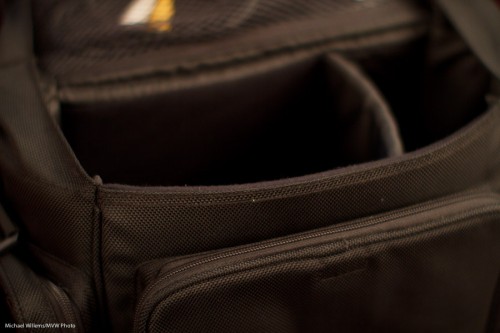
And here, the same viewfinder-filling black bag with the camera on “P” with exposure compensation (the +/- button) set to minus two (or on “M” where we make the meter point at -2):

“But making the exposure go to minus two will make the subject all black, Michael”.

Yeah. And that is what we want, since it is black!

Real-life example 2:

Here, a viewfinder-filling white sheet of paper with the camera on “P” (or on “M” where we make the meter go to “zero”):

And here, the same viewfinder-filling white sheet of paper with the camera on “P” with exposure compensation (the +/- button) set to plus one (or on “M” where we make the meter point at +1):

“But making the exposure go to plus one will make the subject all bright, Michael”.

Yeah. And that is what we want, since it is bright!

Conclusions:

So, no magic. Just logic. Simple:

  1. If a subject is lighter than average I need to make sure it shows as lighter than average, and if a subject is darker than average I need to make sure it shows as darker than average.
  2. I can make these adjustments in manual mode by changing aperture/shutter so that the meter does not point at zero.
  3. Or I can make these adjustments in automatic modes by using exposure compensation (and now the camera does exactly the same: it adjusts aperture and/or shutter).

In the next while, more – but first, start by understanding this. A good way is to use manual mode for the entire day tomorrow, and only available light.

Have fun!

1,001 flashes

My 1,001th post is once again about speedlights – appropriately, you might say.

Yesterday and today, I shot outdoors, with my Canon cameras – and with my second shooter who shoots Nikon. A wedding Saturday and soccer kids Sunday.

And that shooting experience prompts me to say a few things about exposure and flash on Canon and Nikon systems.

And as I was explaining today, it struck me again how complex these systems are if you try to understand them all at once. So I will be discussing them bit by bit, in easily digested parts. The big picture will be clear once you get all the parts. But you always start with the parts, and use deductive reasoning to get the the bigger picture.

So, let’s start with some simple definitions, today. Just to make sure you are all on the same page.

A picture like the one above uses (really, mixes) two types of light:

  1. Available, or ambient, light. From the sun, in this case.
  2. Flash light. From, um, the flash.

Each can appear light or dark in your image:

  • If the ambient light appears dark in your picture, this makes for a dark background.
  • If the flash light appears dark this can make for a dark foreground subject.
  • If the ambient light appears dark, the flash may be the main source of light on your subject, and when using just one flash, you can get a harsh look.
  • If the ambient light appears bright, the flash will not add much.

Both ambient and flash can be adjusted – by you or by the camera.

Ambient light:

  • Manual exposure means you are setting the ambient brightness entirely by yourself. You do this by adjusting ISO, Aperture and Shutter. You use “M” mode for this and ensure auto ISO is off.
  • Automatic exposure means the camera is setting the ambient brightness. It does that in P, S/Tv amd A/Av modes.

Flash light:

  • Manual flash is when you set the flash power level (really, its time) yourself. The flash displays “M” at the back. You set the power fo 1/1 or 100%, or to 1/2 or 50%, or to 1/4th or 25%, and so on. You would do this in a studio.
  • Automatic flash is when the camera sets the flash power level – usually in what we call “TTL” mode. It uses a preflash for this in TTL mode. You would use this at, say, a party.

Getting confused yet?

Then we make it more confusing.

In automatic modes, you can nevertheless adjust the brightness of various parts of your image.

And this is the subject of today’s post: when doing this, Canon and Nikon behave differently.

On a Canon camera, you use:

  • Exposure compensation to modify the brightness of the ambient part of the image from what your camera had in mind. Plus means brighter, minus means darker.
  • Flash exposure compensation to modify the brightness of the flash part of the image from what your camera had in mind. Plus means brighter, minus means darker.

On a Nikon camera, you use:

  • Exposure compensation to modify the overall brightness of the picture (i.e. the flash part as well as the ambient part) of the image from what your camera had in mind. Plus means brighter, minus means darker.
  • Flash exposure compensation to modify the brightness of only the flash part of the image from what your camera had in mind. But it does not always work. Plus means brighter, minus means darker.

You can set exposure compenstion by pressing and holding the “+/- button” or -dial. You set flash compensation on the flash or on the camera – but if you do it on the flash, that overrules  what you do on the camera.

In the next days and weeks I will touch upon these concepts some more. But let’s start here.


One Thousand

This is my one thousandth post here in speedlighter.ca!

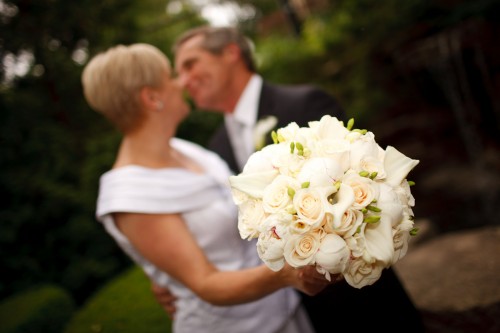
Tonight, I and my second shooter shot a wedding. We came back with nice shots like this:

And this next one, inspired by Mel. Remember, as I have said here many times, an out-of-focus background can make the viewer look and work out what is happening – and this makes the picture better. “Telling the story by not spelling it out“:

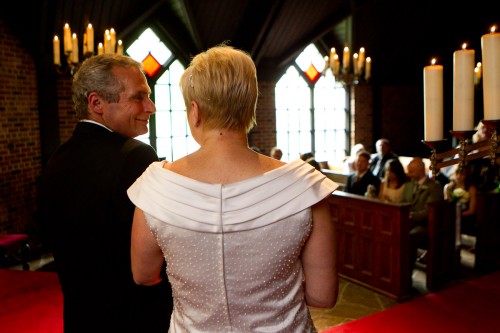
But the chapel.. oh boy.  It was dark. And I mean… dark. As in “1600 ISO, f/2.0, 1/30th second” kind of dark. Except the couple had a pair of very bright lights shining straight down onto their heads from the ceiling. Oh, and yes, bright light from one side’s windows. A very challenging environment – but we still came back with nice shots:

More about this in future days. Let’s just say for now that:

  1. You should not be afraid to use a high enough ISO.
  2. You ought to try several options. There’s seldom “just one”.
  3. Slow shutter is needed? The use it. even if some images may not be sharp.
  4. Use a fast lens. Faster.
  5. Flash not an option? Then use aperture, ISO and shutter to get there.

And now off to sleep for a few hours before going back to another shoot. And tomorrow, 1001 – leaving me feeling a little like Scheherazade.


Take your flash off camera

The best way to improve your flash images is to take your flash off the camera.

As I did here in last night’s Mastering Flash class:

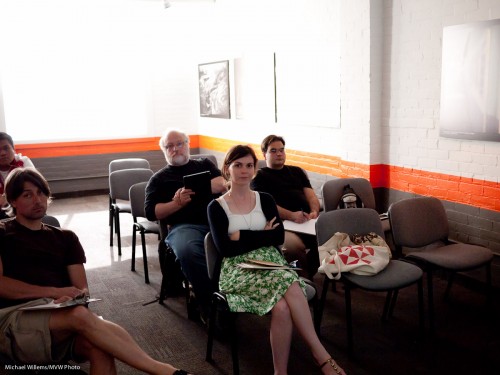
Student, lit with flash (Photo: Michael Willems)

You see, that is direct flash – unmodified. Off-camera, using remote TTL (or I could have used a cable).

So yes, it can easily be done – as long as the flash light axis is not the same as your lens axis. Straight into a woman’s face from above is light we love – but crucially, straight into her face does not mean straight from your camera’s perspective!

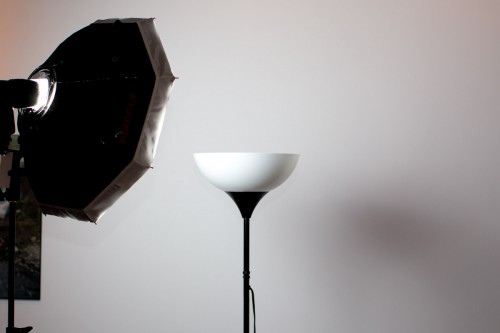
Now, do not get me wrong: modified is great. Like with a small softbox:

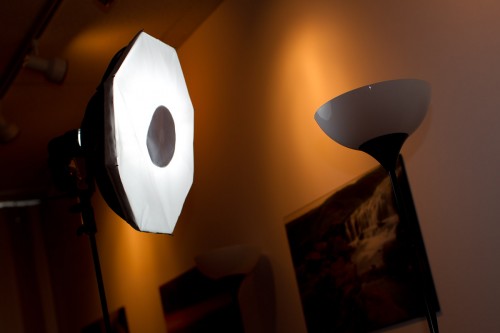
Which from the front looks like this (note the dark circle that prevents light spots):

Which, when combined with a second flash camera right to add edge/hair light, gets me this, of another kind student volunteer in last night’s class:

Student, lit with flash (Photo: Michael Willems)

Simple, no? Just remember:

  • Axis of light <> axis of lens.
  • TTL is fine, if you know how it works.
  • Wireless TTL works very well indeed indoors (and with clever management can be used outdoors also).
  • Keeping it simple often works well.

Simple. With just one or two flashes and a modern cameera you can produce excellent work. (Once you know how it all works, and that is we come in!)


Not the obvious

“Hold your glasses”, I asked the two ladies at the corporate event I shot yesterday, as I aimed my 1D Mark IV at them.

It took a bit of persuading, because they were surprised to find out I wanted to shoot their glasses, not them.

But in the end, they did, and it was, I think, worth it:

Glasses (Photo: Michael Willems)

It seems to me there are two lessons in this:

  1. People will follow commands, if the photographer takes charge. Do not be afraid to ask people to do things!
  2. Sometimes – no, often – pictures that do not tell the whole story, pictures that make you work out what is happening, are the best way to tell a story (you tell by not telling; by having the viewer do part of the work: isn’t that odd?)

Even a standard corporate event can give rise to some interesting shots.


No bounce?

What if you shoot an event in a dark room?

First, set your ISO-Aperture-Shutter combination to something you desire – in my case that is -2 stops metered w.r.t. ambient. E.g. 1/30th second, f/4. and 800 ISO in a dark, dark room like the venue Many options. where I shot a corporate event yesterday night.

But then you do need flash light to fill in the rest. And what if you cannot bounce? If the venue, like mine, is black, with high black ceilings and all black walls? You curse inwardly, of course. And then what?

Many things.

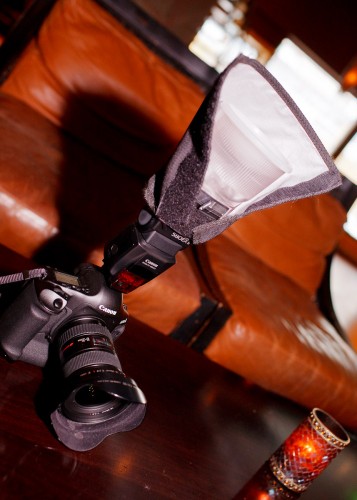
In my case, in a total no-bounce environment I use this: A Fong Lightsphere with a Honl Photo reflector behind it:

Which gives me not the very best light, but it is, I think, perfectly acceptable:

Many other techniques also, but that will come another day.

One more:

And all that in a no bounce environment – which goes to show, you can always do something!


I’m left-eye dominant. Is that bad?

You may not have noticed, but just like you are left-handed or right-handed, you are also left-eye dominant or right-eye dominant.

Most people are right-eye dominant. So they use that eye to look through the viewfinder:

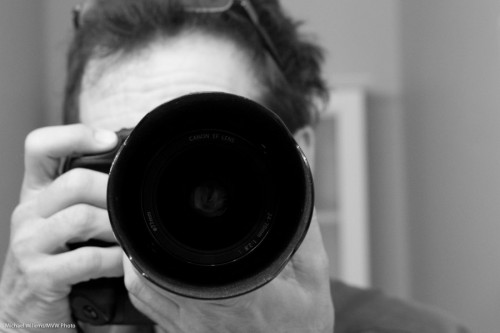
Michael Willems using his camera

Meaning that the other eye looks at you directly – either that, or the photographer has to close that eye.

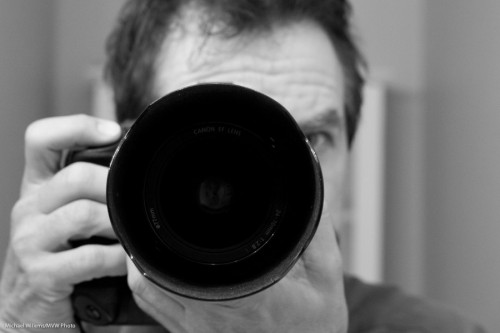
I, however, am left-eye-dominant:

Michael Willems using his camera

So you will never see my other eye.

This has two drawbacks: I look like I am hiding behind the camera, andthe LCD gets greasy from being in constant close contact with my node.

But at least I do not get confused by seeing two different views, and I do not have to squint with my other eye – the camera naturally blocks it. So I think left-eye dominance is good. Just saying.

(I am also left-ear dominant. You will never see my iPhone on my right ear. Always left.)

So now you have learned another little thing about photography – and quite possibly, about yourself. You are welcome.

(And do you see how I am holding the camera? That is how you hold a camera).


Lenses: Brand or third-party?

When buying a lens, you have two options: brand (Canon lenses for a Canon camera, and so on) or third party (“Sigma made for Canon”, and so on).

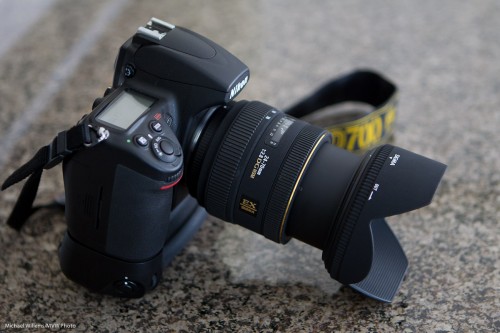
Third-party lenses are often half the price of brand name lenses. Brands say “that is because ours are better”. Third parties, like Sigma, maker of the 24-70 f/2.8 Nikon-mount lens below, would probably say “this is because you pay for the name with those guys”. Which is it?

A bit of both, I think.

I would certainly consider a third-party lens. If:

  • aperture is large,
  • build quality is good,
  • focus is silent, fast and accurate,
  • the lens is sharp, even at the corners,
  • colour is good,
  • and importantly, the lens feels good to me..

…then I will most certainly consider it. And third-party lenses often have better warranty than Canon and Nikon offer.

But that also brings me to why – perhaps because these warranties are needed. The lens above is the third one that its owner tried in about two weeks: lens number one did not always focus consistently, so it was exchanged in its first week, and lens two suddenly stopped focusing after just a few days – the focus motor stopped working entirely in mid-shoot. Lens three, we hope, will work well.

Now that is from a sample of one (well, three). So you cannot draw any conclusions from it. But still… in the past, reliability and quality control used to the the third-party lens makers’ Achilles’ Heel. There is either a certain irony, or a wise lesson, in the fact that two samples of this lens failed in two weeks.

But the lower price – significantly lower – is hard to pass by. I think whatever you choose, you will be fine, as long as you go through the check list above abnd make sure the warranty is OK.

And remember: lenses make your photos, much more than your camera does. So whatever lenses you invest in – investing in lenses is never bad.


Uncle Fred to Uncle Mike

A repeat of a favourite subject – repeated here because it is so important. Namely – avoiding “being Uncle Fred”.

I see a lot of snaps like this, when I look at people’s photos:

Ouch. OK, I took that – but only, I assure you, to demonstrate the point.

What is wrong with that image?

Other than everything, you mean? (Photographically speaking: the kind volunteer student is fine).

  • The subject is in the centre.
  • She is small in the image
  • The image is cluttered
  • I shot down at her
  • I exposed the image badly
  • I have bad “tension points”, where I cut off feet, etc.

So then I did it properly.

I chose a subject and got close. Chose a long lens (the 70-200, a portrait favourite). Then got closer (by zooming in as well as by getting physically closer). Got down to their level instead of shooting down. Avoided clutter. Shot at f/4 to blur backgrounds. Used the rule of thirds – his face is centered one third from the top.

Bingo:

Same light. Same room. Same time.

View the original image (click!), and then view at the original large size, to see how good that is.

You see, sometimes it’s just about composition. “Filling the frame” often dramatically improves images.


Simple outdoors portraits recipe

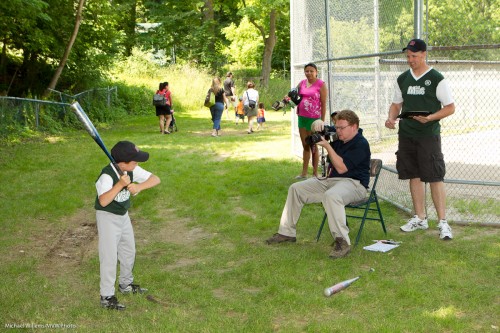
When I do outdoor portraits, I often use big flashes, softboxes, light stands, and umbrellas. But sometimes, like today when I was shooting baseball kid portraits all day, I use just a camera, a lens and a simple on-camera flash.

Unmodified, on-camera flash? Surely that is anathema to what a pro does?

Nope – not necessarily. When conditions are right, you can do this, and get well-lit portraits.

The following example, which shows this, has a less-than-ideal background, but I was just testing my light. Here’s photographer Ray:

To shoot a portrait like this (or rather, to shoot 500-odd of them, as I did today), I do the following if the light is changeable.

First, equipment and setting:

  1. If at all possible, find a spot where your subject is out of direct sunlight. Direct sunlight is harsh and horrible. If sunlight is unavoidable, at least turn your subject away from it.
  2. Find a dark, green background (i.e. like above, but without the fence – which you can be assured I did for today’s real shots!).
  3. Use a camera with a lens in the range of 50-150mm.
  4. Use an on-camera external flash, aimed straight at the subject. Since I am mixing with available light, this is allowed.
  5. Make sure I shoot from the subject’s head’s level (I avoid shooting down or up too much).
  6. I try to ensure the flash light the subject’s face. I avoid shadows (from, say, baseball bats, or from hats). I watch carefully for glasses causing reflections.

Now to the camera settings. I now usually:

  1. Set my white balance to “flash”.
  2. Set my ISO to 200 (as a starting point).
  3. Set my camera to shutter-speed priority mode.
  4. Select 1/200th second
  5. Set my exposure compensation to -1 stop, as a starting point.
  6. Now I aim and focus. I check the aperture chosen by the camera. I want something around f/5.0-f/6.3. If I get too small a number, say below f/4.0, then I lower the shutter speed – all the way to 1/60th second if I have to – and if that is not enough, I increase the ISO. If I get too large a number, say above f/7.0, I increase the shutter to the maximum sync speed (1/200th-1/250th second on most cameras) and then decrease the ISO if I can.

Now take a test shot and see. Adjust as needed. I regularly keep checking my aperture. And if the background gets too bright or dark: well, exposure compensation will adjust the background’s brightness.

Notes:

  • On a Nikon camera, be careful: exposure compensation will also alter your flash brightness (for some odd reason only known to Nikon engineers), so unless you want this, you may need to apply opposite flash compensation (e.g. when using -1 exposure compensation to lower the background’s brightness, you may want+1 flash compensation to keep the flash the same).
  • On a Nikon, also ensure you know whether you have “TTL” or “TTL-BL” selected on the back of your flash.
  • On any camera, since you are using TTL, i.e. the auto flash mode, use flash compensation as needed. Darker subject: you may need to go down. Lighter subject: go up. See yesterday’s post!

Why Shutter-Speed priority (S/Tv)?

Because outdoors light can change drastically from moment to moment. Indeed, I prefer to use manual, if light is consistent. In that case instead of exposure compensation. I use the meter and set my ISO, shutter and aperture such that the meter indicates -1 stop, then test and adjust as needed.

Here’s Ray doing what I am talking about here:

So that’s a lot of stuff to watch!

Yes, it’s a lot of work, and it requires a good understanding of exposure and what regulates it (I know some good courses – just sayin’).

And I see a lot of parents take their children’s snaps. Invariably, they fail to use their flash, which leads to poorly lit photos. Even before you do formal training, you now know better – now go practice.