Opposite to what beginners think…

A working photographer does some things differently from the way beginners might think. Like these ten points:

  1. I do not use lens filters. Unless it is raining, snowing, grubby little fingers reach out, or I am at the beach or in a sandstorm.
  2. I always use a lens hood. Even at night, even indoors. Even at night, indoors.
  3. I often use flash outside. To fill in shadows and back lit faces.
  4. I often do not use flash in dark. To allow the shutter to stay open, and to use available light.
  5. I do not have a camera bag. Just a bag for lenses, flashes, and so on.
  6. Indoors, I point my flash behind me.
  7. I avoid zoom lenses when I can. I often prefer to use primes instead.
  8. I do not install software from my camera maker. Brrrr!
  9. I do not use all the focus points – I use only one.
  10. I set ISO manually. No auto ISO for me.

As you see, the obvious is not always right. Look at how the pros do it, and see if that might work for you.


What a difference a stop makes.

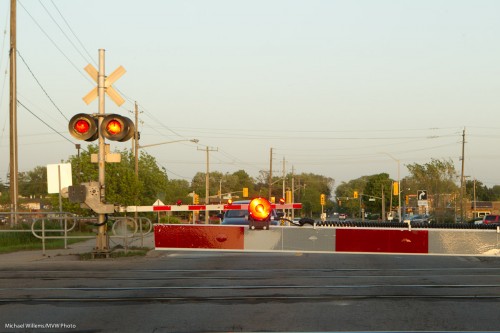
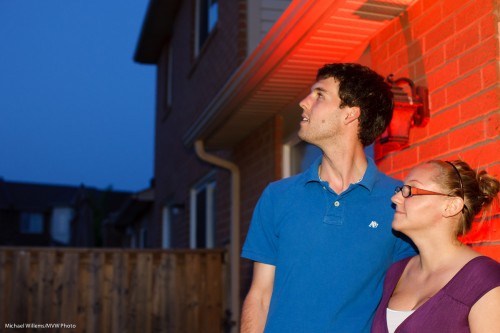
Shoot a late evening scene the “normal” way – auto white balance and exposed for a bright scene:

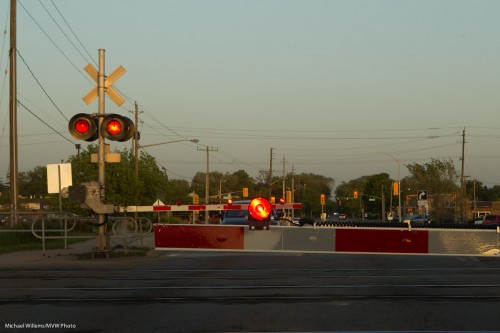
And now shoot it with shade or daylight white balance, and exposed by two thirds to a stop less:

…and you will see a huge difference. Now, do not get me wrong: it is OK to feel that one way is right, or the other way, or even a way in between. What I want you to realize, though, is that a slight exposure difference can make a huge difference in the image.

Lower exposure accentuates and saturates colours, like the red in this image, and makes skies visible rather than detail-less white.

This is why you should think of exposure as a valuable tool rather than as a hassle. And why you should always shoot RAW, so that you can make adjustments later. Not that you would plan to do that – you should pklan to get it right in the camera – but it cannot hurt to at least have the option.


Colour Combos

Using colour in your photos can make a dramatic difference – if you use it well. Three tips for you today in that regard:

Use opposing colours to add interest. Yellow and Blue is such a pair of opposing colours. Red and Green, another one. Whenever you see yellow, ask “could there be blue anywhere to contrast with this?”. Ditto for red and green. Or create your own by using flashes and gels.

Use all three primaries. Images look impressive when you have saturated reds, greens and blues in the same photo.

Saturate. By not mixing with white light, you are saturating your colours. Mixing with other white light decreases the saturation, which is why overexposing makes an image look “washed out”.

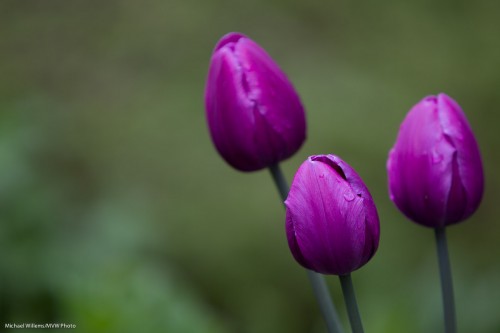
Use beautiful complementary colours – colours that go well together, like purple and green:

Simple tips that can greatly enhance the colour quality in your photographs. Sometimes, things really are simple.


Add flash to darken your photo.

Yes, you read that right: add flash to darken your photo.

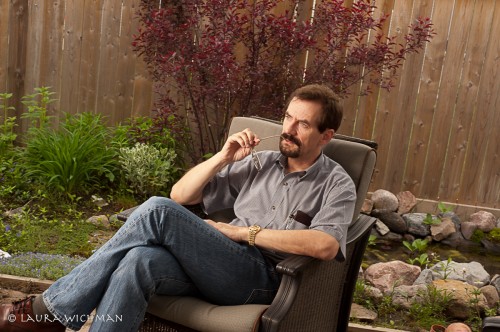
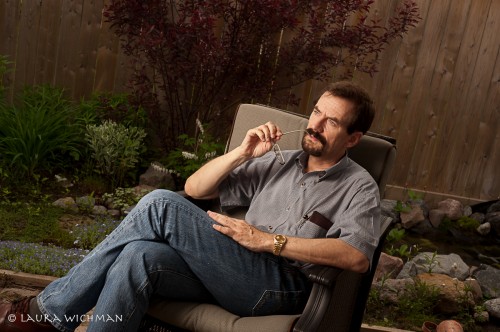
Take this image, shot as a demo for me by photographer Laura Wichman the other day:

Well exposed, well lit, all good.

But you have heard me say many times: “bright pixels are sharp pixels”. So how about if we make this more dramatic?

The use of flash allows us to decrease the ambient exposure (first try faster shutter speed; when you get to your sync speed, e.g. 1/200th second, then carry on and use a lower ISO setting, and finally go to a a higher “f-number”). The background now gets darker:

But because a powerful flash (Bowens, with Travel Pak battery pack, equipped with a softbox) lights me, my exposure does not need to be affected. I can remain as bright, by turning up the flash (needed only if ISO or aperture are changed).

So now we have made the background darker and hence made me the “bright pixels). Using flash to darken most of your picture, in other words.

News Flash: Photo Life Magazine June/July issue is out: in it, you will see my article “Flash: 10 Problems, 20 Solutions”. Go get your copy today, particularly if you shoot flash at events.


Direct the light

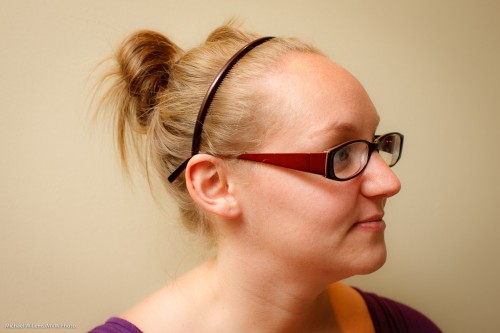
Following up from my post the other day about simple light. Remember this shot:

As I said, the bounce light was directed so that the subject’s face is lit. That is the key here.

Let me show you what would happen if I did not do that right.

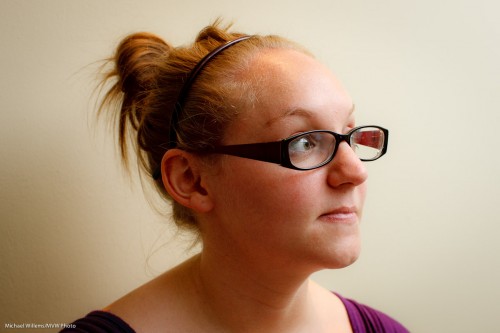
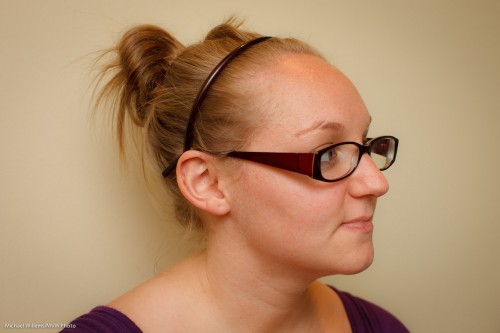
Say I just bounced the flash behind be. That would be “OK”, but no more  than that. The face would look dimensionless – flat, even:

And if I bounced behind me on the left – nowe that would be just plain wrong:

Badly shot (deliberately, and kudos to student Kayleigh for allowing me to demonstrate on her!)

Go back and look at all three – see how much better picture one is?

So the essence is: shoot not from your camera’s perspective, but from your subject’s perspective. Decide where the light should be coming from with resepect tou your subject; then direct your light to that point.


Copyright or copywrong?

A word about business, today on Speedlighter.ca. About contracts and rights, specifically. Copyright. I am not a lawyer, but as a photographer, I feel that “copyright” is an important concept.
For most shoots, the photographer retains the copyright of the images. Hire a wedding shooter, for instance, or a commercial photographer, and the small print will invariably say that this shooter “owns” the images.

Why?

Having copyright means the photographer determines what can be done with the work.

If there is no specific agreement to restrict the photographer’s copyright, that copyright rests with the photographer. In some jurisdictions you may need to “do” something to register copyright; in many (like Canada, as I understand it) that is less necessary.

The photographer having copyright enables cheaper pricing in two ways:

  • The photographer can potentially re-use the images;
  • If the agreement prohibits commercial use by the client or allows use only in a specified geographic area, or for a limited time, then the price can be lower).

This is the case in any commercial shoot (even when you have portraits made at a commercial studio, or, as said, by a wedding photographer).

If, however, the client can determine the use of the photos, that then gives that client de facto copyright over the photos. In that case, no way exists to lower the price by limiting commercial use, say. Another problem is that in that case, the photographer might not be able to show the pictures as part of his or her portfolio. Or even show them to the processing lab for printing. Or even fix them up in Photoshop. Or make a “photographer selection” of good or bad images! So this opens several potential issues, and a detailed contract would have to be drawn up restricting and granting the photographer’s specific rights. Unforeseen situations would make this a rather complex process.

So the complexity goes up and the cost rises. This is why normally, a shoot where the client owns the copyright (and it does happen, of course – as in the case of a “shooter for money”) necessitates the following:

  • Client does the post work;
  • Detailed agreement as to photographer rights;
  • Significantly higher price – normally at least double, often more.

So instead of doing this, it is often easier to put some restriction in an agreement. For instance, in a boudoir shoot it is usual for the photos not to be shared. The copyright still rests with the photographer, but he or she can agree to not share the pictures except under some agreed circumstances (e.g. after permission in writing, or in only certain ways).

Of course this is not legal advice – to get that, go see a lawyer. But it is advice to the effect that you need to think about who owns your images’ copyright, and you need to be explicit about this. Rights exists under the law-  they are someone’s – and you might as well be explicitly clear about this. Hiding the issue of who owns what right never solves anything; rather, it sets you up for problems later.

And that is why, as a photographer, you need a written agreement.


Lights

Sometimes, light can be simple.

Like here: One TTL flash, bounced to my right (in order to ensure that light goes onto the subject’s face, not onto the back of her head):

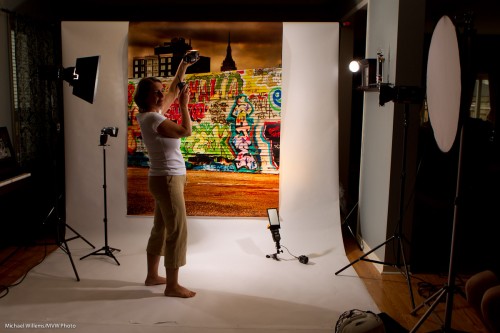
But sometime, for creative reasons you want more lights.Look at the following studio setup from a course the other day:

  1. Backdrop from www.backdropoutlet.com
  2. Main light is a speedlight with a softbox
  3. Right fill is a reflector
  4. Back fill, a flash bounced off the ceiling
  5. Edge light, two strobes
  6. Tow background lights: one white, one yellow (flagged with  Honl gobo)

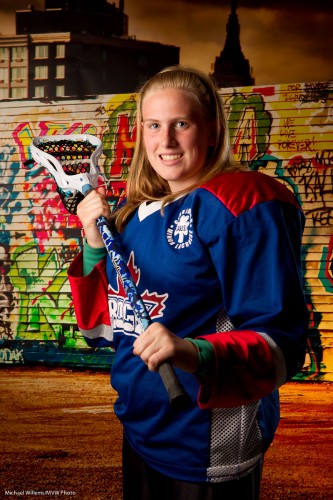
Camera on typical “mixed light indoor flash” settings: 1/30th second at f/5.6, ISO 400.

Like this, demonstrated by my student, photographer Laura Wichman, the other day:

Camera on typical “Studio flash” settings: 1/125th second at f/8, ISO 100.

Because all that gets you light like this:

Both good, but both very different. And as a shooter you need to know how to handle both types of setup. Which is why I strongly recommend training. Because the good news: this is simple, once you know how.


TTL phenomenon

If you have ever shot with TTL off-camera flash, you will have ensured that the on-camera flash is “off”. It still fires its “Morse Code” commands at group A, B or C flashes in the room, but when the actual image is taken a fraction of a second later, it is off.

Except that you may have noticed noticed the following phenomenon: Especially on Nikon cameras, but on Canons as well, it is not totally, 100%, off.

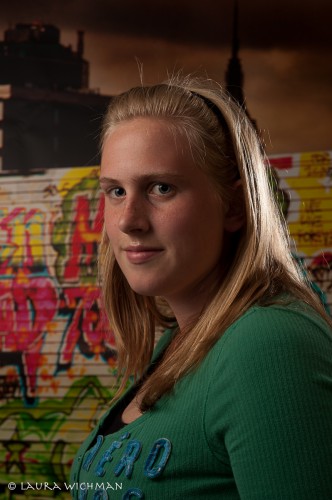
There is a tiny bit of afterglow, which causes an extra little catch light in the very centre of the eye. You can see it in this image by my student, photographer Laura Wichman:

You only see this if you view the image at full size. It is not really very annoying, but if you are determined to get rid of it, simply “Lightroom it out”.

Anyway – learn to recognize this. This is how I know we shot this image in remote TTL mode.

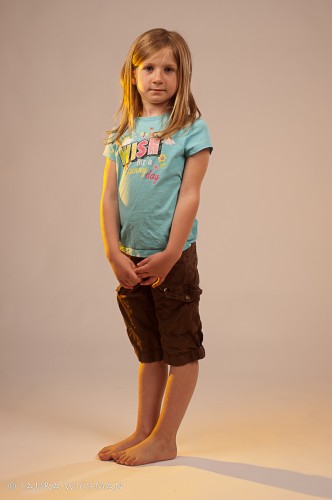
One more of Laura’s shots from this Creative Light session. Here’s we thought a gelled direct light might add some kick. And I love colour – this bright egg yolk yellow Honl gel is great.  Easiest gel to get saturated colour with:

Don’t you love those shadows? Today’s tip: hard shadows can be good. If intended and if created by an off-camera light.


Let there be…

To those of you who are new on speedlighter.ca – this daily blog (yes, I write every day) is your resource for photography knowledge – and very often, speedlight knowledge. Speedlights, as you know, are small flashes, and as you may or may not know, they are wonderful.

When used well.

That implies that you can use them badly. And yes, you can, and that is easy. So here’s how not to do it:

Typical “this is why I hate flash” snap. Of two kind student volunteers yesterday. Shot at f/8 at 400 ISO at 1/125th second. Ouch. Thanks, guys!

To improve this – nay, to have fun and make it good – I would do the following:

  • Set my camera to a better exposure setting for the background. In my case, this was  f/4.0 and 1/30th second, which made the light meter show “-2 stops”.
  • Set my white balance to “tungsten” to make the background blue.
  • But at the same time, add a Honl Photo Full CTO gel to my main flash, to keep the subjects neutral.
  • Now add a second flash to light up the wall.
  • Add a Honl Photo red gel to this second flash.

Then I would get this:

Looking Skyward (Photo: Michael Willems)

How long does that take? Mere seconds. And it results in a great picture, that belies the idea that you cannot use direct flash. When you are mixing light, you can.

What if I had had more time?

Then I would have added one more flash with a gel: a green one.In the bottom left corner. Red-Green-Blue, the three primary colours in one image, adds visual interest.