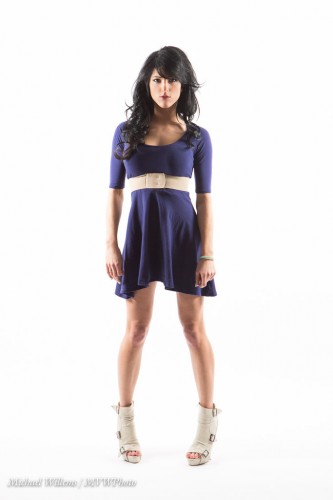
I have seen the enemy, and he is…

…dust! Dust is the enemy of photos. Sensor dust, to be precise. Tiny pieces of dust that stick on your sensor.

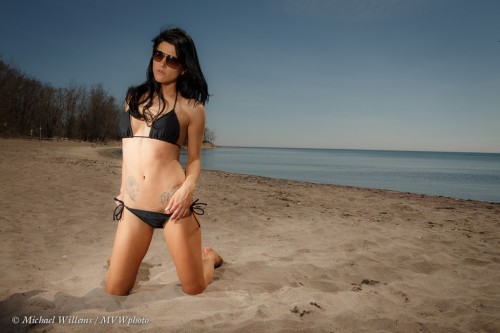
Look at this image of model Danielle on the beach yesterday:

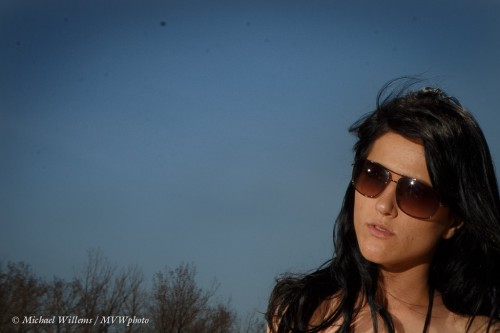
Now look at a small section, with slightly enhanced contrast:

See all those blurry specks? View at full original size (click through twice to do that) and see how terrible that dust really is.

And you see it when you are both:

  1. Shooting at small aperture (like my f/14 all day yesterday), and
  2. Shooting against an even surface – like the sky.

In other words, you get this on sunny days outside!

Solutions? In order of dangerousness, with the safe options first:

  • First, use the built-in dust removal function in your camera repeatedly.
  • Or have Canon/Nikon/etc do it (but this will cost money and take time).
  • Then, with a full battery use the “manual cleaning” option – the shutter stays open while you blow with a rubber bulb blower. Blow with that blower  without touching anything, repeatedly, and try again.
  • As a very last option, use liquids and special pads, but use the right liquids and brushes specifically for your camera 9ask the manufacturer if in doubt), and be very, very careful – a destroyed sensor is not covered by warranty and can cost more than the camera.

Or.. live with them, and remove them in post-production.

TIP: if you do that, do it before you crop, so that you can copy/paste the adjustment to all images with sky.

___

I am teaching this weekend: tomorrow at Vistek in Toronto (“Macro”), and Sunday “The Art of Shooting Nudes” in Hamilton. Book now – there is space.

Treasure Trove

Your old photos are a treasure trove.

I reminded myself of this again last night: searching for some images for a client, I came across many great images that I had overlooked before. Like this, of Miss Halton 2009, Evangeline Mackell:

Some images are great because they remind you of the times you shot them in. Others, because they show friends you may have almost forgotten, or places that seemed humdrum at the time, but carry meaning in retrospect. Or perhaps they show people who have since become famous. Yet others, because they are artistically good. Some, because you simply overlooked them, and that is more common than you may think. Always revisit your images multiple times.

Also, over time, you get new insights into how to finish images. The image above is desaturated – my flavour of the moment. In this image, it makes it good.

One thing to do with your images is to:

  1. Date them in the filename.
  2. Organize your images in folders by date.

TIP: When images are imported into Lightroom, you have options, and here are two of the most useful ones to apply automatically when you import any image:

  • File renaming. My images automatically get renamed upon import to “year+month+day+original filename:, so that an image named “MVWS0318” becomes “20100114-MVWS0318”. That way whenever I find this image on my hard drive in the future, I can quickly go to folder “/photos/2010/2010014-Toronto” to find the other pictures from this shoot.
  • I set the camera calibration Profile to “Camera Standard”, not “Adobe Standard”. That way the images look more like the way they look on the back LCD after I shoot them.

More images:

As you see, even the waitress can make for a nice shot. Or people with nice backgrounds thrown out of focus:

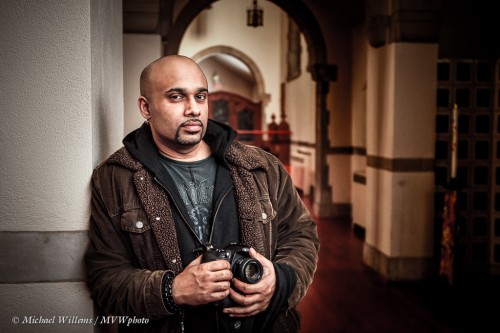
Or people like my friend and animal lover and incredibly talented photographer Baz Kanda, who is expected at the Willems Studio Residence (i.e. here) in an hour to accompany me to the Flash course I am teaching today. Here he is at Storey Wilkins’s residence and at a church, in January 2009:

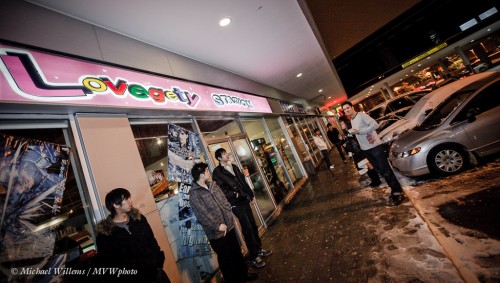
Dallas Hansen at Lovegety Station – only the Japanese can come up with a word like “Lovegety”…:

And those are just a few random picks from a few random days a few years ago. Can you see the potential?

Now, time to prepare for my course.


Presentation.. is important.

Presentation of images to show you are “not Uncle Fred” can be very important. As in this here example from a recent shoot:

That looks better framed than as “just the image”, no? As in food, presentation counts for a lot.

So how do I get this white frame in a JPG file without the hassle of using Photoshop? I use a quick two-step trick. Saves me time.

STEP ONE: I use the Lightroom print module:

  1. After selecting my image, I select the “PRINT” module.
  2. In “Page Setup”, via the menu, I make a custom size of, in my case, 175 by 125 mm, portrait mode. (175mm is about 7 inches).
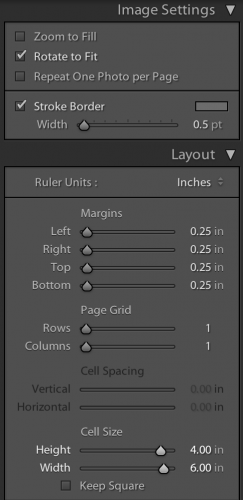
  3. In the “Image Settings” sections on the right, I select a stroke border, grey, 0.5 point wide. I also set the Layout settings properly. Like this:

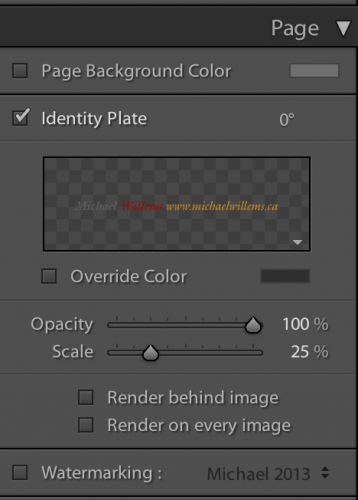
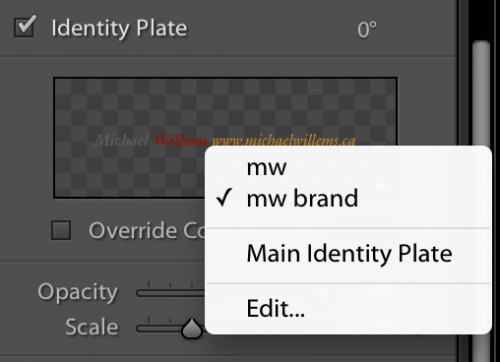
You can create an “Identity plate”, with fonts as per your choice and rotated as needed; and placed where you prefer.

Then I set a print resolution of 240 ppi in the Print Job section; this gives me enough pixels. (240 x 7″ = 1650 pixels; more if I want larger JPGs).

Of course all these settings can be saved as a “User Template”, so once you get this right once, every next time it is just one click.

Having set up my image, I now click on “Print”.

But I do not actually print: instead, I “print” (really, export) to a PDF. I select PDF from the choice menu. The PDF is created on my desktop.

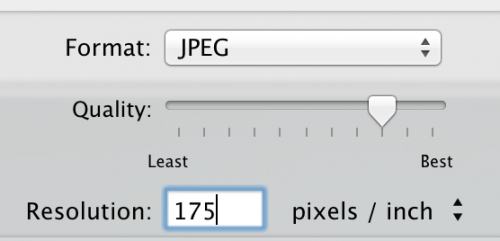
STEP TWO: I now open that PDF, and I select the FILE menu; and within that, select EXPORT. I now select export type JPG, and a resolution of 175 pixels/inch:

That gives me a JPG 1205 pixels wide Just what I needed.

(Why? Well, a “print” 175mm wide is what I selected initially. That is (175/25.4) = 6.89 inch wide. So exporting that to JPG as 175 pixels per inch gives me 6.89 x 175 = 1205 pixels.)

All this sounds complicated, but once you have set it up, it is really just a few clicks every subsequent time. And those clicks are worth it if you want your work to be distinguishable from others’. Here is another example:

Adding a little class to your work’s presentation never hurts.

PS – this works very well printed, too. Print a 4×6 on a 5×7 piece of photo paper, as we have done here in our “virtual print”, and it looks much classier than anything Uncle Fred will ever produce!


A little technique.

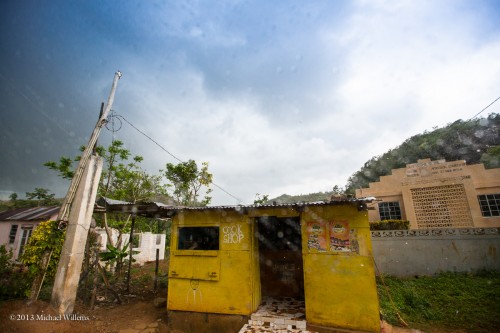
Sometimes images need a little TLC.. a little post work, to bring them back to waht you saw. Like this one, a rainy shot in Jamaica last week:

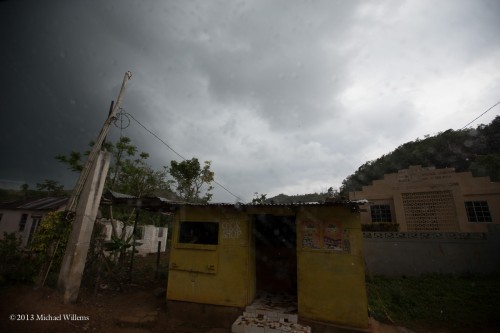
That is what it looked like. But the camera shot, taken in a hurry from a moving bus, was not quite right:

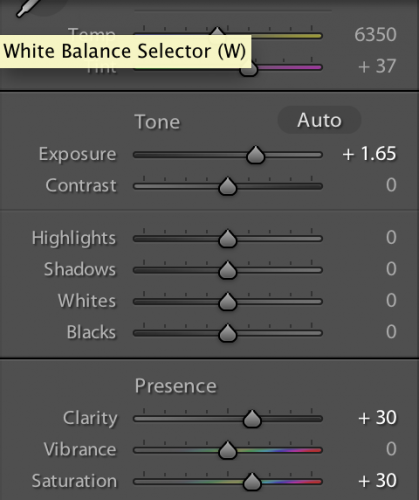
Underexposed, so the colour does not show. So I made some adjustments to bring it back:

A graduated filter at the top; then the “basic” adjustments: Exposure up; then clarity and saturation up. That way, the image looks the way it looked to me. Shoot RAW, and you can do these adjustments without any noticeable quality loss.

It is OK to change an image. “Pixels were born to be punished”, as Frederic Van Johnson says. But in general, I tend to restrict changes to a minimum; and to bring back images to what they looked like.

If you do alter images to create an effect, which I do sometimes too, then I advise you to keep it simple, and to realize that fashion comes and goes, while style stays, so keep the original!


Photo Change, and Video Starter Tips

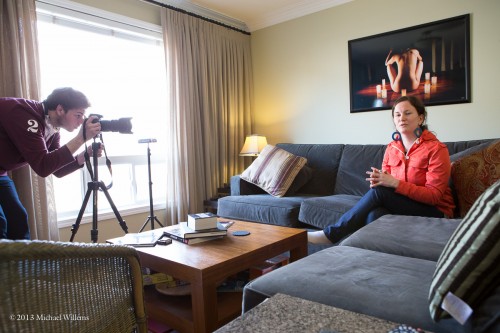
Here’s Brynn and her colleague from Photosensitive, preparing to video-interview me today for the Picture Change Project I will be part of (keep July 15 open, all!):

And this prompts me to talk a little about video today.

Vido on a DSLR is great. Better than with pro hi def video cameras of just a few years ago. As long as you take a few simple things in mind. Here’s my 10 starter tips for video on a DSLR:

  1. Do not focus during shooting. Focus, then leave it alone. Or if you must, then do manual focus, and practice the technique.
  2. Wide lenses make it easier.
  3. Avoid fast shutter speeds: they lead to unnaturally “shocking”, stuttery-looking video.
  4. Unless you are shooting an interview you should shoot short clips, usually. Say, 8-10 seconds.
  5. Shoot 2 seconds before, and 2 seconds after, each clip for fade in/out purposes.
  6. Get close-up, too, not just all-body shots.
  7. Avoid unnecessary zooming in and out or panning.
  8. Shoot “B-roll” frames too – the environment, the “establishing shot”, etc.
  9. Stabilize the camera. See the tripod here?
  10. Use photographic composition rules you already know.
  11. Use separate audio equipment. See it in this shot?

There. Start with that.. and leave lots of time for editing… at least three quarters of your shoot should end up on the metaphorical cutting room floor.


Lenses distort?

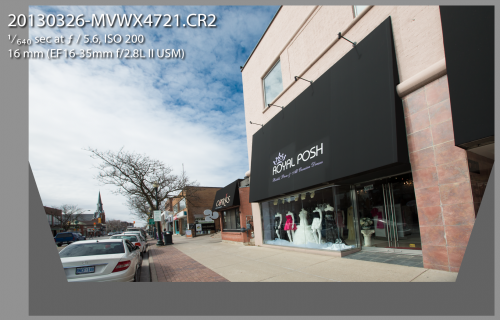
A wide lens, if you aim it upward, will give you converging verticals at the top:

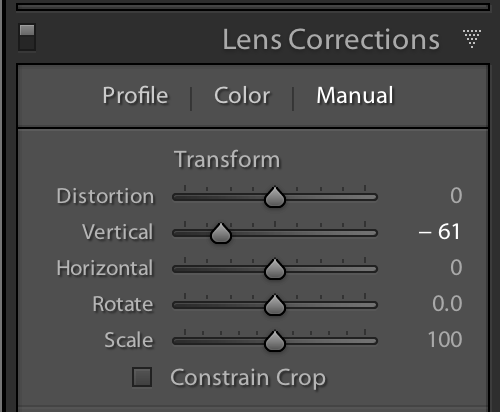
If you do not want this, go into Lightroom’s “Lens Corrections”:

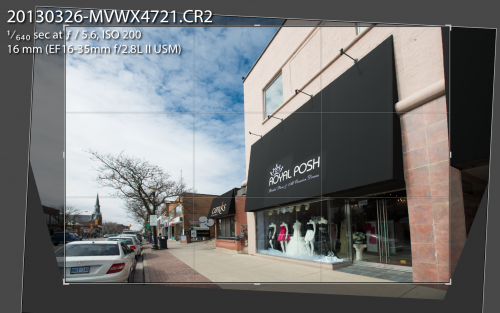
This gives you a corrected view, from which you then crop the excess:

Leaving you with:

The venue above is the venue where tolivetolove.com (my venture with Kristof Borkowski) is joining Jane Dayus-Hinch’s “Wedding Café”, which opens next month.

___

See me next weekend in Toronto:

Explore, network and discover an inspiring array of new photographic products, services and techniques. You will experience the latest photography and video gear and creative solutions at our Photo Network EXPO. Admission not only includes the trade show but also access to hours of free professional imaging presentations each day. To register or for more information visit www.photonetworkexpo.com/.

  • Saturday April 6th, 2013 9am to 6:30pm
  • Sunday April 7th, 2013 9am to 5:00pm

Location: Ryerson University’s Mattamy Athletic Centre (Formerly Maple Leaf Gardens), 50  Carlton St. Toronto, ON


To Alter, Or not To Alter…

Sorry, Bard:

Whether ’tis Nobler in the mind to suffer / The Slings and Arrows of outrageous underexposure and other errors / Or to take Arms against a Sea of photographic problems, And by using Lightroom, to end them…

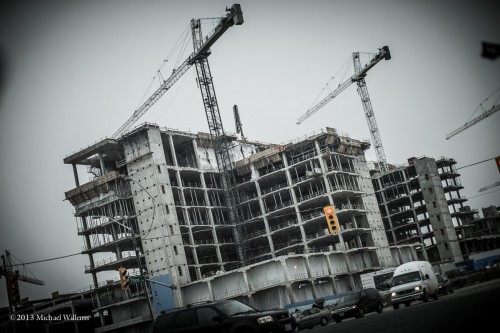
I often wonder, and I am often asked, how much manipulation is too much. Should you do “stuff” in Lightroom (say), or not? Like the “desaturate” or “desat” effect in this depressing building-under-construction half a mile from my home:
And that is a good question. To answer it, here’s my take why not to do post-production (“post”), followed by my opposing take on why to do it. The last word will never be said on this – things evolve. But today, I think this is a fair summary of how things are:

Why not to manipulate in post:

  1. You are faking it – you are not a photographer, but an illustrator!
  2. You are going to be a lazy and incompetent photographer if you always rely on post work to save your work.
  3. If you work in journalism, altering is lethal: you will never work in the press again. This, I think, is valid: we need to be able to trust our news.
  4. Many effects are “fashionable” – meaning they go out of fashion. Careful.
  5. You can easily end up looking “like everyone else”.
  6. It can be manipulative, i.e. it is sometimes done to manipulate your audience (e.g. poor children in a charity ad are often in contrasty, depressing grainy black and white).

However… the “you may not alter” approach is way too black-and-white (pun intended). The real world is far more nuanced. Here why you should feel free to do post-processing:

  1. It is, I think, best to shoot in the camera, not on the computer. That said, many famous photographers of the past did a lot of darkroom work!
  2. Cropping, exposure adjustments, minor sharpening to compensate for camera limitations and for reduced-size output, white balance, colour space choice: these are surely fine in all cases!
  3. As for fixing mistakes: what, you are always perfect? As long as it not a substitute for learning, Fix in post what you get wrong in camera, by all means.
  4. Sometimes it is better to shoot wide, say, and crop later.
  5. Surely converting to black and white is OK, just as “choosing a colour or B/W film” was in the past?
  6. And anything else you can do with a filter is surely all right?
  7. Ah.. but in that case, surely it’s also OK to do any manipulation that mimics a particular film type?
  8. Quoting Frederick Van Johnson: “pixels were born to be punished”. If you are creating art, who cares how?

On balance, I say do what you like in post, as long as you:

  • Keep in mind the “not” reasons above (photojournalists may only adjust exposure, crop, white balance, colour space: and I think that is right).
  • Do not use to unduly manipulate.
  • Promise to learn to do “what you could have done in camera” in camera.
  • Remember that your effect may go out of fashion and that you may look like everyone else.

I love the desaturated effect in the above photo, but the hospital-under-construction looked like this in real ife:

And I could surely make it a little happier, even on grey day like this:

So I think you are allowed to do what you like if it is art. That said, do learn how to do everying possible in camera, in camera!

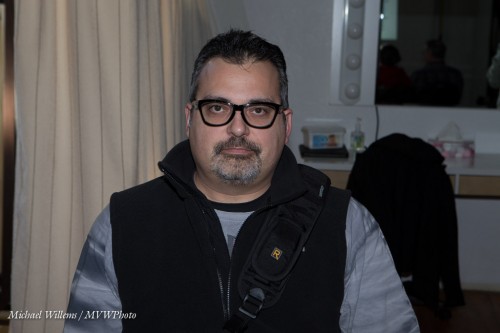
POSTSCRIPT note: the “desaturate” effect is my favourite this month. But it can make people look more rugged. Like this wonderful gentleman at yesterday’s Photography course I taught at the Toronto Digital Photo Club:
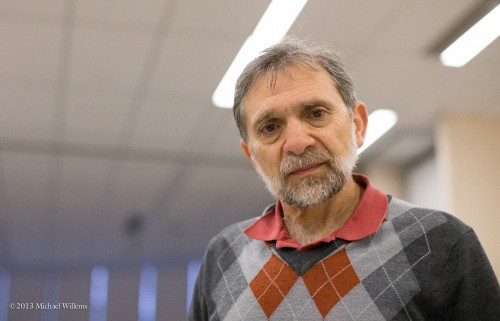

(Shot with available light, 1Dx at 12,800 ISO at f/2. Yes, 12,800 ISO!)

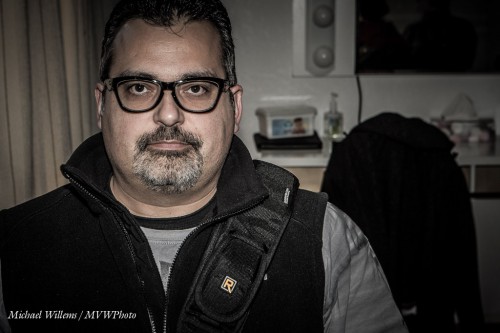
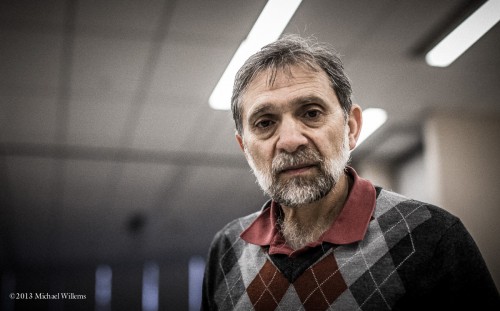
Now, use a “desat” setting, and you get art, but also exaggerated and less flattering facial features:

Tip: If you do want to manipulate women this way, take the following steps:

  1. Expose well – expose “to the right”.
  2. Carefully apply the “desat” effect.
  3. Show your subject the altered image.
  4. Prepare to meet your maker.

Have a great day/evening, everyone! I am preparing for tomorrow’s course.


Don’t Do This At Home?

Let me modify that title. Of course you can do the following at home – you see, I am going to talk again about extensively modifying your images in post-production.

Unless you are a photojournalist, you can of course do this whenever you feel like it, but my feeling is, you should not do it instead of shooting correctly. Shoot correctly; do the rest in Lightroom or Photoshop – when you have to.

But when you have a bad image, as long as it is an exception, you can often do dramatic stuff with that image.

Like this image. A snap shot of one of my students the other week during the Flash course (there’s more flash courses coming very soon, see the schedule). This was not a “real” shot: I was demonstrating how not to do something, if I recall correctly.

Pretty much bad everything (except the subject). Light, exposure, composition: a good example of a mere snapshot.

But then… mmm. Suppose we increase the exposure in post; desaturate the image, pop up the vibrancy, then crop and rotate? Lightroom 4 settings as follows:

  • Exposure +0.7
  • Contrast +25
  • Highlights +10
  • Shadows +55
  • Clarity +100
  • Vibrance -49
  • Post-crop Vignetting: -35
  • Crop to get extra close and to use the “Rule of Thirds”
  • Rotate to straighten verticals

…then, we might actually get a good “dramatic portrait”:

Again, I am not advocating shooting bad images! But when it is the exception, or when you want to do something that cannot be achieved strictly in camera, feel free. By all accounts, Ansel Adams was a huge darkroom user.  If he could do it, you can too. Just make sure you do actually know how to do it without manipulation, as well.


Sam The Studio Man

When I prepare a tricky shot, I tend to use  stand-in model while I work on light, so the model does not need to stand there for half an hour while I adjust and move lights.

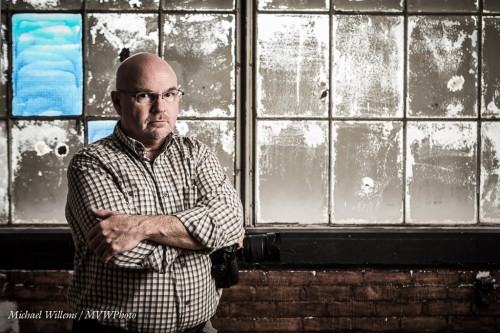
But these stand-in shots are often good, which is why I use them. While preparing to shoot model Danielle, I shot Sam Taylor, who runs the studio I teach in (see www.cameratraining.ca and click on “Schedule”).

I set my exposure for the window: 1/60th sec, f/5.6, 400 ISO. Then I added a strobe with a softbox, and I moved Sam far enough from the window so the strobe would light him up (from 45 degrees above), but would not light up the reflective inside of the window too much. And then I set flash power according to my camera settings. Finally, I did a little desaturating in Lightroom. Result:

Short lighting, great grunge, serious expression, rule of thirds, good balance of background and foreground. A tricky shot, and one I am delighted with.

One of my students remarked on how refreshing it was to see the problem solving process, and to realize that photography is in fact problem solving, yes it is. When I set up a shot, I do not have all the answers, but I see what I want, and I know how to solve problems “step by step” until I get that result.

And sometimes you change your mind. In the final model shot, I could not move the model away from the window, as she sat on the sill. Hence I could not get rid of a shadow cast by the snooted speedlight I ended up using. So then the shot changes entirely: if you cannot beat the shadow, embrace it! To spare those of you who are sensitive, I shall not show you that shot here (it’s a nude),  but if you are interested, click here to go to my tumblr feed.

(By the way: have you considered being photographed this way? if not: consider it. Some beautiful shots of yourself like this are worth making. If you don’t, you may well regret it later in life).


Breaking the rules

One of yesterday’s shots was a shot with very bright back light:

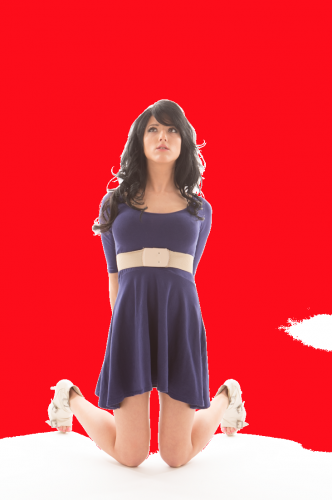
As you see, this image is so bright, that the flare in the lens is causing a lack of contrast. Here’s how much I blew out the background: red means “loss of detail”. Which is what I want for the background.

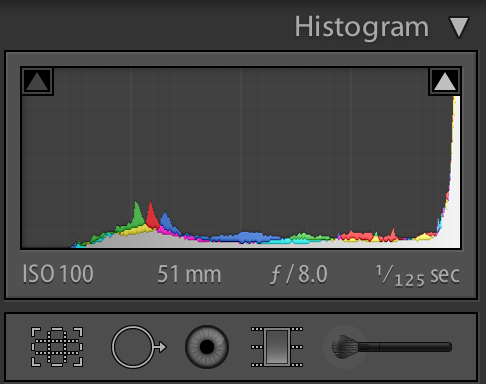
Now for that flare. I can see that the histogram, as a result, shows that there are no true blacks:

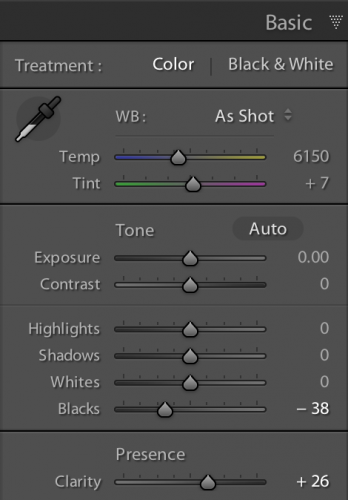
And now to finish the image, I can do a little post work – very easy. Drag the “Blacks” control to the left until the histogram touches the left edge. There are true blacks in the image so I want to see them as true blacks. And drag the “Clarity” control to the right until I get the right look. Which was like this:

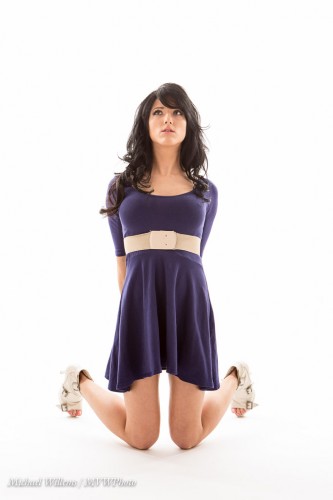
That leaves me with the finished image as follows:

Which as you can see is much better than the original, Look a her hair, for instance, and at the flare (or lack of it, in the finished image) on the dress: problem solved.

This is a rather extreme example, but you will encounter this frequently. Keep this in mind, then:

  • Note 1: know your lenses and how they react to back light.
  • Note 2: remove your lens filter – it would have made the flare much worse.
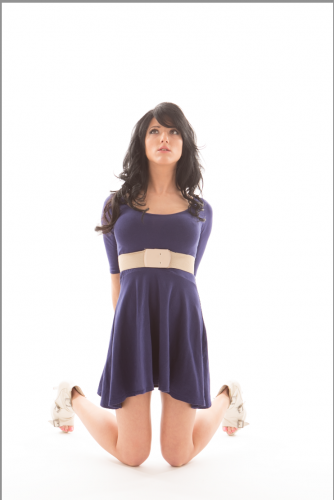
And note 3: you are allowed to do some post work. Another sample:

___

Note: The new workshop schedule is now up on http://www.cameratraining.ca – book soon to ensure your place. Flash, Canon/Nikon TTL, Nudes, and Studio Portraits are all available.