Direct Flash: Can It Be Used?

Unmodified flash? Without umbrella, softbox, or bounce? Can I use that and still get good results?

In a word: yes. You do not always need flash to be modified.

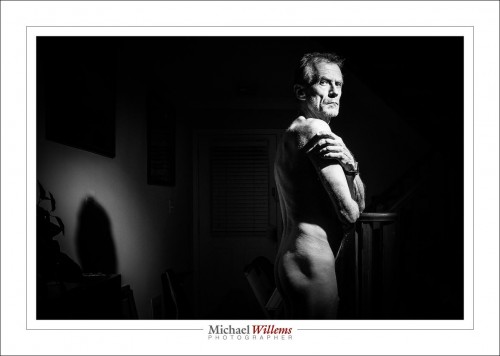
For instance, you may intend the look. One single, unmodified flash can give you a hard look, and that may be exactly what you are after, like in this high contrast B/W self portrait:

So sometimes you can use it to deliberately accentuate the hard look of a photo. So this is the intentional hard look.

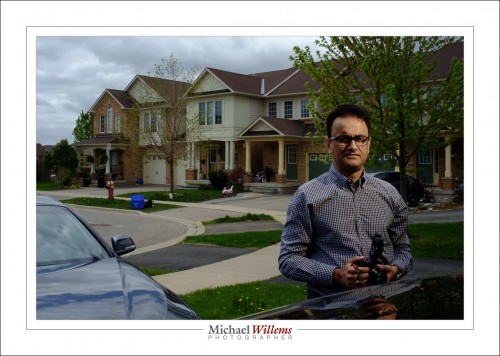
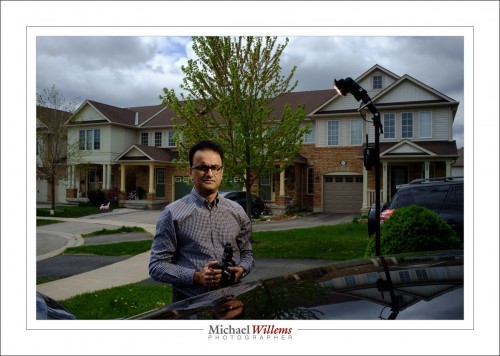
At other times, you are mixing in ambient light to take away some or all of the hardness. That, in other words, is the minimized hard look. One way to do this is to use another flash; another way is to mix in ambient light, like here:

That was made with one flash; see it on the right here:

The key in all examples here is that the flash may be direct, i.e. unmodified; but it is not where the camera is. In other words, it is off-camera flash (OCF).

Whenever you want to try a new look or technique, my advice: yes, try it and see. You may be surprised by the results.

Colour

Again, let me point out today the effect a bit of colour can have. A splash and a dash here and there can make all the difference.

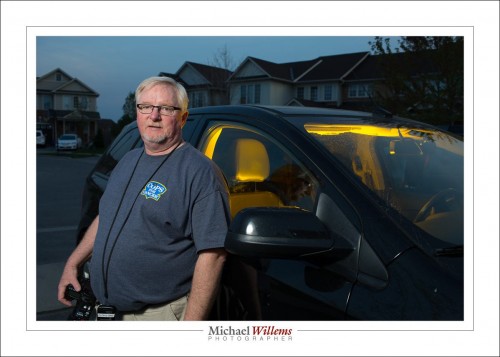
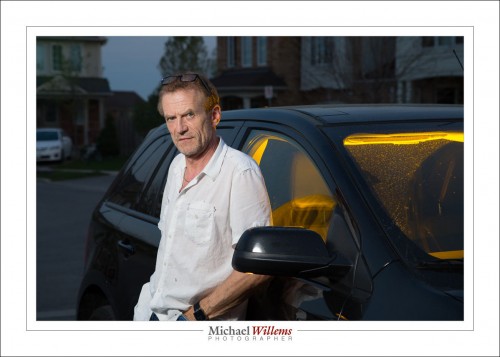
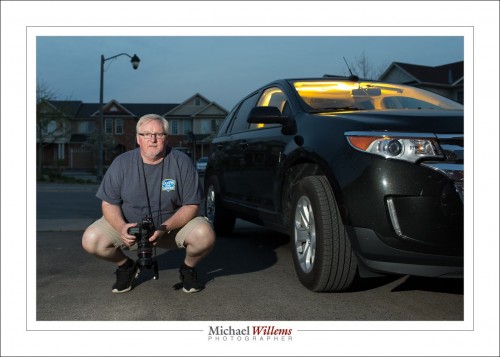
Take this picture, of yesterday’s student by his car:

Without that gelled flash inside the car, the picture would miss something. It just does not look the same:

So I always have a flash standing by just in case. To be precise:

  • Flash, like a 430EX (Canon) or SB-610 (Nikon)
  • Light stand
  • Bracket, for mounting flash onto light stand
  • Clamp, for when I want to clamp the flash to something
  • Pocketwizard radio trigger
  • Hotshoe cable between Pocketwizard and flash
  • Set of Honl photo gels (use discount code “willems” upon checkout, for 10% off)

The gels are important: over time you will get a good sense of what colour suits what occasion. The Honl gels I use are very sturdy, easy to use, and are chosen very well: I have all the colour sets and use them extensively.

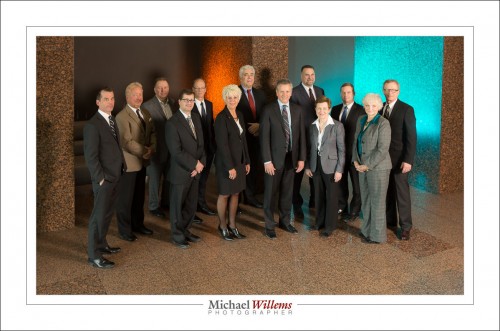
Another recent example, where I used two extra little flashes with gels to liven up a board of directors:

That, too, would have been dull without the colours. And you should never allow a board to look dull.

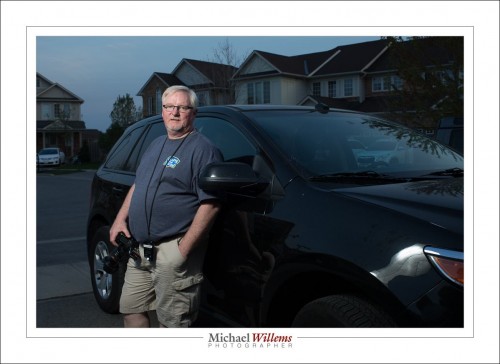
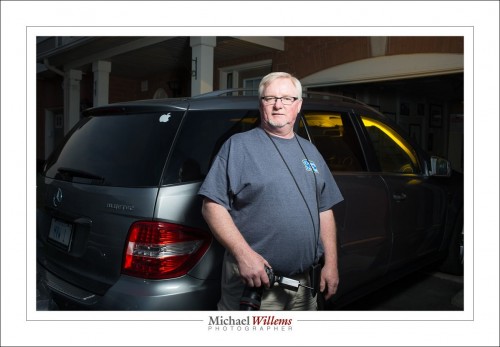
Here’s me, followed by a few more of my student:

You should know, it was not dark when we took those. As you know, your camera is a light shifter. As you know if you have taken my lessons, you start with the background. Set your A/S/ISO to whatever it takes to get that the way you want. Not the way it is. Then, and only then, add flash.

___

If all this is mystery to you, do what my student above did and take a private lesson. In person, or worldwide via Google Hangouts. And start with the books: have those ready during and after the lesson to ensure it all sticks. You too can make artistic professional pictures, and quickly, and without major investments in gear.


White Balance Discrepancy

A Facebook friend asked me this:

I shoot in Kelvin and there is something I don’t understand when I open my raw files up in LR. For example: I have a shot I took and I had the kelvin set to 6500 in camera but when I look at the temperature setting in LR it says the temperature is 5850. Why is this? I’ve verified that no presets are changing the temperature upon upload in to LR.

Good question, and let me explain.

First, the WB setting *is* stored in the EXIF file. Posts on the ‘net that suggest not are simply wrong.

here’s EXIF data from my RAW file:

And here, from my resulting JPG file:

The WB setting is stored, true. But what Lightroom tries to show is the actual look of the file. The WB number has to be interpreted, in other words. And Adobe does this by giving us its best guess as to what the image actually looks like. Don’t forget, colour rendition is complex (it involves colour temperature as well as tint, for a start).

So the phenomenon my friend describes is not a problem; it’s a feature. You can manually set it back to the exact setting your camera was set to, but this would not result in better photos; on the contrary, the quality would be slightly less, assuming you shot correctly.


Beginner’s Point

A beginner’s tip today.

You should usually focus as follows:

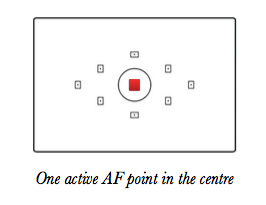
  1. Select a single AF Point (focus point), rather than have the camera select one or more from all available points. Set your camera to the mode where this is the case. You will see something like the illustration above;
  2. Ensure that your focus point selection is not “locked” with a switch on the back of the camera, as is possible on many cameras;
  3. Using cursor or control wheel, move that focus point to where you want it;
  4. Ensure that the focus point is on an object at the distance you wish to focus on (either on your subject, or on some other object that is the same distance away). Note that “an object” means contrast/lines;
  5. Press the shutter half way down, until you see or hear confirmation that focus is achieved (“the beep”);
  6. While holding your finger on the shutter, recompose if need be;
  7. Now press fully down to take the picture.

The mode where the camera chooses focus points often results in multiple points lighting up. Does this somehow result in “more focus” (as in, greater depth of field)? No! It simply means all those focus points found something at roughly the same (close) distance. It is still just that distance that is in focus.

The point is this, and the pun is intended: more focus point does not give you more focus.

___

Learn more from my e-books, including the just released book 7: See http://learning.photography to learn more. You should order now!

What Triggers ShouId I Use?

I hear this question often. About lenses, cameras, flashes, flash triggers, and everything else under the sun.

Of course I cannot tell you what lens, trigger, or camera you should buy. All I can do is say what I do—and more importantly, why.

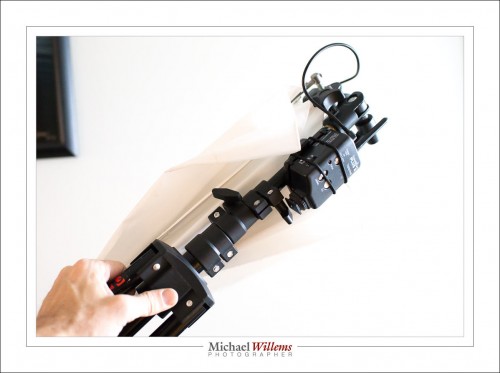
Here’s my standard light stand/umbrella/trigger combo, which is usually glued to me:

So here goes. Triggers to fire the flash: Which ones, why.

First: Light or radio? Do you need triggers at all? You can use either of these two methods, light (or infrared) and radio signals, to fire your flashes, i.e. to have the flashes “talk to each other”. I use radio, because I use OCF (off camera flash) outdoors as well as indoors. Light (CLS/i-TTL/e-TTL) can work great inside and gives you full TTL, but needs a good light path. That is not always available outdoors, and bright sunlight can be tricky, too. So: radio. (If I have all Canon 600EX flashes, I can also have them talk to each other radio to radio without any additional equipment).

Then: TTL or manual? I like both, but whenever I have the chance, I go to setting flash power manually. So I need only manual radio triggers.Not the more costly and less reliable TTL versions. There are other advantages to doing it manually, too. If you set flash power manually, you will have consistency: provided the subject is in the same place, every exposure will be as good as the first one. You will have fewer errors: the subject’s brightness, reflections: none of these can upset your photos. The third advantage is that if you use manual, your flashes can be any old cheap model. Any flash that can be set manually and whose auto-shutoff timer can be disabled. Any brand. Canon, Nikon, Vivitar, mixed: it really does not matter. This caves you a lot of money if you want to use six plashes (I have six and frequently use them all!).

So OK… we have apparently decided to use manual-only radio triggers. That leaves the third question:

Which ones? There’s lots on the market! And for that I use Pocketwizard PlusX triggers. Pocketwizard is an American made trigger. It uses AA batteries. Sender and receiver are the same. It’s easy to use: on/off and channel are the only choices. The LED flashes green to indicate “on”, but turns red when the battery is almost depleted. The Pocketwizard is fast enough to not steal too much time: some cheaper triggers are slow, so your sync speed ends up being 1/200 or 1/160 or sometimes even 1/125 instead of 1/20 sec. And above all, these Pocketwizard devices are sturdy and pretty much an industry standard. If I asked around, the room would have multiple photogs with the same triggers, and if one of mine broke I could easily borrow one off someone else. That, for me, is an overriding reason.

Your reasoning may validly vary. Use Yongnuo, or Cactus, or Crocodile, or whatever cheap trigger you like. If they work for you, they work. That’s just fine. But I prefer to stay with a sturdy workhorse, the Pocketwizard. (And no, they’re not paying or rewarding me in any way to say this. On the contrary: I keep offering to test new devices for review here, but they do not always answer…)


Manual power

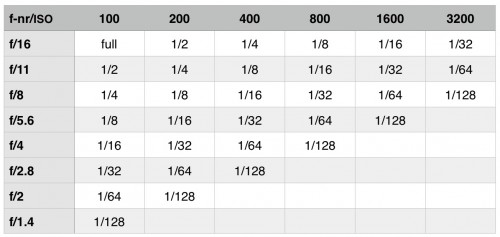
The nice thing about setting flash power manually is that it responds to very simple math. Like the inverse square law. Andthat the common shutter speed, aperture and ISO numbers we know are all a stop apart. They lead to tables like this:

SB910/900 or 600/580EX flash. Zoom set to 35mm. Flash held at 2m (6.5’) from subject. Flash not modified.

So if you have a high-end Canon or Nikon flash and you set the Zoom setting to 35mm, when you set your camera to f/16 and ISO value to 100, you get a well exposed picture at about 2 metres (6.5 ft) distance.

A modifier like an umbrella generally takes around 2 stops, so the same table will hold at one metre (half the distance is 4x more light, i.e. two stops more, which would cancel the umbrella’s 2 stops less).

Simple math. And the rest follows simple math, too: increase ISO and you need less power, and open the aperture and you also need less power. As per the table above. A table that can save you a lot of time.


Basics. Ask.

If you do not understand basic things: ask. There’s no such thing as a bad question, if you don’t understand something and the answer brings you closer to understanding.

I have found often, for instance, that people don’t understand shutter speed. Like “a one thousandth of a second is faster than an eight of a second”., At that stage I lose some people.

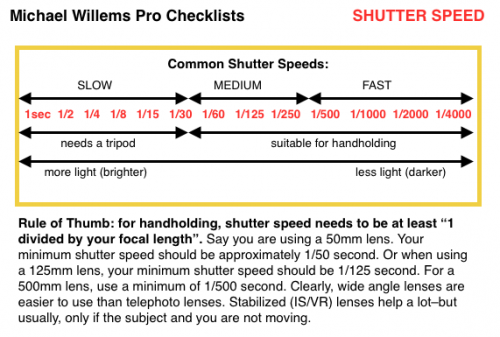
So here: shutter speeds explained in one small page.

Read that thoroughly if you are new to photography and all that tech talk confuses you. And if it is still not clear: ask more.

That’s how you learn, by asking. And that’s why I teach. Via Google Hangouts, if you aren’t local: I teach people all over the world, literally. And when most people say “literally”, they mean “not literally”. When I say “literally” I mean “literally”. 🙂  See http://learning.photography to learn more.


Talking of Which…

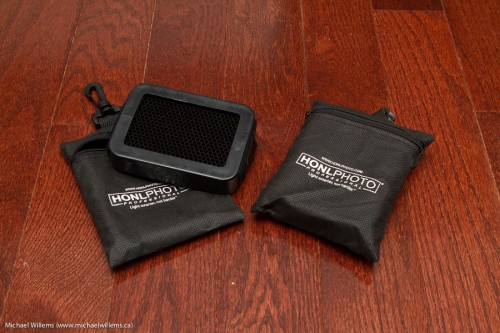
As an aside to my appearance as guest host of TWIP in this week’s Episode 406 (thisweekinphoto.com/twip-406-i-villain-i-photographer/), I chose Honlphoto’s Speed Grid as my product of the week. Today, an update.

First, I notice that the grid comes with its own little pouch now:

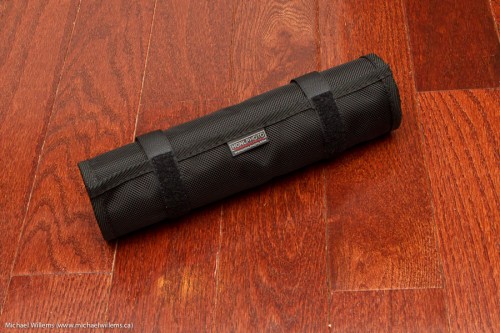
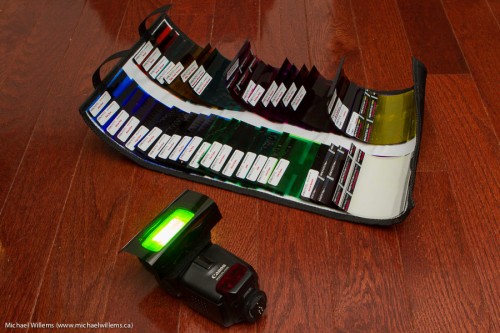
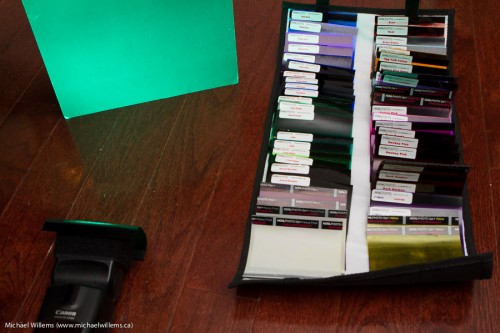
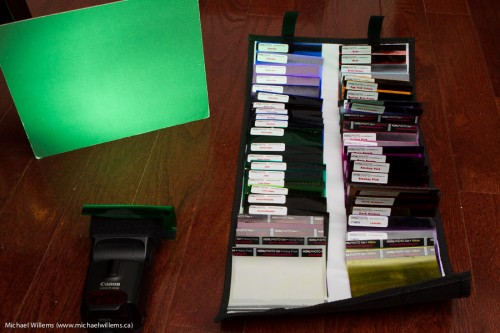
Now, I see that David Honl also has new products. One is a double rollup for the gels:

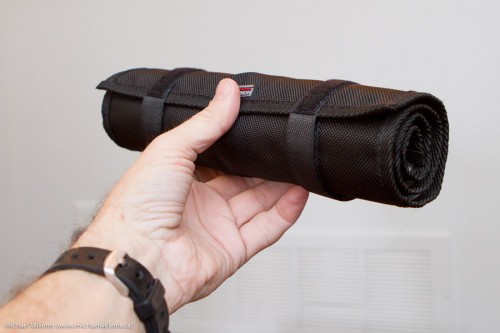
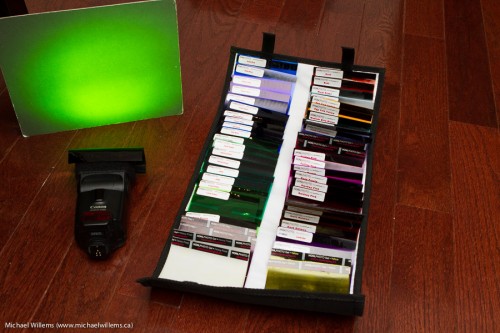
Which, when you open it, has space for lots of gels at once. I have over 50 of them in one rollup:

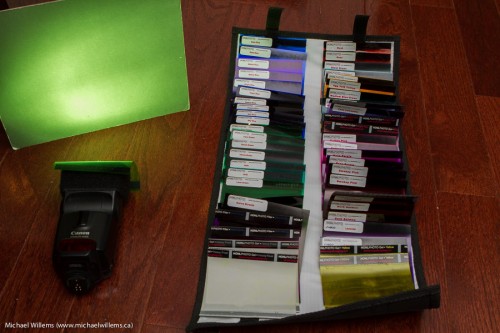
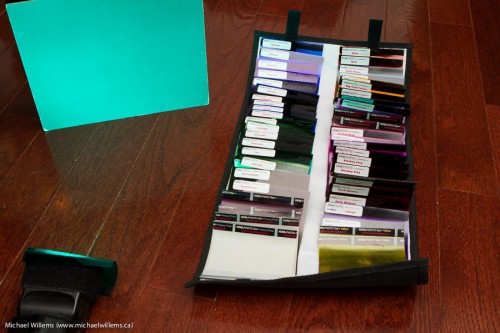
Another development is two new sets of gels: one with 5 different blues, and one with 5 different sets of greens; to wit, these amazing colours:

Aurora Borealis:

Lime Green:

Jade:

Velvet Green:

Fern Green:

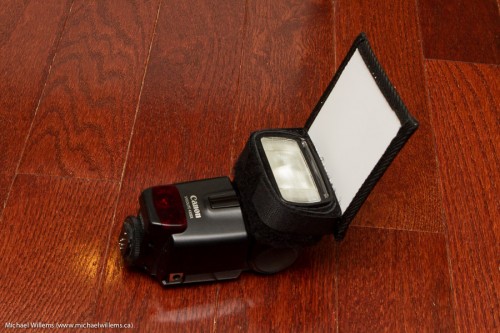
And then there’s a new little bounce card/gobo::

Cool new products. If you are interested in them, go to your local quality high street photography store or get them via this link: http://www.honlphoto.com/?Click=2032 and enter “Willems” on the checkout page for an extra 10% discount off the published prices.


Back button focus: Why and how.

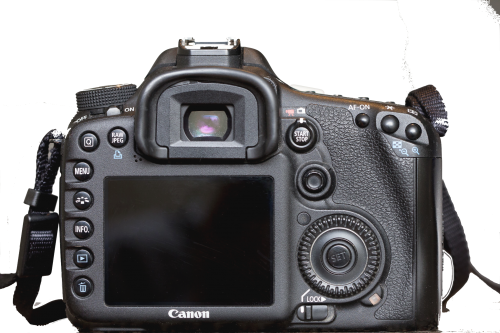
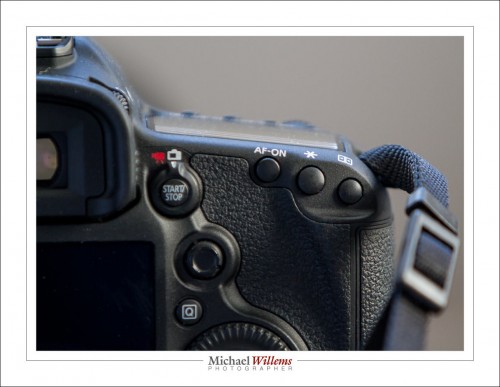
Some photographers (like me, usually) prefer to use “back button focus”. That means that instead of focusing by pressing the shutter button half way down, they focus by pressing a button on the back of the camera. Usually the “AF-ON” or “*” (asterisk) button top right on a Canon camera like the one below. The shutter button now only operates the light meter (in manual mode) or sets the exposure (in automatic and semi-automatic modes.)

On most Nikon cameras, you can use the AE-L/AF-L button on the back to operate focus.

Why would you want to do this?

You might not, or you might. If you prefer this, it is probably for some of the following reasons:

One is that it is easier to separate the process of determining and setting exposure from the process of determining and setting the correct focus distance. These are separate processes that have nothing to do with one another: why combine them into one button? You may well want to focus on the bride’s eyes, while taking an exposure reading off Uncle Fred’s grey suit. This way I set exposure and ignore focus. When I am done and exposure is good, then I go focus where the image should be sharp, and forget exposure (or vice versa). And the two areas do not need to be the same. And usually they are not the same. Unless, of course, your bride has 18% grey eyes.

Also, it is easier to “set and forget” one or both. If, for instance, your distance to the subject does not change, why should you have to re-focus for every shot? There are plenty of situations where this is the case. Like portrait headshots. Focus once, then concentrate on expression and pose, not on focus. By using a separate button you make it possible to do this: focus once, and then forget it until you or the subject changes position.

The third advantage of focusing like this is that it is now easier to make manual adjustments. I focus using autofocus, but sometimes I want to adjust manually. No problem. I can do that, If my camera is set up for back button focus. Beep focus, then overrule that with manual focus.

How?

How do you set it? That depends on the camera. A few examples/notes:

  • On most Canon cameras it’s a Custom Functions (C.Fn) entry or two. For instance, on the Rebel T3i you use C.Fn 9 (option 1 or 3).
  • On the 60D, use C.Fn IV-1 (option 1, 2, 3, or 4)
  • On my 5D Mark 3 it is done in the Custom Controls section of the Quick (“Q”) Menu: set Shutter Button Half-Press to “Metering Start”, and set AF ON to “Metering and AF Start”. I usually also set the AEL button (the asterisk) to “Metering and AF Start”. That way I can use either the asterisk or the AF-ON button. Less chance I miss it!
  • Exactly the same applies to the Canon 7D.
  • On Nikon cameras, set the AF-L/AE-L button to “AF ON”. To do this, go to the pencil menu, find section “controls”, and use “Assign AE-L/AF-L button.”  Within this menu, choose “AF-On.”

Q: Michael, didn’t you say “back focus” was to be avoided?

A: Yes. But this is “back button focus”. A very different thing altogether. “Back focus” means the focus is inaccurate. “Back button focus” means that we are using a button on the back of the camera to start the focus process.

Q: So should I start using back button focus?

A: No, unless you understand all this, know your camera, and are happy to benefit from the advantages I outlines—and only if those are important to you. It’s no big deal either way; I go back and forth between using it and not using it. But now at least you know what it is all about.


Full frame or crop?

You will have heard talk of “crop cameras” and “full frame cameras”. But perhaps the fine points are not exactly clear to you. Let me try to illuminate the subject a little.

First, the definitions. A “full-frame camera” is a camera whose sensor is the same size as a 35mm negative used to be. A “crop camera” is a camera whose sensor is smaller (usually 1.5x, 1.6x or 2x smaller).

Full frame cameras are generally more expensive: they include such cameras as the Nikon D800, Nikon D4, Canon 6D, and Canon 5D Mark III. Generally speaking, “bigger is better”: full frame cameras have some major advantages over “crop” cameras—but the reverse can also be true.

Available Sensor Sizes

  • Lower-end (and many higher-end!) point-and-shoot cameras usually have very small sensors. These do not make it easy to get blurry backgrounds, and they generate a lot of noise at relatively low ISOs.
  • Next, there is the “Micro four thirds” format—these sensors are almost as big as a crop camera’s sensor. Micro four third cameras are twice as small as a negative.
  • The next step up is the “APS-C” crop sensor – 1.6 times smaller than a negative for Canon; 1.5 times for a Nikon. Most DSLRs have this size sensor. Some quality small cameras also do (like my Fuji X100).
  • Next, there is a Canon-only size that is 1.3 smaller than a negative—this is the format used by the 1D (not 1Ds or 1Dx).
  • And finally, there is the full-frame sensor—it is exactly the size of a 35mm negative.

Should you save up for a full-frame camera? Maybe. Maybe not. As so often, it depends.

Pros and Cons of “Full frame” and “Crop”.

Full-frame sensors have several advantages over smaller sensors:

  • Full frame sensors generate lower noise (i.e. produce better quality photos) than crop sensors of the same generation and with the same number of megapixels (Mp). This means that, again given equally old cameras with the same number of megapixels, they are better at high ISO values, where noise can become a problem, than crop sensors.
  • The viewfinder on a full frame camera is larger and brighter than that on a crop camera.
  • In the same conditions, you can achieve blurrier backgrounds than with a crop camera.
  • Wide-angle lenses actually work as wide-angle lenses on a full-frame camera (as opposed to on a crop camera, where each lens works as though it were longer, compared to using the same lens on a full frame camera).
  • The entire lens is used. Crop cameras use only a smaller portion of the lens, so imperfections in the glass can, at least in theory, become more significant.

That’s a nice list, and it explains why most pros use full frame cameras, but there are also advantages to using slightly smaller sensors:

  • They cost less.
  • They are smaller, so cameras with a crop sensor can be slightly smaller.
  • They can use special lenses (DX lenses for Nikon, EF-S lenses for Canon, etc) that were made especially for smaller crop sensors; these lenses are therefore smaller too, so they cost less and weigh less.
  • And last but not least, a big one: lenses “appear to be longer” by the crop factor compared to the same lenses used on full frame cameras. This is an enormous advantage if you need a long lens, such as when shooting lions in Africa: your 200mm lens will now work like a 300mm (Nikon) or 320mm (Canon) lens. And if you have looked at the price of long, fast lenses recently, you will know how big this advantage can be.

Drawback of special “crop only” lenses (DX on Nikon / EF-S on Canon) : if you upgrade to full-frame, you need to replace these lenses. My strategy is to only buy “normal” lenses, those that can be used on any camera (i.e. “EF” lenses, in the Canon world).

Misconceptions

I have heard and read many misconceptions. Misconceptions such as “full frame cameras have better colour”, or “full frame images can be edited more”. Those ideas are wrong. True, many crop cameras produce more noise at a given ISO than a full frame camera, but that does not mean that “full frame colours are better”. Also, age matters (any new camera is better than any old camera), and pixels matter (an 18 Megapixel crop camera probably produces less noise at a given ISO than an equally old 33Mp full frame camera). So a blanket statement like “full frame images can be edited more” is a half truth at best.

Effect on Apparent Lens Length

As said, crop cameras “appear to lengthen a lens”. That is, a 35mm lens works like a 50mm lens when used on a crop camera; a 50mm lens works like an 80mm lens when used on a crop camera; a 200mm lens works like a 300mm lens when used on a crop camera, and so on. (All numbers approximate). The same lens, for instance, mounted on two cameras with the same number of megapixels, one with a full-frame sensor and one with a crop sensor, might give these two images:
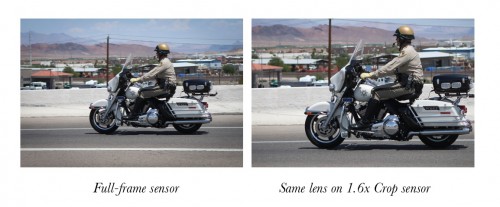
In this example, on the 1.6x crop sensor (the sensor that is 1.6x smaller than full frame), the same objects in the resulting image would be 1.6x larger. An advantage when you want telephoto behaviour; a drawback when you want wide angles.

“What type of camera should you buy?” The choice is up to you. Both full- frame and crop cameras have advantages and drawbacks. If you were to summarise it in just a few words, you might say “full frame usually gives better quality; crop usually gives better value”. I usually prefer full frame cameras because of the better high-ISO performance at the same pixel count and because of the blurrier backgrounds; but I own a crop camera as well, because i like the fact that without buying more lenses, I now have more focal lengths available. After all, depending on the camera it is on, each lens now has two focal lengths, effectively.

Only you can decide whether quality is most important to you, for instance, or money. “What camera should I buy” is like asking “What car should I drive”. A tough question for anyone but yourself to answer.

Either way, any modern DSLR will provide quality beyond that of good professional cameras even just a few years ago. This is a great time to be a photographer.