Selfie…

Self portraits are tough. Because you do not know what you are doing. And you cannot focus. And the camera doesn’t hold itself. Above all, it’s a drag, because you want to see to compose, but you cannot. Not until afterward, anyway, and that tends to be a pain too.

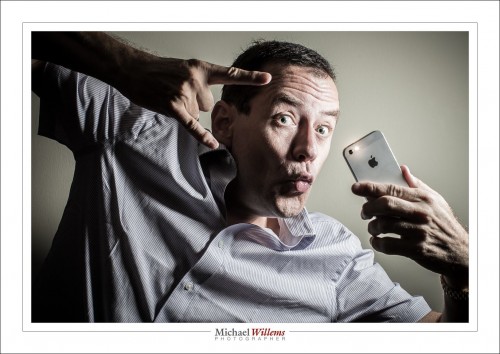
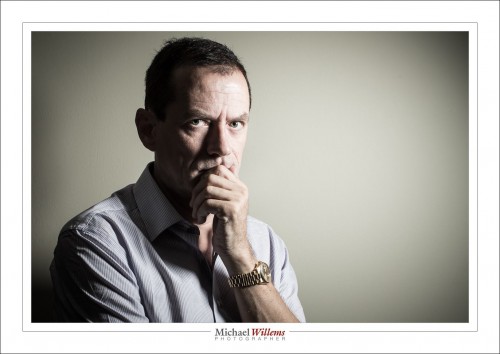
And yet, I do them all the time. Including this, the never do this at home, folks shot:

Yeah. The duck face. With gang symbols, and an iPhone. Ouch. These are usually shot in a washroom, and then you post it on Facebook, if you are a teenage/20s girl, and immediately all your fine feathered friends say “AWESOME PHOTO!!!”, while in fact it’s usually an awful photo.

But as you see, my selfie is technically good. So here’s how I do it:

So here’s the TEN WAYS TO A SELFIE:

  1. The camera is mounted on a tripod.
  2. It is set to manual mode, 200 ISO, f/8, 1/125th second (with these settings, only the flash will do any work, and ambient light will not interfere).
  3. It is set to the 10-second self timer mode.
  4. It is equipped with a Pocketwizard (set to send, or “remote” mode).
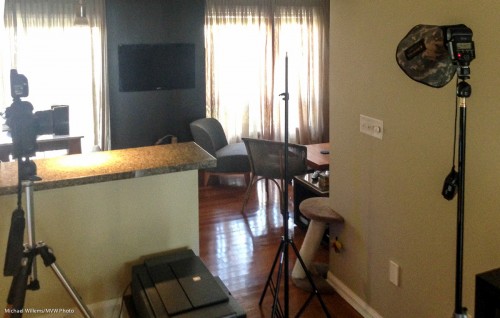
  5. The flash is mounted via a ball head onto a light stand. The ball head allows me to point the flash conveniently. I have it positioned 45 degrees up, as seen from where my face will be.
  6. The flash, too, has a Pocketwizard (in receive, or “local” mode), and it fires the flash via a flashzebra.com hotshoe-cable.
  7. It is equipped with a Honl Photo Traveller 8 portable softbox.
  8. The flash is set to manual, quarter power. That gave me f/8, at that distance and at 200 ISO.
  9. See that additional light stand? A-ha! I put it where the subject (i.e. I) was going to be. Then I focused accurately on it. Then, with that focus distance set, I set the camera to manual focus. Then, when taking the shot, I moved the light stand away, and positioned myself exactly where it had just been.
  10. I aimed my face toward the softbox, in order to get the lighting pattern you see here.

That’s how I did this shot.

Oh yeah.. you see the iPhone pretending to be flashing? That’s an app, FlashLight, that allows me to turn the light on permanently.

And finally, you see that I also went close, and that I composed using the rule of thirds. Mission accomplished. Including Dreaded Duck face!

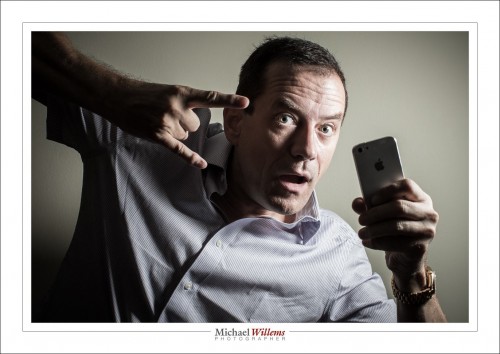
Here. One more. In case the duck face was too much to take:

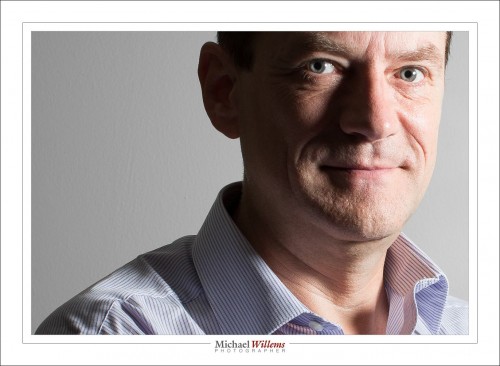
Oh, OK, OK, here’s a more serious one, where I went closer:

And one last one from the same setup:

Now you go try!

____

Want to learn? I have just scheduled a special all-evening Flash course on 3 Oct; as well as a five-evening basic photography course, starting Oct 2, aimed at novice to intermediate users who want to learn to use their DSLR properly once and for all.

These courses are very special in that they are like private coaching: I will only take up to 5 students for each course. The Flash course includes the Pro Flash Manual, and the five-evening course includes course materials and homework. Both are now available for signing up on www.cameratraining.ca/ – see the flash course details on this page.


Post hoc

..ergo proper hoc? No – forget that: I am not talking about logical fallacies.

I am talking about what happens to photos after you take them.

Here’s what happens after a shoot, quite often:

  1. You shoot.
  2. You get home and look.
  3. You think “Oh, I am not very good”
  4. You think “Oh – I am amazing, actually”
  5. Repeat 3 and 4 a few times
  6. After oscillating a while, you settle down and pick some images to use
  7. You share those, and you are done.

But what you should do is also: look again later. You increasingly see your images as what they are, not as “what you were doing when you shot them”. This is why you use Lightroom, and this is why it is useful to go back and review your work – even years later.

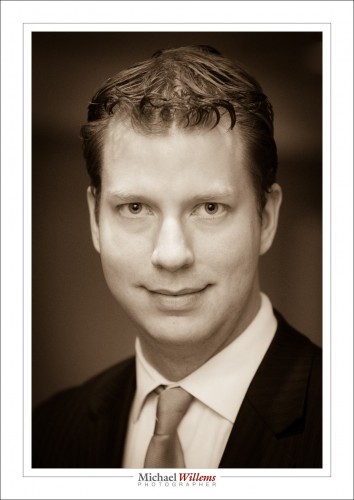
For example, three years ago, I shot an event with showman/radio person JT Foxx (brother of a then friend of mine) on a visit to Toronto. At the time, the event pics were good, but he did not like the portraits – and indeed, he had not had the best night before, and the light wasn’t great, and I had no off-camera flashes, and so on. So – I got some snaps, but I was not terribly happy with them either.

Until I just changed upon them again – three years later. I think, now, that this is actually a very good portrait, showing his personality:

(95mm, 1/125th sec at f/2.8, 800 ISO, bounced flash).

So I got a portrait out of this shoot, three and a half years after the shoot. And that is my point – look again at your images. Try a different crop (or, as in this case. sepia instead of colour). Have a new eye – and even years after a shoot you will discover gems that you did not know where there. Your image library is a mine – and sometimes a gold mine.


You have nothing to fear…

…but fear itself. And a little grain. When it comes to high ISO values, that is.

But the benefits of those high ISO values a modern camera gives you can be great, too.

I often see new photographers hesitate to go above 400 ISO, say. Well, it all depends on the camera of course, but generally, you shoot to get pictures, and a picture with grain at 1600 ISO is better than a blurry mess without grain at 400 ISO.

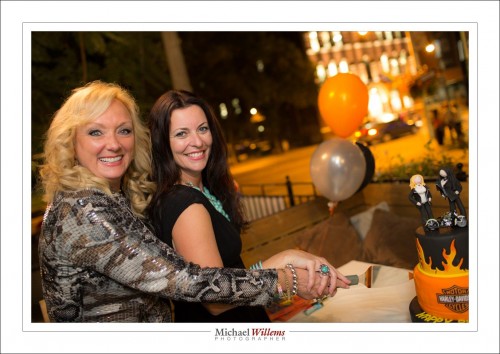
Look at this example from Wednesday night. Jane Dayus-Hinch, wedding organizer/guru/TV personality, with Eddie Suliman, cutting their joint birthday cake.

Outdoors, on Toronto’s Church Street.

Shot at 1/30th second at f/2.0, at 3200 ISO, using my 1Dx and the 35mm f/1.4 prime lens.

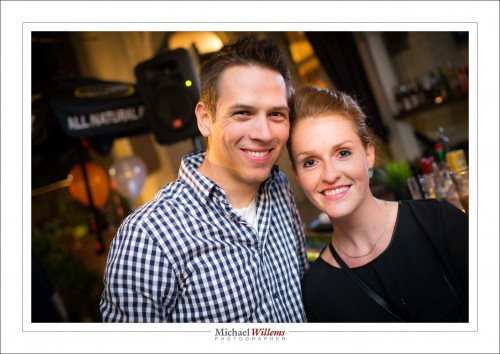
Another few examples, all shot at roughly the same values (the last one at 1/20th second):

So yes, you can shoot at high ISO values. And yes, you can shoot slow, if you use the flash to light your subject (bounced, of course). Your camera will not be as good as mine, but a little grain is OK – better than a picture with those horrid black backgrounds.

___

Want to learn this stuff? Want me to teach you how to make pictures just as good? Sure thing. Contact me. I teach at schools, clubs, colleges, high-end stores, and privately, in person or via the Internet. And it is remarkably easy. Once you know.


Timing

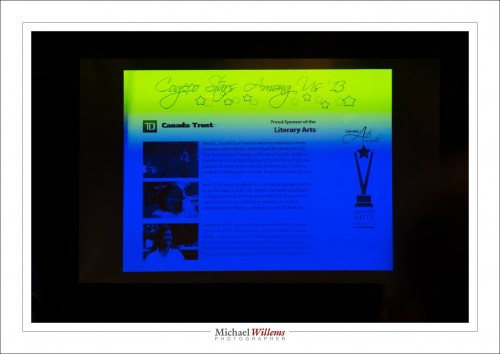
OK. What happened here, at the annual local Arts Council Awards Media Kickoff ceremony? The projector that created this image was broken? The lamp was old?

No, nothing like that. Like fluorescent light, the projector effectively (by virtue of the LCD that blocks the light, or not, and does this for the three primary colours of red, green and blue) flashes on and off at a rapid rate, and if your shutter speed is anything faster than the rate of flashing, this kind of thing will result. This image was taken at 1/2500th second. At that speed, every picture is different, and none are good.

The best strategy is to expose at a multiple of 1/60th second, since 1/60th sec is the power grid frequency and also traditional TV screen refresh frequency.  Multiple meaning 1/60th, or 1/30th, or 1/15th… and so on.

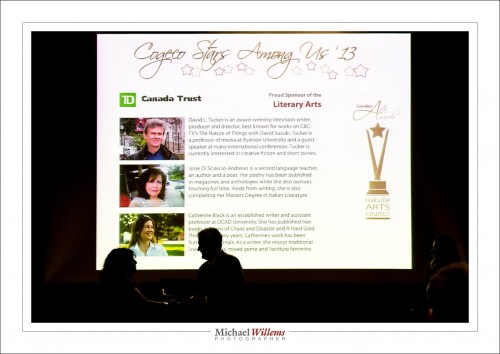
So I shot the second shot at 1/60th second (obviously using lower ISO and smaller aperture):

And hey presto. Good exposure (and just enough back light on the mayor and the award recipient to make it a good picture).

Yeah, I received an award also, for being one of three finalists in the Digital Arts category. The winner will be announced later in the year.

Always nice when my photography is recognized.


Focus

In yesterday’s self portrait, I mentioned I pre-focused. I did the same in the panning shot of a few days ago. “How?”, I am asked.

Good question. And it’s simple.

  1. Select one focus point (centre, say, or any other)
  2. Aim that where the subject will be – that is, at an object the same distance the subject will be (I used the front of the bed). When shooting in a studio, I put an “X” on the floor, then put a light stand with a hat on the “X”, and focus on that. Then as the self timer counts, I replace the light stand with me.
  3. Focus, and hear the beep to indicate focus has been achieved
  4. Lift your finger from the shutter (or focus-) button
  5. Set the lens to MANUAL focus

Now you are pre-focused at the correct distance, so you can set the camera to self-timer and shoot, if it’s a self portrait. If it is a panning shot, no time is lost when shooting. As long as you keep the camera where it is, and you ensure that the object indeed will be at the distance that you focused at.

This is a technique I use quite often. Also, for instance, when shooting fireworks or night scenes, when focus is hard to achieve.


Selfie…

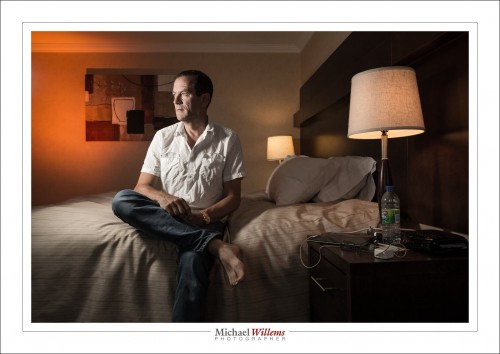
From Hopper to Leibovitz, hotel rooms have always been a fascinating setting for art portraits.

I portrayed myself in a hotel in Timmins, Ontario, Wednesday morning, evoking feelings of these prior artists, but especially, creating with light. Straight out of the camera.

If I say so: my best self portrait. Ever.

Click to see larger:

I did this in my suite in the Timmins Day’s Inn. I was alone and I used:

  • Camera perched on an upturned Ottoman
  • Main light is a 580EX flash with a Honlphoto Traveller 8 softbox, clamped to a desk chair.
  • Additional flash is a 430EX speedlight with a Honlphoto Rust coloured gel, for some nice warm light.
  • Camera at 100 ISO, f/5.6, 1/60th second.
  • Flashes fired with Pocketwizards.

Camera prefocused and using its self timer. This took me only a couple of attempts to get right.

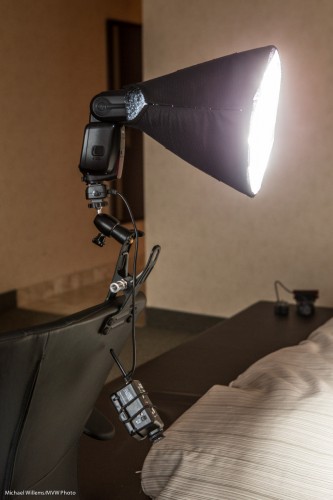
The main light: a flash connected with a Flashzebra cable and mounted with a ball head onto a clamp, clamped to a chair. Note the second flash sitting in the background.

And no, the name “selfie” doesn’t do it justice, does it?


Mind to sensor

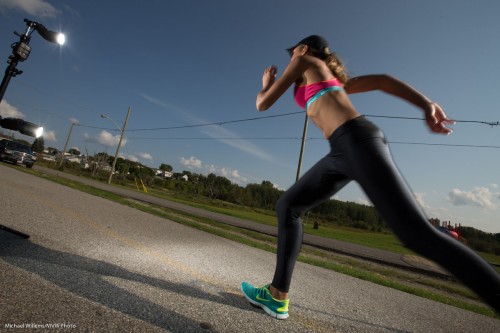
So the day yesterday in Timmins I had the following shot firmly in mind:

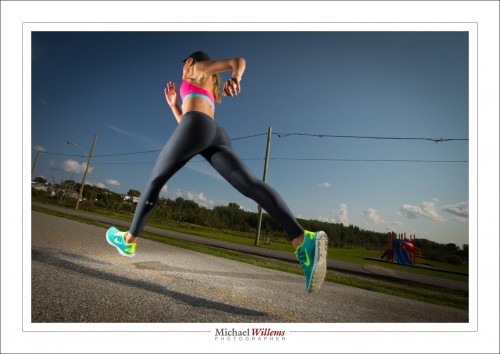
But that was mind only. I needed a setting – friends and students Aurele and Lisa came up with the perfect location for what I had in mind, and Savannah, the model, had a jogging outfit, and is a runner. Serendipity!

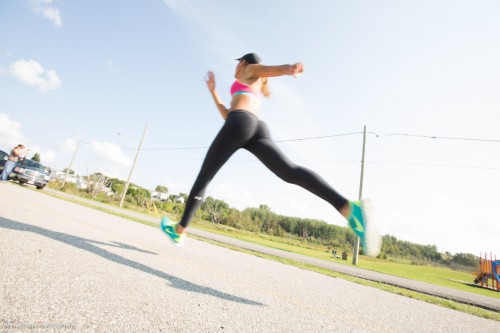
So now the shot. If I were to get low to the ground, use my widest lens, and use available light, I would get this (this was my composition test shot):

So then I go to work.

To get the saturated look I like, I want to darken the background, ambient, light by two stops. I start at the usual sunny day settings of 1/250th sec at 100 ISO. That gives me f/11. So that makes me use two speedlights direct on front of the model and one behind; all set to half power. One light gives me f/8, so two lights around f/11. See the two flashes on the left:

One on a light stand, one attached lower to the same light stand with a clamp. Used at half power, while I perhaps would have preferred quarter power (they are Nikon flashes, so will overheat) – but half power is better than full power.

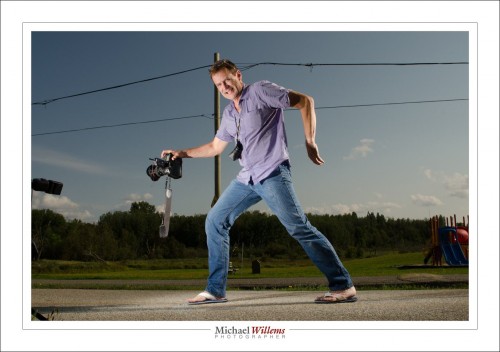
Now, walking like an Egyptian, I explain the idea to my students:

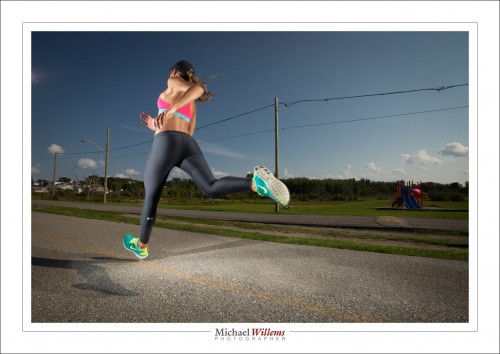
And there we have it – now all I needed to do is agree on the spot; prefocus (so there’s no delays); and shoot. That took a few attempts, but not many: out of seven tries, two were perfect. Here’s the second of those:

Post work consisted merely of removing a few unwanted shadows and background objects, and I had the exact shot I had in mind. And my students did too, and they learned the process, and they fully got it. It’s nice when it all comes together.


Pan pan pan

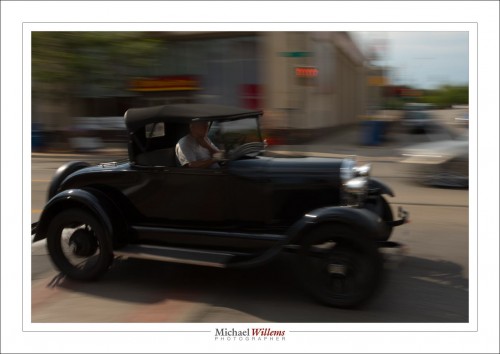
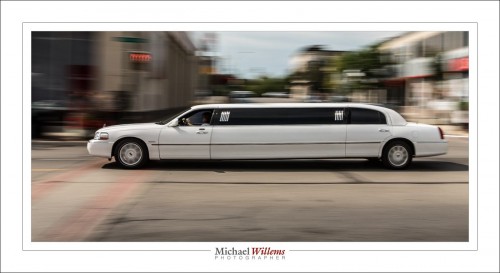
No, not a non-urgent request for help from an aircraft. Not that kind of pan. I am talking about this kind of panning: moving along with the subject while using a slow shutter speed:

You do this as follows:

  1. Set your camera to the lowest ISO
  2. Set your shutter speed to, say, 1/20th second
  3. Fine whatever aperture matches this for a good exposure. You can use aperture mode, but I prefer manual mode. On a sunny day, you may need to cut light – if so, you can use a polarizing filter or a neutral density filter.
  4. Aim where the vehicle will be when you shoot (in front of you) and focus there. Now set focus to manual (i.e. you have now preset the focus for the right distance: that way, no time is wasted by the camera trying to focus).
  5. Wait for the car, and start tracking it before it gets to you. Moving smoothly now, shoot when the car is in front of you.

It’s really not difficult.

And you can see that the traffic lights in Canada work at 120Hz. How? I shoot at 1/20th second, and that gives me six little red men. 20×6 = 120, i.e. the red light is not continuous, but flashes on 120 times a second. (Can you tell I am an electrical engineer by training?) … Bonus question: approximately how fast is the car traveling?

TLC

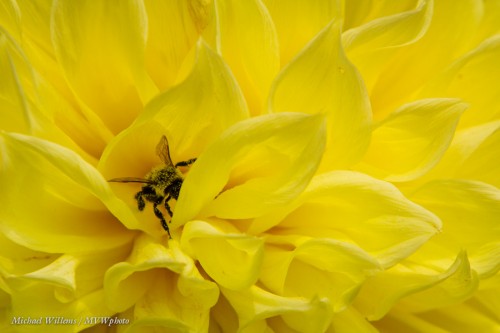
Macro pictures need a little TLC. This long-lens picture from Sunday’s photo walk: just a little cropped, but otherwise as shot. Student Jackie found the bumblebee: for bugs you need to either be serendipitous or be patient. And you need to observe well. Jackie did both, and I took the picture too:

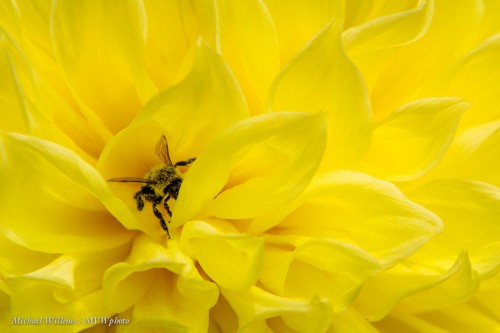
Now with some TLC:

Look at them full sized and you will see many small blemishes and imperfections – yes, flowers have them too – and in picture 2 you will see I have removed them. I also brightened it a little. See the difference?

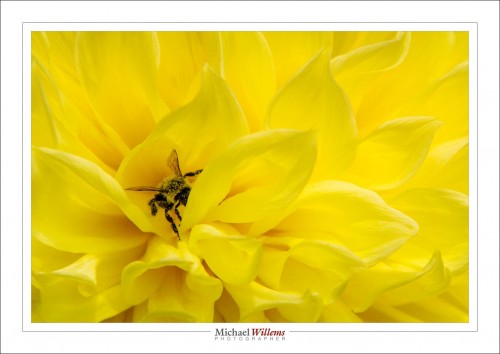
And then here it is with a little frame around the image:

You will notice also that the picture is simple. Simplifying your pictures is the single most important way to make them more “professional”. That, and using the Rule of Thirds: the insect is not where Uncle Fred would put it (that would be in the centre).


Pullback

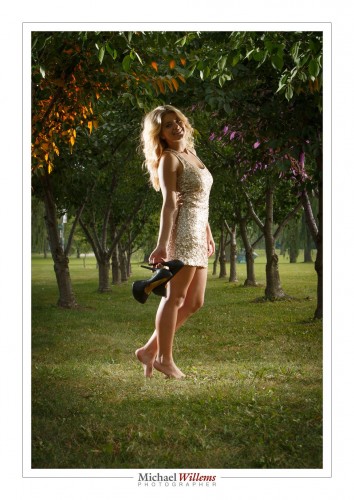
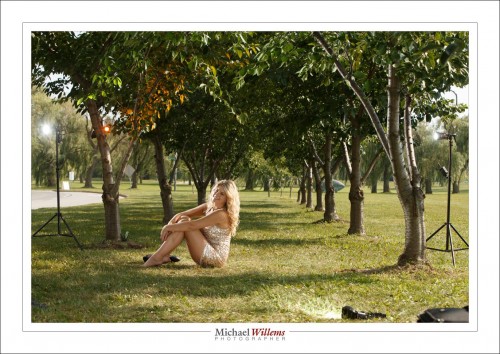
I have advised you here again and again to do a pullback shot every time you shoot. Like for yesterday’s picture:

Here’s how I set it up:

As follows:

  1. One flash direct, on a light stand camera left, just behind model aiming at her.
  2. One flash direct, on a light stand camera right, just behind model aiming at her.
  3. One flash direct by my legs, on the ground, aiming at model
  4. One flash in tree left, clamped, with Egg Yolk Yellow Honl Photo gel
  5. One flash in tree right, clamped, with purple Honl Photo gel

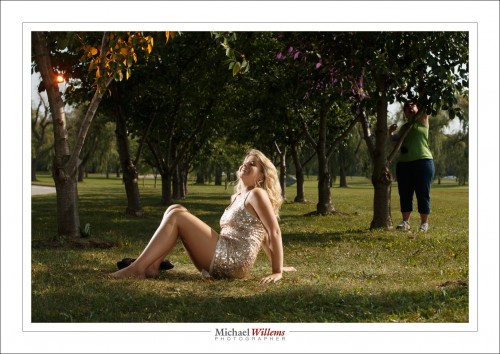
Yes, that purple flash is there – here’s Lori fixing it:

The point is that I would have forgotten the setup quickly if I had not had this pullback shot. With five speedlights, forgetting what was where is easy!