That long look

As you all know, there are three ways to get “blurry backgrounds”:

  1. Large aperture (“low f-number”).
  2. Get close.
  3. Use a long lens focal length (“zoom in”).

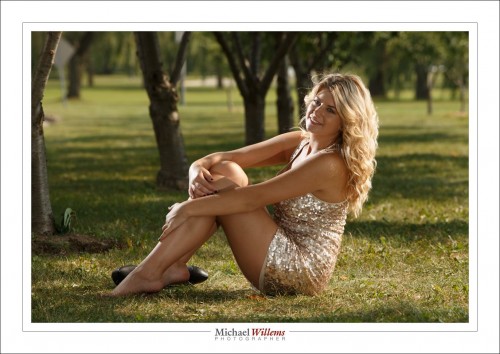
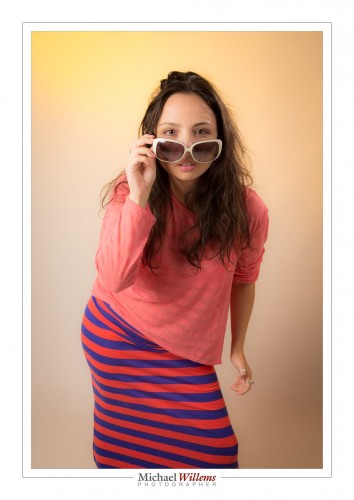
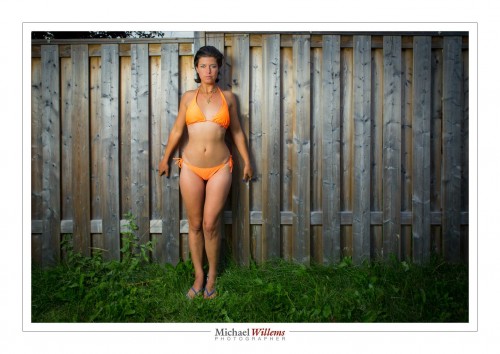
The first one is the one everyone thinks about – but the last one has a very recognizable look. Like this, yesterday, at 190mm at f/8:

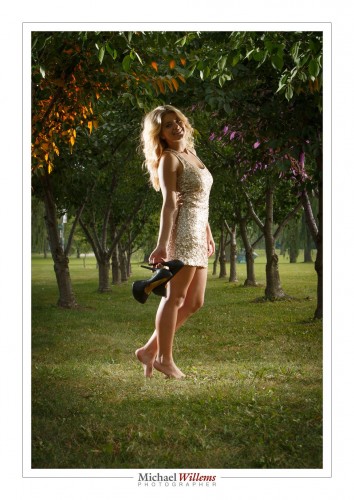
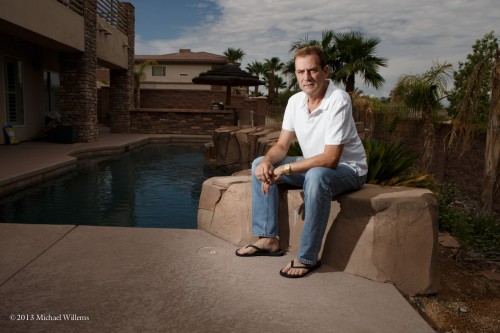
Compare that look and that background blur with this, taken at 70mm:

Both nice, but the first one (viewed full size) has that distinct “long look”, and the background is blurrier. Reason I like the 70-200mm lens for fashion shoots if I have enough space!

___

Want to learn this? There are a couple of spots still open on my Oakville Photo walk, this coming Sunday from 1-5pm. Go to www.cameratraining.ca/Schedule.html and follow the BOOK link.

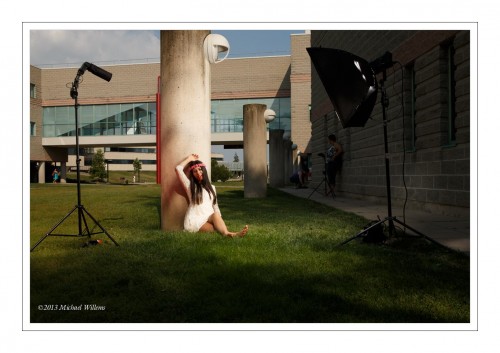
Hippie Chick and Death Star

From today’s NSI course:

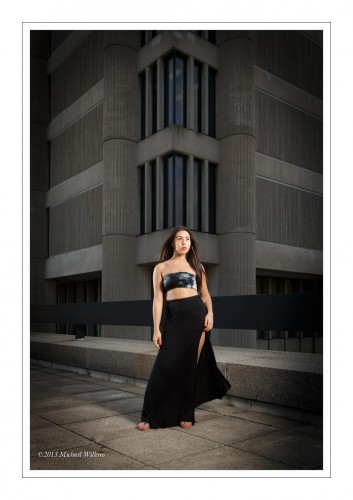
The pretty woman in front of the dystopian death star. The background underexposed by two stops, as usual.

This was done with a softbox on our right, and two more speedlights, on on the right and one on the left.

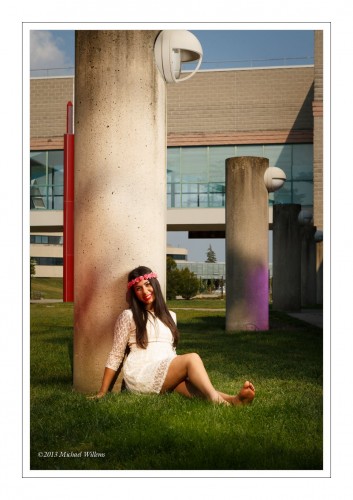
This was shot in a similar way:

The secret: underexpose the background by about two stops. 1/250th sec at 100 ISO at f/10; and then set the lights to give you those values.


More than looking pretty

When I photograph people, there is often a conflict involved. There usually is, I might even say.

Why? Because I want to show the person’s character. Their inside; their conflicts;perhaps, their deep issues; their happiness, or lack thereof; their age; their life experience. I want the image to be evocative, to raise questions, and even, if possible, to tell stories. But mainly, I want it to raise eyebrows and to make people think.

The person photographed, on the other hand, usually wants to look like a supermodel, or like a person younger or happier or thinner (usually, all three) than in fact they are. And that is often in direct conflict with what I want.

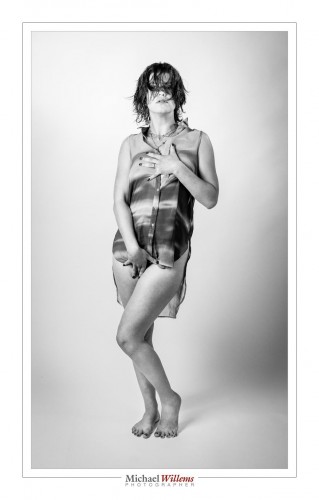
Take a photo like this, from 2012:
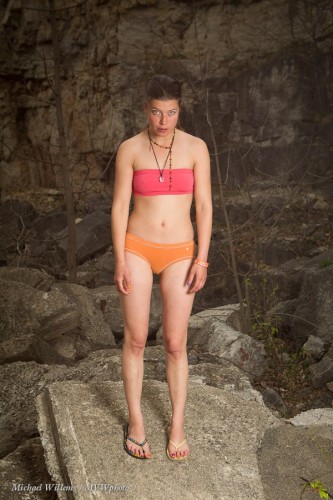
That photo is in fact a tribute to Dutch artist Rineke Dijkstra (see here). In it, the model does not look like a glamorous model; instead she looks almost like an insecure teenager. There’s insecurity, embarrassment almost, awkwardness for sure, body awareness, also.

Of course, the model does not like this portrait, and nor do her friends. (As I mentioned here last year, I was amazed that in The Netherlands, several people, when seeing this image, immediately said “That’s a Rineke Dijkstra”! Europeans really do have a great sense, and knowledge, of art.)

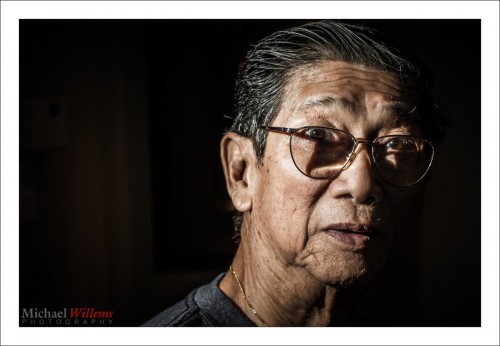
This portrait shows someone with life experience:
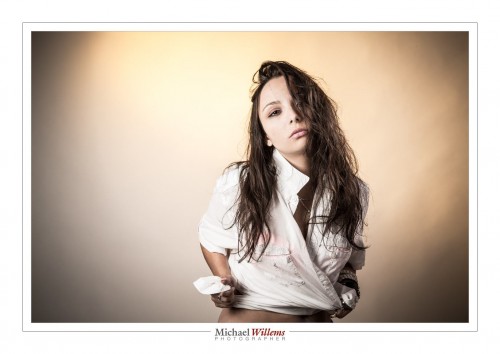
This shows a young woman thinking, and not happy:
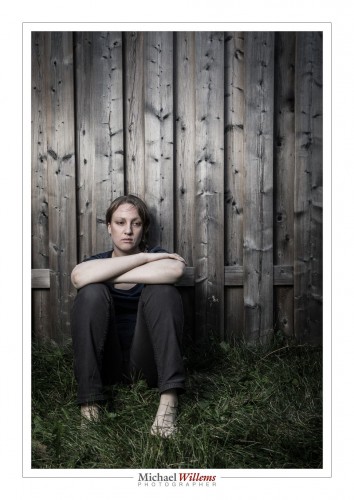
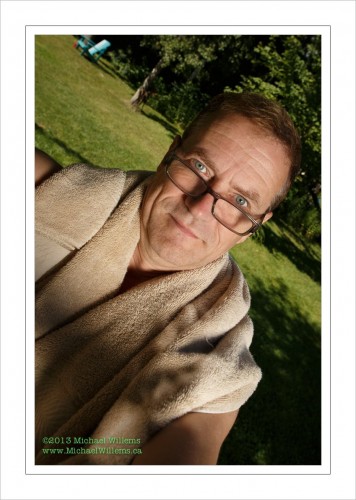
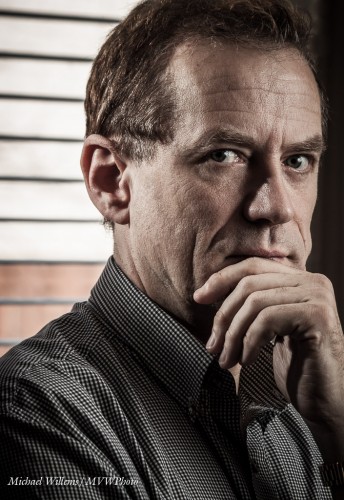
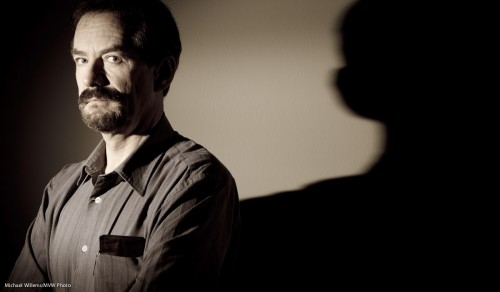
None of these are happy snaps (no smiles, see?). But they are good portraits. And here’s me in a few of last year’s self portraits:
So when you are about to make a portrait, first ask yourself the most important question:

Whom is this portrait for?

It could be:

  • You.
  • The subject.
  • The subject – but 20 years from now.
  • The subject’s kids.
  • People who read a magazine the picture will be in.
  • Future generations.
  • Colleagues and friends.
  • An art competition’s judges.
  • Some combination of the above.

Then, when you are clear on that, decide what you want. The audience will lead you to the picture. Yes, you should also ask what the person portrayed wants – but it does not always matter. Karsh’s famous Churchill portrait was made seconds after Karsh removed Churchill’s cigar, and shows his resulting grumpy expression.

Then decide on a way to do the portrait – perhaps a compromise, or just for one party, or whatever – as long as the answer is not “I dunno”, because then, no great work will result.

Very often, just asking and answering this question will lead to a good photo.


Test Shot

I spent yesterday shooting portraits. And here is my test shot:

Why “a test shot”?

For outdoor portraits, I set up a single softbox. I check my ambient light and underexpose that slightly: I start with 100 ISO, 1/250th second, then see what aperture that needs. Then I set my flash to the desired brightness to give me that aperture.

But then I do one single test shot – that is all I need. I check:

  1. Is the background dark enough? (*)
  2. Is the foreground bright enough? (*)
  3. Do I see a catch light?
  4. Are glasses free of reflections?
  5. Are the shadows in the right places?

(*) I judge this by means of using a Hood Loupe, and/or using the histogram, and the “blinkies”. Not just visual inspection of the rear LCD in bright sunlight!

Of course here since I am holding the camera and a pocketwizard, my expression and the composition are not quite right, but that is not the point. The light is right.

And provided I do the setup right, one test shot is all I need.

Come to NSI to learn more – Sunday-Thursday next week!


A small adjustment

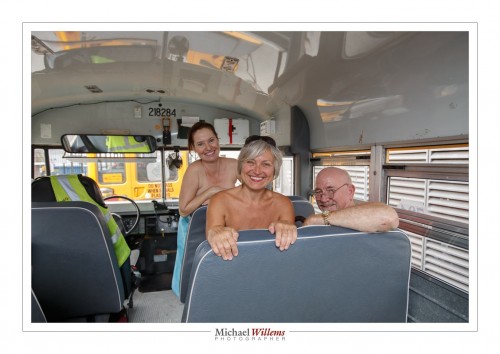
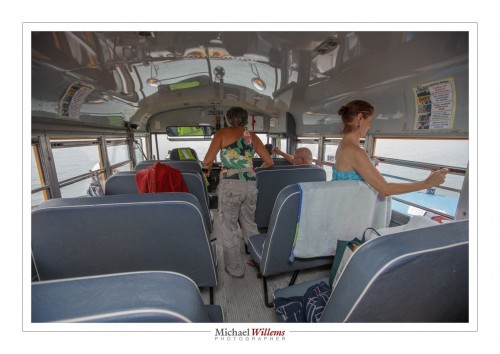
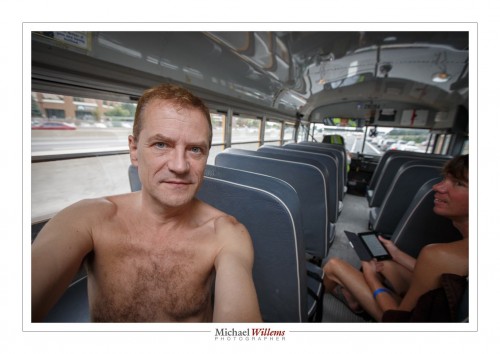
If you photograph people against windows, as in this “Bare Bus” picture of two days ago, between Bare Oaks resort and Toronto’s Hanlan’s beach, what happens?

Usually, you will either get silhouetted subjects or blown out windows, i.e. you do not get a well-balanced picture like this:

In that picture, the background is not overexposed. Same as in this one:

So – how do I do this?

Either of:

  1. Expose for the background (using, if you like, a spot meter) and light up the foreground with (bounced) flash.
  2. Overexpose the background a little, yes, but use RAW, so you can drag the “Highlights” back in Lightroom (and the “shadows” up). This minimizes the difference between dark and light. I.e. keep it within limits, so you can fix the issues in Lightroom.
  3. A combination of (1) and (2) above.

And that is what I do when I shoot: I keep it under control so I can fix any issues later. I.e. make sure that if you overexpose, you only overexpose a little, and the same for underexposing.

Here, one more sample – this one even more difficult because it was a self portrait:

Note that for a self portrait I will let the camera choose where to autofocus – and that is very rare. Normally, I choose, But when I am not looking, I cannot choose. So the camera chooses – and it chooses the closest subject.

This, by the way, was a special bus tour, leading to a beach visit with photos, and a photography course the next day; and portraits Saturday. Stay tuned for more.


Outside Fill Flash

Look at me, yesterday, taking a picture of the flower-girl at Halyna and Vitali’s wedding in Toronto:

You see that in spite of it being bright daylight (1pm on a sunny summer day), I have my flash aimed at the girl. And you see I am getting down to child level. And here is that picture, taken the very same second:

The look is defined by me:

  • Underexposing the picture a little; the ambient part, that is, to bring out the colour in the sky. Look at the pavement to see how much darker I made my ambient (about two stops).
  • Using a wide angle lens (16-35 on a full frame camera).
  • Getting down to the ground.
  • Using the rule of thirds.

Flash outdoors, then. But because I used the flash to enable me to darken the ambient by a couple of stops, it is more than fill flash.

Indoors, on the other hand, I used no flash yesterday, not at all, in the house or church. Unlike me, but the results were good:

Instead, I used a higher ISO and a prime lens, almost wide open (like at f/2 – f/2.8). It’s all what’s needed: no dogma!


Plan!

I am preparing for a wedding tomorrow. And as always, I am pumped. Weddings are fun, and while shooting them takes a lot of talent, effort and experience, it is also very rewarding.

So what am I doing tonight? I am making lists. List of:

  • The shots I want.
  • The addresses and times.
  • Names and phone numbers.
  • The equipment I need. Including spares for everything!
  • Events specific to this culture (all weddings have specific cultural traditions – knowing them helps!)

Preparation is half the secret of success. Tip: ensure that your car is in good shape and full of fuel, and that you have cash for parking meters, etc.

I’ll share a little more of the success factors in the next weeks. But now – packing my bags, packing the car, preparing for an all-day shoot. Life’s good when you can do all day what you enjoy!


Silence In The Studio!

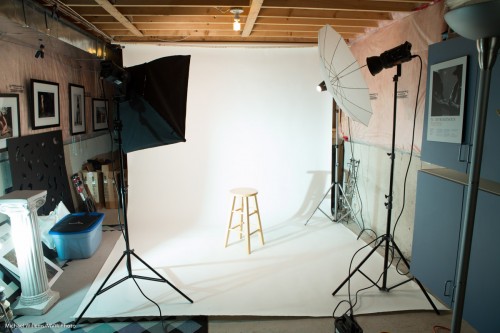
And here is my own studio:

That consists of:

  1. A backdrop stand with a white paper roll (other colours also).
  2. A main light with a softbox (on a light stand).
  3. A fill light with an umbrella (on a light stand).
  4. A hair light with a snoot (on a light stand).
  5. A background light with a grid and yellow gel (in this case, a speedlight on a clamp).

Other necessities include:

  1. Pocketwizards to fire the first flash and the speedlight (the rest can use the built-in “cell”).
  2. A stool.
  3. Music (so not “silence in the studio”!).
  4. Lots of props.
  5. Lots of extras lights and modifiers.

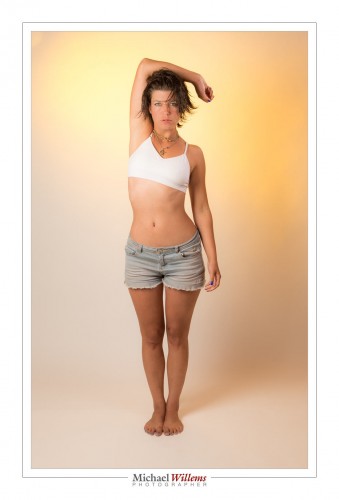
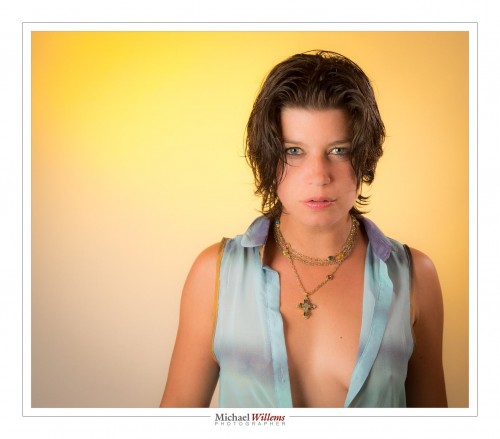
I used three strobes and one speedlight in the shoot a couple of days ago. That setup pictured above gave me shots like these:

Where it is easy to enhance the saturation of yellow (and to go horizontal if you wish):

Or indeed to go back to black (and white), where it’s all about the shadows:

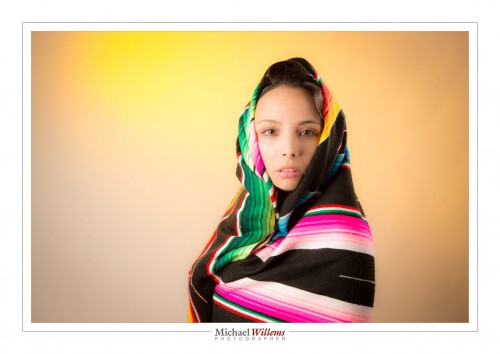
You can use the colours you shot:

Or you can go “desaturated”:

This shot, at first, seems to shout for colour:

But the same shot in B/W gives you new possibilities – e.g. to darken the lips a little and make the face stand out extra pale and beautiful:

What I like about studio shooting is that exposure is always perfect, provided you meter or guess it right in the first shot, and further, that you have control over everything. And that means you can now concentrate on expressions and ideas, not just on aperture and shutter settings.

PS: those of you who are in LinkedIn and do not yet have a headshot: contact me and have me make one. To be taken seriously, you need a headshot, and I mean need. No blanks, and no snapshots – those are two deadly sins.

___

I recommend you learn studio-style shooting and those of you who come spend the days with me at Niagara School of Imaging will learn all this, as will those who come to me for private or planned training (as in, Sheridan College Oakville starting in September).


Back Yard

You can take nice pictures in the back yard. Like this one of yesterday:

To do this, you need:

  • An SLR camera with manual mode.
  • Off-camera flash: e.g. a remote flash in TTL mode fired by your camera’s pop-up, for many cameras, or by a 580EX/600EX/SB-900/etc on the camera; or a remote flash in manual mode fired with Pocketwizards.
  • Perhaps a modifier, like an umbrella or a small softbox.
  • A light stand and bracket to mount all the above.

So the equipment is relatively simple. And the use? Not so difficult either. Let me repeat how you do this.

First we set the exposure of ambient part of the image (the “background”):

  1. Camera on MANUAL mode
  2. ISO: Set to 100 ISO
  3. Shutter: Set to 1/250th sec
  4. Aperture: Start at f/5.6 if it is overcast. Or if it is brighter, go up to f/8, f/11, even f/16. Trial and error can work: you simply go as high as you need to get a darker background (for instance, on a sunny day, f/5.6 or f./8 will give you a way too bright background). For me, a “darker” background is -2 stops. If you like less drama, -1 stop is OK.

That’s the background done.

What about the foreground?

If the aperture you need to get to a darker background is f/8 or a smaller number, and your flash is close to the subject, you can probably use an umbrella or softbox. If it is f/11 or higher number, you will possibly need to use direct flash, unmodified, since a modifier loses power.

All I did was add a little vignetting and some minor tweaking.

Easy once you get the hang of this. And I can help in many ways. One of those ways: Aug 18-22 you get the chance to learn from me in a very intensive 5-day workshop at the annual Niagara School of Imaging, held at Brock University. There are still a few spots open: book now if you dig flash as much as I do.


Dramatic portraits

Why is my portrait style dramatic? Because it’s my style and I like it. And because I want to emphasize my subject. And because I like saturated colour. And because I like to be the boss of the light. Those four reasons.

Here’s the back yard I am at, this morning.

And now I come. I do my thing.

  • ISO to 100
  • Shutter to 1/250th
  • Aperture to what I need to get a dark background (f/11 in this case)
  • Flash power to match those (full power, direct flash about 5ft away from me)

And that gives me what I have in mind.

Much more my style. And by the way, as always, to judge an image, view at full size -in my case, by clicking on the image and then selecting full size and if needed, clicking on the magnifying glass.

___

You can learn this too. Benefit from the many learning opportunities: NSI next month, private courses by me in Oakville all the time, 24/7, courses in Hamilton and Oakville as per cameratraining.ca, and courses at Vistek, just for a start. But better: get enough people together and I’ll fly to you anywhere in the world and teach you all about flash for a day.