1Dx New Function

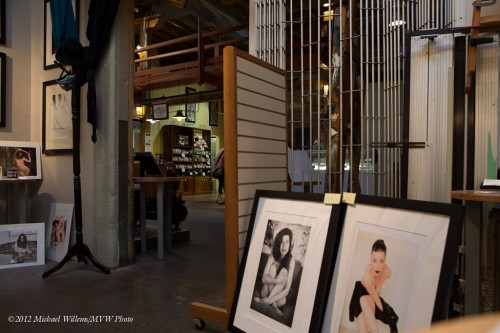
One function I have had on Nikon bodies, and which Canon has now added to the 1Dx body, and very well indeed, is the “multiple exposure” function.

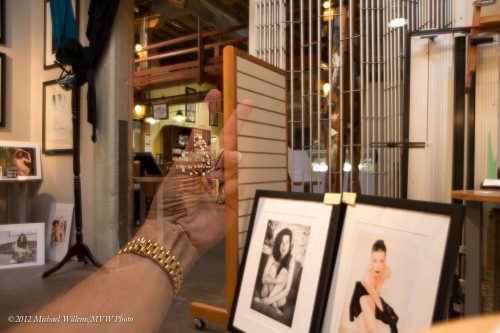
I can take several functions and put them together. I get to choose how; here I chose “two shots” and “additive”. I then put the camera on a tripod, told it to shoot one stop too dark (because I will be adding two shots!), and shot this:

Then without moving the camera I shot this:

Then the camera put them together for me:

Fun.

But why not do it in Photoshop?

Well… first, you would have to do it in Photoshop, which is work. More importantly, the camera actually makes a new RAW file, not just a JPG, so if I need, I get to adjust it the way I can adjust any other image.

I can see that I can have fun with this. The “how to add” options include bright, dark, additive, and average. The number of exposures can be set also. I can decide whether or not to keep the originals as well. And to do this in the 1Dx brings me back to film days, but better.

And of course if you do not have a camera that can do this, you can do it in Photoshop. Have you ever done this? Can you find cool uses for it?

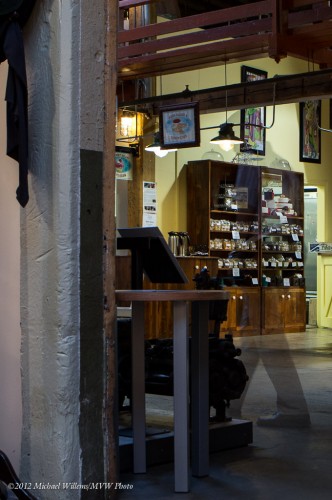
Here’s another one, a ghost.

Have fun making your own.


Why fast wide?

A wide-angle lens is simple to use, as you have amply read here. Easy to focus (“zero to infinity at f/5.6”), and easy to shoot at slow shutter speeds.

So why splash out on an f/2.8 lens instead of, say, a 3.5-5.6 lens, or an f/4 lens?

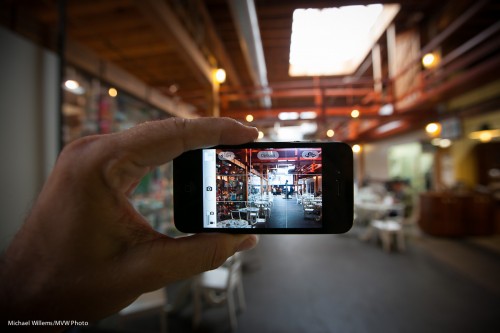
Precisely because it is so easy to get “sharpness all over”. What if I want blurred backgrounds? Like in this shot?

For that shot I held the iPhone as close at the 16-35mm f/2.8 lens would focus (namely, at 28cm from the camera). I used f/2.8, wide open, and that plus the close proximity to the phone gives me acceptable blur in the background. f/4 or f/5.6 would be a whole lot sharper in the background; in this case, that would be undesirable.


Trixie….

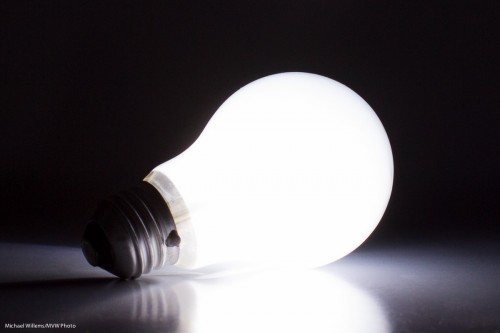
Okay, here’s a simple trick shot for you.

How did I get the bulb to light up without it being connected?

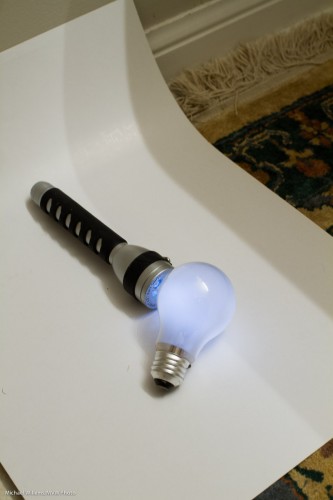
Simple. Like this:

I used an LED flashlight behind the (frosted) bulb. That makes it look like the bulb itself is lit. 6 second exposure, 200 ISO, f/5.6.

Sometimes “simple” is all it takes.


Lightroom and Products

Can you keep product shots simple?

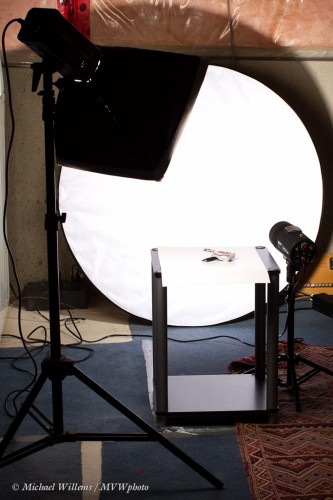
Sure. When I shoot products, I might, for instance, use a simple setup not unlike this:

That is a simple table with a white sheet for the product; then a reflector behind. The product is lit by, in this case, one light with a softbox; while the background is lit by a single light aimed straight at it. (To keep it simple, the lights are both fired by their slave cell; I fire a speedlight on the camera, set to manual 1/128th power, at the ceiling for this.) I use manual on the camera; f/8 at 1/200th sec (ambient light is completely dark with this setting).

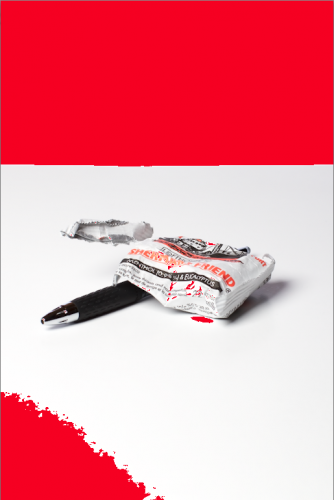
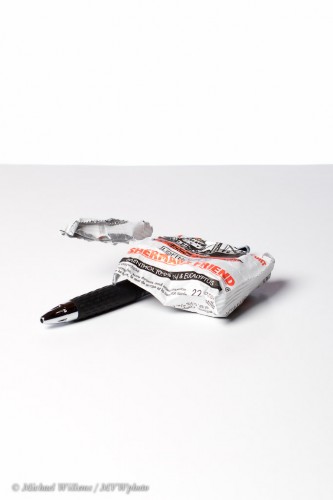
In order to remove any wrinkles from my background, and in order for it to disappear, let’s assume that (as often is the case) I want it to be completely blown out. Featureless. Like this, if I turn on the highlight warning in Lightroom:

Alas, by default Lightroom 4 protects me against myself. It stops me from blowing out the background and if there is any detail left in the background, I get it back, whether I like it or not! So the red areas will not show.

Silly choice, Adobe. I’ll be the judge of what adjustments I want, thank you.

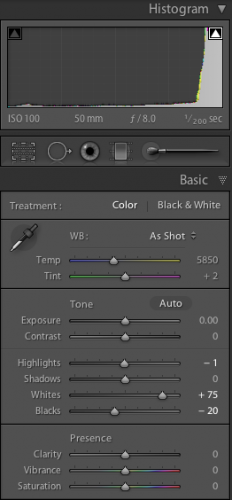
But there is a way to get back my overexposure: turn up “whites” in the Develop Module’s Basic pane:

In this case I had to turn up the “Whites” setting to +75 to get back the picture above (which corresponds to the way I saw it on the camera’s back).

I turned on the line surrounding the picture, else it would vanish into the page (which is why I overexpose it in the first place).

Another simple product option: I used a light table with a curved back, another option, today during the class I taught at Vistek:

Again, a simple solution: a speedlight connected to the camera via a cable, and a Honl Traveler 8 softbox on the speedlight. Everything handheld.

So yes, youcan keep product shots simple.


Summer Snapshot tips

Since the weather in Toronto is so beautiful, I though I would give you a few tips for the summer and snapshots.

  1. Be prepared: Battery charged 100%; lens cap removed; lens hood on!
  2. Expose the background properly – and often, to avoid blown-out skies that means slightly underexpose it. Then use flash, if needed, to fill in the foreground.
  3. You can also use a polarizer.
  4. Use the Rule of Thirds (look it up here if you need).
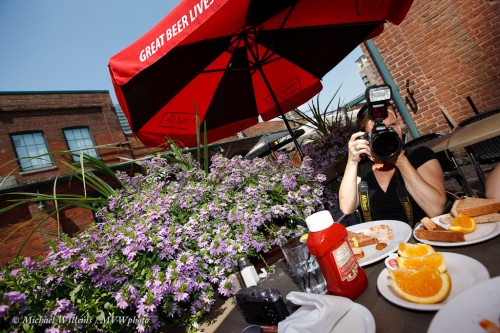
  5. Simplify your pictures. In the snap above, I am doing that by tilting. You can also do it by zooming in, getting closer, blurring the background, changing your position, etc.
  6. Consider wide angle lenses – 10mm on your crop camera gives you a picture like the above.
  7. For depth in your images, use that wide angle and get close to something. Anything. Even an orange.
  8. Think about your composition, not the tech stuff. That should be automatic.
  9. Always think: “where is the light”. This is a key question you should ask before you take any photo, every time.
  10. Have fun and shoot a lot, while always thinking these thoughts.

Now go out and take some snaps… reinvigorate yourself as a photographer. I may do the same today.


Stuff Tip, repeat

A repeat of a previous “Stuff Tip”:

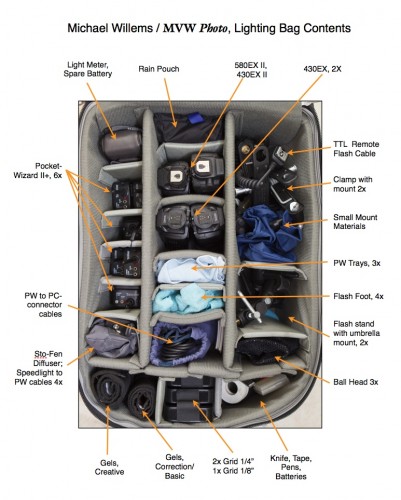
Make photos of your flash bags, then annotate these photos (and date them). Now print them. I mean a photo like this – here is my flash bag (yes, that is just my small flash bag):

That is useful for the following reasons:

  • A guide in packing before a shoot.
  • A guide for you and your assistant in packing up after a shoot. I have left items before, but not when I use a checklist.
  • Insurance cover: you never know when you have to prove what you own
  • Travel

Do it.. do it now and live more happily!


Flip

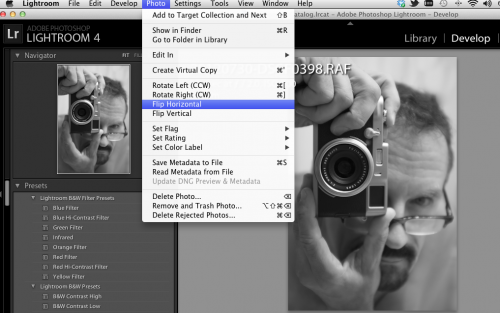
Quick Tip: When you shoot into a mirror, for your next Facebook avatar (go on, admit it, you’ve done this shot), then you get a mirror image – which is incorrect (eg you cannot read any text in the image, and faces look very different, since we are not totally symmetrical).

The fix is simple: in Lightroom, go to the DEVELOP module and use function Photo – Flip Horizontal:

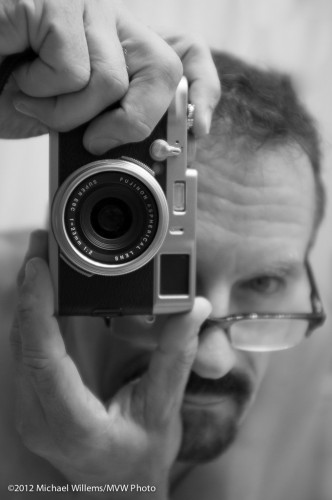
Now your image is true.

You can now read the writing on the front of my lens.


Close-up photography tip

Do I need a macro lens for close-up photography?

Yes. No. Depends. Depends, like so many things.

Often, a long lens will do well. As in this image, taken with my 70-200 2.8L stabilized lens:

And the next thing you need to ask yourself is: how large does the picture need to be? What is it for? A large poster, or a small print, or a web site?

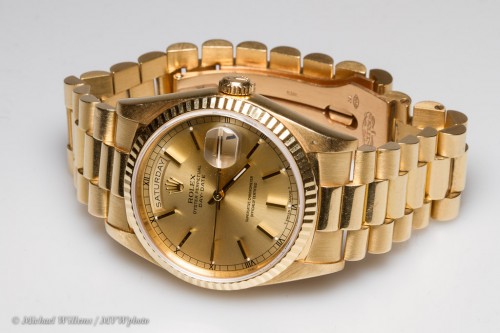
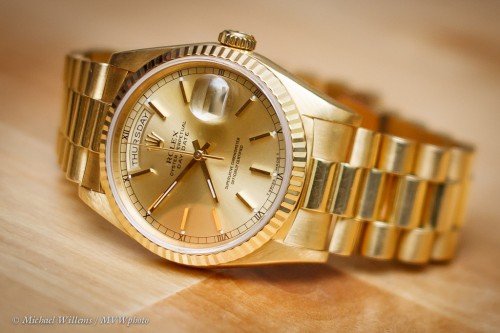
If the answer is one of the latter two, i.e. “not large”, and your sensor has lots of pixels, you can simply crop. As in this image I took just now with my 45mm tilt-shift lens on my 1Ds Mk3 camera, a full-size sensor camera. This is not a macro lens, so I cannot get close:

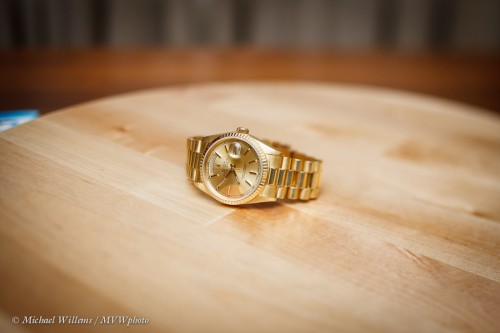
But because my camera has lots of pixels and this image was meant for web sites or smaller prints (like 5×7, say), I can crop down to just the watch, and I am still left with 1833×1222 pixels.  Even that is too much for this web site: when you click on the image below to see full size, you will see a large image on your screen that is downsized to just 1024 pixels across.

And that is plenty here. In other words, you may not need a macro lens!

A few more tips:

  • Clean the object before shooting. Every speck of dust will show
  • Use a tripod
  • Clean any remaining dust specks in Lightroom or Photoshop after taking the shot.

So… the obvious answer is not always the whole answer, or even the right answer. The world is not black and white; it is 256 shades of grey.

(PS: Isn’t that tilt-shift lens disgustingly sharp?)

Why you shoot RAW

One reason to shoot RAW is that it enables you to handle difficult situations, like those with too much difference between bright and dark areas, like this one, today at The Distillery, where I was attending my exhibit:
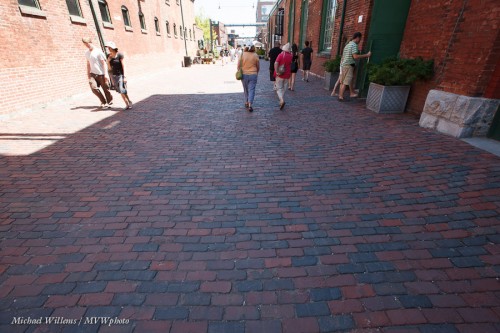
The shadow area is dark, the sunny area is way too bright.

Normally, when shooting a close-by object, I would use a flash for this. But with a wide angle like this, you would need a lot of flashes to light up the dark area. So, RAW to the rescue!

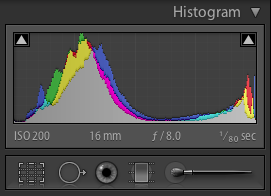
The original image look like this in Lightroom. The histogram shows that the bright areas are stuck right up against the edge:
And the original settings in the BASIC pane:
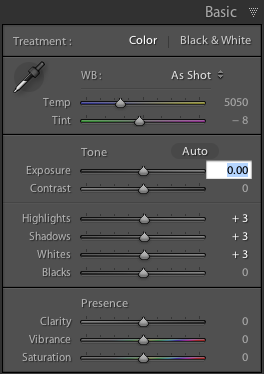
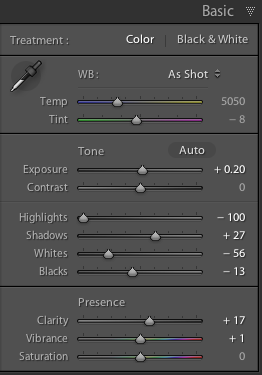
Fortunately, we have enough room in the RAW image to fix this: the bright areas have detail in them still. They may be overexposed, but they are still present in the data. So now we drag the bright areas down, thus changing the Basic settings to something more like this:
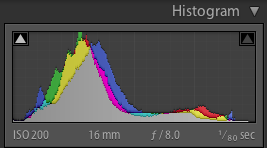
Which when you check gives you a histogram like this, much more like it – from dark to light without anything getting too close to the edge:
Which gives you a picture like this:
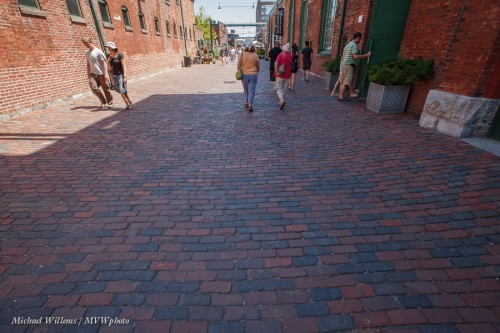
Simple, takes a second or two. This is a little like creating a HDR image from one file – which in fact is exactly what we have done here. The dynamic range in the original was too difficult for our camera to handle, but since it was only a few stops out of range, we were able to fix it in post-production.

I am not advocating doing this all the time – but sometimes, you have little choice. In those cases, expose to the right – overexpose the brights a little, because as long as it is just a little, you can fix the issue later.

How much is a little? I find that if I get some blinking (in the “blinkies”-view), I am good. Blinking is supposed to mean “no detail”, but on most cameras, blinking means something rather more like “watch out, you are getting close to losing detail here”. If the entire area is one solid black/white blink, then I have done too much to save. Stay clear of that and you can rescue the image. And Lightroom makes this very easy and quick.

One more image:
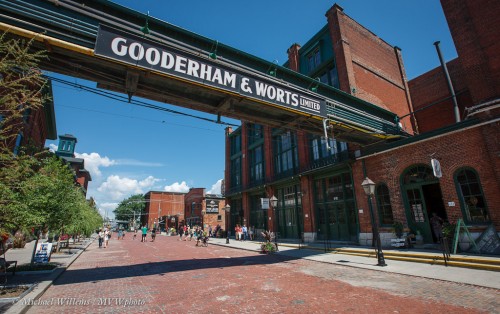
Incidentally, one reason to visit my exhibit (http://www.michaelsmuse.com), apart from the obvious one (to see my work and to buy an original framed print for your wall!), is that it is held in the Distillery District, one of Toronto’s most photogenic areas – it cries out to be photographed.

So bring your camera. I shall be there again tomorrow afternoon (Monday) – 1-5pm, come say hi. (Sssshhhh, don’t say anything: if I am at the gallery, and you mention reading this post to me, I’ll even give you a 10% discount on a print).

 

DOF in product photography

I was asked several times in the last few days about a previously made point (yes, since you ask: I repeat things quite frequently, since repeating is the way we learn – especially if, as I do, you explain in a slightly different way each time).

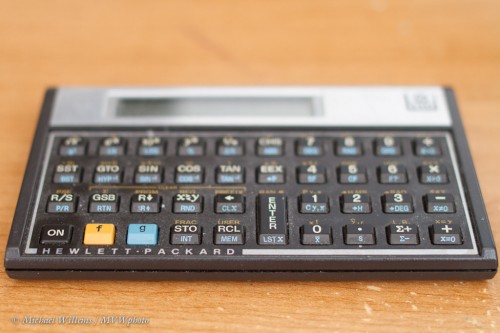
In product photography, you often want great depth of field (“DOF”) – i.e. everything is sharp from front to back. Like in this picture of one of the best calculators ever made, and shame on HP for stopping production: this is still the best calculator I have ever owned:

Oh, but we cannot see the calculator at the back. DOF is insufficient. Well, I suppose we could shoot at f/45 if our lens allowed it, but that would lead to slow shutter, fuzzy pictures, and might still not be enough even then.

So? The tilt-shift lens to the rescue. Resulting in this, at the same settings, including an aperture setting of f/3,5!

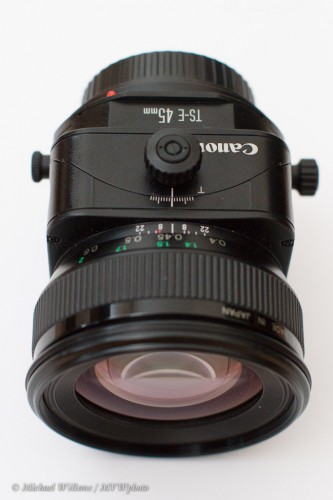
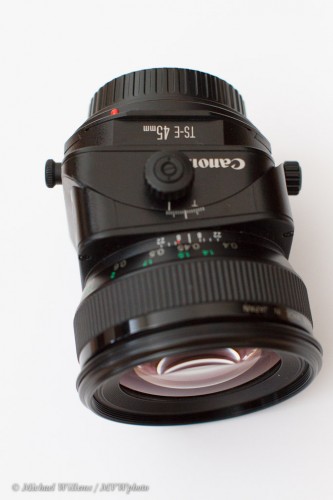
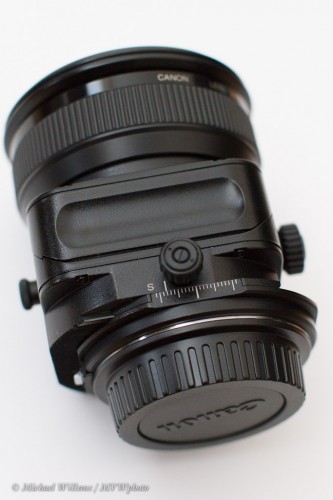
This is that lens:

It is a manual focus only lens that allows tilting, which moves the focus plane, like for the shot above:

And it allows shifting, for occasions where you point up or down or left and right, like in architecture, and you do not want verticals to converge.

It also allows turning by 90 degrees, so your tilting and shifting can be along any axis, horizontal or vertical or diagonal.

The last adjustment is interesting: unlike the DOF, this you could usually also do in Lightroom (or PS if you feel so inclined), but why bother if you can do it while shooting?

Tilt-Shift: A specialized lens, but invaluable (meaning valuable – the English language is illogical) for product shots. Real product photographers should own one, so if you need product shot and you do not own this type of lens… call me!