Yah man!

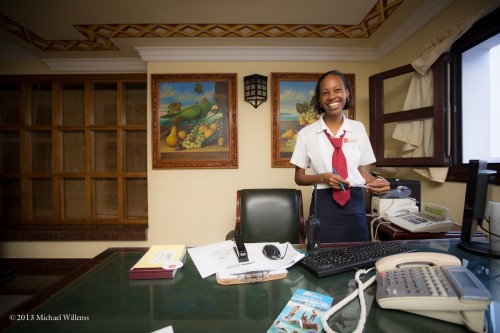
I am in Jamaica, to shoot Kristen and Dan’s destination wedding.

This week will be intense, and fun. Lesson one: bring, among others, a wide angle lens. Wide angles are easy (great DOF, slow shutter possible) and offer dramatic perspectives.

Lesson two: shoot a story. I have shot the happy couple since Pearson airport, and will continue until they land again at Pearson. Stories are much more gripping than random shots.

Jamaica is wonderful and the people are amazing. The Riu resort is good. My only drawback so far is that I had to pay $400 extra to get a room with Internet, and slow Internet at that, and handicapped (only port 80 browser. No email, etc, so I have to work around that). More costs extra. There goes my profit for the shoot.

But look for lots of travel and wedding shots. Until then: cheers!

Kids

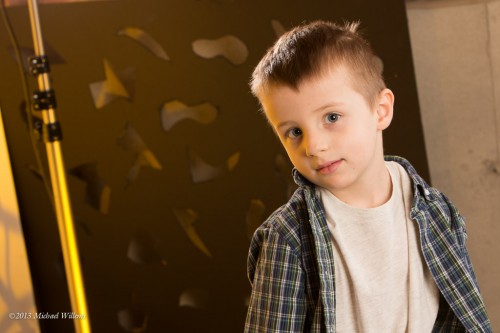
When shooting kids, it is important to shoot a lot of different ways, to see what will work. Take a lot, and see what works, then refine that. Best to use simple studio lighting. I try to engage the child in the shoot, allowing him, for instance, to choose some of the gel colours.

Here’s a few from that portrait shoot this morning:

Kids move, so a nice prop (like a stool, in the example above) is good.

Do not be afraid to get close and fill the frame!

Try desat or otherwise changed colours in a few images.

And try different positions.

Simple backgrounds are good, because the emphasis should be on the child. But I sometimes just change my position to get a difefrent background, like the grungy one here:

Bribery helps, too!

If you do not have a studio setup, use a prime (fixed) 50mm lens and larger aperture and 1600 ISO indoors in reflected light. Either way, you will end uyp with good images. Do it – your child is young only once. And do also consider going to a pro – if you come to me, I will teach you some useful photography skills while we shoot!


Tonight, a moment ago.

Snaps of the evening… my Bengals.

Mau:

And Shiva:

Meaning, grab your camera, and go shoot the things that are important to you! Because you will shoot things that are important to you. And also because you will practice shooting in low light. And you will practice getting composition right. And expressions. But mainly because you will shoot things that are important to you.


Ten Tips for Comp Cards

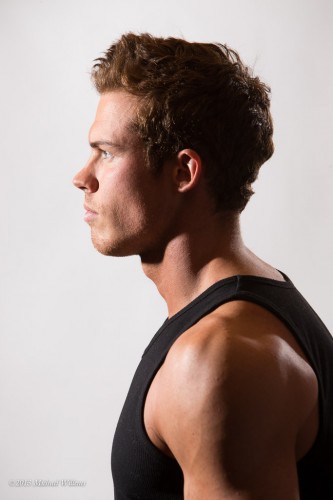
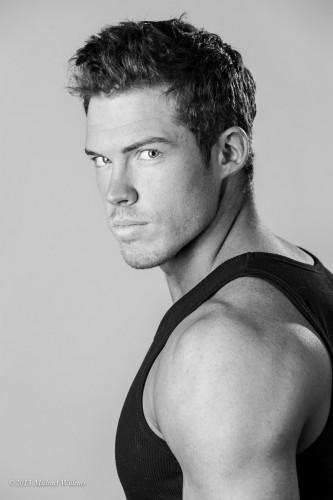
I shot a male model yesterday for his comp card (the hand-out that a model uses to get considered by, and used by, agencies and clients).

The key to a shoot like that is to do it well. It is usually a studio-only shoot that includes attention to make-up and hair, and involves various looks all designed to give a great overview of the person.

And here’s Ten Tips for Comp Cards:

  1. Include various looks – but mainly simple processing.
  2. Include a standard headshot.
  3. Include a three-quarter profile.
  4. Include a full profile.
  5. Include various outfits.
  6. Smiles as well as non-smiles.
  7. Simple lighting, as well as edgy lighting.
  8. Accentuate strong points.
  9. B/W as well as colour.
  10. Finish the images properly (the ones shown here are essentially unfinished).

A few more examples:

Fun to shoot, and essential to do well. Nothing kills a modeling career quicker than snapshots on the comp card, and nothing helps more than a great comp card, since it is the first point of contact.

(Yes, I shoot males too, and yes, I can shoot yours, if you like: contact me to learn more.).

Now preparing for my Jamaica destination wedding this coming week…

Be in control of your light

Look at the picture of Sam here, shot last night with the Nikon D4, using a single flash aimed straight at him:

Not bad. Yes, as you all know, direct unmodified flash can work fine – if the flash is not where your camera is.

And the background is nice! But that is a mere accident: the flash is lighting up the white backdrop, too.

But what if we did not want this effect for the background? Say we want it to be back, or to be lit differently, or to have colour?

Well then is paramount to keep the face flash off the wall. And we do this by fitting a grid to the flash:

The grid restricts the area lit by the flash – basically it just lights a circle straight ahead. So now we get this:

So now we have a dark wall. That does not of course mean we need to keep it dark, but now where and how we light is is under our control. We could do these shots:

If we had not used a grid to keep the initial background dark, we could not have coloured it.

The D4 with the Nikon 24-70 performed very well, by the way!


Brampton – come and learn!

There are currently some people signed up for the Sheridan College “Basic Digital Photography” course starting 22 April in the Brampton Campus of Sheridan College. But there is a lot of space.

And.. I am teaching it, so it will NOT be “basic”! 12 weeks of Monday nights, three hours a night, and I teach – and it is my own course. Truly amazing value. Come sign up, or tell your friends to.. it’ll be fun!

Students may register in person, by mail or online via the Sheridan home page www.sheridancollege.ca….click on Continuing Education, Browse by Area of Interest (a page of boxes), click on course link for e-store information. The e-store displays the course name, course code, course description, semester offerings, cost and number of seats available…if the student chooses to register online, they would then proceed to the shopping cart and pay by VISA or Mastercard.

Come join me for an amazing experience!


Photo Change, and Video Starter Tips

Here’s Brynn and her colleague from Photosensitive, preparing to video-interview me today for the Picture Change Project I will be part of (keep July 15 open, all!):

And this prompts me to talk a little about video today.

Vido on a DSLR is great. Better than with pro hi def video cameras of just a few years ago. As long as you take a few simple things in mind. Here’s my 10 starter tips for video on a DSLR:

  1. Do not focus during shooting. Focus, then leave it alone. Or if you must, then do manual focus, and practice the technique.
  2. Wide lenses make it easier.
  3. Avoid fast shutter speeds: they lead to unnaturally “shocking”, stuttery-looking video.
  4. Unless you are shooting an interview you should shoot short clips, usually. Say, 8-10 seconds.
  5. Shoot 2 seconds before, and 2 seconds after, each clip for fade in/out purposes.
  6. Get close-up, too, not just all-body shots.
  7. Avoid unnecessary zooming in and out or panning.
  8. Shoot “B-roll” frames too – the environment, the “establishing shot”, etc.
  9. Stabilize the camera. See the tripod here?
  10. Use photographic composition rules you already know.
  11. Use separate audio equipment. See it in this shot?

There. Start with that.. and leave lots of time for editing… at least three quarters of your shoot should end up on the metaphorical cutting room floor.


Dan’s The Man!

Congratulations to my client and friend, drummer and Jazz band leader Dan Bodanis, who at this weekend’s Photo Network Expo in Toronto won in the raffle, and not just anything: he won the free admission to this year’s Niagara School of Imaging, held at Brock University in August  – that’s around $800 in value! I am teaching there again this year, so I look forward to seeing you there, Dan, and it could not have gone to a nicer person. You’ll love the experience.

Here’s me, teaching at the EXPO in Maple Leaf Gardens on Saturday:
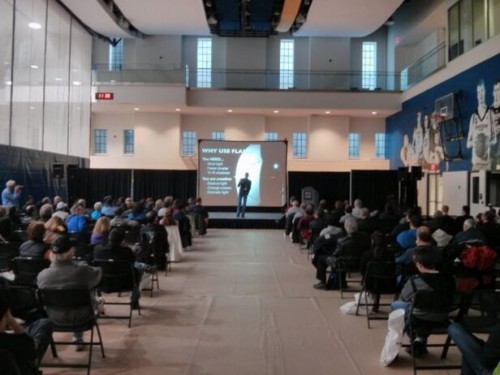
Are you, too, coming to NSI? People come from all over the continent: worth it, totally. Great teachers, great subjects. and a week with other enthusiasts (amateurs, emerging pros, and pros) living, breathing, eating and dreaming photography.

You can perhaps start by coming to my Studio Lighting course on Wednesday night in Hamilton? There’s still space: book now if you want to learn studio lighting.

I am once again mentioning learning, because learning photography is actually rather simple. If things are well explained, you will have many epiphanies. I love opening eyes, and more and more, I see how great it is when people “get it”. Like EXPO attendee Thomas B, who just now sent me this very kind email:

“Your presentation at the Photo Network EXPO was absolutely amazing.  Not only are you an excellent orator, clear and concise, but your instruction was seamless and logical.  I’ve done a lot of photography but almost exclusively with existing light.

I’ve recently acquired two Canon speedlites and have been somewhat dumbfounded as to how I would make them work for my purposes.  With your expert direction, I was able to experiment the following day and had considerable success.  It has motivated me to learn more.  I look forward to taking one of your courses.

[…]

You have completely demystified the flash for me.  Your lecture was like an epiphany.  The camera as a “light shifter”, what the shutters actually do at the different speeds and the fact that the flash is always 1/1000 of a second, regardless of what you thought it would be.  Impressive.”

I am posting this for no other reason than to stress my assertion that you indeed need to learn in a formal learning setting, with a good teacher, not just by reading articles or watching videos on the Internet. Come to NSI, do my courses on the way to then, do some coaching: you will be amazed at how quickly you learn.

So, the learning part. Here are ten learning tips:

  1. One thing at a time! Never mix subjects while learning. If you are talking about focus, for instance, then do not mix exposure or colour or motion blur into it. Solve focus first, then move on to the next item
  2. Break everything down into logical and consecutive sub-units. Only when you understand the first point, move on to the second point. You build a solution out of building blocks, as it were. This is where a great teacher comes in, and his or her good understanding of logic.
  3. Writing things out is good – but not at the expense of listening! Use a camera to snap the screen, perhaps.
  4. Follow your instructor’s logic. There’s a reason behind it. (See step 2).
  5. Class learning is about understanding, not about committing immediately to memory. You understand the logic of a subject in class; then you practice; and during this, your understanding deepens and you actually commit to memory.
  6. Never confuse “a function and how it works” with “the buttons you press to use it”. The latter is completely unimportant. That’s what manuals are for. It’s the purpose of a function that matters.
  7. After a course, immediately put a reminder into your iPhone calendar to review your notes one month, and then six months, after that course. Everything that has slipped between the cracks will click into place at that point.
  8. Follow the instructor’s advice. There’s a reason for everything he or she says.
  9. Learn the techie things: it will become apparent later why they are important. I assure you that, at least in my courses and workshops, everything you are taught has a good reason for you to know it, or it wouldn’t be in the course.
  10. Be as hands-on as you can. We learn by “muscle memory”, not by “being told things”.

Go on: become a pro shooter. You can do it.

Now back to my cats, who have just discovered that my custom-made furniture is very good for sharpening their nails, and is fun to climb onto vertically, by using just those nails.


Canon redux…

Aha! I can admit when I misjudged: Canon just called me – the Manager, Professional & Customer Service, no less – and they are taking it seriously – the sales guy did escalate my issues, and perhaps read the blog? They are now making arrangements for investigation/repair and loaners. I shall keep you all in the loop!


Cats are…

…nocturnal. I just realized that as my two new cats are waking up – at 1AM – and exploring through the house. Miao.Miao.Miao.Miao!

And that is yet another reason for fast lenses and high-ISO cameras. And especially for learning photography. It’s not difficult, but like driving a car, you need training. Call or email me if you are interested in learning, and I will outline all the options.