White Balance Discrepancy

A Facebook friend asked me this:

I shoot in Kelvin and there is something I don’t understand when I open my raw files up in LR. For example: I have a shot I took and I had the kelvin set to 6500 in camera but when I look at the temperature setting in LR it says the temperature is 5850. Why is this? I’ve verified that no presets are changing the temperature upon upload in to LR.

Good question, and let me explain.

First, the WB setting *is* stored in the EXIF file. Posts on the ‘net that suggest not are simply wrong.

here’s EXIF data from my RAW file:

And here, from my resulting JPG file:

The WB setting is stored, true. But what Lightroom tries to show is the actual look of the file. The WB number has to be interpreted, in other words. And Adobe does this by giving us its best guess as to what the image actually looks like. Don’t forget, colour rendition is complex (it involves colour temperature as well as tint, for a start).

So the phenomenon my friend describes is not a problem; it’s a feature. You can manually set it back to the exact setting your camera was set to, but this would not result in better photos; on the contrary, the quality would be slightly less, assuming you shot correctly.


Beginner’s Point

A beginner’s tip today.

You should usually focus as follows:

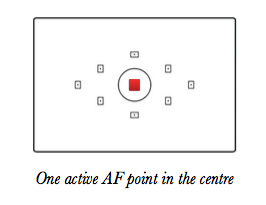
  1. Select a single AF Point (focus point), rather than have the camera select one or more from all available points. Set your camera to the mode where this is the case. You will see something like the illustration above;
  2. Ensure that your focus point selection is not “locked” with a switch on the back of the camera, as is possible on many cameras;
  3. Using cursor or control wheel, move that focus point to where you want it;
  4. Ensure that the focus point is on an object at the distance you wish to focus on (either on your subject, or on some other object that is the same distance away). Note that “an object” means contrast/lines;
  5. Press the shutter half way down, until you see or hear confirmation that focus is achieved (“the beep”);
  6. While holding your finger on the shutter, recompose if need be;
  7. Now press fully down to take the picture.

The mode where the camera chooses focus points often results in multiple points lighting up. Does this somehow result in “more focus” (as in, greater depth of field)? No! It simply means all those focus points found something at roughly the same (close) distance. It is still just that distance that is in focus.

The point is this, and the pun is intended: more focus point does not give you more focus.

___

Learn more from my e-books, including the just released book 7: See http://learning.photography to learn more. You should order now!

Another Lightroom tip…

In the Develop module, Lightroom has “Lens Correction”.

Its auto functions work very well. Usually setting profile on (tick) and auto to on (tick) is all I need to remove distortion.

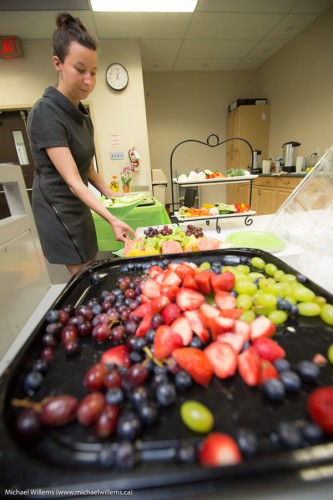
But it can do more. Look at this picture:

You know about not putting a person near the edges, and especially in the corners. Right?  Well, sometimes you have no choice, like in the picture above. 16mm lens, and no way to avoid person in corner.

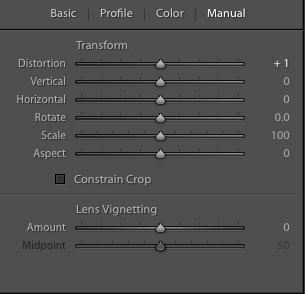
But now I go to Lens Corrections, the MANUAL tab:

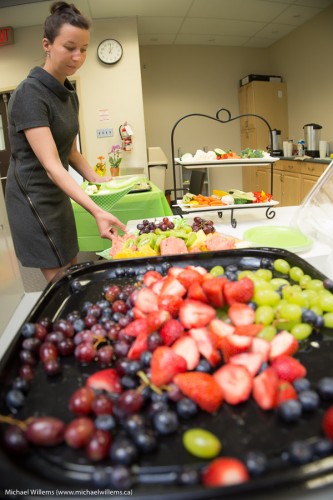
..and I drag down “Distortion” until the clock becomes a circle, and the face looks normal.

Not bad, eh!


“My first… etc”

I very often hear people who are a little ahead of themselves. They do paid portrait shoots before learning how to focus, that sort of thing. They do not want to learn formally, for instance from a course, or books, or seminars; and yet they expect the knowledge to come to them for free, somehow.

Wishful thinking, and you know it. So let me grab a few of these things by the horns. Starting with portraits. You are doing a studio portrait; you have a backdrop; but the rest is mystery. So your images end up:

  • Badly lit.
  • Under- or overexposed.
  • With a background that is sharp instead of blurred.
  • With the subject not separated from that background.
  • Out of focus.
  • With the background white, not coloured even though you use gels.

That is because you never learned the basics. But there is good news: studio portraits are simple. All you need to learn is:

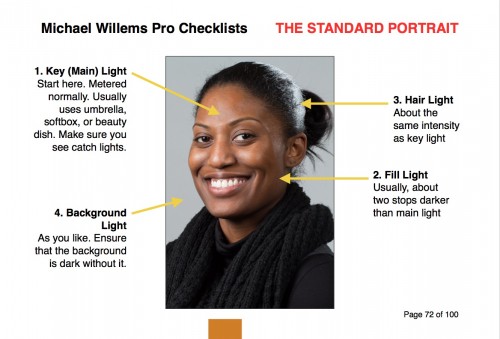
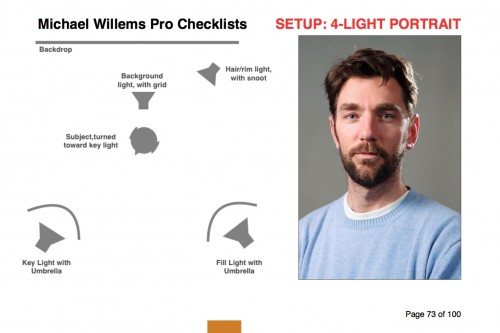
  • Lighting. A main light, 45 degrees away from subject. A fill light, same on other side. Hair light, opposite main light. See diagram, from my new book:

  • Exposure. Set your camera to manual mode, 1/125 sec, f/8, 100 ISO.
  • Turn the flashes to half way (obviously  the flashes are on MANUAL too).
  • Now meter the main flash. Adjust main light until it reads f/8.
  • Same for hair light.
  • Fill light: meter this to f/4 (i.e. adjust this light until meter reads f/4 when it flashes).
  • Background light: same as main light, again.
  • White balance to “Flash”.
  • Focus using one focus spot. Focus on the eye using that one spot.
  • Use a lens longer than 50mm. I prefer my 70-200 or my 85mm prime.
  • Move subject from background as much as you can. Then you can gel the background light. If, whoever, much of the normal light falls on the background, you cannot gel. Test this by turning OFF the background light: the background should be dark.
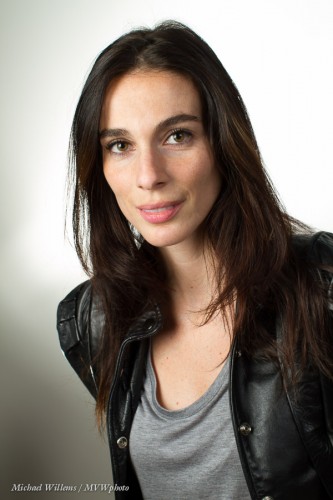
  • Turn subject toward main light, then head slightly to you.

Like this:

That really is all. Click., You have a competent portrait.

What you must not do is pretend that no learning is necessary. Go find a course, go buy my e-books; read this free resource www.speedlighter.ca; take private training; sign up at Sheridan College; : whatever you can do, do it now.

It really is simple. But not as simple as “I just bought a camera and next week I am shooting a wedding”—and believe me, I have heard that very statement more than once.


View

Why do we use an oldfashioned viewfinder instead of the screen on the back of the DSLR camera?

As you see, pros almost always use this viewfinder instead of the happy, large, bright, colourful screen on the back. Why?

We almost always use the viewfinder (when shooting stills, anyway) for various reasons. Some obvious, some a little less so.

The first few might not apply to everyone: they can be a matter of taste.

  • The viewfinder shows us the scene before the picture, while the screen in a sense shows us the scene after the picture.
  • The viewfinder, through its diopter adjustment,the tiny little wheel or slider right by where your eye goes,  can be set to your eyesight. That way, no need for glasses, as long as your eyes fall within a certain diopter range (-1 to +3, perhaps).

The rest are simple truths that it would be hard to argue with:

  • The screen sucks power out of the battery.
  • The screen is very difficult to see in daylight.
  • Wedging the camera close to your face (and yes, you need to touch it; that is why it has that cute little rubber bumper) makes it much more steady and stable than holding it in the air.
  • Focusing when using the screen cannot use the focus sensors, so must be deduced from the screen—which is a lot slower.

And there is one more reason,  but it is only important for men. When using the viewfinder you look like a pro!

🙂


Plus ça change…

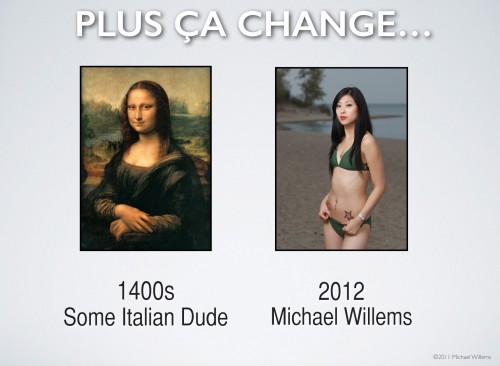
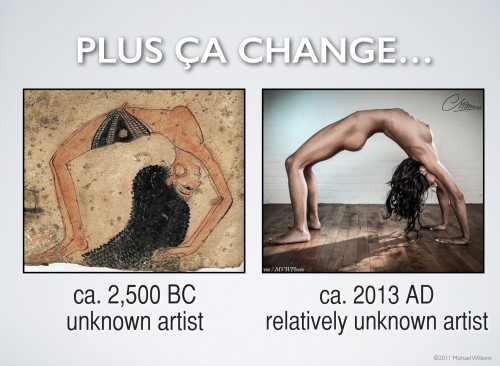
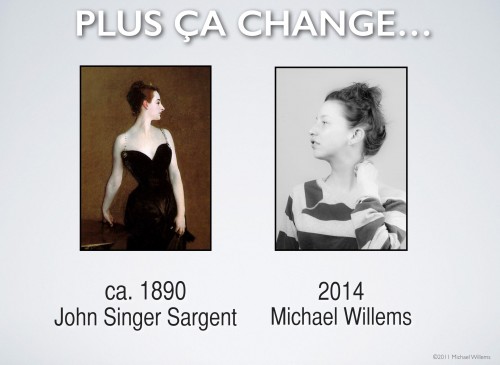
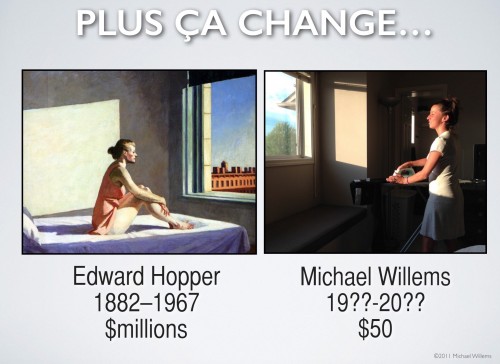
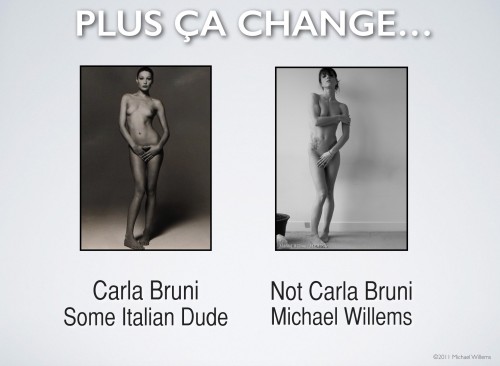
The more things change, the more they remain the same. In many ways, this applies to art, and I will give you a few examples here of mine on the right, and earlier art on the left.

We start in the renaissance:

Before you say it: “Some Italian Dude” was of course Leonardo da Vinci. Joke. But can you see the similarities?

Now let’s jump back another 4,000 years and we see this… and I swear I did not see the image on the left until after I had taken the one on the right.

Forward, now, to one of my favourite portrait painters: from the late 19th century, here’s John Singer Sargent’s “Madame X” and my friend. Again, the similarity, to me anyway, is striking:

And now to another one of my favourite artists, Edward Hopper. And mine. Somehow this too feels very much the same:

Finally, a comparison between Conte’s Carla Bruni and my model. The way she holds her body, shoulders, legs, feet: sooo similar. And no, he is not just “some Italian dude”: that too is a joke. Just before any literal thinker takes offense. Joke, everyone!

What is not a joke is that once again, several works feel or look similar, and not because of copying: my model had never heard of Carla Bruni. But in spite of this, she assumes the same body stance:

Art feels the same to people across the continents and across the centuries, even millennia. And that is amazing: truly a way of communicating.


What Triggers ShouId I Use?

I hear this question often. About lenses, cameras, flashes, flash triggers, and everything else under the sun.

Of course I cannot tell you what lens, trigger, or camera you should buy. All I can do is say what I do—and more importantly, why.

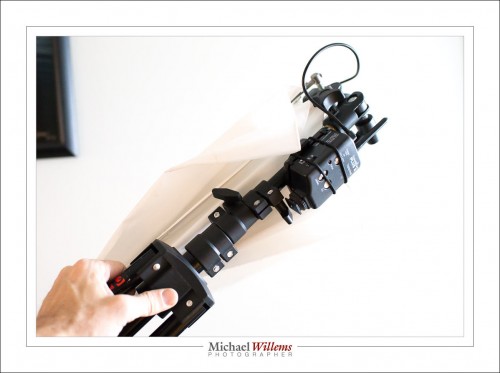
Here’s my standard light stand/umbrella/trigger combo, which is usually glued to me:

So here goes. Triggers to fire the flash: Which ones, why.

First: Light or radio? Do you need triggers at all? You can use either of these two methods, light (or infrared) and radio signals, to fire your flashes, i.e. to have the flashes “talk to each other”. I use radio, because I use OCF (off camera flash) outdoors as well as indoors. Light (CLS/i-TTL/e-TTL) can work great inside and gives you full TTL, but needs a good light path. That is not always available outdoors, and bright sunlight can be tricky, too. So: radio. (If I have all Canon 600EX flashes, I can also have them talk to each other radio to radio without any additional equipment).

Then: TTL or manual? I like both, but whenever I have the chance, I go to setting flash power manually. So I need only manual radio triggers.Not the more costly and less reliable TTL versions. There are other advantages to doing it manually, too. If you set flash power manually, you will have consistency: provided the subject is in the same place, every exposure will be as good as the first one. You will have fewer errors: the subject’s brightness, reflections: none of these can upset your photos. The third advantage is that if you use manual, your flashes can be any old cheap model. Any flash that can be set manually and whose auto-shutoff timer can be disabled. Any brand. Canon, Nikon, Vivitar, mixed: it really does not matter. This caves you a lot of money if you want to use six plashes (I have six and frequently use them all!).

So OK… we have apparently decided to use manual-only radio triggers. That leaves the third question:

Which ones? There’s lots on the market! And for that I use Pocketwizard PlusX triggers. Pocketwizard is an American made trigger. It uses AA batteries. Sender and receiver are the same. It’s easy to use: on/off and channel are the only choices. The LED flashes green to indicate “on”, but turns red when the battery is almost depleted. The Pocketwizard is fast enough to not steal too much time: some cheaper triggers are slow, so your sync speed ends up being 1/200 or 1/160 or sometimes even 1/125 instead of 1/20 sec. And above all, these Pocketwizard devices are sturdy and pretty much an industry standard. If I asked around, the room would have multiple photogs with the same triggers, and if one of mine broke I could easily borrow one off someone else. That, for me, is an overriding reason.

Your reasoning may validly vary. Use Yongnuo, or Cactus, or Crocodile, or whatever cheap trigger you like. If they work for you, they work. That’s just fine. But I prefer to stay with a sturdy workhorse, the Pocketwizard. (And no, they’re not paying or rewarding me in any way to say this. On the contrary: I keep offering to test new devices for review here, but they do not always answer…)


Flash Method

Today’s excellent training in London, Ontario, reminds me of a few things.

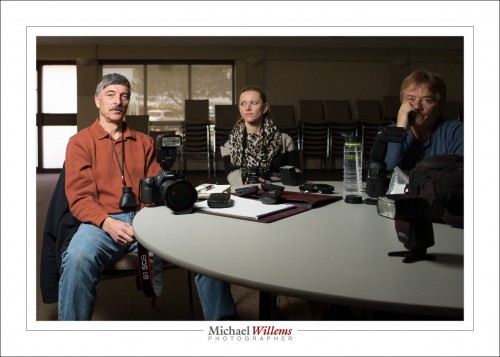
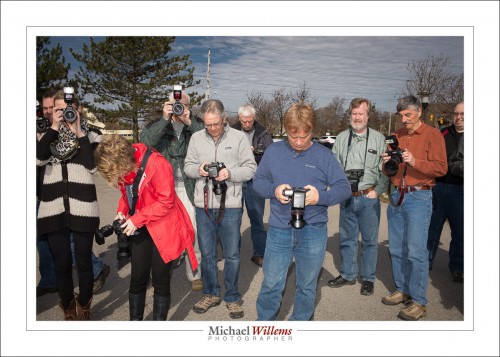
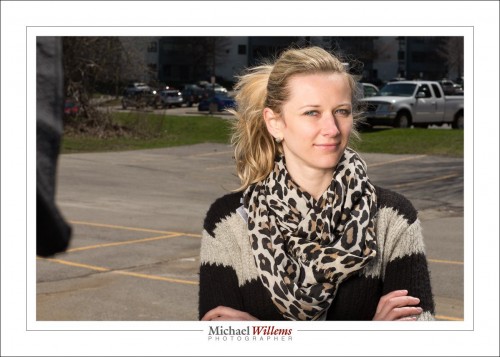
First, a photo or two from the day:

As a result of today’s training, a few simple reminders come to mind:

ONE: Make sure your auto ISO is OFF at all times

TWO: Make sure your lens is set to autofocus

THREE: Make sure that the lens is securely screwed in and locked.

FOUR: Make sure you have enough power for the shot, given your aperture and ISO, For an inside flash photo where you are bouncing, this can be problematic. So you can set your camera to 400-40-4 (400 ISO, 1/40 sec, f/4) , but before you take the photo, you should:

  1. Set your flash to M (manual).
  2. Set its power to full (100%, or 1/1).
  3. Take the photo.
  4. If you now see a clearly overexposed flash portion of your photo, good, carry on: go back to TTL flash and take your picture. If, however, you do NOT see clear overexposure, then either increase your ISO or decrease your f-number, and repeat.

If you follow those four simple steps, your photos will be better, more successful.

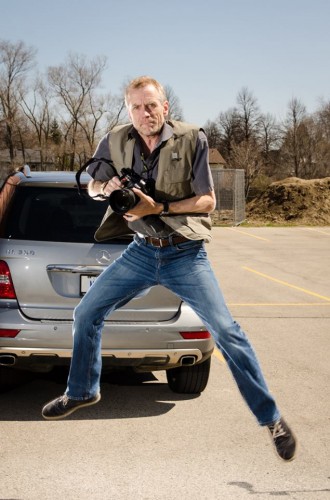
And I leave you with “me”, today, by a kind student:

(Want a course like this? Contact me any time,. These courses are enormous fun, both the theory courses and the practical follow-up we did today).

LR, Video, Flash: Learn Remotely

Lightroom 6 is out, and you need it. The End.

OK, not quite the end, but Adobe Lightroom 6 is an amazing workflow and editing tool, and no, you do not need to do the edits in Photoshop: you do almost all of them in Lightroom, as I do. Read yesterday’s post about some of the new features, and there’s a lot more. More description soon.

But how to learn it? It may be great and earth-shattering and all that, but most of us do not just intuitively learn a complicated app simply by playing with it.


Learn Lightroom Remotely:

Well: now there is a better way: I can teach you remotely. Using Google Hangouts, I can show you, and we can set up your workflow, edit photos, create cool presets: while we use the computer together. You see me; I see you; you hear me, I hear you; and we see each other’s desktops.mIt really is almost as good as being in the same room together. Whether you are next door, or in Australia (literally).

This method works so well that I have also started teaching video editing the same way. For my usual teaching rate I teach you individually. All you need is a reliable Internet connection, and preferably a computer with a built-in camera, speaker and microphone.

You see what I do, or I see what you do, while we talk and see each other as though we were in the same room. You will be amazed at how much more quickly you learn with this method.


Video Editing:

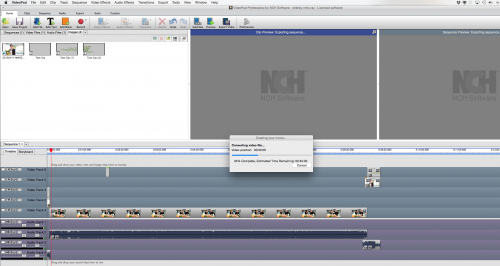
I also teach video and how to create video with a digital SLR. Here’s my desktop an hour ago, as I am creating a video export, combining video, audio, pictures, text, and royalty-free music, with a client:

This, too, lends itself very well to teaching remotely using Hangouts.

Pick up your phone and give me a call and from Lightroom to Video to Flash, I will teach you how it all works.  This, too, comes with my usual Full Happiness Guarantee: If you are not delighted, money back. It’s never happened, but if it does, I will honour my promise!


Finally: The Pro Checklist Book! IT WILL BE MADE.

Whether the Kickstarter campaign is successful or not (and you have about 12 hours left, if that) – the printed version of the new “Pro Checklists” book WILL be made. So in the last minutes, please go to Kickstarter (link HERE) now and support this print production, and at the same time benefit from interesting and fun rewards.

If the campaign fails to reach target, I will contact you individually, and I will honour the campaign promise, because come what may, this checklist/best practices book of charts and one-pagers will be made. Print quotes are rolling in as we speak!


Back to work, for me. No rest for the wicked, as they say.  —Michael

Lightroom 6

Yesss… Lightroom 6 is out. And that is a reason to rejoice.

After a complicated upgrade (I had real trouble finding the “buy it as an app” option: Adobe really wants the extra revenue of the Creative Cloud, so it pushes you there), and after a subsequent day of converting catalogs (my one catalog contains a quarter of a million photos) I am playing with it now.

Cool.

First, the feature you do not see: speed. Reports talk of a significant speed increase. I have not seen a giant difference, but based on reports, I am sure I will. It sure is not slower. Faster is good.

Second, the one feature that was cool in iPhoto (now: photos): face recognition. It has now been added to Lightroom, and it works well.
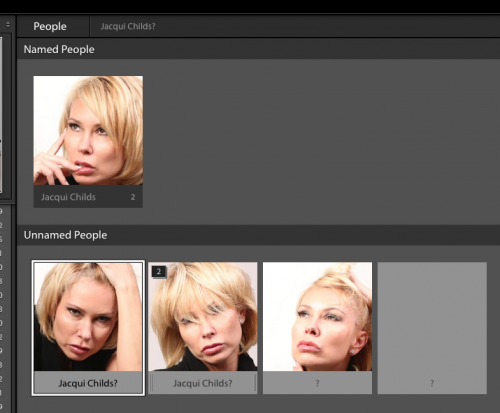
The feature is intuitive: I have not had to read any sort of manual, so far. Lightroom recognizes where faces are in your pictures, and it guesses who they are with an amazing degree of accuracy. You start it; it identifies faces; you conform its guesses or correct it and name the people, and you are done. I did 2015, and am now am doing the preceding years. It will take me a while, but it’ll be well worth it.

Another new feature: HDR, “high dynamic range”. You are now able to take a photo multiple times (2, 3, 10, whatever) with varying exposure, and pull them together into one HDR image. Gone are the days that dynamic range was something to worry about. Select the various photos, do some settings, like deghosting (see below), and you are done.  Lightroom creates a new images named …-HDR.dng: a full DNG. Finally, a good use for the DNG format. And much better than creating a JPG.
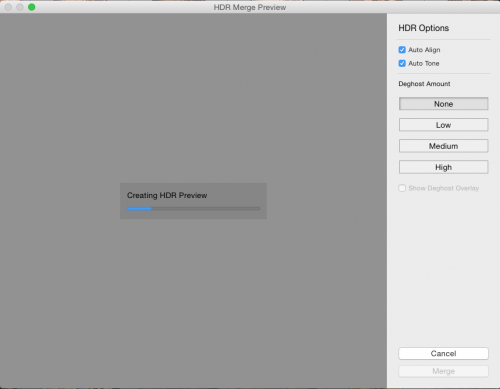
Next: Panoramas. You can stitch together pictures that lie beside each other into one wide panorama. Another feature that until now needed additional software. Both Panoramas and HDR appear in a new PHOTO option:
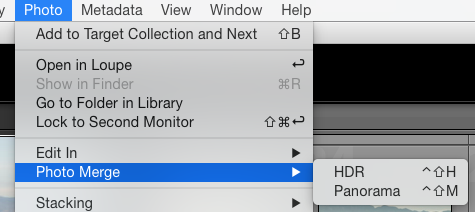
So now you choose “Panorama” and wait as it is built in front of your eyes. You even have an “Auto crop” option: marvellous. And again, a huge, excellent file is built in front of your eyes, as it were. And again, it is a .DNG file, a huge advantage over other software, that creates JPG files. And look what I just created: the city of Las Vegas at this size:

Yes: 25,000 x 3412 pixels. That is, an 85 Megapixel DNG file. Wow!

Here is a small version, “just” 5,000 pixels wide, that I deliberately saved with a logo and at that “small” size and with high compression, i.e. low image quality (it is, after all, a copyrighted image). It still shows the point very well though when you view it at full size. Go ahead and view at full size:

Fantastic, no? I will be doing this all the time now.

I see all sorts of other advantages and incremental improvements in version 6.

Let me give you just one cool little timesaver. To use the entire dynamic range of your image, take a grey, low contrast image, where the bottom end of the histogram does not reach “0” (the left end) and the top end does not reach 255 (the right end) (i.e. the blacks are not black and the whites are not white).

Now, in DEVELOP, in the BASIC module, shift-doubleclick on the words “Whites” and “Blacks”. Lightroom automatically drags blacks down and whites up until you are using the full dynamic range from 0 to 255. Cool, or what!

In the next little while I will document some more of these advantages and tricks, but for now, let this be enough reason already to upgrade. Enough reason by far. Have fun!