400-40-4: When To Vary

Regular readers all know my “400-40-4” setting for inside flash. The “party setting”, as I also call it.

  • 400 ISO, 1/40 sec, f/4.
  • Flash bounced.
  • And white balance set to “Flash”.

Easy to remember; fits only one way. And it makes nice photos: well lit subject and warm background. Like this:

But remember that this is a starting point. And starting point implies that changes are necessary now and then. Or perhaps frequently.

So when do you need to change?

First and foremost, when you have insufficient flash power. When the ceiling is high, or the wall you are bouncing off is dark, or you need a very bright flash portion of your image with lots of flash compensation, or the room’s ambient light is very low, then you will will need to change the settings. In this case you can lower the f-number or, more usually, increase the ISO.  Set it to 800 or 1600 and try again. This is rather common.

TIP: One way to know quickly if this is the case in the room you are in: set your flash to manual mode, full power (1/1). If it is still too dark, you have insufficient power. Depending on how dark, select 800, 1600, or 3200 ISO, and try again. Once you have an overexposed picture you can go back to TTL mode.

Note that when you increase the ISO, the background gets brighter. If the reason for changing to a higher ISO was a dark room, this is fine. But otherwise, you may need to also select a faster shutter speed to fight this. Watch your ambient light meter: you are aiming for roughly –2 stops. If, say, you go from 400 to 1600 ISO, you need to change the shutter to 1/160 second to keep ambient exposure the same.

You may also need to change aperture when you need more, or less, depth of field. In that case, set it as needed. You can then change ISO to counteract the exposure change you made: e.g. if you go to f/8 to get more depth of field, go to 1600 ISO to get the same ambient exposure.

So, summarising:

  • Start at 400-40-4. Be ready to go to 800-40-4 or 1600-40-4.
  • If the reason was “low ambient light in this room”, that is all you need to do.
  • But if the reason was “low flash light”, be ready to select a faster shutter speed to keep the background the same brightness.
  • If you vary the aperture, the same applies: you may need to vary the ISO to counteract the aperture change and keep exposure the same. ISO Affects

Is all this complicated? Not really. Just remember your exposure triangle, and be analytical (as in “WHY am I changing this variable or that variable”). And remember: practice, practice, practice.

___

Don’t forget to get the flash book from http://learning.photgraphy. And if you want real, in-person teaching, then a short private training session with me, in the same room or via Google Hangouts wherever you are in the world, is just what the doctor ordered. Contact me via email michael@mvwphoto.com or phone +1 416 875-8770 to hear more!

 

Do it now

A note to those of you who want to learn things—some time soon.

My advice is to do it now. Often, that’s the only way to get things done: do them right now. Not “some other time”, since that never arrives. Tomorrow is always just out of reach.

Learning photography is easy. There are many ways to do it. They involve books and training (see http://learning.photography), but they all also involve doing it.

Like the relationship between depth of field (“how blurry is the background) and distance to your object. The essence is to try it without varying anything else. For example, look at the background. Is the whiteboard fuzzy or sharp?

35mm lens, f/2.8:

35mm lens, f/2.8:

35mm lens, f/2.8:

All I did was vary the distance. The board gets blurrier as I move forward. (The smile gets bigger, as well, did you notice? Nothing like poking a camera into someone’s face to get a smile—or to get beaten up).

So f/2.8 can give you a very blurry background, or a blurry background, or a sharp background, as long as you change the distance. You could also try leaving the distance the same but varying the lens focal length (by zooming in) or the aperture (remembering to adjust ISO to keep exposure the same).

The key is: do it. Don’t just think about it. Grab your camera (now!) and learn the relationship between aperture, ISO, shutter, focal length, and distance.

The same is true of the learning thing. If you had been thinking of booking some private learning time, or of buying my books, do it now, so your next shoot (even if it is for March Break) will be better. You know my number.

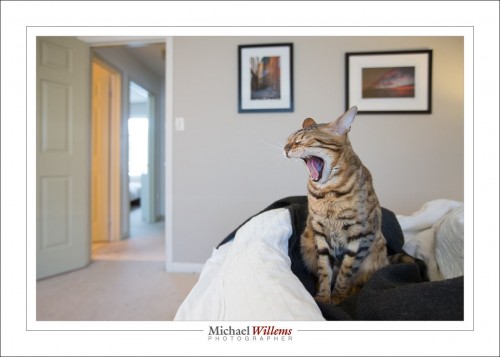
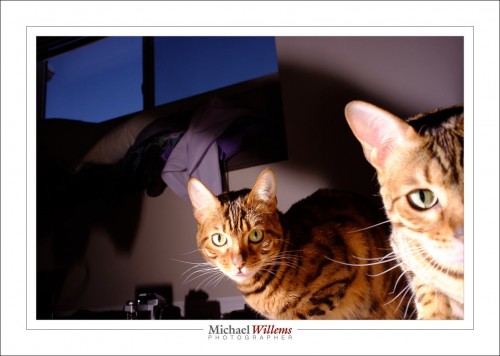
And to finish: one more tip. If you always have your camera at hand, you lose nothing. Like the cat yawning, this morning:


Challenges in a

I shot portraits yesterday. Some were headshots. These are sometimes challenging because you want to get great expressions out of people who are not professional models. Saying “smile” doesn’t do it.

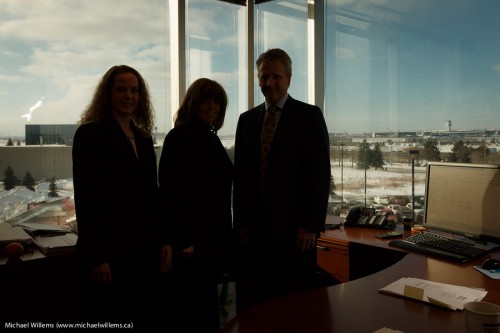
But then, even more fun, the environmental portraits. And these should be storytelling pictures. With good group composition.  Three colleagues:

In these, as you see I like drama, so I expose for the outside. 100 ISO, 1/100 sec, f/8. Why not the usual 1/250 sec? Because that would have meant f/5, and in this case I wanted f/8 for DOF.

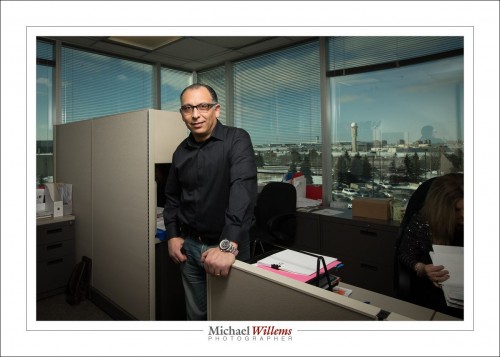
The story is to do with the airport, of course. And individual shots are easier: see my friend and assistant Maged yesterday as I was setting up for the shot.

Nice wrap-around light from an off-camera umbrella.

Here, another one:

The biggest challenge? The flash has a big umbrella. This is visible in almost every picture as a window reflection. And it lights up the ceiling: ditto. And I needed an angle that shows the radar tower. So in the event, I moved left and right, up and down, back and forth, and I made the light and the subject do the same, until I finally had one angle that had sufficient light in the subject and that had no umbrella showing, and only acceptable ceiling reflection. It’s always possible: I learned that long ago. But I also learned that it’s always a challenge. So: persevere.

Why not do without an umbrella?

That’s why!


The Prime Requirement…

…of a photo is that it should be simple. That is:

Anything that is in the photo is in the photo because it needs to be in the photo; else, it should not be in the photo.

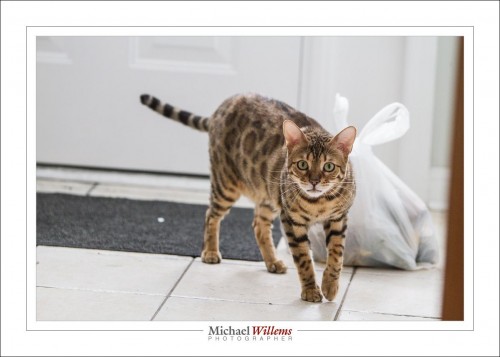
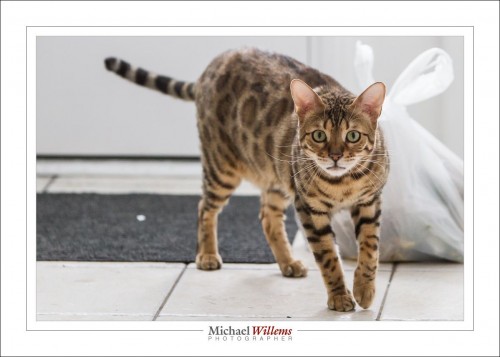
Take, for example, this shot of Shiva:

Mmm. It has potential, but it’s not straight, another big no-no, and it could be cropped tighter. That way, we get more emphasis on Shiva and we simplify: we lose the doorpost on the right, the door panel elements on the left, and various other “stuff that doesn’t belong”. And every non-needed element that you take out of a photo makes it better! So we get:

Much better. But the first thing my eye is drawn to is that white piece of paper on the mat. Can you see it? It is almost all that I see. So… healing brush, remove! The same for the black piece of dirt in the foreground.

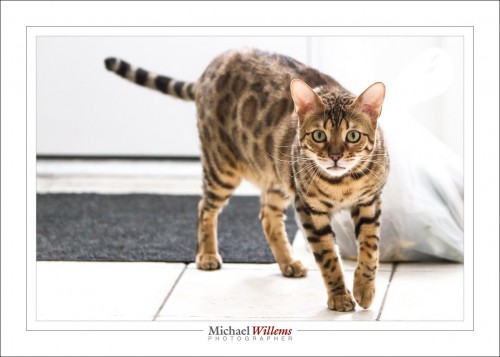
Then, it’s a little dark, so let’s brighten it. That has the additional effect of removing much of the garbage bag.

And now we have the final shot:

When you compare that to the original first shot you see that simple changes made this image a gazillion times better. And that is the official term for it.

Cropping is a major element of my changes here, and cropping/rotating is, as far as I am concerned, allowed.

___

Learn all this and more in my e-book collection. In six e-books, you learn pretty much everything I know. See http://learning.photography for more information, tips and tricks. See you there!

x100: Can you see a theme?

Regular readers will see that the last few days, I have been shooting with, and talking about, the Fujicolor x100 camera that I carry:

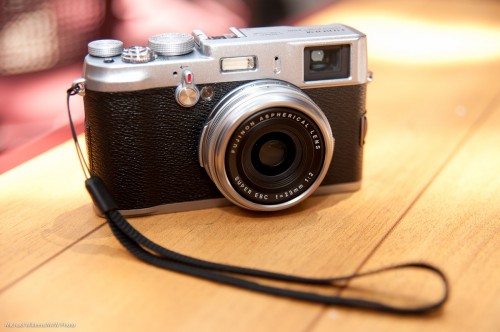
Fuji X100 (Photo: Michael Willems)

The theme has been: given the right light (e.g. flash!) and the right techniques, you can take professional pictures with it that are as good as those taken with an SLR. This is almost straight out of camera (a crop and a few dust spots removed):

Now while I am not recommending product shoots with the x100, this goes to show it can be as good as an SLR.

But now let’s take it a step farther. It can be better.

Yes, better. And here’s how:

I just took that picture at 200 ISO, f/8, 1/1000 sec. That makes for that nice, dark sky.

Wait. Did he just say 1/1000 sec, one thousandth of a second? That is impossible since the flash sync speed of 1/250 second limits the shutter speed you can set the camera to when using a flash. Right??

Wrong. The x100 has a leaf shutter. And it allows flash up to 1/1000 second. And as said, that is why that sky is so wonderfully dark. It is in fact noon and it looks bright to my eyes. But 1/1000 sec makes it dark. Two stops darker than my other cameras could have done!

But he could have done that with aperture, with a higher f-number. Or with an ND filter.

Nope. If I had, I would have run out of flash power. The flash needs to get through that filter, or through  that small aperture, and it is not bright enough at higher apertures, especially when a modifier is being used.

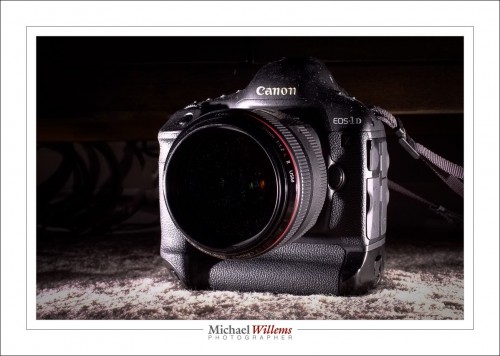
So the x100 may be small, but it can do things my $8,000 1Dx cannot do. Just saying!


Dot by dot

Have you ever looked in front of a projector as it is projector? What do you see?

What you see is little white dots of dust floating through the air. Lots of them. Dust everywhere. Normally invisible, but visible under bright light.

And that is exactly what happens under bright light when you take close-up shots with a flash.

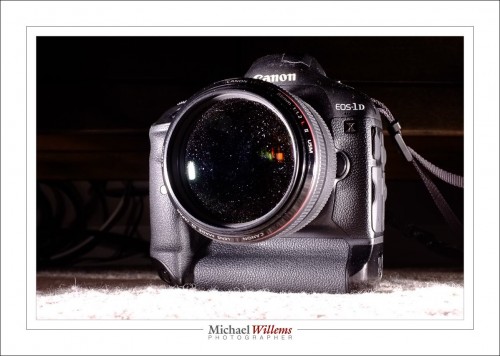
And as I pointed out yesterday, this needs a lot of work to remove. View this at full resolution (click through until you see it at maximum size) to see all the dust spots:

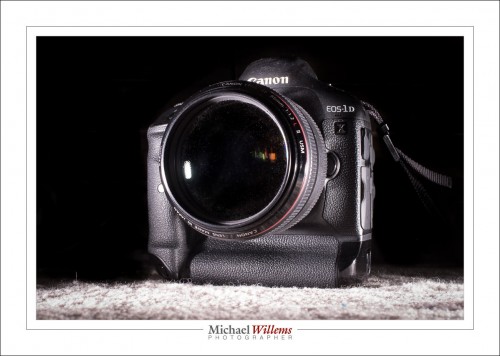
And this turns into this after a lot of manual work:

And I mean a lot of manual work. Here’s the healing brush tool and what I did with it to produce the image above:

The moral of this post: As I said yesterday, it is well worth cleaning objects before you shoot them: otherwise you have a lot of work, and work like the healing brush work above will cause Lightroom to run out of memory and other resources.

___

Want to learn all the cool tricks of Adobe Lightroom? Or the use of flash, so you can use a little camera (or your big DSLR) to take shots like the above? Contact me (michael@michaelwillems.ca) and I will help you. In person, at your location or mine; or through Google Hangouts, wherever you are in the world. Worth every moment of your time, I promise. Photography is an amazingly fun and rewarding endeavour, whether as a hobby or professionally.


Crispness

I like crisp images, like this one I just took of one of my toys:

You see, here’s my floor, with that toy, using available light:

Nothing wrong with that, but I prefer more crisp sharpness, more contrast. Like the sharpness flash gives you:

I took that picture purely to illustrate how to take this picture, Namely, with a Fujifilm x100 camera (which has an APS-C sensor) with a Pocketwizard on the flash hotshoe and “external flash” enabled. The camera was set to 200 ISO, f/8, 1/125 second: standard studio settings. Two flashes, one on the right at 1/16 power; one on the left at 1/4 power, fitted with a 1/4″ Honlphoto grid:

When you click through to view these at full size, they are good.

View that full size and a few things may occur to you. Like “remove dust with brush and blower before taking any close-up flash shots”. And “a small camera, like the Fujifilm x100, can make excellent, sharp, crisp photos when you use it well”. But especially: “flash is one way to make photos crisp, both in reality and in perception”. Reality, since the flash lasts only 1/1000 sec at full power, and therefore 1/4000 sec at quarter power”; hence, there will be no motion blur. And perception, because exposing to the right (i.e. brightly) and with lots of contrast makes things crisp.

Look at this image full size:

There you have it: sharpness. just one more advantage of using flash.


East of Toronto

Good news for those of you east of Toronto: The Durham Region gets its own specials in Whitby.


They are:

  • April 11: Camera Skills for the Emerging Pro”, Half Day Special
  • April 12: The Efficient Photography Business (Intermediate)
  • April 18: “Introduction To Flash” All Day Special
  • April 19: “Flash In Practice”, All Day Special

These four courses are for committed amateurs or emerging pros. And they come with special prices for the books, also. See learning.photography/collections/training-misc for details and booking.

Book now: each course will go ahead if we get enough people, and there is strictly limited seating.


Expose

A student told me today that she had issues with shooting in manual mode. Especially, she says, in difficult circumstances.


Well, here is my answer. Yes, it is tough. “Less than ideal circumstances” is as much of a problem for me and everyone else as it is for my student. That is why we buy expensive lenses (low F-numbers let in more light; expensive cameras allow very high ISO values, and so on). Perhaps my student found it tough because it is impossible with her equipment.

But the principle of exposing right in manual mode is still simple. If it is too dark in your photo, you can do exactly three things (apart, of course, from turning on more lights). Same for my student as it is for you and for me.

1. Increase the ISO
Drawback: more grainy pictures
Limit: your camera only goes so high
What the pros do: buy an expensive camera that works well at high values

2. Lower the F-number
Drawback: you get less depth of field, which sometimes you want.
Limit: your lens only goes so low.
What the pros do: spend lots of lenses with low f-numbers

3. Slow down the shutter
Drawback: you get motion blur in your photos.
Limit: anything slower than, say, 1/60 sec will give you motion blur.
What the pros do: not go too slow. Or use a tripod..

So if your picture is too dark, you just have not gone high enough (iso) or you just have not gone low enough (f-number) or you just have not gone slow enough (shutter). Not difficult.
And you can use a trick! Let’s start with that trick.

  1. Go to PROGRAM Mode (P)
  2. Press the shutter slightly so you see the chosen aperture, shutter speed, and ISO
  3. Write those down.
  4. Go to MANUAL mode (M)
  5. Enter those values for ISO, aperture, and shutter.
  6. Now start varying from there. See what happens when you vary each of the parameters.

It really is as simple as that to get a good starting point. And you can also get good starting points for the variables. Like ISO: 200 outdoors, 400 indoors, 800 in tough light. Or shutter: keep above 1/60. Or aperture: open up indoors (low “F”), and stop down outdoors (high “F”).


The inverse square law

As you all know, the inverse square law states that light gets weaker in proportion to the square of the distance.

So at twice the distance I get one fourth of the light. At three times the distance, one ninth of the light. And so on.

Good. So if I aim a flash at an object at one metre and get good exposure at f/5.6, then at two metres distance I expect two stops less light, i.e. f/2.8, two stops more open (i.e. 4x more light).

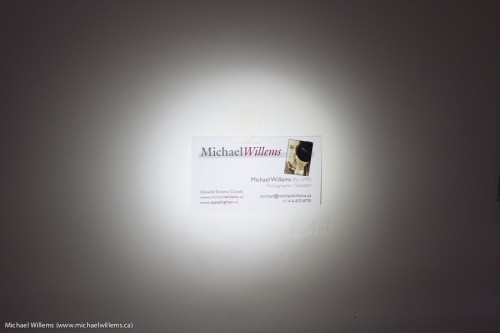
Let’s see. First, let’s use an LED flash light. At f/5.6:

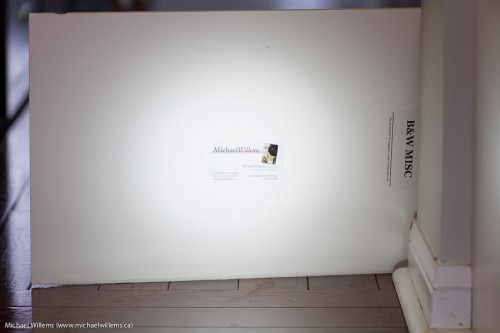
Now when I move from 1m to 2m and make the aperture f/2.8, it should be equally bright:

What gives? It’s brighter! Only by reducing the exposure 0.5 stops do I get to the same brightness (as verified with the histogram, and looking only at the lit part):

So it seems that the inverse square law does not hold!

Here’s another example. I will shoot at 1m, 1.4m, and 2m. If the first shot is at f/8, the second one should be at f/5.6 (half the light, because 1.4 squared is 2), and the third f/4 (a quarter of the light, because 2 squared is 4). When I do that, I get:

Hard to see here, but they get brighter each time, while theory says they should stay the same.

Only by reducing the second picture by 0.25 stops, and the third picture by 0.5 stops, do I get the same exposure. So my flash apparently needs to be corrected by -0.25 stops per stop.

Wait. Is this crazy Mr Willems saying the Inverse Square Law is incorrect?

Yes. Yes, he is. I am. I am saying exactly that. The Inverse Square Law does not apply. Not to concentrated beams. The Inverse Square Law applies only to point sources of light that radiate that light evenly in all directions. When we move the light away from the subject, the angle loses us photons, but the moment we “catch” some of these lost photons and send them to the object we are lighting anyway—and that is exactly what we are doing with a concentrated beam—that moment, the law no longer holds. Yes, the light gets weaker, but by a smaller amount. That smaller amount, the “escaping photon recapture rate”, or “EPR rate” if you like silly acronyms, is +0.25 stop per stop lost, in the case of my Canon flash.

So what would affect the numbers?

Clearly, at the extreme end, with a laser beam, the correction is virtually +1 stop per stop lost (think about it: how else could we do moonbounce, where we bounce a laser off the surface of the moon). Meaning, the light does not go down at all with distance.  With a flash light, it is, as you see, a little less extreme: there is dropoff; just a little less than you would expect. With a large softbox that radiates in all directions, you will get something closer to the inverse Square Law. With an umbrella, you get closer to it still.

But this is not a theoretical discussion, of interest only to geeks. This is important in practice to us photographers. If I move a snooted hair light twice as far away from the subjects it is lighting I should get two stops less light (2 squared = 4). But the light reduces less than that. So instead of going, say, from f/8 to f/4, I might need to go from f/8 to, say, f/5.

My advice: Learn how the light sources you use (straight flash, bounced flash, umbrella, softbox, etc) behave when you double the distance. Do this in the dark, so ambient light plays no role. Easy enough, and then you have an idea that will be valuable in real-life practice.


Check out my e-books on http://learning.photography/collections/books and learn everything I know. Taught in a logical fashion, these extensive e-books (PDFs with 100-200 pages each) will help you get up to scratch quickly with all the latest techniques. And when combined with a few hours’ private coaching, in person or via Google Hangouts, you have no idea of the places you’ll go. You’ll be a pro!