Print.

A photo is not a photo until it is printed. And you should print your photos. Today, I am making a case for doing that.

You are reading this post because you are into photography. You are a beginner, or an advanced amateur, or a seasoned pro who would like some new techniques. Either way, you have come here to learn about something dear to your heart: making images. And for many of you—especially the beginners—this means you have hundreds, thousands, tens of thousands of images that live only on your disk drive.

Great. But that is not the whole job. You are leaving out the last step. A very important step; I would say an essential one. Creating a print from the best of those electronic files.

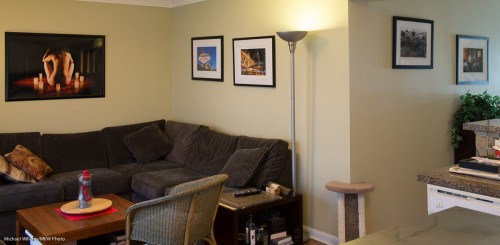
Like here, in my living room, which as you can see is decorated with one artistic nude, three travel photos, and one “selfie”:


Why is printing images so important?

For many reasons, of which I am going to mention the top six.

It is the only way to preserve the image. Digital images get lost. Let me repeat that: Digital images get lost. All information carriers (Papertape. Magnetic tape. Floppy disks. Hard disks. CDs. DVDs. CF cards. SD cards. USB keys. Every single type!) lose their information in anything from a year or two to a decade or two. I cannot stress that enough. You will lose your information. CDs, DVDs, hard disks: all of these are meant for temporary storage. there is as yet NO permanent storage solution other than cuneiform clay tablets. “The cloud” is no solution either: things get lost.

Also, even if by a stroke of luck you do not lose the data, you cannot read old media (try to read an 8″ floppy disk: I challenge you!). We may be the generation that takes more photos than any preceding generation; we are also the generation that will lose more photos than any preceding generation. This is a tragedy. Please.. print, to preserve.

They decorate your living room very nicely. There is a reason there is no hotel without prints on the wall. Prints add style, class, to your environment. Not just to hide stains: prints look beautiful on your wall and you can choose something to complement your environment (e.g. urban scenes in a country cottage, and vice versa).

Prints look much better than displays. Prints can be much larger (the nude above is 40″ wide); they can be on metallic paper (that one is); they have wonderful colour saturation, and they are, when done properly, much better than a display. Yes, printing needs to be set up properly, but it is worth doing.

They are a great way to share. Having photos on a hard drive is ok, but how often do you show them? A print on a wall is seen every time someone walks by that wall. And not just for ten seconds: for the entire evening, if you have dinner guests.

There are many possible formats. I love fold flat photo books with hard pages. There are many formats, from canvas wraps to such books: you can go wild. All this amounts to much more than just your LCD screen!

You will feel good about your skills. There is a special thrill in seeing your work large, as it is supposed to be, on your own wall. Your work instead of some IKEA artist’s work! This is an important motivator to keep shooting, as well.

My recommendation is a strong “go make some prints from your best photos—today!”

EXTRA: TIP for readers in the Toronto area: for great prints, in a wonderful variety of types, go to Fotobox in west Toronto, on the Queensway. Tell them I sent you—they have done my large metallic prints, and I am delighted with their service, attitude, skills, quality and pricing. Fotobox, 936 The Queensway, Toronto, ON M8Z 1P4(647) 430-8499. See www.fotobox.ca. (And no, before you ask: I am not being paid for this mention.)


Starting Year Six

I am today starting year six of this blog, the Internet’s only daily photography teaching blog.

My mission is the same as it has always been: to educate. I aim at everyone from beginner to pro. Short posts, all designed to educate in some way or form. And it’s daily: whenever I miss a day or two, I make up for it later.

www.speedlighter.ca is, and will always remain, free of charge. All I ask in return is that you:

  • Tell all your friends and acquaintances about this blog. “Like” the posts you like (click on the facebook share button). Better still, share the posts you like with your friends. In other words, help me reach a larger audience.
  • Consider training, private or in a small group. A half day’s course/seminar can turbocharge your photography.
  • Have a look at my e-books and, if you like them, buy them, as many hundreds of you already have.
  • And finally, last but not least, that you consider me as a photographer, for photographing everything from corporate headshots to industrial to models to family photography and weddings. If it can be photographed, I can do it.

Today, a short note about make-up.

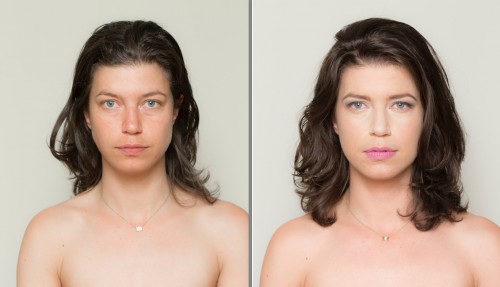
As you will see in my price lists, I offer make-up artist and hair stylist for shoots as an optional extra, at $125 each. If you want to be shot for a formal photo of whatever kind, do consider a good MUA. Even if you are a man it can be worthwhile. Sure, it’s more money, but it’s amazing what make-up can do.

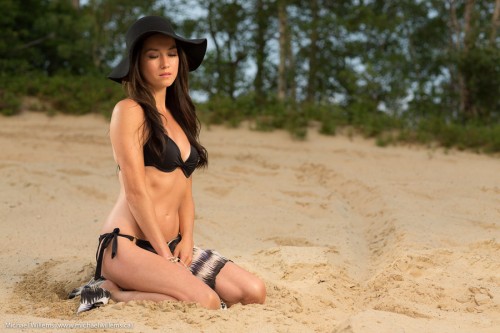
Look at this recent example (Make-up by Melissa T, one of my regular super-talented MUA’s):

Obviously she is very pretty with or without make-up, but I think you will agree, the attention given to make-up and hair do put the second photo in an entirely different league.

TIP: if you cannot afford one, go to Shopper’s Drug Mart: they have MUAs in the store who will do it for you, when you buy some make-up. Some of them are very good.

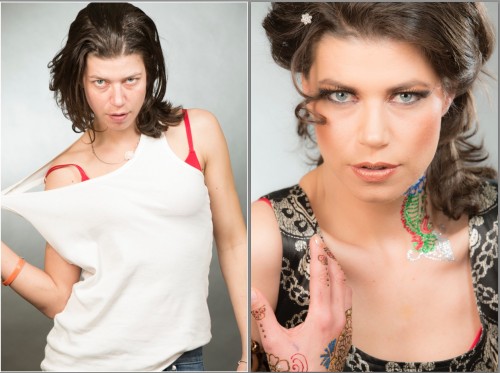
Here’s another example, from a shoot earlier this year. Here, the theme was Desi (pertaining to the Indian subcontinent) and henna.

Yes, that was on the same day, just an hour apart, No tricks involved. Just make-up. Stars and celebrities look great on TV, in part because they have make-up done. So if you hire me for a headshot (for press releases; your company’s annual report; newspaper announcements; LinkedIn; your web site; even for Facebook use!) consider having a MUA (Make-Up Artist) present as well.

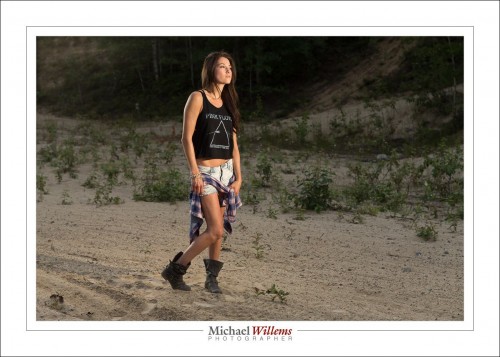
I’ll finish with one more photo, from last Friday, the beautiful Vanessa Scott in Timmins, Ontario:

SOOC (Straight out of the camera). Canon 1Dx with 85mm f/1.2 lens, set to f/5.6 and 1/80 second at 200 ISO. Lit by two flashes:

  • One on our right with a Honl Photo half CTO gel and fired through an umbrella;
  • One on our left fitted with a grid and a quarter CTO gel, as the hair light
  • Both set to manual power; half on the right, quarter on the left
  • Both fired through Pocketwizards.

This is not rocket science. I can teach you how to do this in one three-hour lesson. What I cannot teach you is how to be Vanessa, or failing that, how to find your own Vanessa to shoot.

And when you do, do consider adding pro Make-Up and Hair.


Gelling!

In yesterday’s shoot with Vanessa Scott in Timmins, Ontario, I used gels to recreate the sunlight that was fast fading below the hills. All shot with Canon’s amazing 85mm f/1.2 len.

(1/200th, f/4, ISO100)

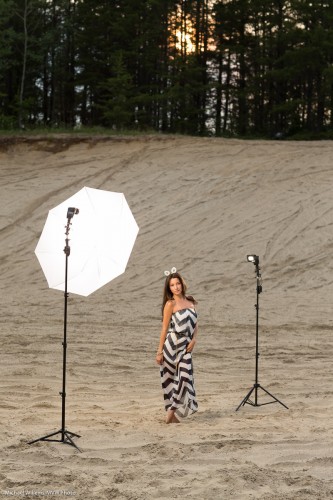
Vanessa looks like she is in that light, because I put a CTO (Colour Temperature Orange) gel by Honlphoto on the main flash, like so:

You will see also that I am using a second flash, fitted with a grid, for the hair light. Two flashes driven by Pocketwizards—that’s all.

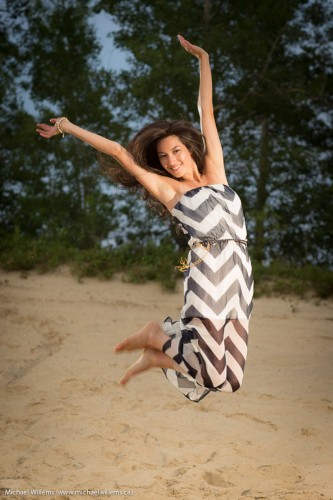
One more from this amazingly versatile young woman:

1/60, f/5, ISO100 — I had to adjust for fading light


Again, the flash allows me to offset the subject against the background, which I keep dark. Without the flash, I would lose the nice colour and I would have to make everything, including that background, very bright.

And that’s how the cookie crumbles.


Today, a QUIZ!

Test your knowledge of the basics: a quiz for you today. Select the best answer. Tomorrow, the answers.


1. You are shooting a hockey game. Your autofocus should probably be:

❏  In AI Servo/AF-C focus mode

❏  On manual focus

❏  In One Shot/AF-S focus mode

❏  Out of focus


2. At f/5.6, your picture is too dark. You can try going to:

❏  f/8

❏  f/4

❏  f/11

❏  1/60 second


3. If I move a light three times farther away from the subject it is lighting up, the subject now gets:

❏  Twice as much light

❏  Half as much light

❏  One third as much light

❏  One ninth as much light


4. For a blurrier background, you can go to a lower f-number. You can also:

❏  Step closer to your foreground object

❏  Use a longer lens

❏  Zoom in on your foreground object

❏  All of the above


5. For a “panning” picture of, say, a bicycle, you could try the following as a starting shutter speed:

❏  1/100 sec

❏  1/1000 sec

❏  2 seconds

❏  1/15 sec


6. A 50mm lens is normally called a “standard” lens on a film camera. On a crop camera with a crop factor of 1.5 or 1.6 you could use this for the same effect:

❏  a 50mm lens

❏  a 135mm lens

❏  a zoom lens

❏  a 35mm lens


7. The “rule of thirds” says that an object would look good if it were:

❏  Exactly in the centre

❏  One third from the top or bottom, and one third from either side

❏  Anywhere

❏  The square root of 2 away from the centre


8. Going from f/2.8 to f/11 gives you:

❏  Three stops more light

❏  8.2 stops less light

❏  Four stops less light

❏  One stop more light


9. The larger the f-number, the…

❏  …larger the opening in the lens

❏  …sharper the picture

❏  …smaller the opening in the lens

❏  …more the colour goes toward red


10. In exposure terms, 1/500th second and f/4 is equivalent to 1/30th second and:

❏  f/1.2

❏  f/1.6

❏  f/4.85

❏  f/16


11. Going from f/2.8 to f/11 gives you:

❏  Three stops more light

❏  8.2 stops less light

❏  Four stops less light

❏  One stop more light


12. Going from 1/30 sec to 1/250 sec gives:

❏  Three stops more light

❏  Three stops less light

❏  Four stops less light

❏  220 times less light


13. For a high-key photo, I want my light meter to indicate:

❏  In the middle (“0”)

❏  On the minus (“–“) side

❏  On the plus (“+”) side

❏  Alternating between plus and minus


Autofocus point

An important point about autofocus (and forgive the pun).

You have a number of AF points. One in the middle, and then 2 more, or 8 more, or 40 more: whatever. Lots, on my 1Dx:

These “points” are sensors that look for focus by looking at lines and sharpening them. But did you know that some points are sensitive only to horizontal or vertical lines? That’s why, when you select one AF point, sometimes you cannot focus even though you are pointing the AF point at a nice lined surface.

The centre AF point is always sensitive to both horizontal and vertical lines. But many other AF points are sensitive to only horizontal, or only vertical lines.

What’s more, this even depends on:

  • The mode you are in
  • Auto or manual AF point selection
  • The minimum f-number of your lens. Some points are points (sensitive to both) when used with an f/2.8 lens,. but horizontal only, or vertical only, when used with an f/5.6 lens.

So, my strong advice: Read up on how your camera does it. And if in doubt, use the centre AF point, since it is likely more sensitive and a cross-type sensor.


Low key or High Key

Definition time:

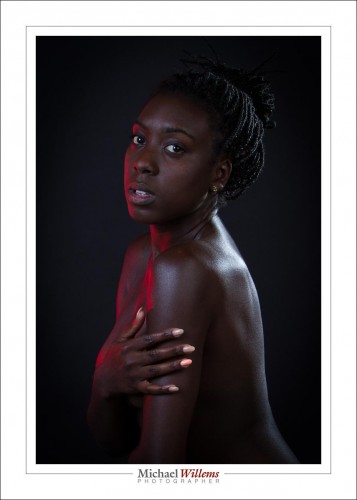
A low key photo is simply a photo that is “overall dark”. Like this one, of Serenity, made yesterday:

(Black backdrop, 200 ISO, 1/125 sec, f/8, softbox on left as main light, softbox on right as fill light, snoot behind right as hairlight, gridded gelled speedlight on left for red accent).

The nice thing is that the subject stands out because she is the only light thing; in particular, her eyes are.

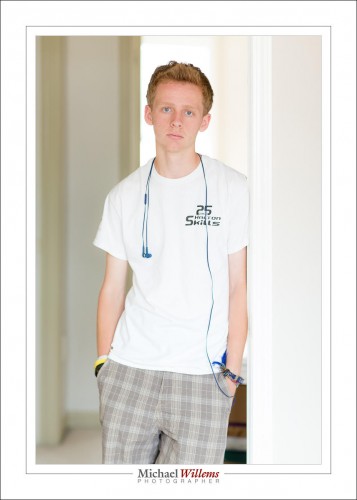
A high key photo, you guessed it, is a photo whose overall brightness is high. Like this, of intern Daniel, also made yesterday:

There you have it.

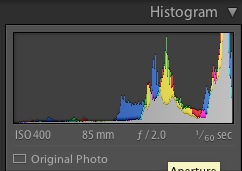
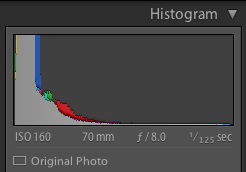
Which histogram belongs to which photo?

Answer tomorrow!


Conundrum

OK, so you have a flash that does not work on your camera. Bad contact.

But:

  1. This flash works on every other camera. Ergo, it is the camera.
  2. This camera work with every other flash. Ergo it is the flash.

Huh? Which one is it?

That is what a client came to me with. And never to shy away from a challenge, I took a look and figured it out. And since this could affect you too, if you own a camera and flash, I asm sharing.

Solution: it is both.

With any flash problem, you start by resetting camera and flash and cleaning contacts on both sides, camera and flash. Most “real” flash problems are caused by a bad contact.

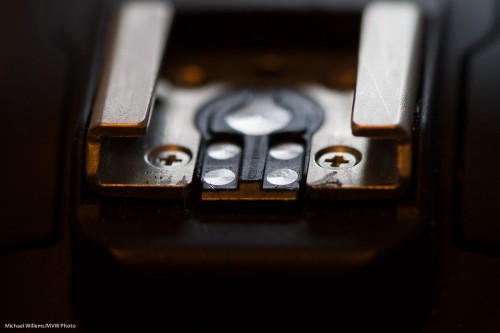
This camera, a Rebel, has rather a large vertical distance between the hot shoe and the actual contacts; i.e. the contacts on this camera are “recessed” a little more than usual, as this photo shows:

Next, the flash. Here are the flash contacts. This is a Canon 580EX II flash:

Clean, and functional.

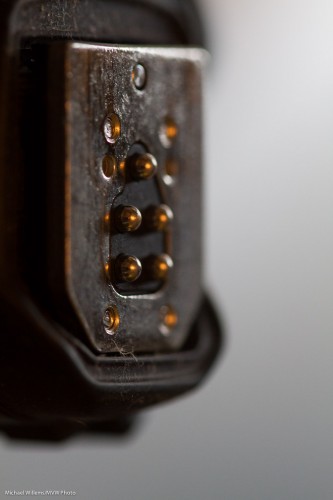
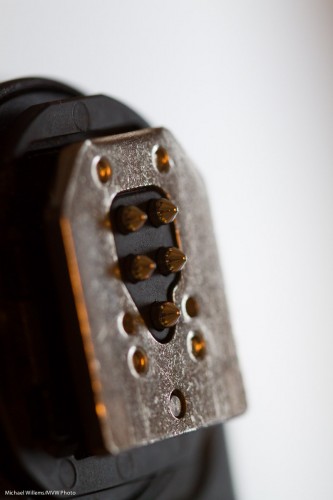
But then I noticed something. My own 58u0EX II flash, i.e. an identical flash, is in fact not identical. It is newer, and its contacts look like this

Can you see the difference? Instead of round, they are pointy, and they extend farther.

So Canon did a rolling upgrade in mid-production, and changed the pins. Obviously, my friend is not the only person who had problems with the flash contacts.

So this was the problem: a camera with slightly more space to bridge, and an older flash that has slightly less ability to bridge space. That’s why it was the combination that did not work.

And 580EX II owners, take note. Do you have the older pins, or the newer pointed pins?


A New Modifier!

You know how I like the Honlphoto range of small flash modifiers, and I use them all the time. Small, light, sturdy and affordable is a great combination of properties for travelling photographers. Right now David is just outside Mosul in Iraq. This brings back memories: I was in Mosul in 1982 (see me next to Nineveh’s City Gates), and I stayed at the Railway Hotel. Small world.

(Full disclosure: David is a friend of mine: but that is not why I recommend his stuff. The reverse, rather: I like his flash stuff so much that I contacted him and we became friends.)
Broadly speaking, there are three types of small flash modifier:

  • Modifiers that change a flash’s direction, like snoots, grids, gobos.;
  • Modifiers that change the flash’s colour (gels, coloured reflectors);
  • Modifiers that change the nature of the light, usually by softening, such as softboxes, reflectors, and bounce cards.

So you modify where the light goes, in what colour it goes there, and how it goes there. And now there is a new modifier in the latter category.

To place this new modifier, let’s start with the existing ones.

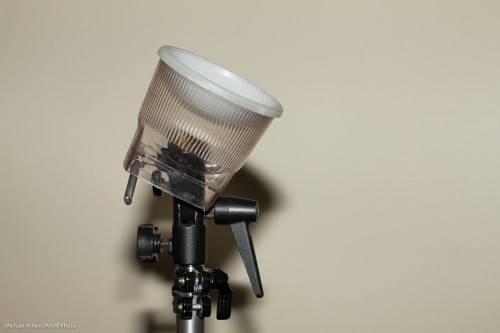
First, we have “no modifier”: aimed straight at the subject from atop the camera. When I use that, I get cold, harsh light. Look at this object in front of a wall:

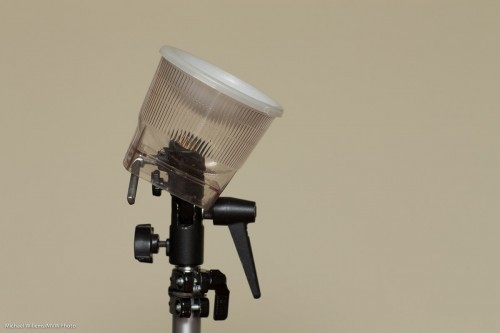
Then I bounce the flash behind me, up at 45 degrees, to get a much better result:

Much better, but I cannot always do this. The ceiling is sometimes too high, or it is a bright colour, or there are objects in the way that stop the light from my flash from reflecting back; or there simply is no ceiling.

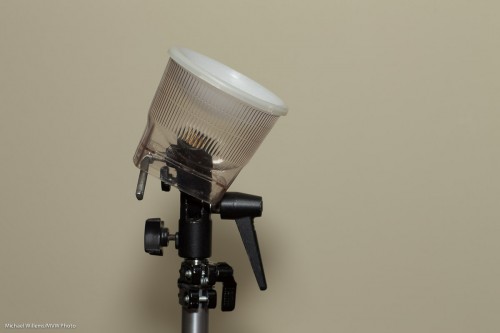
In those cases, I can use a reflector on the back of the flash. The Honl Speedsnoot doubles very nicely as a reflector. While this is not perfect, the shadows are a lot less hard than they would be from direct flash, and the light comes from a higher position.

This solution is not always easy: the reflector takes a little manual dexterity to tie to the speedstrap on the flash, and it can flop down all too easily.

I can also put a hard reflector card (bounce card/gobo) behind the flash. This is hard when there is no bounce at all, but it works very well when combined with ceiling flash:
Next: a great modifier is the softbox. In the next photo, I used a Honlphoto 8″ Traveller8 portable softbox off camera. The shadow is under my control: bring the flash closer and it softens, and the flash’s position determines where the shadow goes. Now that nasty shadow becomes a creative tool under your control.

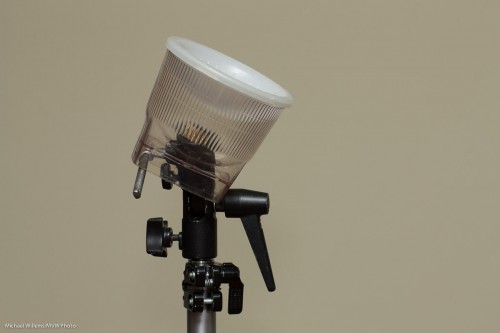
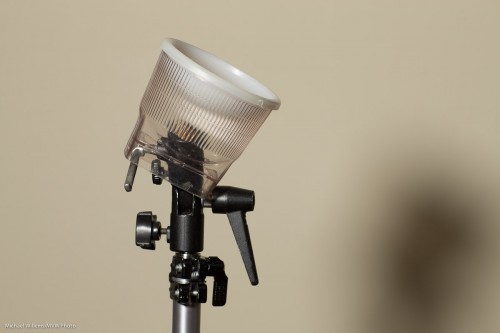
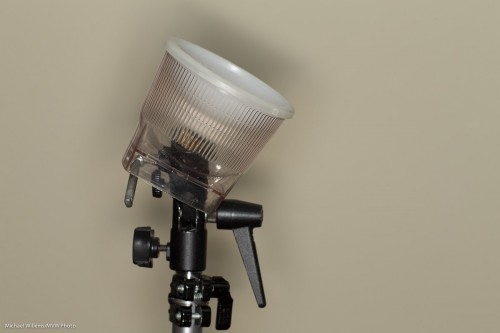
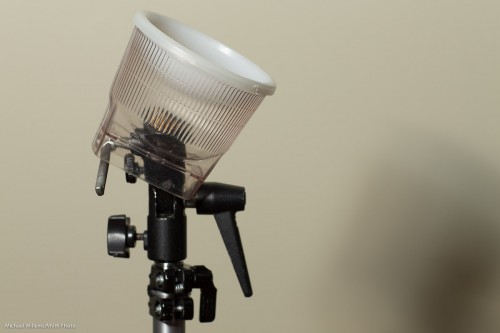
Another great option is the ring flash. Rather than buying one, you can go with the Orbis ring flash attachment for your speedlights. I will talk more extensively about this in a next post, but for now, just look at the light with its distinctive halo, a halo that shouts “Ring Flash!”:

And if I take it off camera it’s still great:


NEW: THE LIGHT PADDLE; A MINI REVIEW

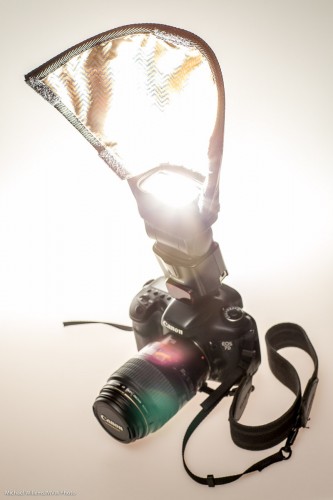
There is an all new small flash modifier to add. Dave just sent me one, a hands-on mini review of which I am hereby delighted to bring to you as a Speedlighter Exclusive… the Honl Photo Light Paddle.

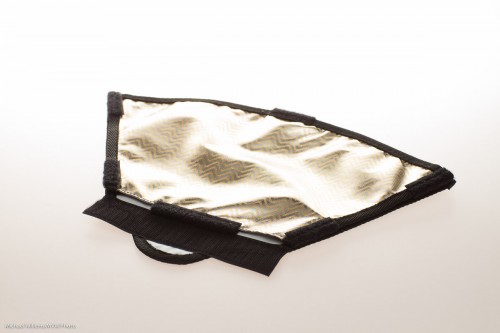
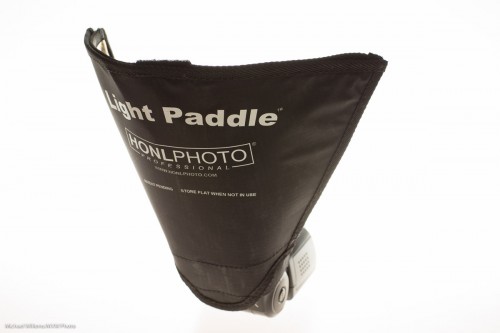
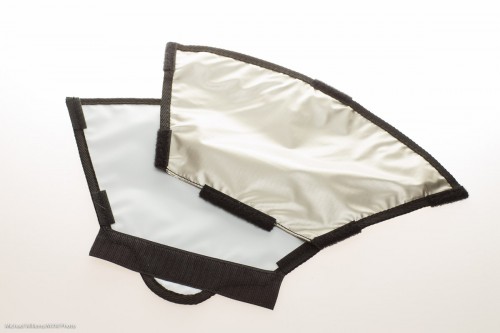
When you take it out of the package, the light paddle is a flat modifier, and in fact the package says “store flat when not in use”:

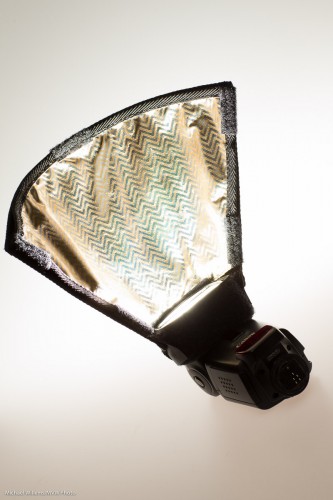
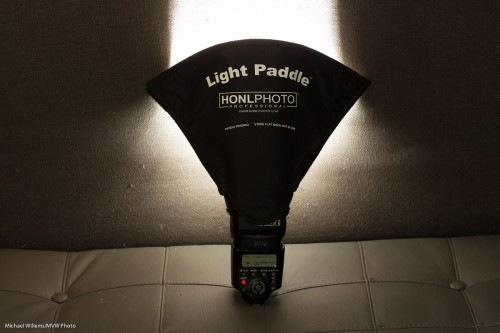
But attach its Velcro to a speedlight’s Speedstrap, and it becomes a convenient paddle that grabs the light, and nothing more or less, from the f;lash and bounces it forward.:

The Light Paddle is like the reflector, but having used both, I find that the Light Paddle has some big advantages over that and other modifiers.

  • It takes the right shape immediately. No guessing, adjusting, re-adjusting: it is the perfect shape each time.
  • It reflects the optimum amount of light from the flash, i.e. it catches the light, no more and no less, so it takes that worry off my hands.
  • It is sturdy: unlike a “free form” reflector, it holds its shape. I only used this sample for a few days but it looks and feels just as sturdy as the other Honl Photo flash accessories. And as said, light, sturdy and small, when combined with affordable, is a great combination for flash aficionados like me.
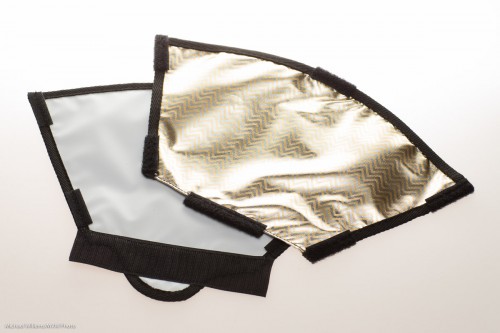
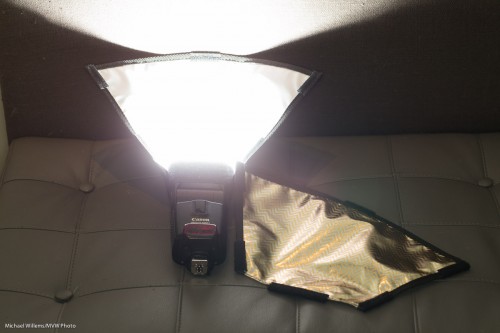
  • It has not one, but three bounce surfaces. As you see in the image below: peel off the reflective surface. which is initially CTO (Colour Temperature Orange, i.e. tungsten/warmer light), and you get white; reverse it and you get a lighter slightly warm orange.

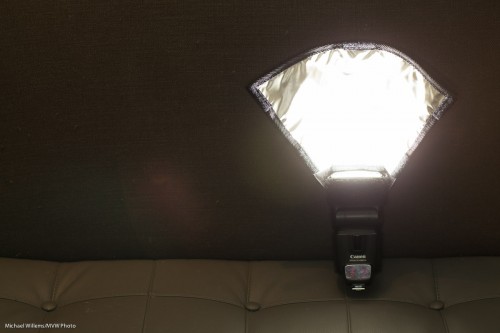
Here’s what it looks like with its three bounce surfaces:

I found the Light Paddle to be directional where you would want it to be.

You can use the Light Paddle on an on-camera flash or on an off–camera flash. In either case, I found that it provided a surprising amount of directional control and consistency. Here it is again, and as you see it reflects the flash fully, and makes its surface much larger and higher:

The Light Paddle in Practice

Let’s look at the Light Paddle in practice. Here is a usual operating mode:

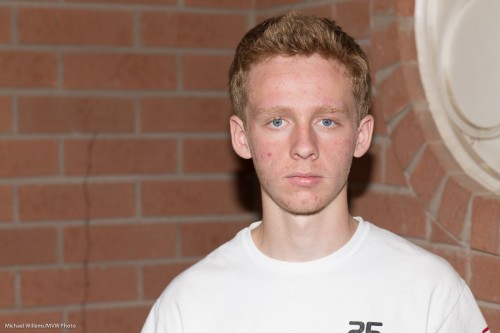
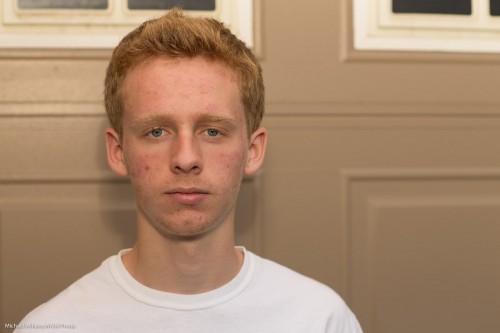
First, straight flash, in a situation where there’s no bouncing (and thank you, kind July Intern Daniel H., for your volunteering):

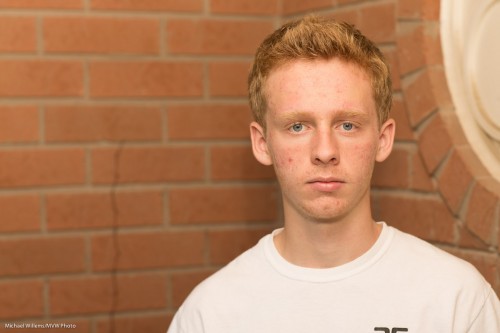
Now in the same no-bounce situation, the Light Paddle:

But it is outside that this really shines. Another before and after:

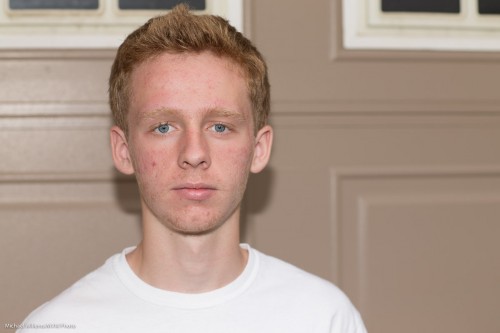
Another outdoors example, once more with the CTO (warming) side reflector: again, straight flash, then flash with Light Paddle. The difference is very clear.

Based on all this,. the Light Paddle is certainly going to be a staple part of my flash bag for events and creative use. It is not the only flash accessory, but it fills in the gap between bounce card, reflector, and softbox ever so nicely. Thanks, Dave.

If you want one, go  to Honl Photo for orders as soon as it will be available—I am sure that will be soon, both there and at your favourite local retailer.