Lightroom trick

You have an iPhone or similar? Then do this: in every location you shoot, take an iPhone shot first. Because iPhones have GPS coordinates built in.

First add all pictures to a collection. Go to that collection. Select all pictures.

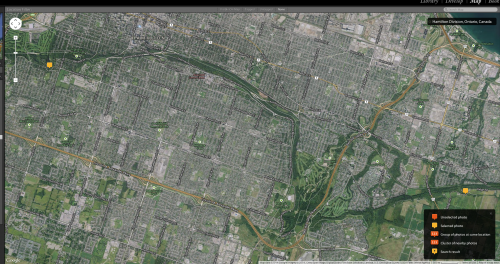
Now go to the Maps module. You see the locations show up. But look at the numbers: you see only the iPhone shots show up, like this, of the two locations I shot waterfalls at, the other day (the yellow dots top left and bottom right, and both say “1”, meaning “in what you have selected, there is 1 shot at this location”):

Now in grid view, select all the shots you took at the first location They all show as selected. Then click once on the JPG shot: it shows as more brightly selectd.

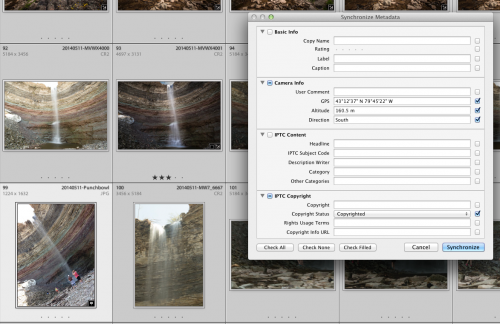
Now you can, from the METADATA option in the menu, select “Synchronize Metadata…”:

And if, as here, you “super-selected” the iPhone shot, which has GPS data, the GPS and altitude fields are filled in. Now turn on the tickmarks as I have done, and when you click “Synchronize”, these fields will be synchronized to all the other photos in that location.

Now repeat that for the next locations: select them, super-select their iPhone shot, and sync.

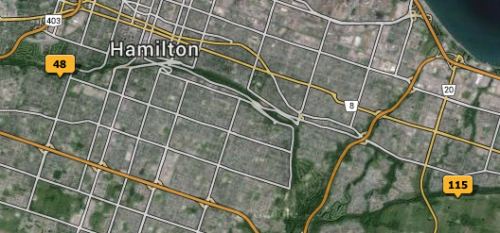
Now the numbers show the actual numbers, i.e. all photos now have locations built in:

A simple, effective way of getting GPS data into your pictures even if your camera does not have built-in GPS.

Cool, or what? Yes, Lightroom is full of such tricks. And so am I.


Full frame or not?

I am often asked “should I go full frame”?

A full frame camera is a camera whose sensor is the same size as a negative used to be. Cheaper cameras, on the other hand, have a slightly smaller sensor. We call these “crop cameras”.

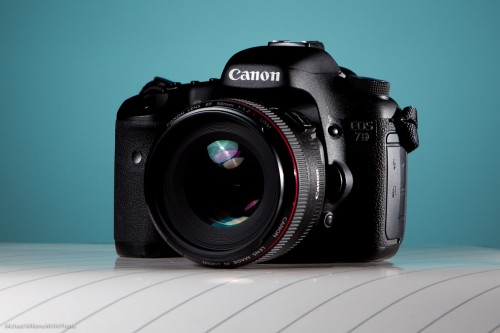
The Canon 7D, a crop camera

Making a camera with a smaller sensor means that it, and its lenses, can be:

  • Cheaper
  • Lighter
  • Smaller

That’s good. But it also means a few not-so-good things:

  • Smaller viewfinder
  • Lower picture quality (more “noise”)
  • Slightly lower ability to create blurry backgrounds
  • Lenses “appear longer”: good when you want telephoto; less good when you want wide angles.

So you take your pick. Most people start with an affordable crop camera, but go to full frame eventually.

More importantly: lenses. Some lenses can only be used on crop cameras. These lenses (EF-S for Canon, DX for Nikon) are cheaper, smaller, lighter—but they are less future proof. The other lenses can be used on any camera: crop as well as full-frame. It is the latter kind of lenses I recommend, in case you go full-frame at some later stage.

Now, off to a Toronto bank to do executive portraits. Later!


Slow down!

I have a useful mnemonic for you:

For a flow, go slow.

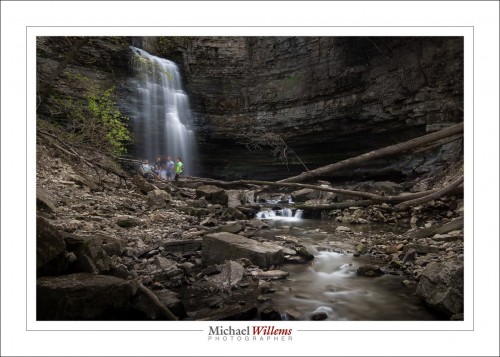
Meaning if you are picturing something that happens as a continuous flow, you should use a slow shutter speed, to capture it as that flow.  Like this, a few hours ago:

To do this I did the following:

  1. Defy death by climbing down an unofficial trail.
  2. Use a tripod.
  3. Use a wide angle zoom lens (16-35mm, on a full frame camera).
  4. Put a variable neutral density (ND) filter on the lens, set to its maximum darkness.
  5. Camera on manual. Use 100 ISO and a high f/number; in this case, f/20
  6. Now see what shutter speed I need (20 seconds).

And that’s it!

Notes:

  • You do not always need a slow shutter. For the waterfall, 1 second would have been fine too. But the river looks better at that slow speed.
  • At small apertures you will see sensor dust.
  • Use the 2s self timer, or you will shake the camera by pressing the shutter button.
  • Do not damage your equipment; it’s easy enough!

And you will get great pictures.

___

Footnote: two weeks from now, I shall be teaching “Landscapes” in Timmins, This will be part of that!


Flash too dark. Why?

Say you take a picture, and say that the flash part of that picture is too dark. Like this:

There are two possible reasons, and it is important to distinguish between them, since they have two entirely different solutions.

  1. The flash part is too dark because your camera and its TTL metering system metered the flash incorrectly, so it somehow decided on too low a flash power setting. This could happen because of subject brightness (a white subject); because you moved the camera; because of spot metering errors; because you set the camera to the wrong mode (it should be on “TTL”); or simply because of errors in the metering system.
  2. There is simply not enough flash power available, given the chosen aperture and ISO settings.

So how do you know which one of these reasons is causing your dark flash picture?

Simple. Turn the flash, which is normally set to TTL, onto MANUAL mode, and select full power (100%, or 1/1). take the photo.

If you now see something like this, then the error was metering:

This means: given the selected aperture and ISO settings, there is enough power available, the camera just chose not to use it. The solution is to meter accurately, perhaps using matrix metering, or spot metering off a grey card; avoid recomposing; ensure that the connections are all clean and intact.

If, however, on full manual power you see the following, then there simply was not enough power available:

I.e. the camera would have liked to select more power, but it simply was not available. The solution in this case is to increase your ISO, or decrease your “f-number”, or bring the flash closer to the subject—or a combination of several or all of those.

___

Many more tips when you take one of my courses, or read my e-books, especially “Pro Flash Manual”, from this page on the e-store.

Brand aware!

An acquaintance-via-the-web asked:

“I’m not a photographer. I’m a very busy mother of three. Having said that I’m looking for a “stupid- proof” dslr camera. We’d love the quality of the photos but want something simple to use. I was looking at nikon d series as well as the canon rebels.”

Well, as you might imagine, I have a few things to say in reply!

First: the camera does not really matter. You should be in manual mode for best result, and a camera is just a camera. The lenses matter: get a fast 50mm f/1.8 or f/1.4 lens. And both brands are superb. I can, and do, use both and I love them both.

But then: for the low-end cameras, go Canon. A Digital rebel has all functions including (for most) remote TTL flash master, flash compensation, flash exposure lock/flash value lock (FEL/FVL), and many others The Nikon leaves out many of these functions in the low-end models. And believe me, you will grow to need these. So definitely, between those two, the Canon.

Third: there is no fool-proof camera. The camera is a fool. In any picture, only YOU know what should be sharp. The camera does not. Only you know how bright or how dark you need the picture. Only you know what colours you like. There is no way for a camera to know these things. You need to learn things. Get the “mastering your camera” book from http://learning.photography and read this. Read this web site. Learn how to use the camera on manual (the free chapter will help, too). Asking for a stupid-proof camera is like saying “I want to do brain surgery but I just want it to be easy: I want stupid-proof scalpels”. It just does not work that way. We distinguish Uncle Fred snapshots from real pictures by the amount of knowledge the photographer has.

And the good news: not that much knowledge is needed. Learn how to:

  • Operate the camera in manual mode (manual IDSO, manual aperture, manualshutter)
  • Focus where you need, using just one focus point
  • Set the right white balance (colours)

Learn these simple things.. get a digital rebel with a 50mm f/1.8 portrait lens and do just a few hours training and your photos will be superb. You will be grateful later in life, when you have brilliant shots of your kids. Shot like this, which you can easily take with a Rebel and that 50mm lens:

Go for it, and enjoy photography. It can be easy, but you do need to learn a few basic things.


Trixie

A trick for you today; a post-processing trick.

Say you have a shot you like, like this model pose:

(1/125 sec, f/2.0, 800 ISO, using a Canon 1Dx with a 85mm f/1.2L lens. Ambient light plus bounced flash set to +1.7 FEC.)

But… when we look closely, we see that alas, it is out of focus:

Sharpening does not help, with an image that is out-of-focus to this extent:

So now we add film grain by moving the EFFECTS–GRAIN slider up to +66:

Unlike “digital noise”, film grain looks pretty cool. Like old higher-ISO Kodachrome film. And the key point here: we no longer notice the unsharpness as much. This image is now acceptable!

As a bonus, any skin blemishes now also disappear into the grain. The final image looks good:

So if an image you have is not ideal, do not give up. Images worse than this have been rescued. If it is really bad, make it B/W as well. And often, you end up with a perfectly good picture where the grain adds to the atmosphere.


400-40-4 reminder

You remember the student I shot yesterday with split lighting? Well, here he is again, in the same classroom, a few minutes earlier, with the exact same conditions:

Compare the two.

Yesterday’s photo was made with the camera in “studio settings”, which makes indoors ambient go away. This one was shot using the well-known “400-40-4” settings of 400 ISO, 1/40 sec, f/4. The “indoors flash starting point“, if you will.

That makes ordinary indoors light a little brighter than it is (the room was fairly dark), but still about two stops below ordinary lighting; the subject is lit with my flash bounced behind me.

These two settings should be ingrained in your flash brain as good starting points for very different requirements. Study the two and associate each one with a setting.

___

Need to learn basic camera stuff? Do get my e-book “Mastering your DSLR”, which is available from http://learning.photography — and use the limited time discount code speedlighter on checkout for a 15% discount. Act now, temporary discount!

Split

Today’s lesson is a simple “Split lighting” picture. This was one of my students in today’s Canon-sponsored class at Vistek Toronto. The danger of sitting in the front row is that you will be pictured:

Split lighting is a technique where exactly half a face is lit, and the other half is dark; the face is “split in two”, if you will.

I did this as follows:

  1. Camera on Manual
  2. Camera set to 100 ISO, 1/125 second, f/8.
  3. On–camera flash is a 600EX set as MASTER flash, and its actual flash function is OFF (i.e. it ONLY works as master flash, telling other flashes what to do).
  4. On our right, a 430EX flash set to TTL SLAVE mode. This flash needs a grid or snoot fitted in a small room; here, the room was large enough to do without (there were no close-by walls that the flash could light up).
  5. Flash Exposure Compensation set to -1.7 stops (on the camera)
  6. There is no 6: steps 1-5 were all.

Yes, this stuff is really quite simple once you know, and modern camera and flash equipment brings this in the reach of everyone. All you have to learn is some technique. And that is where I come in!

___

SPECIAL: For the next 7 days, until May 10, my readers get 15% off all orders on my new online store, http://learning.photography: use discount code speedlighter on checking out to claim your discount.

Quick Hi-Key Recipe, or “What’s The Secret?”

There are many “secrets” in photography. They’re not secret, really: they are the distilled knowledge. The simplified “start here” points.

So let me give you one now—one of many from the Flash course; this one, which by the way I am teaching on behalf of Canon Canada at Vistek in Toronto tomorrow, Saturday:

Quick High Key Portrait

  1. Get a camera with a flash mounted on the camera.
  2. Set the camera to M (manual), 800 ISO, 1/125th sec, f/5.6
  3. Ensure that the flash is set to TTL mode (Through-the-lens metering).
  4. Set Flash Compensation to +1.7 stops (“plus one and two thirds”). You can do this on the flash (or on the camera if you are using Canon. In Nikon, do it on the flash please, or you are limited to +1 stop).
  5. Point that flash upward 45 degrees, behind you.
  6. Find small room with white (or at least whiteish) ceiling/walls behind you.
  7. Dress the subject in light clothing.
  8. Put the subject in front of you, about 1-2 metres away. Focus on model. Fire.

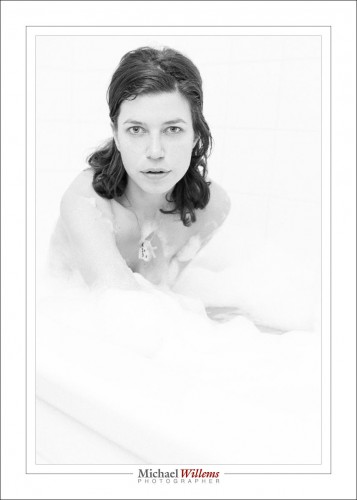
Now you will get this (I converted it to B/W and added some “film grain” for effect):

Not bad for a 30-second shot, no?

You should turn on your “blinkies”: you want the wall, but not the subject, to blink (to be overexposed, or close to it).

If the picture is too dark, increase flash compensation. If that makes no difference, then it is a lack of available power; in that case increase ISO, or decrease the “f-number” (or both).

And that’s all there is to it, really.


Let there be…

….no light. Lack of light. Because a good photo often starts by having no light. At least in your mind. And then, mentally or physically, you add light where you like.

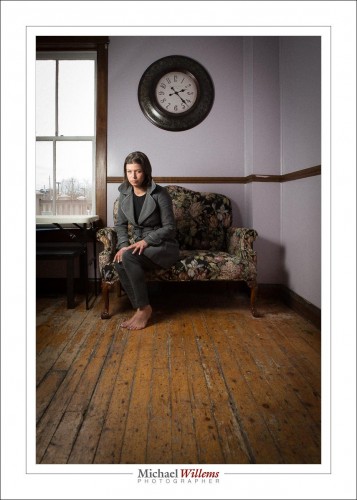
I do this to get a dramatically lit portrait like this, for instance:

In this picture I started by exposing for the bright outside. With 1/200 sec and at 200 ISO, that gave me f/5.6, which is what you see in the picture.

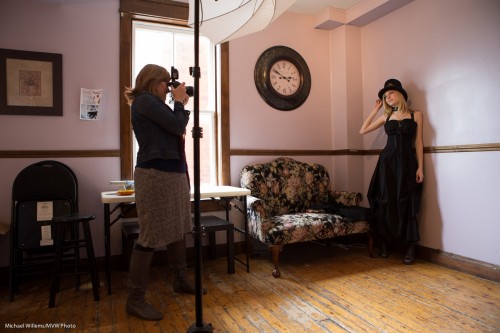
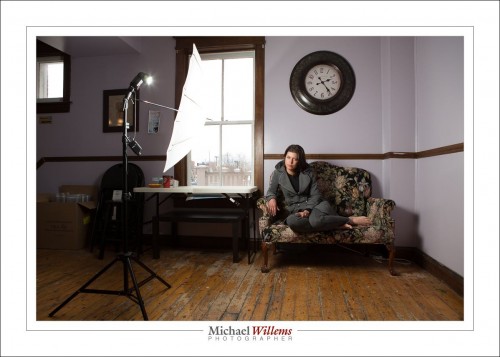
But now the model would be dark. So now I add my flash, operated via simple Pocketwizard radio triggers. The setup was like this:

…except the flash was a little closer to the model in my shot. Like this, in fact:

Trial and error gave me 1/4 power for the flash at those settings. And that was not really trial and error; it was an starting point from experience.

If I am a little bright on the outside, I do not mind vignetting (darkening the outsides) in post. Why? Because this increases quality (with the decrease of the bright parts, “noise” gets decreased as well).

Anyway—this post points out to you that as usual, a good photo is a photo where you have thought about the light, rather than just pressed the shutter. One more example for the road:

___
Have you checked out the e-store yet? http://learning.photography