Amateur Aesthetic

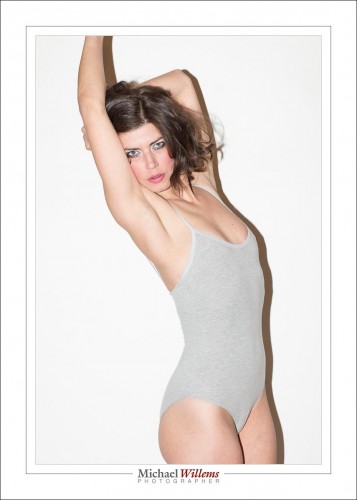
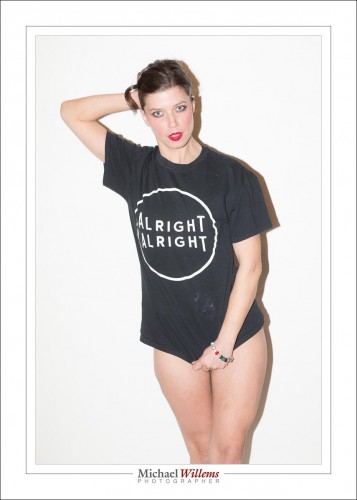
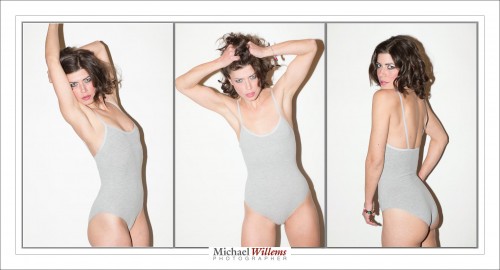
Today, another example of the “Amateur Aesthetic” or “Snapshot Aesthetic”made popular by such contemporary photographers as Terry Richardson, after Diane Arbus and Nan Goldin, two of my favourites.

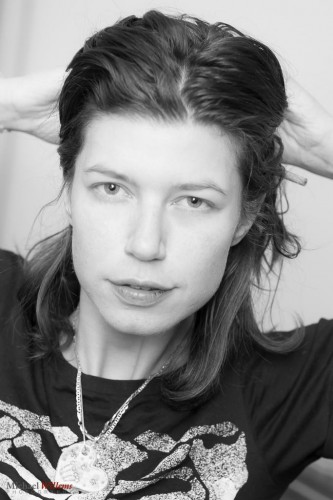
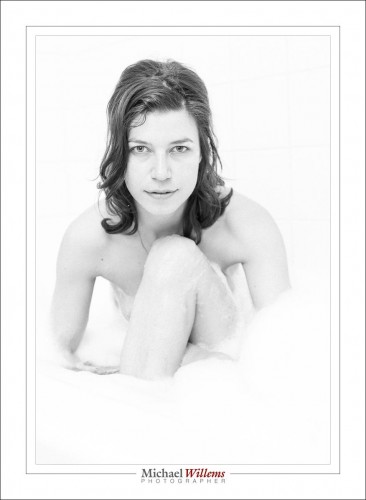
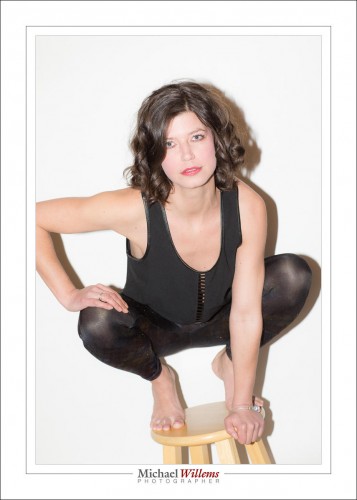
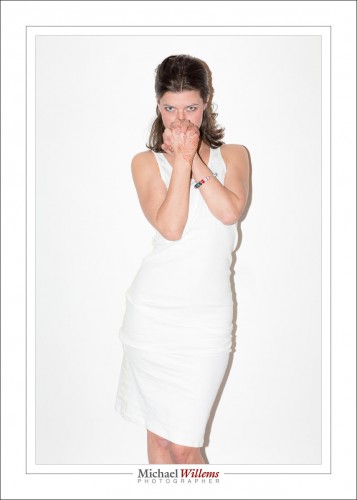
Here’s mine, a high-key model shot:

We call it amateur, or snapshot, because you use a flash straight on, and aim at the subject, and have the subject stand in front of a white backdrop, camera aware. Like Uncle Fred does. This gives you the drop shadow. It also, however, gives you very flattening light, and models like this: it hides any facial features. Overexposing a little, or rather, exposing brightly, makes it even better in that regard.

Unlike your Uncle Fred, my models and I think carefully about composition, light, and expression and pose. The direct flash means you need to aim the subject’s face down a little, else light comes “from below”, which is never flattering.

So nothing is left to accident, in spite of the amateur look.

For this shot, I used 1/160th sec, 400 ISO, f/5.6 and an on-camera 600EX flash. The flash compensation, like in the examples of a few days ago, was set to +2 stops, and I used TTL flash metering for flexibility.

Your assignment for today: shoot a portrait like this. I am about to teach a TTL flash course, and my student will do this as well. In addition to “proper” flash, you need to know techniques like this as just another tool in your toolbox.


What do I need?

What, asks a reader, do I need for portraits?

First, read http://www.speedlighter.ca/tag/portraits/ — this will give you an idea of the technologies and other needs.

For a minimum portrait with off-camera flash, you need:

  1. A stool and a backdrop (can be improvised).
  2. A camera.
  3. A flash—nikon user, an SB710 or SB910 (or predecessors).
  4. Aim the flash behind you 45 degrees up. Make sure there is a, preferably white, ceiling/wall where the flash points. Shoot.

That will give you a one-light, bounced portrait:

For a minimum portrait with off-camera flash, you need:

  1. A camera with a pop-up flash that can drive other flashes (most Nikons, most recent Canons).
  2. A flash—nikon user, an SB710 or SB910 (or predecessors).
  3. Set up your camera’s flash option in the “pencil” menu to not do ordinary TTL, but to do Commander instead. Then, in the commander settings screen, turn off the flash on the camera (top option), and set the A and B group options to “TTL”. Note the channel.
  4. Ensure that your flash is set to the same channel.
  5. Optionally, use a modifier such as a small softbox or a

That will give you a one-light, camera flash portrait:

Finally, for a “real”, i.e. traditional headshot, you would have four lights. To see how these work, I will repeat here a post from the past:


When you make a portrait using standard “studio settings” (i.e. you have the ambient light do nothing; and to achieve this you use f/8 at 1/125th sec at 100 ISO), and you use one flash, modified with an umbrella or softbox, you get a portrait, but it is very dramatic: only what you light is lit.


Desi

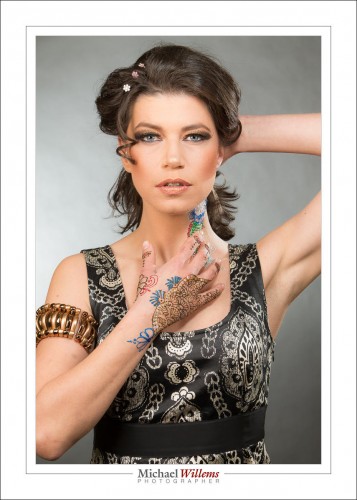
Today was a Desi shoot: a shoot with an Indian subcontinent theme. Henna artist Sadaf Ahmed and make-up artists Aisha and Falak got together with me and six models to shoot what they’re all capable of.

Here’s a sample:

What is special about this sample is that it is straight out of the camera. No skin smoothing, no adjustments of any kind except the removal of one tiny temporary blemish, which will be gone by tomorrow anyhow.

And we achieved this by having a great model, Kim G, and a great set of make-up and henna artists, and great light.

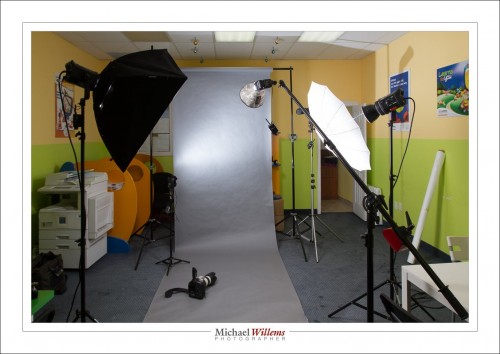
That light looked as follows:

Backdrop with a grey paper roll. A camera on manual, at 420 ISO, f/8, 1/125th second, with a 70-200 f/2.8L lens. Fitted with a Pocketwizard transmitter. And lights as follows:

  • Strobe: Main light, softbox on our left
  • Strobe: Fill, umbrella on our right
  • Speedlight: Background light on the left behind, aimed at background
  • Speedlight:Hair light with snoot on our right behind, aimed forward at subject
  • Speedlight: on boom, with small Honl photo Traveler Eight 8″ softbox. This gives the face more brightness.

All lights fired via Pocketwizard radio transceivers (the simple ones, that need manual flash operation). Connected to speedlights via Flashzebra cables.

This gives me pictures I can use straight away with no further modifications. Good, eh?

___

Want to learn? Hands-on course in Oakville this Saturday, “Learning TTL Flash”. 10AM, contact me (michael@michaelwillems.ca) to hear more and to book, now.


les animaux

Shooting animals, there is one thing you have to take into account. Namely, that they have snouts, where the nose and eyes are far apart in distance when they look at you. Unlike in the case of humans, where our eyes and nose are quite close.

This is important why? Because of focus. Where f/5.6 may be enough for a face to be in focus, in an animal, invariably it isn’t, and you will get either a sharp nose, or sharp eyes. Anyone who has taken pictures of their pet will know this. Especially when using fast lenses indoors.

The solution?

There’s the usual suspects: to get more depth of field, you need any combination of:

  • a wider angle (shorter) lens, i.e. “zooming out”, or
  • you get farther from your subject, or
  • you use a smaller aperture (higher “f-number”).

Or, perhaps the simplest solution: you do not shoot them straight on.

See. we have narrow depth of field, but it is not annoying us here. Both nose and closest eye are in sharp focus.

Bonus question: what about the light?

I am bouncing my flash behind me. You can see that by the catch light: a circle on the ceiling behind me, lit up by my flash.

___

Want to learn video with your DSLR? Come to my 3-hour seminar in Oakville on Sunday, 30 March. This seminar is limited to no more than 6 people. In this three hour lesson, Michael teaches you:

  • Perfect camera settings for each situation
  • The secret to achieving focus
  • Additional equipment to consider
  • Avoiding the 5 common mistakes
  • Audio: The forgotten essential.
  • Three ways to Make It Better.
  • Composition of your images
  • Types of shot and how to use them
  • Storytelling in a video: using B-roll, script, and storyboarPost-production tips

Your DSLR is a great tool for movie-quality videos, but only if you know the secrets to its effective use. Space is limited: sign up now via http://cameratraining.ca/Booking.html.


This Report Contains No Flash Photography

Mass hysteria: we see it in humans all the time. Don’t use your cell phone in a gas station (total number of fires or explosions worldwide as a result of cell phones: zero). Don’t use your blackberry in a hospital (a 100 mW blackberry is supposedly a danger, while the doctor’s own blackberry, or the security guard’s 5,000 mW walkie-talkie, apparently represent no danger). Our local hospital has a No WiFi rule—and yet there is a WiFi network all over the hospital, named “staff only”.One presumes staff WiFi is kinder, gentler, somehow. Do not vaccinate (danger of vaccination: negligible. Danger of the diseases prevented by vaccination: immense). And so on. Superstitions are dumb, and I mean that: dumb because they knowingly do not look at evidence, just at emotional “I read it on the Internet” inputs.

One particularly insidious one is the uniquely British “This Report Contains Flash Photography” warning, with an exclamation mark, no less:
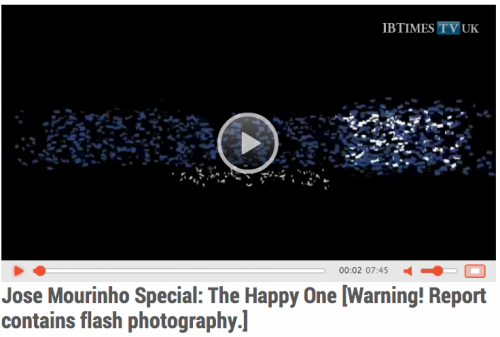
Every news item in the UK that has a photographer flashing is preceded by this warning. Even news web sites carry it. Newsreaders say it.  Enough to make you really, really fear flash photography. And as you may have guessed, The Speedlighter cannot let that go unchallenged. It is insidious because it leads to a general fear of flash.

The British justification is that there are some epileptics sensitive to flashes. Which is true, and we should not trivialize the seriousness of epilepsy. I would not: I myself have a brain that is very sensitive to light flashes at certain frequency, and EEGs have shown me to be very close to this type of photosensitive epilepsy: my brain displays distinct epileptiform EEG patterns. I remember the EEG: a weird experience, to have my brain affect the frequency of the flashes I was seeing. Brrr… Br-r-r-r-r-r… Brrrr… B-r-r-r-r-r-r… the flashes went.

However, (a) there are very, very few people with actual photosensitive epilepsy (a few thousand in the UK, The Guardian estimates; it is unlikely that out of those, more than a few are watching any particular broadcast), and (b) they are sensitive to repeated, regular flashes, say at 15-25 Hz, not to individual and irregular flashes from cameras.

The reason this warning is nevertheless carried is, apparently, a regulatory one. Safety above everything, and the law is the law.
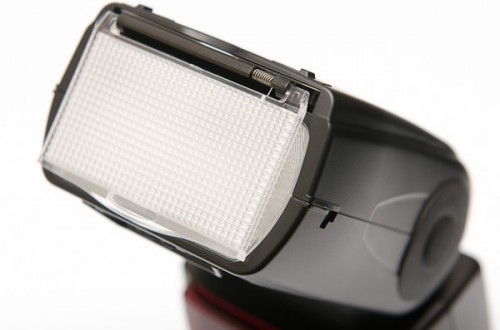
And the problem with that is that if we put safety above everything, we do not have a workable society. Of course, in practice clearly we do not do this: we make reasonable accommodations. Else, cars would have to move at 5 km/h with a red flag preceding them. And with two drivers at all times, preferably. We would, of course, not fly airplanes at all; nor would we ride horses. All nuts and nut products would need to be permanently banned, as would alcohol and tobacco—and fat. We would force-vaccinate all kids. All movies that contain any adult situations, nudity, political statements, religious discussion should be banned for fear they may offend.

As you see from these hyperbolic hypotheticals, saying “safety above everything” is unworkable, and we do not do it. We just pretend to, because it is comfortable for simple minds to hear that our governments are removing all risks.

When deciding whether a warning is useful, you look at other places, Do other countries mandate this warning? Not to my knowledge; and yet, there are no hordes of Americans, Germans, Canadians, and so on all dropping like flies from flashes in news reports. So we can safely say: yes, this is another case of mass hysteria. If you are asked not to flash because someone objects, fine. If you yourself have light-sensitive epilepsy, then ask for no flashing. Other than that:
___

Have you seen my new Video With Your DSLR course on the schedule? Check out www.cameratraining.ca‘s schedule page.

 

I See

“I see” in Latin is “Video”. A mode more and more DSLR cameras have. Can your camera do video?

If so, it behooves you to learn how to do it! It’s great quality, movie-type quality in fact, but the camera is not just point-and-shoot (point-and-tape?). Instead, there are things you need to learn. Things about the camera setup. Things about the extra equipment you need. Things about storytelling and about filming techniques. Things about post-production. Simple things, but without them you will never produce a good video. With them, however, it’s easy!

Well… It just so happens that I have recently written an all-new video/DSLR course. It will answer questions like:

  • The one accessory you must have
  • The shot types you need to know
  • How to storyboard
  • Camera settings; what are the secret “gotchas”?
  • How to shoot with what you have’
  • How to use audio
  • Composition tips
  • Common mistakes—and how to avoid them
  • Why you need an iPhone, too!

…and much more.

I will be teaching it on 30 March, but it is available as of now as private or custom small training, 24/7.

So if you have ever thought “maybe I should learn this video thing; after all, my camera can do it”, then now is your time.

Contact me to book, and to hear more: I am here for you.

Michael


Effective Black and White

Black and white (“Monochrome”) is very effective when you want to draw attention to the subject, not the surrounding “stuff”. We should all do more black and white.

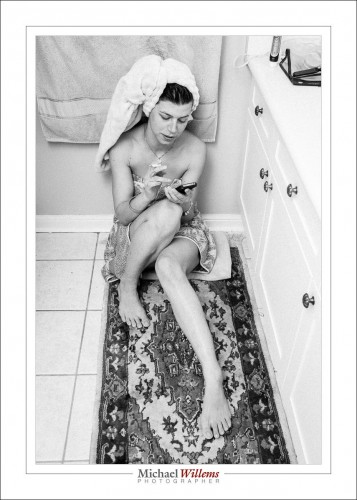
I find that in particular, high-key photos like this benefit greatly from being in B/W:

Any colour in the walls etc take away from the effectiveness. And B/W makes it much easier to make a face really stand out in this kind of light.

How do you do a picture like that? Very simple:

  • Camera on manual.
  • 800 ISO, 1/125th sec, f/5.6.
  • Flash Exposure Compensation set to +2 stops.
  • Flash aimed up, behind me. .

Why 800 ISO? To give the flash enough power. Why Flash Exposure Compensation? It’s a white scene and I want the camera to shoot it as such.

A little post work can be good in “documentary” shots like this:

Wide angle lens creates pleasing shapes.

And that post work I mentioned consists of B/W conversion, cropping/rotating, and adding a little contrast and a little film grain. Yes, ADDING film grain. Film grain (a standard option in Lightroom’s DEVELOP module, in the EFFECTS pane) is nice (unlike digital noise). Makes this look like an old B/W film picture.

Photography is such a rewarding activity.

___

Video too! I now have a new course, “Video with your DSLR”: see www.cameratraining.ca or ask me for private training. Worth it, learning to do pro video!


High ISOs again

As for what I said the other day about high ISO values, here’s a reminder. It is better to get a grainy picture than to get no picture.

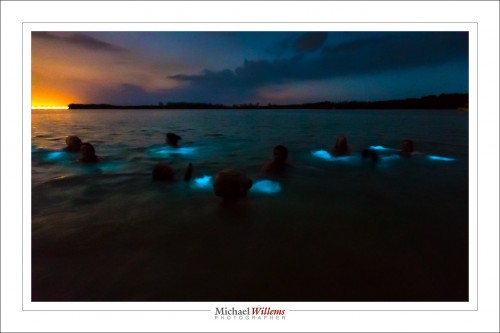
Case in point. Here’s Jamaica’s Luminous Lagoon last year, with swimmers :

That was taken from a moving boat at:

  • 12800 ISO
  • f/2.8
  • 16mm lens (on a full frame camera)
  • 1/4 second

Yes, yes, 12,800 ISO. And yes, one quarter second on a moving boat. So it took a few attempts. Note that I used the 16mm lens to get as wide as possible: the longer your lens, the faster the shutter speed needs to be for a motion-free picture. So the wider, the better for slow shutter speeds.

But the moral of the story: even when it is pitch dark, you can often get better pictures than you thought. Always try, and do not be afraid of high ISO values if that is the only way to get the picture.


Terry

If you read this blog, you know I am all about proper lighting. And proper lighting is about off-camera flash technique, modifiers, and so on.

But it is also about making exceptions. One of those is what I like to call the “Terry Richardson look”. Look him up: he is one of the world’s most highly paid photographers and his typical work consists of putting famous people (think Barack Obama, Miley Cyrus, and every other celebrity) against a white wall and shooting with a direct, on-camera flash.

Normally, this is a recipe for disastrous snapshots. But he somehow carries it off, and we call it the “punk/amateur aesthetic”. And so I like to think I can carry it off too. Have a look at some shots from yesterday:

So why do these work, against all better judgment?

Because they have a recognizable look. And because they are what I would call urban cool. And they provide wonderful, even, beauty lighting that compliments skin and fills in any facial features (think wrinkles). And because lighting skin brightly is very complimentary. This Terry Richardson technique can take ten years off someone’s age.

The images above were made in the studio with a simple on-camera flash aimed straight into the subject’s face. I used TTL flash and (this is crucial) I set flash exposure compensation (FEC) to +2 stops. 400 ISO, f/5.6, 1/125th second.  You need a powerful flash (I used a 600 EX): the pop-up flash will not do.

But the above is all you need. And—here’s the kicker—because of this simple, all-filling light, no post work needed to be done on these images.

A few more examples:

Triptychs work well, too:

So this technique may look like a snapshot technique, but it is in fact well thought out and executed. Of course I would not recommend doing this in all your pictures, if only because twenty years from now, this will look dated. But for sure, Mr Richardson is on to something here. And I am happy to have this available as one of my techniques.

___

Note: if you want to also see the nudes from this session, head on over to mvwphoto.tumblr.com


Metering 101

Light meter at “zero” means a good picture. Right?

Wrong.

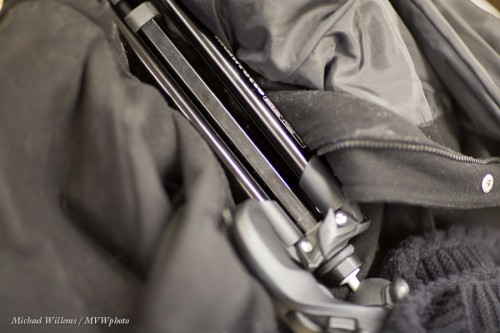
Shoot something black, filling the entire viewfinder with that object, and make sure the light meter points at “zero” as you are pointing at the subject (use the viewfinder!). Take the picture.

You get this:

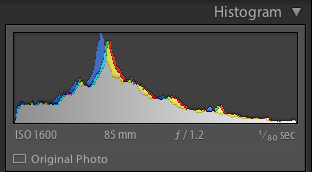
The histogram shows why this is bad:

A histogram of a black object should peak on the left (the dark side).

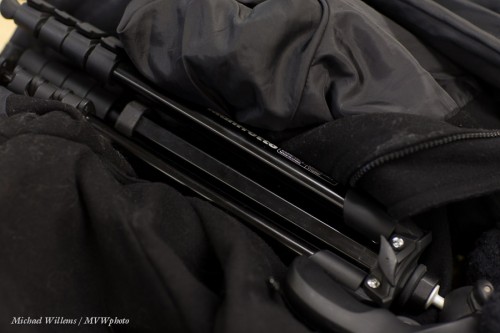
Now do it again, with the light meter pointing at –2 (minus 2):

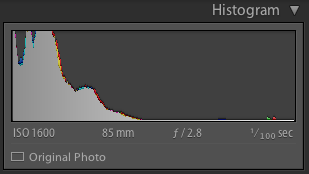
Perfect. Look, the histogram is right for this type of scene:

The moral of this post:

  • “The meter displays zero” does not equal “this will be a good picture”. It merely means “this will be a mid-grey picture, neither dark nor light”.
  • “The meter points to minus” does not equal “this will be a bad picture”. It merely means “this will be a dark picture”.
  • “The meter points to minus” does not equal “this will be a bad picture”. It merely means “this will be a dark picture”.

And there you have it. Now you understand the camera’s built-in light meter.