You have nothing to fear…

…but fear itself. And a little grain. When it comes to high ISO values, that is.

But the benefits of those high ISO values a modern camera gives you can be great, too.

I often see new photographers hesitate to go above 400 ISO, say. Well, it all depends on the camera of course, but generally, you shoot to get pictures, and a picture with grain at 1600 ISO is better than a blurry mess without grain at 400 ISO.

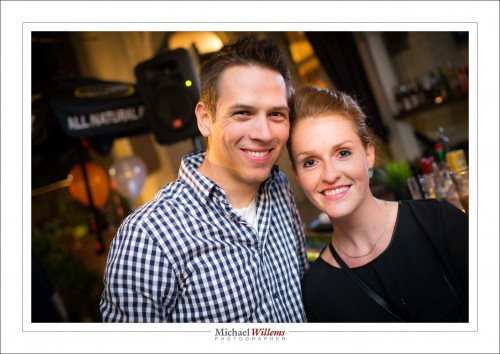
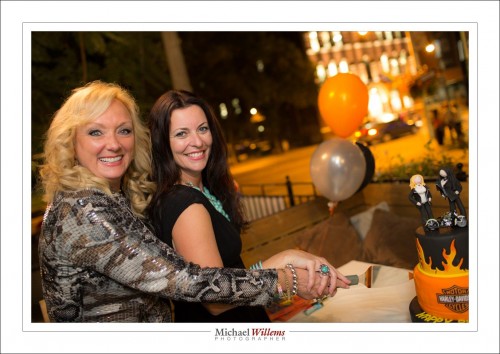
Look at this example from Wednesday night. Jane Dayus-Hinch, wedding organizer/guru/TV personality, with Eddie Suliman, cutting their joint birthday cake.

Outdoors, on Toronto’s Church Street.

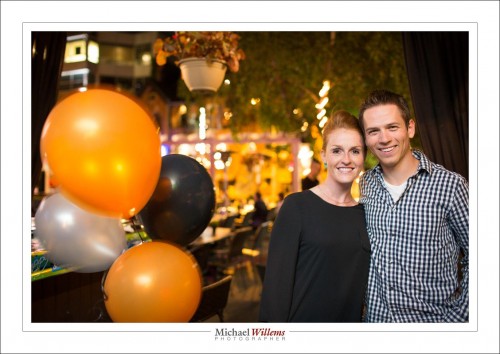
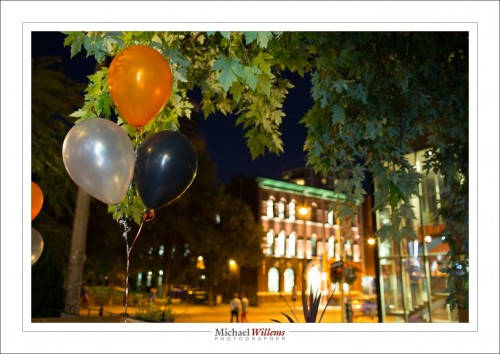
Shot at 1/30th second at f/2.0, at 3200 ISO, using my 1Dx and the 35mm f/1.4 prime lens.

Another few examples, all shot at roughly the same values (the last one at 1/20th second):

So yes, you can shoot at high ISO values. And yes, you can shoot slow, if you use the flash to light your subject (bounced, of course). Your camera will not be as good as mine, but a little grain is OK – better than a picture with those horrid black backgrounds.

___

Want to learn this stuff? Want me to teach you how to make pictures just as good? Sure thing. Contact me. I teach at schools, clubs, colleges, high-end stores, and privately, in person or via the Internet. And it is remarkably easy. Once you know.


More!

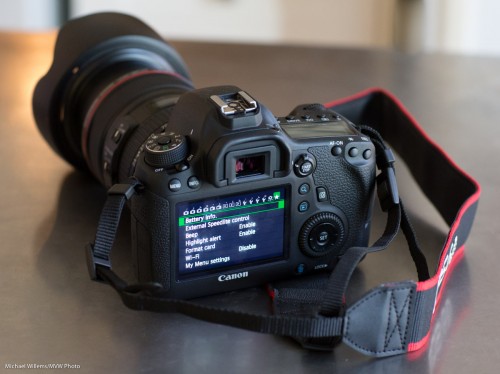
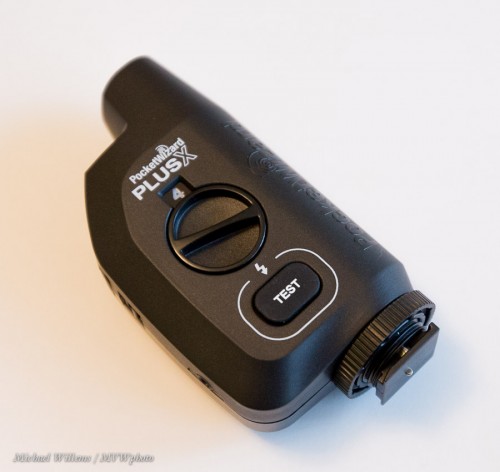
A tip for those of you who have Pocketwizard triggers, like my new PlusX here:

Especially for the new models: Read. The. Manual.

There’s functions and tips that are very helpful, that you will never figure out yourself. Like

  • The relay mode, one channel up.
  • And the way to set the new PW to “transmit only”.
  • And the new LED battery power indication, something I have wanted forever.
  • And tips and tricks for positioning the devices properly to ensure a good radio path.

Reading the manual is sometimes worth it, and this is one of these times.


Timing

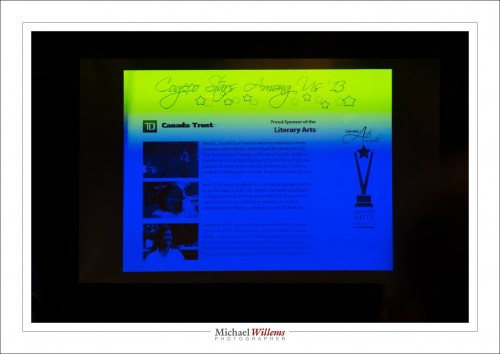
OK. What happened here, at the annual local Arts Council Awards Media Kickoff ceremony? The projector that created this image was broken? The lamp was old?

No, nothing like that. Like fluorescent light, the projector effectively (by virtue of the LCD that blocks the light, or not, and does this for the three primary colours of red, green and blue) flashes on and off at a rapid rate, and if your shutter speed is anything faster than the rate of flashing, this kind of thing will result. This image was taken at 1/2500th second. At that speed, every picture is different, and none are good.

The best strategy is to expose at a multiple of 1/60th second, since 1/60th sec is the power grid frequency and also traditional TV screen refresh frequency.  Multiple meaning 1/60th, or 1/30th, or 1/15th… and so on.

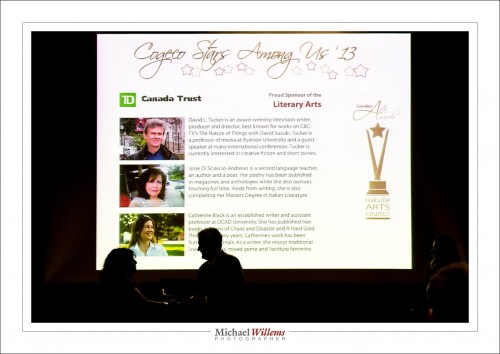
So I shot the second shot at 1/60th second (obviously using lower ISO and smaller aperture):

And hey presto. Good exposure (and just enough back light on the mayor and the award recipient to make it a good picture).

Yeah, I received an award also, for being one of three finalists in the Digital Arts category. The winner will be announced later in the year.

Always nice when my photography is recognized.


Spot Visualization

You know those sensor dust spots?

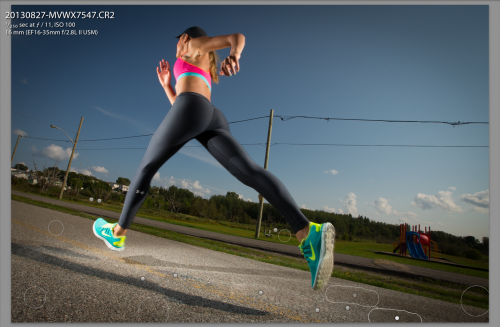
Yeah, I hate them too. When you shoot a sky at a small aperture like f/11, you will see them, sensor cleaning notwithstanding. They’re always there, like little poltergeists that are there to upset you and destroy your images. Modern sensor-cleaning cameras are a little better, but nevertheless, even when 99% of the dust is removed, that leaves the other 1%.

And that is enough. If you look carefully at this, full-sized (keep clicking), you will see some, e.g. top right.

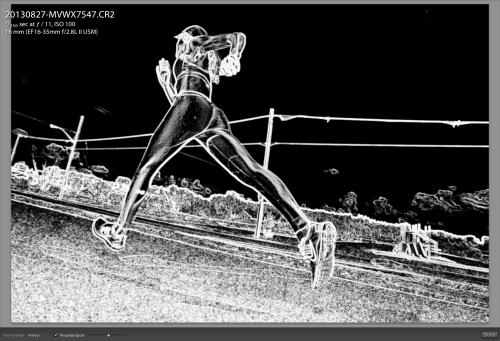
But Lightroom comes to the rescue. In the DEVELOP module, at the top, select the clone/healing tool, set it to healing, and now at the bottom, activate “Visualize Spots”.

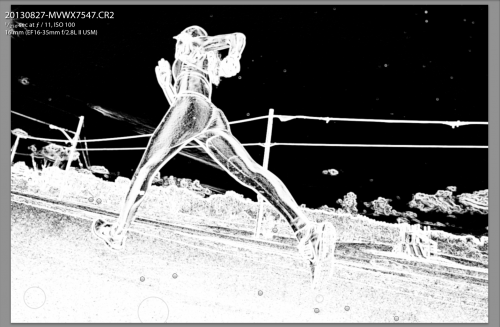
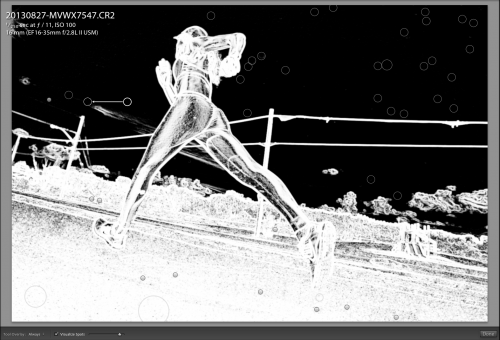
You see no spots? Drag the slider at the bottom to the right so you see them all:

Ouch!

OK, now that you see them, zap them all:

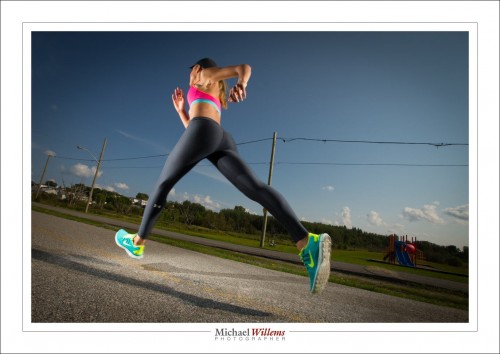
Now go back to normal view, and your image is cleaner than clean. Here;’s my final version (again, for best effect, as with all pictures here, click through to see large):

No dust. Thank heavens.


6D

My oldest son Jason uses a Canon 6D with 24-104 f/4L lens, and I had the chance this weekend to play with it a little. Here’s a portrait I just made, of Jason, with the 6D and that lens:
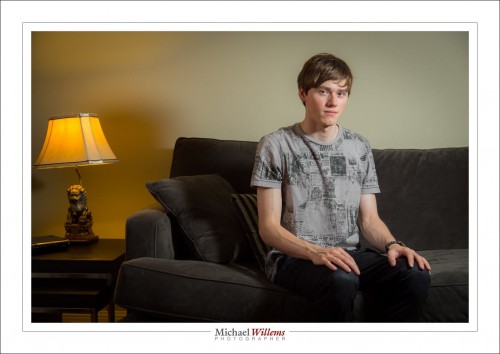
Here my first impressions: Love it!

OK, that’s that.

But wait.. there’s more!

The 6D is basically a low-end full-frame camera. I have always said that full frame will prevail (the sensor is the same size as 35mm film, meaning bright, large, viewfinders, great high ISO performance, and very shallow DOF (“blurry backgrounds”) when you need. Full frame is the way to go, and the 6D does not disappoint.

So why is it “low end”? It isn’t, really. Of course in order to not cannibalize the 5D and 7D sales, Canon left off some things that the 7D, 5D, and so on do have. For instance, there are fewer functions available via buttons (White Balance and Flash Exposure Compensation are two notable missing functions that now need menu or quick menu access).  The frame rate is lower. There are no dual cards slots. The focus system has fewer spots than the 5D, 7D or 1D series.

Do these matter? Not really. I could live without them. This camera looks and feels great; the shutter is quiet even without the “quiet mode” engaged; build quality and sealing are good: I would be delighted with this camera.
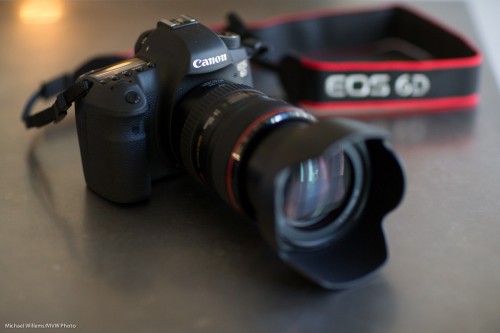
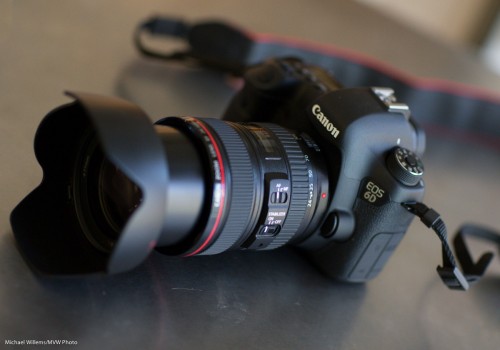
There are many pro features included that I had expected Canon to leave out. Lens adjustment, copyright info;  all these are there. There are even all-new functions like built-in GPS and a pretty good working WiFi mode. The mode button locks. The Quick menu is the same as on the 7D, 5D3, and 1-series. (TIP: in this quick menu, set the joystick to move focus point without further button presses, and invert Av/Tv wheels in M mode).

Minuses? Well, for me these are minor:

  • The menus are not getting clearer (getting rid of the colours is not very clever).
  • The language in some of the new menus is atrocious (after setting copyright info, for instance, instead of a simple “OK”, I need to press MENU, whereupon I see “[OK] has been selected. The settings screen will close after saving the text entered”, then a choice of  “Cancel” or “OK”.  Huh?
  • White balance and Flash Exposure Compensation (“FEC”) are only available via the quick menu. Of course for FEC you can use the flash itself.
  • The viewfinder is, I think, a 97% viewfinder, not a 100% viewfinder
  • We have the traditional 9 AF points in a diamond, rather than the 7D or 1D’s excellent AF system.

But as said, these are minor, and the pluses mentioned outweigh them easily.  Amazing camera – don’t we love the free market? Thank you, Nikon and Canon, for engaging in this eternal great arms race. I would be delighted to have a 6D as a second camera when shooting anything; or as my only camera if I were on a budget and could not afford a 5D3 or 1Dx. Great camera, right at the right time.

 

Dreams

We all have dreams – right? Mine is to buy the only “main” lens I do not have yet: the Canon 85mm f/1.2L. A dream of a lens – the sharpest I have ever used, and the way it focuses manually is like angels are gently licking the internals as you turn the focus rings.

OK – so that is perhaps an exaggeration, the bit about the angels. But I do love this lens, and I just rented it from www.gtalensrentals.com until Thursday. Because when I can not afford a piece of equipment, or when I want to try it out, or when it’s something I would use only a few times a year, I rent.

So this lens: until I can afford, I rent. Here’s a snap of Mau, just now, at 2500 ISO, f/1.4:

This lens is ridiculously sharp, as well as being fast and a pleasure to hold.

Look for some more images made with this lens, in the next few days. And if you have dream equipment too, go rent it for a few days, right now!


Pocketwizardry

As those of you who read this DAILY teaching blog all know, I use both TTL flash (fired by “morse code” flashes of light) and manual flash – and in the latter case, I usually use Pocketwizards.

Like in this shot:

Where are they? Ah. Here:

You see: I “Lightroomed” them out in post. Sometimes that is the only way – and it is simple here.

I had six Pocketwizards. I just bought one more, bringing my total to seven. The new one is a PlusX, the new “low end model”:

I shall use this on the camera, leaving the six others free for use on lights.

Why simple?

The higher-end models have zones. And they do more stuff, in particular the TTL models. But more stuff means more things to go wrong, and TTL means reverse engineered TTL, and hence possibly even more things to go wrong; and funny little batteries are expensive and hard to find. So I am happy with simple pocketwizards.

And yes, these are compatible with -among others!- the old Plus II models. The first 4 channels of the ten equate to the four channels on the Plus IIs.

I am often asked “do you use Canon’s built-in TTL wireless?” No, I do not. I have a 600EX, but I would have to replace my 580EX and four 430EX flashes as well – a $1500 investment. No, thanks.

The best news? These new Pocketwizards cost less than half what the Plus II cost, and are more robust. So far: wholeheartedly recommended. (But, Pocketwizard, please include a hotshoe cable…)

TIP: if you use, or would like to use, flash creatively and well, buy my NEW e-book. Click on PRO FLASH MANUAL above: the world’s best full flash course in 123 pages for just $19.95!


Exposure Compensation!

Expposure Compensation (“Exp.Comp”, or the “plus/minus” button). What does it do?

Not magic. The only ways to make a picture darker are:

  1. Lower ISO
  2. Larger F-number
  3. Faster shutter

..and the opposite for a brighter picture.  There’s nothing else. Nothing!

So what does it do, this exposure compensation?

  • If you are in Aperture Priority mode, it changes the shutter speed (or possibly the ISO, if you are using auto ISO) to a slightly different one than the camera would otherwise use.
  • If you are in Shutter Priority mode, it changes the aperture (or possibly the ISO, if you are using auto ISO) to a slightly different one than the camera would otherwise use.
  • If you are in program mode, it can change either the aperture or shutter or both (or possibly the ISO, if you are using auto ISO) to a slightly different one than the camera would otherwise use.
  • On some cameras, if you are in manual mode, it simply changes the meter reading.

My opinion? Why make things complicated for yourself!

It is best to:

  • Use manual exposure mode and not use exposure compensation, which after all is a meaningless concept when you are doing the setting.
  • Alternately, when the light changes quickly, you use aperture mode (or shutter mode), combined with exposure compensation for light or dark subjects.
  • In all cases you do not use auto ISO!

Simple once you know. Keep things easy for yourself, and learn the three quantities (aperture, shutter, ISO) and how they affect your pictures.

Of course as speedlighters know, when using flash, there is a fourth quantity: flash power!)


Focus

In yesterday’s self portrait, I mentioned I pre-focused. I did the same in the panning shot of a few days ago. “How?”, I am asked.

Good question. And it’s simple.

  1. Select one focus point (centre, say, or any other)
  2. Aim that where the subject will be – that is, at an object the same distance the subject will be (I used the front of the bed). When shooting in a studio, I put an “X” on the floor, then put a light stand with a hat on the “X”, and focus on that. Then as the self timer counts, I replace the light stand with me.
  3. Focus, and hear the beep to indicate focus has been achieved
  4. Lift your finger from the shutter (or focus-) button
  5. Set the lens to MANUAL focus

Now you are pre-focused at the correct distance, so you can set the camera to self-timer and shoot, if it’s a self portrait. If it is a panning shot, no time is lost when shooting. As long as you keep the camera where it is, and you ensure that the object indeed will be at the distance that you focused at.

This is a technique I use quite often. Also, for instance, when shooting fireworks or night scenes, when focus is hard to achieve.


Selfie…

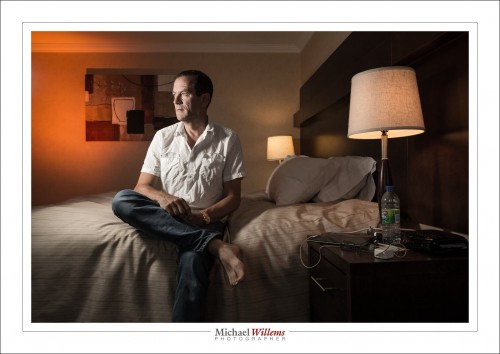
From Hopper to Leibovitz, hotel rooms have always been a fascinating setting for art portraits.

I portrayed myself in a hotel in Timmins, Ontario, Wednesday morning, evoking feelings of these prior artists, but especially, creating with light. Straight out of the camera.

If I say so: my best self portrait. Ever.

Click to see larger:

I did this in my suite in the Timmins Day’s Inn. I was alone and I used:

  • Camera perched on an upturned Ottoman
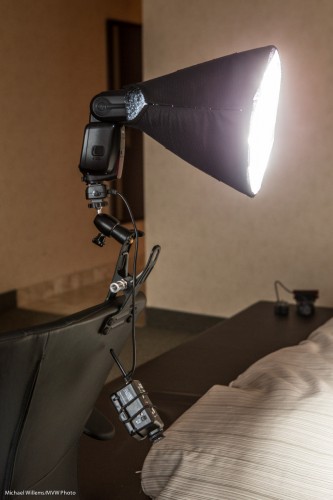
  • Main light is a 580EX flash with a Honlphoto Traveller 8 softbox, clamped to a desk chair.
  • Additional flash is a 430EX speedlight with a Honlphoto Rust coloured gel, for some nice warm light.
  • Camera at 100 ISO, f/5.6, 1/60th second.
  • Flashes fired with Pocketwizards.

Camera prefocused and using its self timer. This took me only a couple of attempts to get right.

The main light: a flash connected with a Flashzebra cable and mounted with a ball head onto a clamp, clamped to a chair. Note the second flash sitting in the background.

And no, the name “selfie” doesn’t do it justice, does it?