A quick product shot

Today, I am sharing a quick product shot.

Here’s the shot, of my “nifty fifty”, a 50mm f/1.4 lens:

And here’s how I shot it:

  • I used a Canon 5D camera on manual at 100 ISO, f/4 and 1/125th second.
  • The lens was on a table with a white sheet of Bristol Board underneath.
  • The background was an improvised white background (I used a reflector).
  • I used a 430EX flash with a Honl grid, diagonally above the lens, as the main light. The grid causes the dropoff from the centre.
  • I used a 430EX flash with a Honl blue gel and a Speed Gobo to illuminate the background.
  • I used e-TTL to fire the flashes, from my 7D’s pop-up flash (the 7D will support this, like Nikon cameras. On other Canon cameras I need to use a 580 EX flash on the camera to drive the remote flashes).
  • I set a flash ratio of 8:1 a:b, where A was the main flash and B was the product flash.

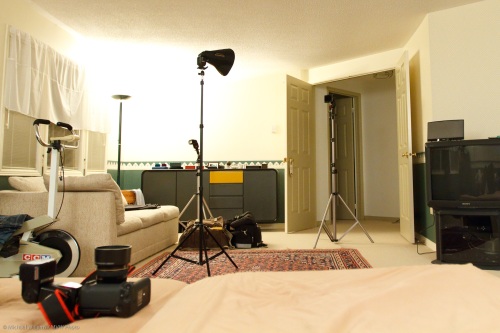
All of which looked like this:

Simple. It only took a few minutes to set up, which is good since I was tired.

One tip: when shooting this type of product clean it well using a soft brush, or else you will spend hours in Photoshop or Lightroom aftereard, cleaning dust.

Using light today.

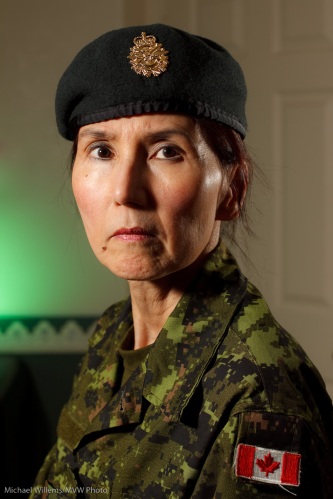
I shot Victoria Fenner today. But only, you will be glad to know, with a camera.

Let me talk you through that, shall I?

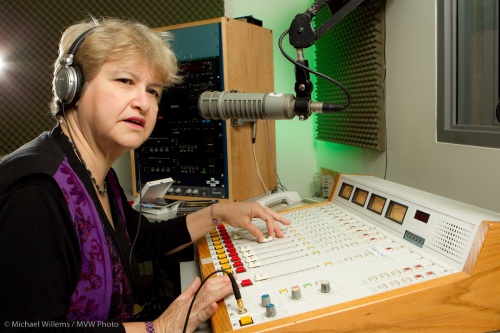
Victoria is an audio expert. She used to run the studio at McMaster University that we shot this in. We decided to shoot her doing her thing – and sound is her thing. So we shot in a studio first:

Camera: I shot her with a Canon 1D Mark IV. The camera was on manual at 100 ISO. I used a 24-70 lens set to around 24mm – meaning around 30 “real” mm.

Light: the camera was equipped with a 580 EXII flash to act as e-TTL “master” to drive three 430EX speedlites:

  1. The “A” flash through an umbrella on camera right, shining into Victoria’s face. An umbrella throws nice soft light, great for faces. (There is a certain irony in the fact that we use the word “umbrella” to name this thing that throws around this nice light. Umbra means shadow!)
  2. One “B” flash with a green Honl Photo gel in the background – I love adding a splash of colour, and green goes very well with purple.
  3. Another “B:” flash, fitted with a Honl Photo 1/4″ grid, as hair/accent light shining toward the camera. You can see it just outside the field of view.
  4. I set an A:B ratio of 4:1 to 8:1.

All this took about ten minutes to set up, and ten minutes to take down.

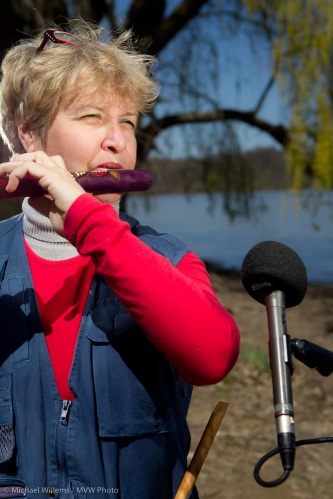
Then we shot some outdoors. For this, I used two flashes off camera: one into a Honl gold/silver bounce card; the other using a grid, as before. Yes, in bright sunlight you can fire these flashes using light-controlled TTL.

This was a bright day in April around noon. But it does not look like noon light, does it? I shot in Aperture mode, with -2 to -3stops exposure compensation. That darkened the background to give it colour saturation. The flashes took care of the foreground.

Son in car

My son, just now, in a car in broad daylight, in a shot that took only a couple of minutes to set up:

I used three speedlites on light stands; all three were fired using e-TTL light control from a fourth one on the camera.

One speedlite is on camera right, one on the left, and one in the middle using a new Honl softbox to light up his face.

Of course with a few more minutes I would have

  • Moved the softbox so it did not reflect,
  • Positioned the other better
  • Used more gels to add more colour
  • Cleaned the car more

… but with a teenager, even three minutes is a rare gift.

A portrait with three speedlites

Here’s a portrait I just shot.

I used the Canon 1D Mark IV with a 580 EX II flash on the camera, used only to drive three 430 EX II flashes using remote e-TTL. This is easier than ever: with the right knowledge and tools it takes mere seconds to arrange.

So here’s how I did it.

I used a 50mm prime lens (meaning 65mm effective focal length) with the camera on manual, 100 ISO, f/5.6 at 1/125th second.

The lights were:

  • One 430 speedlite, the key light, is on camera left one foot away from the subject and is mounted on a cheap light stand. It is equipped with a new Honl Traveller 8 softbox.
  • The second, the accent light, also on a light stand, is one foot behind the subject, is aimed forward at her, and has a Honl 1/4″ grid fitted.
  • The third flash, aimed at the wall, is mounted on its little plastic light stand and has a green Honl gel fitted to its speed strap in order to add a splash of colour to the background.
  • I set an 8:1 A:B ratio to stop the accent lights from becoming too bright (the key light was A). I also used – 1/3 stop Flash Exposure Compensation, since the initial frame showed the face a bit bright.

That setup was:

Simple and effective. And if I say so myself, I think the green gelled background accent was an inspired choice.

Today, with small flashes and modifiers, using TTL, you can do professional studio work in no time.

Grids and why you might like them.

Grids,  like the Honl grid attached to my flash here, are very important modifiers. A grid ensures that the light from a flash does not go “everywhere”. Instead, it goes to one cone of light, that drops off softly at the edges. This was taken by a student a few hours ago:

Oddly, that cone is a bit softer than the straight flash.

TIP: Use a gel if you want to see where a light is going, That way you can identify easily which light is shining where:

And have fun.

That wired effect

Here’s a picture I just took of my favourite patient model. I used some technique to get that dramatic “Wired” effect:

The way I made this picture:

Camera:

  • Camera: Canon 7D with 50mm f/1.4 lens
  • Set to Manual, 1/125th sec, f/8, 100 ISO

Flash:

  • Multi-flash TTL with one on-camera and two off-camera flashes.
  • One “A” Flash on the camera (580 EX) as fill flash and “commander”;
  • The main lighting was rim lighting: two 430 EX flashes either side of the model, slightly behind, set up as “B” flashes.
  • I was using a 1:8 A:B ratio.
  • The 430 flashes were each equipped with a Honl 1/4″ grid, to stop their light from hitting the entire room.
  • Flash compensation -1 stop to avoid overexposing the rims (this is common when your main flash lights only a small part of the picture).

Post:

  • And finally, I desaturated the colours in Lightroom: Presence +15, Vibrance -20 and Saturation -40. I also did a version where I desaturated only red and orange, and increased sharpness, which is the usual technique.

Try it yourself, or come to our two-day Light workshop 10+11 April to learn exactly how to do this.

7D popup residual glow…

Look at this, from yesterday’s pic:

The Canon 7D can direct other flashes with its popup – unique for Canon, and that is what I was doing in this portrait (the main flash is a 430EX with a Honl reflector).

But when you do this, even when you turn the popup flash off (it only commands the other flashes), there’s a tiny residual glow! Every time. That is the little white dot.

Tip: cover it with your hand when shooting (or use Photoshop).

Portrait using two flashes

Here’s an impromptu portrait I took on Tuesday, of a lovely student who kindly volunteered to be the subject, in the Flash for Pros course:

And here’s how I did this:

  • Camera: The camera was a Canon 7D
  • Lens: I used a 50mm f/1.4 lens. (50mm on a crop camera, even the very cheap f/1.8 version, makes a great portrait lens).
  • Settings: The settings were Manual mode at 1/30th second, f/5.6, 400 ISO
  • Flashes: I used two 430 EX flashes on light stands, fired from the pop-up flash (like most Nikon cameras, the 7D allows this). Other than that, the pop-up flash was disabled. (I could also have used a 580EX on the camera as master.)

And how I used those flashes:

  • I used e-TTL, so I did not have to meter and set the flashes manually.
  • The main flash (“A”) was on camera left: a 430EX fired into a Honl gold/silver (half CTO) reflector. It was about a foot away from her.
  • The second flash was also a 430EX; this one fired straight at her from 45 degrees behind, through a Honl 1/4″ grid. This flash was also about a foot away from her.
  • I set an A:B Ratio of 4:1, so the main light was two stops brighter than the hair light.

Another student that night wrote a blog post, here, where you can see a few pics with some of the modifiers I used.

So it’s actually quite simple: now you go try. It is amazing what you can do in just a few seconds with just a couple of flashes (speedlites) and some small, light, convenient modifiers.