Easy Portrait Tip

An easy portrait tip (or two) for you today.

Uncle Fred puts every subject dead in the centre. You, of course, will not do that, since it leads to an unbalanced image. You will use off-centre composition instead. In a portrait, you will put the centre point (the eyes) a third of the way from the top:

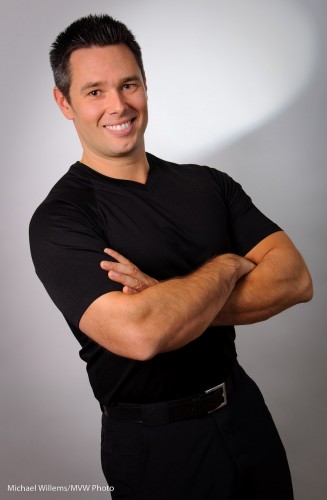
Able Assistant Matt

You will also:

  • Ensure there is a catchlight in the eyes.
  • Focus on those eyes.
  • In a formal portrait, use f/8 (or at least f/5.6 – f/11, in that range).
  • Light from one side, or straight on, but in any case from 45 degrees above.

Like I said, simple – but very effective. Try!

Smiiile!

OK, so – no, don’t ever say that to a subject. The command “smile” is like saying “look weird”, “look unnatural”, “assume a pose”. And not only to young children.

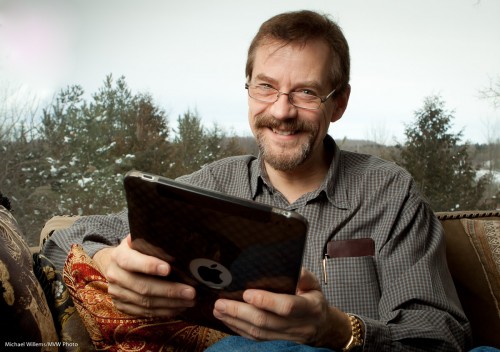
Instead, tell stories, say something funny, get the subject to relax. This picture of me was taken by a student a day or two ago:

Michael Willems - smiling

And I never smile. But, mention certain subjects and I smile naturally, not because I am told to smile – that never works.

This is one reason portraits can take time to make. Getting a subject to relax cannot be done in a hurry.

How did we light this?

  1. Expose for the background. Ensure the background light does work as “fill light” for the subject.
  2. Use an umbrella-mounted speedlight (shooting through the umbrella if you can), connected via pocketwizards.
  3. Position the umbrella somewhere 45 degrees above the subject, and for a male, 45 degrees to the side if you like.
  4. Set the flash power according to the exposure you worked out for the background. Use a light meter to verify that.

Bob’s your uncle: Practice that technique and you will do much better when shooting portraits. And remember, never say “smiiile”.

Finishing

Today’s post is about finishing faces. It has no illustrative photo, for a reason.

You see, when you shoot a portrait, with today’s multi megapixel cameras and great lenses, you can zoom in to pore-level. And when you do that, even Angelina Jolie is human rather than angelic.

So it behooves us to be a little easy on the skin. To go easy on imperfections. But in a subtle manner.

Here are a few things to make things look better after the fact:

  1. Use a softening filter. We rarely do this anymore in the Photoshop age.
  2. Select a soft image setting in our cameras. This too is unnecessary.
  3. Use the “Clarity” setting in Lightroom, and set it to, say, -15. This is mathematical magic worth trying.
  4. Use Lightroom’s (or Photoshop’s)  healing brush to permanently remove temporary blemishes – such as pimples, bruises, etc.
  5. Use Photoshop’s Healing Brush to move wayward hairs into place.
  6. Use the same Lightroom Healing brush to make slight facial adjustments (I have been known to ever so slightly move an eye).
  7. Minimize permanent features – Healing brush set to an opacity of 33%, say.
  8. Use the HSL tool to increase the luminance of orange – this is kind to skin.
  9. Optimize the exposure of skin – the brighter, the smoother.
  10. Slightly vignette the image.

And with some simple tools like the ones above, carried out in seconds, we can subtly impriove faces until the subject loves the image without knowing quite why.

And that is why I am not illustrating this with an image. I would rather keep everyone guessing.

Light as a creative tool

A quick tip today. Look at this portrait of a personal trainer which I helped a student take earlier today:

Portrait of Travis

Standard key light (a small strobe), fill light (in an umbrella) against a white background. But instead of onto the head, which is already separated from the background by its colour, I turned the hairlight onto the background.

And because it has a snoot on it (a Honl Photo snoot, attached to a speed strap), I get this nice parabola-shaped beam of light behind the subject’s head. A technique worth using occasionally. Avoid getting stuck in the “same old light” category!

(The parabola reminds me of a satellite, somehow. Probaby because have an engineering degree?)

Portrait tip

As I said before, you can use just about any lens for portraiture.

But there are certain guidelines to obey. Like: when using a wide lens, put the subject small in the centre. Then optionally crop.

To illustrate. This is a 50mm portrait of me just now:
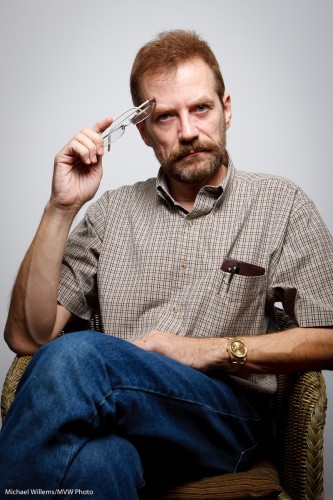
Michael Willems by Michael Willems (50mm)

Michael Willems by Michael Willems (50mm)

That is just about OK. Any wider and it would be too wide, and for a portrait like that, ideally I would like to zoom in more, to maybe 70mm, and then to stand back.

But perhaps you cannot do that because there is no space. Or you want the environment in the image.

Fine, you can use a wide angle lens. But be careful. If you put your subject too close, the nose will be too large and the face distorted. And if you put your subject near the edge of the image, it will be distorted also.

Look at this 35mm portrait:
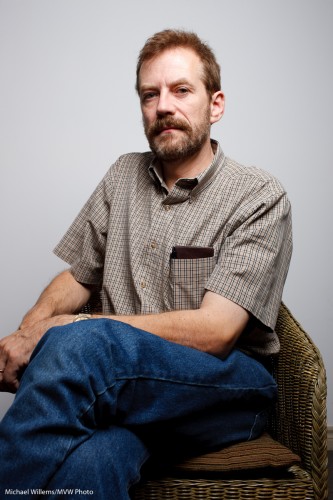
Michael Willems by Michael Willems (35mm)

Michael Willems by Michael Willems (35mm)

Not good. But what if we put the subject smallish in the centre?
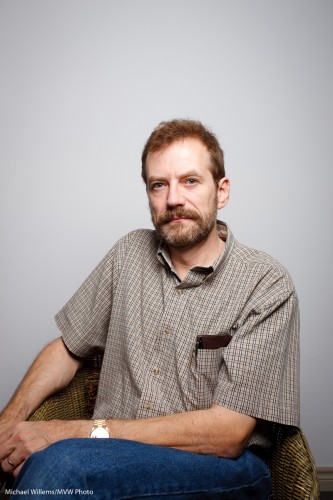
Michael Willems by Michael Willems (35mm, subject in centre)

Michael Willems by Michael Willems 35mm, subject in centre)

That is fine, And optionally, then we crop:
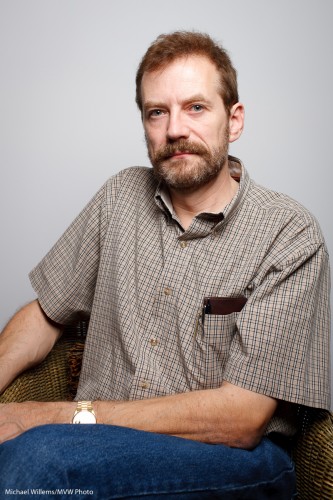
Michael Willems by Michael Willems (35mm, cropped)

Michael Willems by Michael Willems (35mm, cropped)

By cropping, we have now essentially made the 35mm lens into a longer lens. But even without cropping, it is the fact that the subject is in the centre and not very big that makes the composition fine.

I can think:
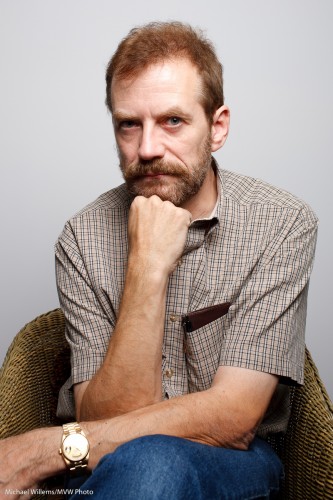
Michael Willems by Michael Willems (35mm, cropped)

Michael Willems by Michael Willems (35mm, cropped)

I hope this brief example helps dispel the thought that you “must” have an 80-135mm lens for portraits!

And to finish, a silly image.
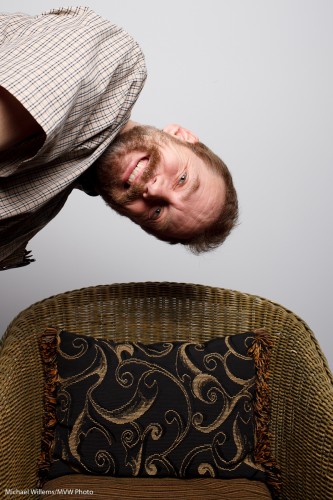
Michael Willems by Michael Willems (35mm, silly)

Michael Willems by Michael Willems (35mm, silly)

Yes, I can be silly.

Finally, a question for you to try your hand at, at home. Can you figure out how I lit these images?

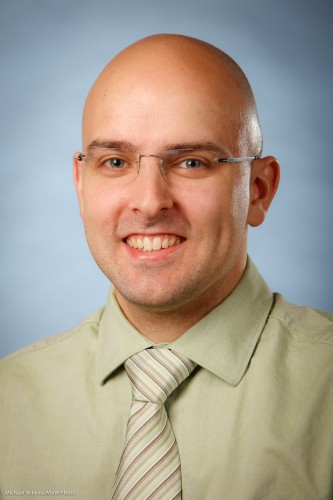
The Royal

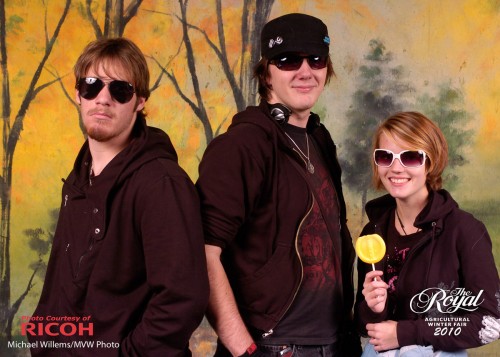
The last few days, and the next eight days, I am taking portraits at the Royal Agricultural Winter Fair in Toronto. Family portraits.

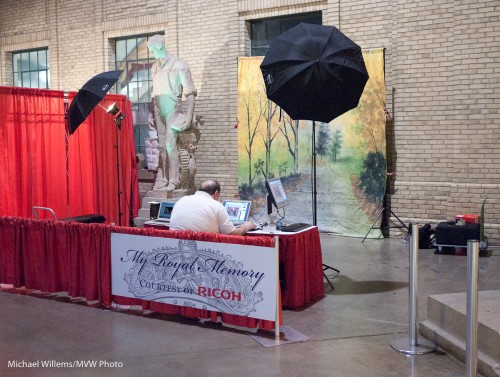
To do this, my colleague Paolo and I use this simple setup:

Setup at The Royal

Setup at The Royal

Two strobes in umbrellas, and a backdrop. That is it!

So you need a camera plus:

  • Two monolights, 45 degrees off to the side, high
  • Two stands and two umbrellas
  • A light meter
  • A backdrop
  • A way to connect the camera to the lights: perhaps pocketwizards, but a cable will do.

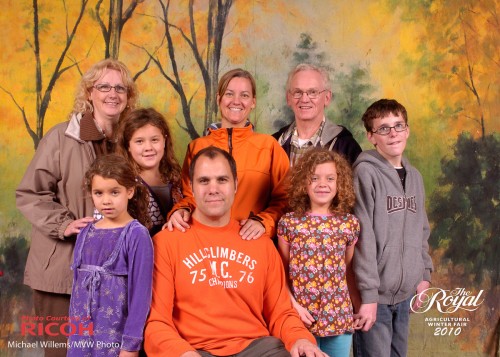
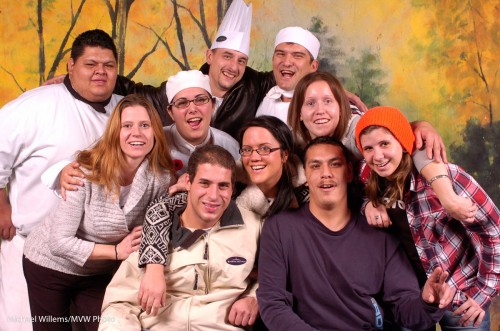
That is all. And every picture is reliable. Like this:

Family Portrait

Family Portrait

Friends

Friends

Friends

Friends

More tips:

  • People skills and compositional insight both help greatly.
  • Positioning (not “posing”) is the most important thing.
  • “Straight on” poses are not normally pleasing.
  • Telling people to “Smile!” is not a guarantee for nice photos

The moral of this post: simple light, two umbrellas, can do very well in giving you reliable images.

Catchlights

Typically, a portrait needs to show catchlights in the eyes.

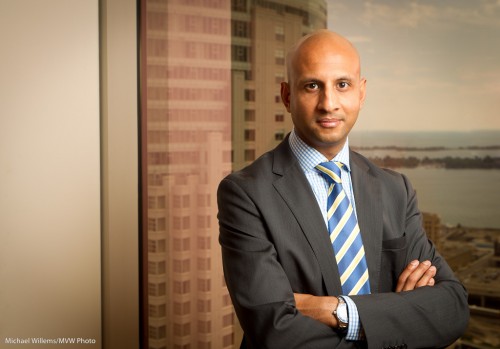
Those little sparkles of light. Like in this portrait of a recent client, Mo Vikrant, an amazing (and amazingly well educated) young financial advisor in Toronto:

Mo Vikrant, photo by Michael Willems

Mo Vikrant

Can you see how those dots of light add life, add sparkle, to this portrait?

Now, I am not as adamant as PPOC, the Professional Photographers of Canada, that every eye must have a catchlight (and only one), or it is a failed portrait. But I do think that typically, yes, they need to be there, and they need to be round.

So I used a speedlight shot through (not reflected off) a partially-unfurled umbrella for that portrait.I cold also have used the Honl Traveller 8 softbox – this too would have given me nice round catchlights.

Detail is important!

Learning light

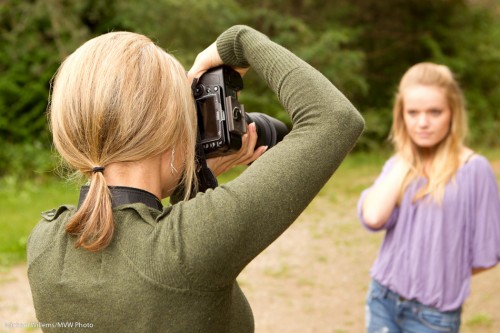
In an intensive half-day custom course, I taught my student Melony some glamour photography techniques a few days ago. From flash techniques to colour to modifiers to using a light meter to posing.

She brought her daughter as her subject, and both did excellent work.

Student shooting model

Student shooting model

(By the way, did I ever tell you to make the viewer work in interpreting an image? Yes I did. And the blurred out daughter in the background is an excellent way to do that. Don’t tell the whole story, let the viewer figure it out.)

But anyway. Student Melony also kindly photographed me:

Michael Willems, by Melony McB.

Michael Willems, by Melony McB.

That is a great portrait.

And I can say that because it is the photographer who makes the portrait, in this case, more than the subject.

So how did we do this? Why does it work?

This works because:

    1. The light is good. First, Melony exposed the background properly (i.e. she did not overexpose it: exposing less is good, so that the subject, not the background, becomes the “bright pixels”). Willems’s Dictum: “Bright Pixels are Sharp Pixels”. Also known as “blurriness hides in the shadows”.
    2. Then, I am lit by the sun from the right (aided by a speedlight, but as the sun came out just at the right moment, this was no longer necessary). That gives us the nice shadow.
    3. But then, in a twist, and that twist is what does it, I am lit by a strobe with a softbox on the (camera) left – that gives the “ultra-realistic” look. Light from the back -and yet I am bright in the front.
    4. This image also show good use of appropriate props – I am holding the camera, which for a photographer is part of the story.

      Pocketwizards and a battery-powered Bowens light, as well as a speedlight, were used here.

      And kudos to those of you who spotted the other essentials, around my neck: a Hood Loupe by Hoodman, and a flash meter.

      Light makes a photo. Creative light makes it better. And it is simple. Once you know it.

      This is the sort of stuff I teach at my workshops, and Joseph Marranca and I are doing several more in October: check the schedule on www.cameratraining.ca !

      And yes, I wear a tie almost every day.

      Ten Portrait Tips

      Here’s ten important portrait tips for you today:

      1. Use the right lens. A lens in the 35-100mm range is best (on a crop camera). A 50mm f/1.8 lens can be had very affordably, and this length (equivalent to 80mm) is great for headshots.
      2. Think about your lighting. Natural light is best (from a north facing window). Avoid direct flash: when using flash, bounce it off a white or near-white wall or ceiling or use other modifiers or off-camera flash. Use a hair light when needed to separate a person from the background. Consider adding a splash of colour. Match the light to the mood, and realise that good light is all about the shadows.
      3. Closest eye sharp. Ensure that the eyes are sharp. Nothing else needs to be sharp, but the closest eye in particular has to be in focus.
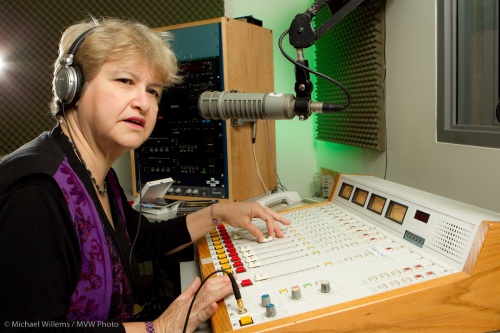
      4. Think about the environment. If this is an environmental portrait, use a wider angle lens and show the subject interacting with, or surrounded by, that background. But if the background is not meaningful, blur it.
      5. Get the Moment! Shoot a lot, so you will catch the right moment, not the cheesy expressions.
      6. Catchlight: ensure the eyes show a little catch-light. If not, they look lifeless.
      7. Off-centre composition: do not put your subject, or your subject’s eyes, in the centre of your photo: Uncle Fred does that. Instead, use off-centre composition (“the rule of thirds”).
      8. Directing: never tell your subjects you are posing them: say “positioning” instead.
      9. Positioning: Angle your subjects unless they are very thin. In multiple-person groups, make little groups, use a combination of “sit”, “stand” and “lean”, and use joiners to join the groups. having a subject lean into the camera is often flattering.
      10. Props – consider using props that are meaningful (an author holding a book, for instance).

      An environmental portrait sample:

      Victoria Fenner

      Audio Expert Victoria Fenner in the studio

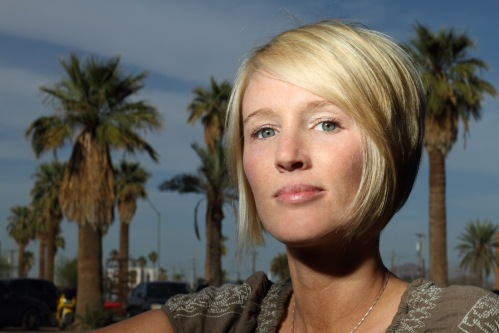
      And another one: a headshot, but still environmental:

      Christy Smith of Studio Moirae

      Christy Smith of Studio Moirae

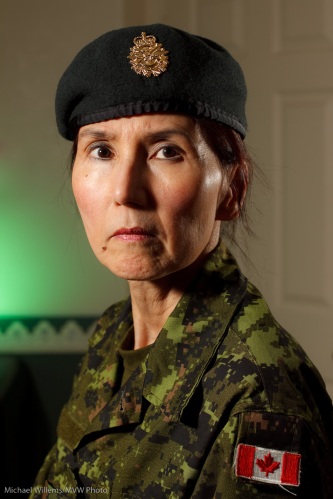
      And here’s a traditional headshot:

      A Female Soldier

      Army Reserves Private

      There are of course legion more tips and tricks, but the above will get you going. There will be more tips coming!

      If you want to learn more, and “hands on”, then come for a short, effective, course – send me an email to hear when and where. Like the all-day Advanced Lighting course on May 30 in Mono, Ont: there are still spaces.

      Tip time: studio setup

      A few quick setup tips – for portable studios like mine, here today for a corporate shoot:

      Portable Photo Studio Setup Tips

      Portable Photo Studio Setup

      In no particular order:

      • Roll the paper the way I am showing here. Like a toilet roll: roll from the top. That way you get more available height.
      • The backdrop stand goes in a bag. Ensure that when you put it back in the bag, the large holes show. That way you can see which sidebar is the middle one – you may not need it (like me here).
      • Ensure cables are out of the way. Wrap them around light stands to avoid them hanging out too far where people can trip over them.
      • Always bring a power bar.
      • Use tape or something large on the floor to tell models where to stand and how to orient themselves.
      • Tell subjects “baby steps only when I ask for adjustments”. Else they always turn too far.
      • Start with the body. Then the head. Then the eyes.
      • Arrange to have a test subject available. Else your first client is the test, and that looks unpfofessional.
      • Use a tripod. Adjust height as needed.
      • Camera to 100 ISO and auto ISO off.
      • Camera on manual, 1/125th second, f/8, and use a meter to adjust the lights to that.
      • Test shot one: no flash. It has to be dark!
      • Test shot two: flash, but no subject (focus manually). It has to be white!

      That is, I trust, helpful. Efficiency is all, or a two-hour shoot can turn into four hours with setup and takedown.

      A studio like this one, the one I built this morning, took me half an hour to build and 15 minutes to take down.