Cheers.

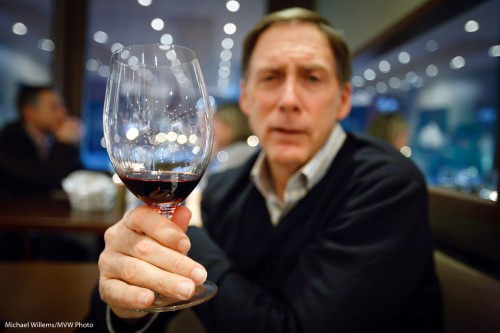
The other day, before a course I taught, here’s a friend and student holding out his glass of Merlot – no, it was not a Merlot, it was an Italian red:

Bruce holding glass

Isn’t that a nice shot?

So here are a few notes, numbered for your convenience, to help you take the same.

    1. As I point out time and time again, a shot that “makes the viewer put it together” is often great.
    2. A blurry person is often also appreciated by… the person, if they are shy. When people (ladies and teenagers, often!) say a panicked “no pictures”, try this.
    3. I used a 16-35 mm lens set to 30mm on a full frame camera, set to f/2.8.  On a crop camera, you could use a 24mm prime lens, for example. On my 1Ds I could also have used the 35mm prime. This would have been my favourite lens for this shot.
    4. The wide angle gives you those wonderful converging lines.
    5. The wide open aperture of f/2.8 enabled me to shoot at 1/15th of a second using available light – at 3200 ISO.
    6. The blur also gives me a simple image with no distractions.
    7. It is very important that the lens is wide open. Look at the out-of-focus lights. They are circles. If the lens had been partly stopped down (to f/3.2, or f/4, say) you would have seen octagons or hexagons instead of circles.
    8. And yes, you can shoot at 3200 ISO with a good camera. Point-and-shoots will not do this, even with Lightroom noise reduction.
    9. That speed of 1/15th second is still a bit slow. You could easily get motion blur. So I took 3 or 4 pictures, of which this one was razor sharp.
    10. I focused carefully, using one focus point, on the glass.
    11. I had the subject move his glass forward, and I moved as close as the camera would let me focus. This makes the background go blurrier.
    12. Finally, I had to get the white balance right in post. This is very important with available light shots, which can otherwise take on an orange/yellow cast.

      A little work – some thought goes into even a simple snap. But do it, think, and you get nice shots where you would not have expected them. And that is what sets you apart from Uncle Fred.

      Portrait tip

      As I said before, you can use just about any lens for portraiture.

      But there are certain guidelines to obey. Like: when using a wide lens, put the subject small in the centre. Then optionally crop.

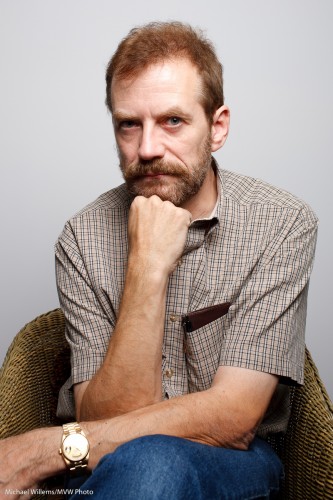
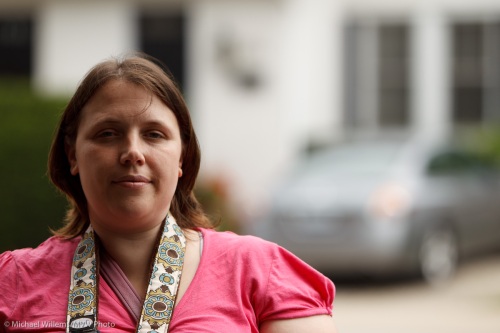
      To illustrate. This is a 50mm portrait of me just now:

      Michael Willems by Michael Willems (50mm)

      Michael Willems by Michael Willems (50mm)

      That is just about OK. Any wider and it would be too wide, and for a portrait like that, ideally I would like to zoom in more, to maybe 70mm, and then to stand back.

      But perhaps you cannot do that because there is no space. Or you want the environment in the image.

      Fine, you can use a wide angle lens. But be careful. If you put your subject too close, the nose will be too large and the face distorted. And if you put your subject near the edge of the image, it will be distorted also.

      Look at this 35mm portrait:

      Michael Willems by Michael Willems (35mm)

      Michael Willems by Michael Willems (35mm)

      Not good. But what if we put the subject smallish in the centre?

      Michael Willems by Michael Willems (35mm, subject in centre)

      Michael Willems by Michael Willems 35mm, subject in centre)

      That is fine, And optionally, then we crop:

      Michael Willems by Michael Willems (35mm, cropped)

      Michael Willems by Michael Willems (35mm, cropped)

      By cropping, we have now essentially made the 35mm lens into a longer lens. But even without cropping, it is the fact that the subject is in the centre and not very big that makes the composition fine.

      I can think:

      Michael Willems by Michael Willems (35mm, cropped)

      Michael Willems by Michael Willems (35mm, cropped)

      I hope this brief example helps dispel the thought that you “must” have an 80-135mm lens for portraits!

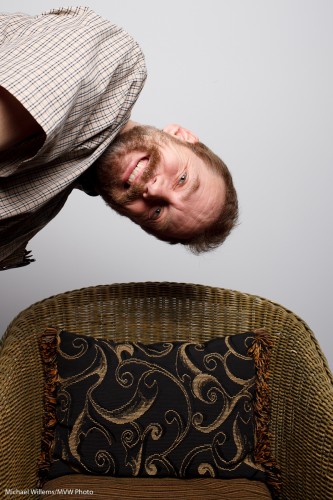
      And to finish, a silly image.

      Michael Willems by Michael Willems (35mm, silly)

      Michael Willems by Michael Willems (35mm, silly)

      Yes, I can be silly.

      Finally, a question for you to try your hand at, at home. Can you figure out how I lit these images?

      Accountants of the wild frontier

      Today was a good example of n event shoot.

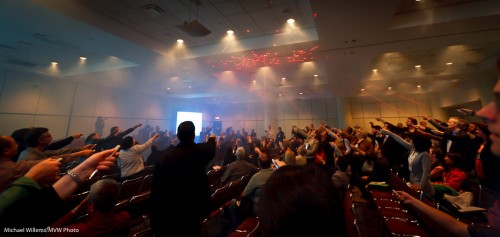
      Colleague Joseph and I got to the Metro Toronto Convention centre to shoot a few hundred accountants pointing laser pointers at the ceiling. A very un-accountant-like event!

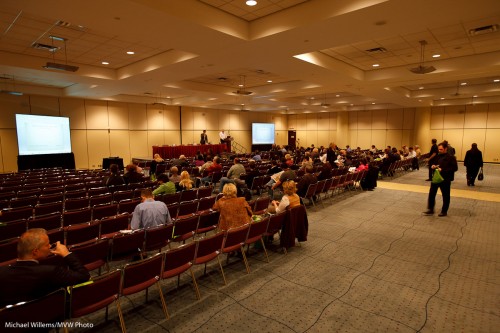
      So we set up ladders and camera with the light just right. We use a combination of ambient and gobo’d flash. Test shots of the room looked like this:

      Convention hall

      Convention hall

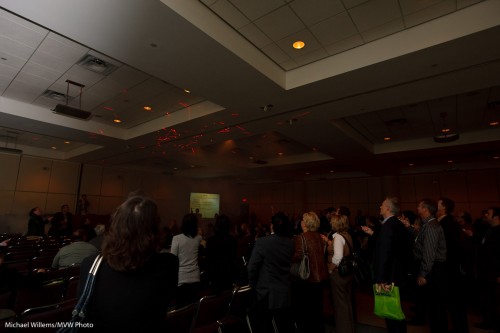
      The event starts. And as the fog machine we had arranged starts and on command, the accountants’ laser pointers aim… unexpectedly, someone dims the lights to just about zero.

      So we get this:

      Convention hall

      Convention hall, lights dimmed

      No time to say anything: we only have moments to shoot.

      So I quickly had to:

      • open up the lens to f/2.8,
      • shoot at 1/15th second,
      • at 800 ISO,
      • I quickly set the flash to 1/16th power manual and bounced behind me (if I had had more time I would have gone up to 1/8th power),
      • ….and then at home, push the exposure another stop!

      In the end, this gives this:

      Convention hall with lasering accountants

      Convention hall with lasering accountants

      Not too shabby eh? Ever seen such a fun group of accountants?

      The moral of this post: you have to be quick on your feet and problem-solved instantly when someone is hiring you for a shoot. You cannot come home with excuses: need photos instead.

      And it never hurts to shoot RAW.

      Scale and grandeur

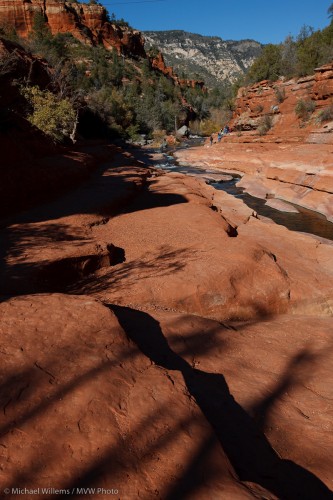
      It is important to add both a sense of scale and a sense of grandeur to landscape photos.

      You add grandeur by using a wide lens and getting close to something (even the ground). That shows the size.

      And you add scale by helping the viewer. Adding people is a common technique, as I did in this image of Sedona, AZ, in December last year:

      Sedona, AZ

      Sedona, AZ

      You need to see that image real size to really see it (click through, then select full size). And that brings me to today’s last tip: make it big. Large prints are sooo much better than 4×6 prints.

      Wide, and wider

      Wide angle lenses are good, you have heard me say this many times.

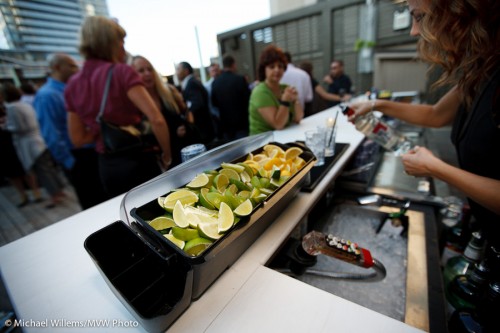
      Not just for travel. Also, for instance, for “event background shots”, like this recent picture taken at a corporate event:

      Bar Lemons

      Bar Lemons

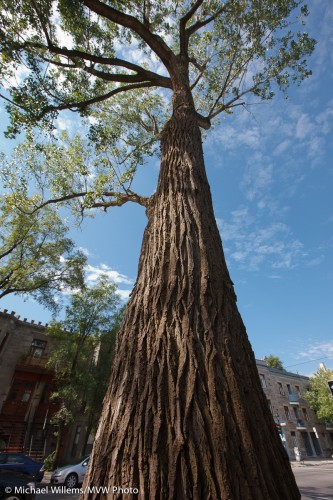
      Or for this:

      Montreal Plateau Tree

      Montreal Plateau Tree

      Wide angles because:

      • You get more in (d’oh).
      • They are easy to focus – if you wish, you can get it all in focus (but see the note below).
      • It is easy to avoid camera shake (a safe-ish shutter speed is “1 divided by the lens length”, after all, so shorter lenses are easier).
      • You introduce depth (“close-far” technique).
      • You can exaggerate perspective, if you wish.

      So how wide is “wide”?

      I would say 16-35 mm on a “full frame” camera – that means 10-20 mm for those of you who use a crop camera, like a Digital Rebel, 50D, D3000, or D90.

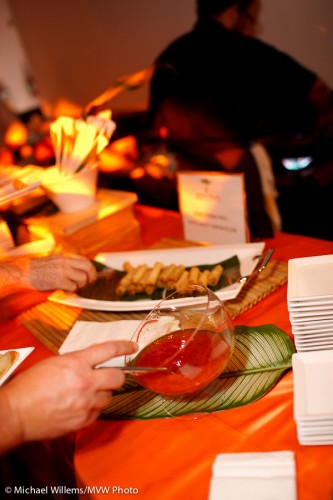
      Now I promised you a footnote. Wide lenses make it easy to focus on “everything”. So what if I want selective focus, like in the bar or in the following shot? Selective focus is oh so important in photography, as it helps you tell a story:

      Buffet

      Buffet

      Well, then I need to have a wide open aperture. Wider than on a longer lens.

      And that is why I use a 16-35mm f/2.8 lens, and if I could find a faster one I would get it, too. The faster (i.e. the lower the “F”-number), the better. So when some say “a wide lens does not need to be fast”, they are wrong.

      Piece it together

      I have mentioned this before: the need to have your audience piece things together themselves.

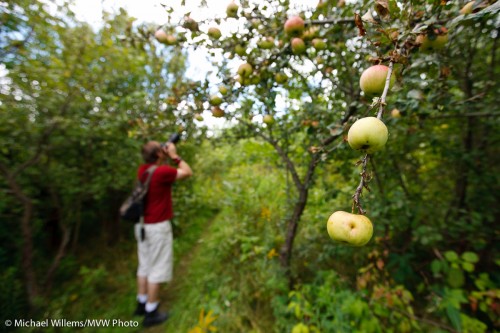
      One way is to use selective depth of field. Like in this snap from a recent outing in Mono Cliffs Provincial Park:

      Mono Cliffs Provincial Park, photo Michael Willems

      Mono Cliffs Provincial Park

      You see the apple first, then a blurred out view of the photographer, then you figure out what it is, then you slowly see what’s happening.

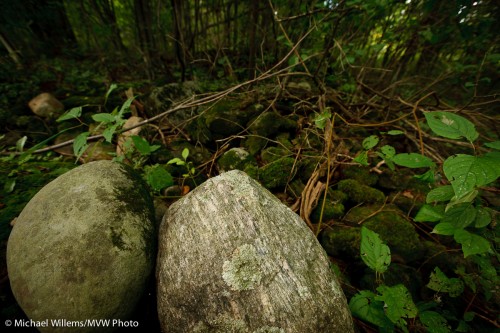
      This snap also shows the benefit of wide angle lenses. As does this:

      Mono Cliffs Provincial Park 2, photo Michael Willems

      Mono Cliffs Provincial Park 2

      Depth! And I also used a bit of flash, with a half CTO gel.

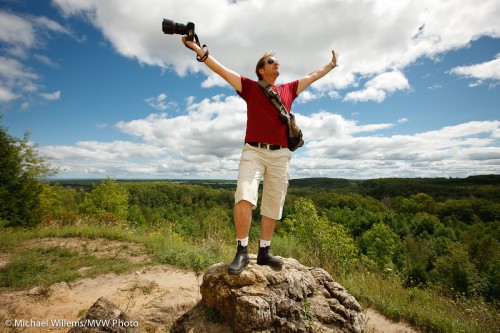
      And one more, finally: colleague Joseph Marranca in the park at the lookout point. Also shot with a little fill flash with a half CTO gel, with the camera’s white balance set to flash. After first exposing properly for the background, of course.

      Mono Cliffs Provincial Park 3, photo Michael Willems

      Mono Cliffs Provincial Park 3

      What we are doing there? tracing out  the route for the upcoming Nature Walk course!

      All those shots were taken with a wide angle lens. Wide meaning 16mm (or 10mm if you have a  “crop factor” digital camera, i.e. one that is not “full frame”). Wide angles rock.

      Unstick yourself!

      A recent meeting with a very talented young photographer, Peter McKinnon, prompts me to write about lens choices for a moment.

      Peter, who is a student of mine in the Advanced Flash lighting workshops, showed me a wedding album and other wedding shots he recently did. He showed me a wedding he shot on his own,  entirely with a 24mm prime lens, and much of it at f/1.4. Never took that lens off. No long shots. No zooming. Just Peter and his wide angle lens. Fantastic work.

      The 1D Mark IV makes a lens look 30% longer, so that’s 24 x 1.3 = 31mm. Roughly equivalent, then, to me using my 35mm f/1.4 lens on the full-frame 1Ds Mark III body.

      Mmm. That would be liberating: one lens, a wide one, for an entire shoot. And I have mentioned before, for events this is my favourite lens.

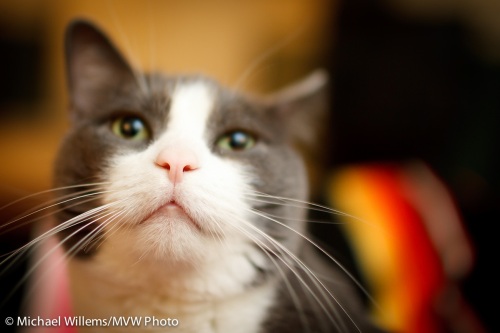
      Selective focus:

      Cat, by Michael Willems (35mm, f/1.4)

      Cat, by Michael Willems (35mm, f/1.4)

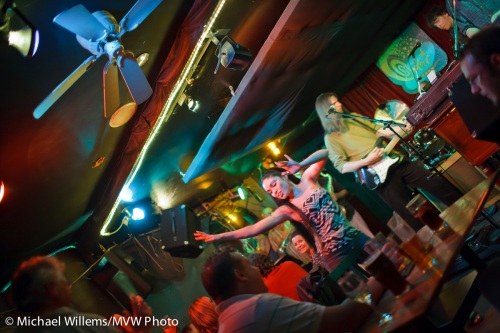
      Low light ability:

      Club, by Michael Willems (35mm, f/1.4)

      Club, by Michael Willems (35mm, f/1.4)

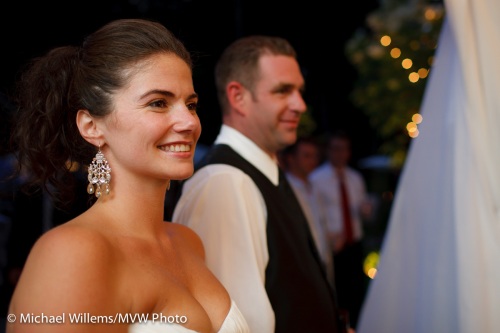
      And both, available light and selective focus:

      Couple, by Michael Willems (35mm, f/1.4)

      Couple, by Michael Willems (35mm, f/1.4)

      So I checked. The last wedding I shot, I used my 35mm lens for fully 30% of the shots! I too love the shallow depth of field:

      Bride and Groom, by Michael Willems

      Bride and Groom, by Michael Willems

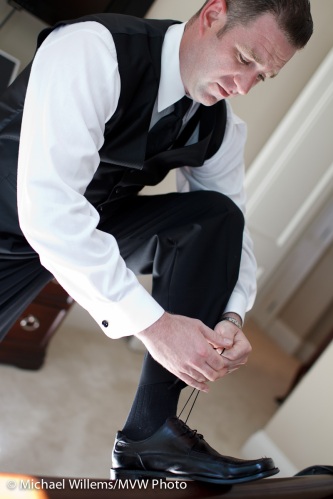
      And I like the ability to get it in and to not have to worry about how to zoom.

      Groom getting ready, by Michael Willems

      Groom getting ready, by Michael Willems

      So here is my suggestion: that you too spend an entire day shooting with one wide angle lens. This will free your mind from deciding on lens, zoom, and so on, and open your eyes to the photos in front of you. And that is what photography is about: photos, not cameras or lenses.

      And you know what: I’ll do the same, on my next event shoot.

      Enlarging the moon

      One aspect of wide versus telephoto lenses is how large the background gets. As in “If you want a large moon, use a long lens”.

      Huh? What do you mean, Michael?

      I shall illustrate with a couple of shots I took of a student during a “Creative Urban Photography” outing the other day. One with a long lens, and one with a wide angle lens.

      Ignore the light (I was using a flash with a warming gel on one camera, and no flash at all on the other), and look instead at the size of the blurred-out car in the background:

      Here’s picture one:

      Student during recent CUP outing, Oakville

      Student during recent CUP outing, Oakville

      Now look at picture two (where by moving my position I have kept the subject the same size):

      Student during recent CUP outing, Oakville

      Student during recent CUP outing, Oakville

      See how that car magically grew much larger in the second picture?

      Do I need to explain which picture was taken with a wide angle lens, and which one with a telephoto lens?

      So now imagine the person is a tree and the car is the moon at night, or the setting sun. So what lens would I be most likely to use if I want a large moon or a large setting sun?

      Piecing it together

      Remember my recent post about how you need to tell a story with your pictures, but in a way that makes the viewer piece together that story?

      One way to do that is by adding a second person in your portrait background, but having that second person blurred out. You sawa variant of this in the wedding cake picture, with dad in the background.

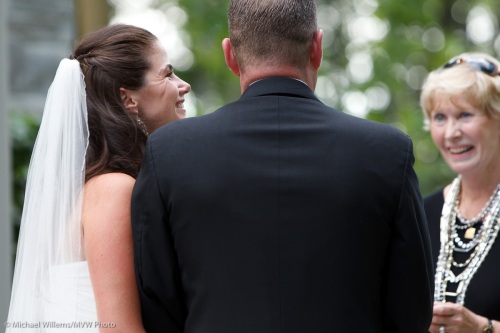
      But this technique works especially well when there are two or more people, and especially when there is a relationship between these persons. Like in this nice wide-angle image of the bride and groom:

      Groom with bride, by photographer Michael Willems

      Groom with bride, by photographer Michael Willems

      The centre of attention is the groom (unusually, because of course most of the rest of the wedding photos emphasize the bride, not the groom).  And then, a few milliseconds later, you clearly see the bride, and that she is smiling, and she is looking at her new husband.

      More technical detail:

      • The wide angle makes the perspective show.
      • A good lens, which allows a wide aperture, and proximity to the subject, blurs the background.
      • Flash was bounced off the wall behind me, on my left (so the subject is hit with photons from the front).
      • The camera is in manual (“M”) mode; Exposure is set to light the room well.

      Sometimes, not showing things that normally you would, also works. Look at the groom: we have no idea what he is thinking.

      Knowing Looks, by Miochael Willems

      Knowing Looks

      Well, of course we do, we can guess – and that is what this is about.

      Try it yourself now, this type of portrait! Aperture open all the way on a fast lens.

      Wide or telephoto?

      I am going to repeat something I have mentioned many times before, but that never goes out of style: the difference between a wide angle lens and a telephoto lens.

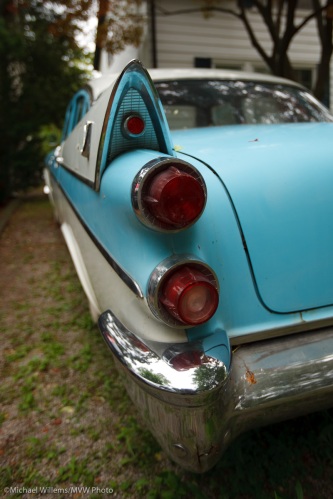
      Here is the same car shot recently with a telephoto lens from afar and then with a wide angle from close up:

      Telephoto/far away:

      A 1958 Dodge shot in Oakville by Michael Willems

      A 1958 Dodge in Oakville (70-200)

      Wide/close by:

      A 1958 Dodge shot in Oakville by Michael Willems using a wide angle lens

      A 1958 Dodge in Oakville (16-35)

      You see the difference, yes? If ever the saying “a picture paints 1,000 words” is true, I imagine it is here.

      Wide shows enhanced perspective/depth. Telephoto makes it look flat. This is not because of magic in the lens: it is simply because of the vantage point you take using each lens.

      In addition,

      • Telephoto creates blurrier backgrounds more easily, while wide can easily have extensive depth of field
      • Wide is less susceptible to motion blur

      Wide is better for situational portraits, low light shooting, and architecture, and much travel. Telephoto is better for flattering portraits.