…the computers are being hooked up again soon, and I expect by tomorrow this time my usual teaching posts will be able to continue. Until then, enjoy going out and shooting!
Monthly Archives: April 2011
Move
I am moving today from Mono to Oakville, ON. That means for once perhaps no post. Not that I would not love to write, but it looks likely that Internet connectivity may take a day to set up.
In the mean time, why don’t you, if I may make a suggestion, take the lens cap off and go shoot some pictures. Right now. With a 50mm lens (or if you have a crop camera, a 35mm lens, or a zoom lens set to the “35mm” focal length zoom position. With particular emphasis o:
- Rule of thirds
- Blurred backgrounds
- Simplifying
I shall try to post later, but if not, you will know why.
Colour space
I am often asked “should I use sRGB or AdobeRGB or some other colour space when I shoot a picture, or when I export a file?”
Yes. To sRGB, that is. Choose sRGB in your camera, and choose sRGB when exporting a file from Photoshop or Lightroom.
There is a lot of ‘religion’ and a lot of misinformation here.
- Colour spaces are conventions for how a file describes colours. There are many colour spaces.
- sRGB is designed to be usable for cheap screens, cheap printers, etc, and has somewhat fewer reproducible colours in its colour space.
- Strictly speaking, AdobeRGB and others are “better”, therefore.
- But… they are not supported by all devices and by all software.
- So if you use these, your viewer may not be able to see them properly!
- sRGB is therefore the safe option and it should always be chosen unless you know the viewer can definitely see other colour spaces.
- When you shoot RAW, the camera saves all colour info, so the setting is not important. It is only when you expert from Lightroom or Photoshop into a JPG file that you need to choose.
The following two images are ProRGB and sRGB outputs, respectively:
ProRGB:
Now the sRGB file:
Now on my Mac, the second image looks great but the first image looks very flat and desaturated.
You may see the same files – if so, lucky you. But would you really want to put up, or send, a file when a large part of your audience will see flat colours? I did not think so. So – choose sRGB.
How now, green screen?
Why do we use a “green screen” background to shoot subjects sometimes?
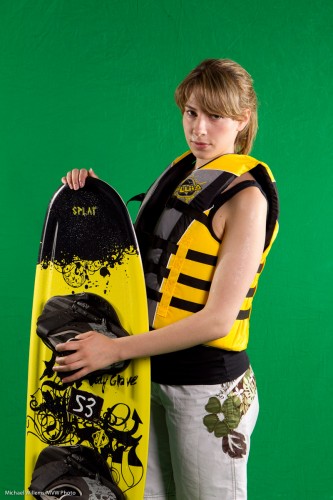
Here’s why. The simple colour (usually a specific green, though it could be blue or some other colour) can be replaced easily by a new background.
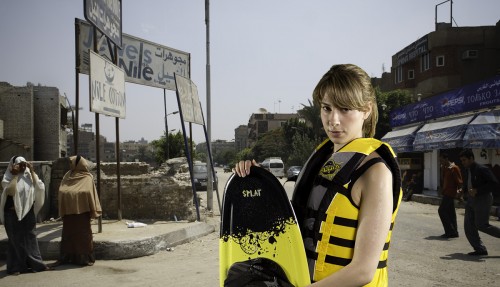
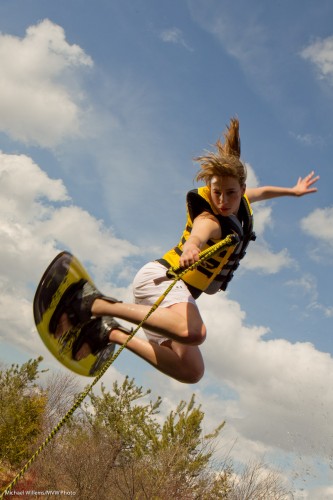
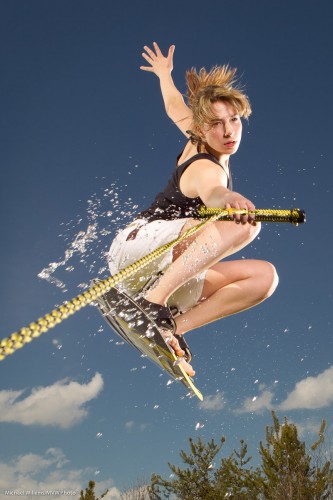
Say I want to shoot a wakeboarder in Egypt. Makes sense, the desert, wakeboarding, right? So to do this, I can fly her and a bunch of lights to Egypt.
Or, I can do the following instead.
First, shoot her against a green screen background:
Then go to Photoshop (not that I like Photoshop – I do not, but for serious manipulation work like this it is the standard) and do the following:
- Open the photo in Photoshop.
- Select ‘Color Range…’ from the ‘Select’ menu.
- After the Color Range dialog box comes up, click on the eyedropper tool, drag the ‘Fuzziness’ slider to around 30, check the ‘Invert’ checkbox, choose ‘Grayscale’ from the ‘Selection Preview’ popup and make sure the ‘Selection’ radio button is pressed.
- With the eyedropper tool, click in the green area of the image. You should see much of the green area as white, and the rest of the image (which gets selected) as black. If there are still areas of the green screen which are not white (e.g. wrinkles in the backdrop), hold down the Shift key and click on them with the eyedropper until all of the green area is selected.
- If there are still pixels here and there that are white, you can lower the Fuzziness until it is easier to click on the areas. You can use the ‘Refine Edge’ dialog from the ‘Select’ menu.
- Once you’re satisfied with your selection, click ‘OK’.
- You should see the object you are trying to select selected. If there are any problem areas (i.e. you see scrolling ants in areas inside or outside your selection that shouldn’t be selected), use the lasso tool (hold down Shift or Option (Mac)/Control (Windows) to add to or subtract from the selection) to make your selection perfect.
- Now you are ready to remove the green screen. Make sure you’re working with the proper layer, and, if you are on the ‘Background’ layer, double-click it and click ‘OK’ to make it into a normal layer, then select ‘Inverse’ from the ‘Select’ menu to reverse the selection.
- Now press the ‘delete’ button or select ‘Clear’ from the ‘Edit’ menu to remove the selection.
- The edges of your object/person may have a slight ‘halo’ around them. Clean them up by selecting ‘Layer>Matting>Remove White Matte’ or ‘Layer>Matting>Defringe…’; usually 1-3 pixels will do the trick.
- Now you can put any background you would like behind your cut-out object. I select ALL in the first image, then COPY, then I open the second image, and select PASTE. Now I scale, rotate, etc.
Now you get this:
(Go to full screen to see the detail.)
Much cheaper than flying to Egypt. No? And it took only a minute or two. If you have never tired “green screen”, you might find it occasionally fun or necessary.
Making it seem easy.
A student wrote to me just now, about last Saturday’s workshop, “You and Joseph make it look so easy!”.
He means things like turning this well-conceived but not-very well made available light snapshot…:
…into this creatively lit art photo:
That was from the workshop last Saturday. And yes, we shot this in the camera like that – it’s not Photoshopped.
Our student is underestimating himself, and based on past performance I am sure he did great – but his point is well taken. Experience makes everything seem easy. Brain surgery, too (one day I must ask brain surgeon).
How do you learn? My teaching uses the following methodology:
- You learn by understanding technical basics.
- Then you build on those in a step-wise manner – logical progression is key here. Build understanding, one fact at a time. Only when you “get” one fact, move on to the next level, that builds on the previous.
- Then you lean how these principles and technologies apply in real life: i.e. what situations they address.
- Then you practice. This is when you really learn. During, and after, this practice, of course you continually go back to step 1 and review the fundamentals – and it is at this point that they will all eventually click into place.
That is behind my basic teaching (“learn the camera”), and my advanced teaching, in particular the “Advanced Flash” and “Event Photography” signature courses. And it is also behind the practical workshops Joseph Marranca and I teach to small groups of students.
Sometimes this teaching can seem a bit much. So many facts to learn! But compare this to driving a car, which is also complicated. Or try riding a bicycle.
An image is the confluence of moment, subject, and light. So, the key to the shot above is:
- Know the technical aspects of your photography (without that, all else fails);
- Come up with the concept;
- Ensure you have equipment;
- Ensure you have model, setting and props;
- Design the right lighting – the key step in this image;
- Execute!
On the workshops, we do everything from step 1 to 6. The shots above are made by everything coming together. Without the idea – nothing. Without model and props – nothing. Without technical skills – nothing. Without equipment – nothing.
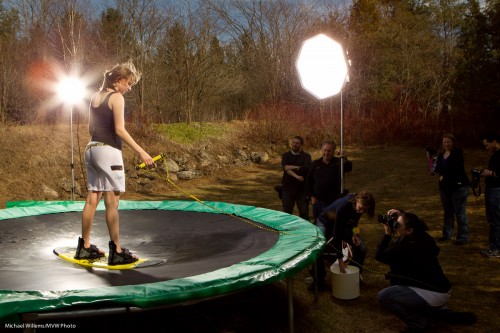
So how did we make that shot?
We rented a boat, and… oh wait. No lake.
So we used the following:
Not something you set up in ten minutes, of course. But when you do it, and it all comes together, the images are great.
In the eye of the…
Take a day outside. You want to shoot a snap of a pretty model.
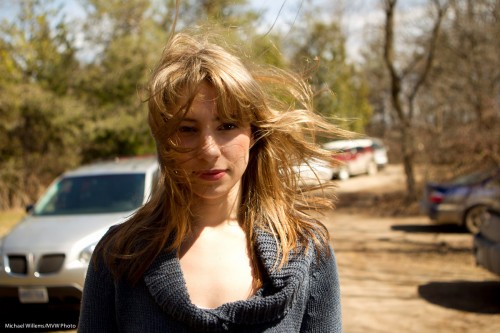
If you are Uncle Fred, you shoot in the “AUTO” mode. Or in Program, or even in Aperture mode, with a large aperture (low “F”-number), to blur out the background. OK, here we go. SNAP:
But because you read Speedlighter.ca, you realise that background should be darker. So then you shoot again, after setting exposure compensation down two stops (-2). That gives you 1/1000th second, and the image looks like this:
Mmm. So now you need to turn on the flash (and again, you know this because you are a Frequent Reader here).
So then you do this – and you get this:
Oh. That’s right. The flash sync speed is 1/200th second, so your camera will not allow the 1/1000th second shutter speed you need. So the image is overexposed, at 1/200th second.
OK- so now you use Fast Flash (“High Speed Flash”, on Canon, and “Auto FP Flash” on Nikon). And you move close, very close – or you have insufficient power.
That gives you this:
Nice.
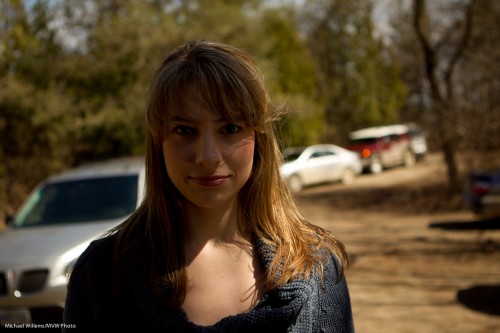
But could that shadow be softer? Yes. So you put a Honl Photo softbox on the flash – yes, you can use a softbox like this on the on-camera flash – and now (after once again ascertaining you are close enough – even closer now, since the softbox loses some light too), you have the image you were after in the first place:
Compare this excellent image with the snapshot image at the top and you see why it pays to know flash techniques, and you see why I am passionate in teaching them.
What if there’s no wall?
I keep recommending that when you use TTL flash, you bounce it off walls or ceilings.
So what if there is no wall or ceiling?
Then you do the following.
- Ensure you expose the background well, with high ISO, open aperture, and slow shutter as needed.
- You may be able to bounce after all, when your ISO is high and aperture is open. Flash can reach farther than you think! So – try.
- You can move the subjects! Ask them to “move over here for a second” – near a wall. Every venue has some wall or other, or perhaps a low ceiling in one part of the room. No reason you cannot ask people to move!
- If that fails, bounce of “anything”, using a Fong lightsphere. Not creative light, so this is not your first choice, but it can save your behind.
- And if all else fails – direct flash, but perhaps still modified by a bounce card (or even a Fong thing aimed forward). And do not forget flash compensation.
So you see, there are always options.
Science or craft?
In response to my “quick portrait” instructions, a reader asks:
What do you think about Strobist.com’s method where he recommends adjusting shutter for ambient and aperture for flash, by “chimping” (no light meter).
Just interested in your response.
As the two methods have similar results, yet dramatically different philosophy.
Great question.
David Hobby (the Strobist) and I (the Speedlighter) sometimes differ – he says “don’t use TTL”, I say “do” – but it is never a case of “you don’t know what you are talking about” – it is more “personally, I’d do that differently”.
First, I think for ambient you set both aperture and shutter. Clearly, changing aperture affects foreground as well as background.
The table of “what affects what” is as follows:
- Shutter: Changes mainly the background.
- Flash power setting (including distance of flash to foreground subject): Changes mainly the foreground.
- Aperture – changes both.
- ISO – changes both.
So first off, I’d change the two boldfaced properties above.
But secondly – I like to meter, since it takes guesswork away. Then I finesse.
Yes, my experience tells me I can just choose 1/4 power on the flash, say, and with f/5.6 this will give you a good picture at standard ISO and distance. But it’s still guesswork so you need to iterate. When I use my meter I am objectively sure I’ll get that good starting point with less iterating.
That said…
- I will not go to extremes and set my light meter to tenths of stops. No way. The last bit may be chimping, not metering to 1/10th stop which I will never see anyway.
- I set the values I know will work to get close enough before I even meter. You will see that with a little experience, this will work just fine.
So taking into account 1 and 2, David and I are not that far apart after all, are we?
Effing!
F-numbers, that is.
A post for beginners, today. About the “F”-number and why it is important. Very important.
The most important number is the minimum f-number a lens can be set to. In other words, the maximum aperture, or lens opening that this lens can go to.
F-numbers? Yes, you know. These numbers: f/16, f/11, f/8, f/5.6, f/4, f/2.8, f/2.0, f/1.4, etc. And the lower the F-number, the larger the opening. (The diameter of the opening, by the way, is the lens’s focal length, f, divided by this number. So a 100mm lens set to f/4 would have an aperture diameter of 100/4 = 25 mm).
So how low can we go?
- On your consumer lens, that minimum f-number is 3.5 when you zoom out, or 5.6 when you zoom in. So on your lens it says “1:3.5-5.6”. Look at the top or at the very front of the lens.
- On my photojournalist zoom lenses it says “1:2.8”, meaning that the lens can open to f/2.8 whether I zoom in or out.
- On my fixed, or prime, lenses, this number says “1:1.4”: i.e. I can open to f/1.4.
This is important for two reasons.
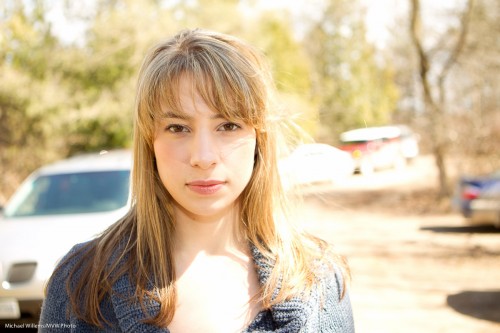
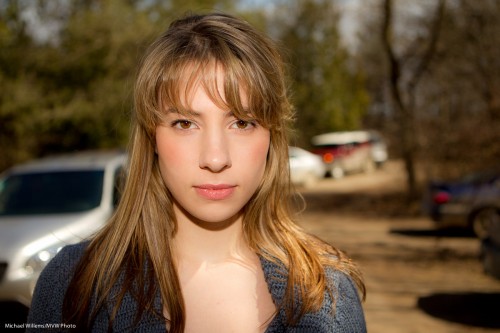
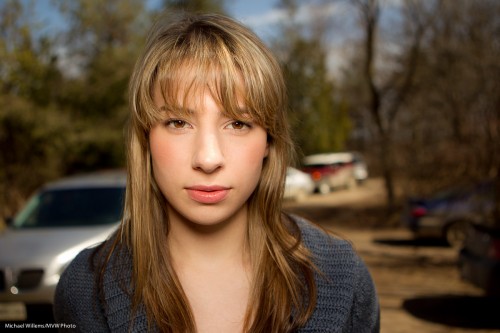
First: lower F-numbers means more selective depth of field, i.e. the ability to blur the background. See these pictures, of a student the other day:
You can see clearly that if you want those blurry backgrounds, you need the low f-numbers. No substitute will do. That’s why we pay for “fast lenses” (this just means “lenses with a low “F”-number”).
Second, the larger the opening (the smaller the f-number), the more light comes in. And hence, the faster the shutter speed can be. Look again at the above images. The “consumer lens” needs 1/60th second – barely fast enough for a sharp image. The “pro zoom” needs just 1/250th second. Nice. And the fast prime lens needs only 1/800th second: a stunningly fast shutter speed that will freeze any motion.
The above images, and those numbers, show very clearly why I would rather shoot a party with a prime f/1.4 or f/2.0 lens than with a zoom lens. If there is one investment you might want to consider making it is that fast lens.
Beauty
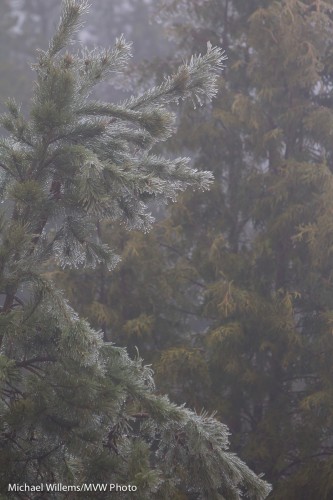
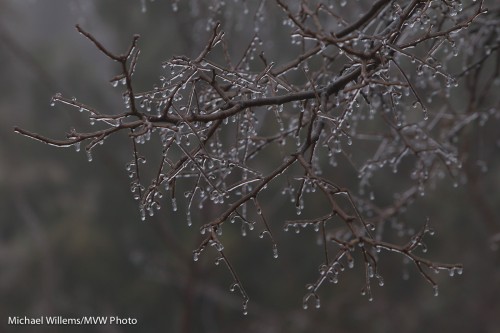
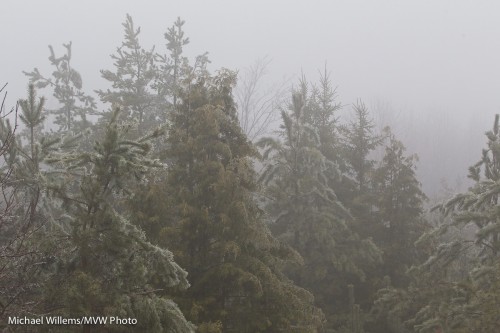
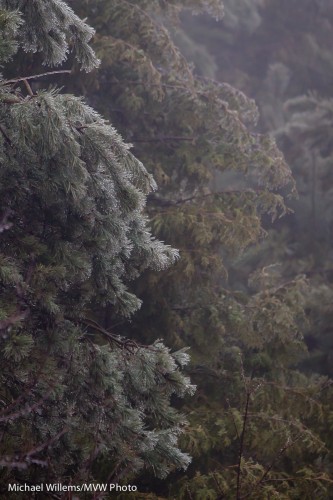
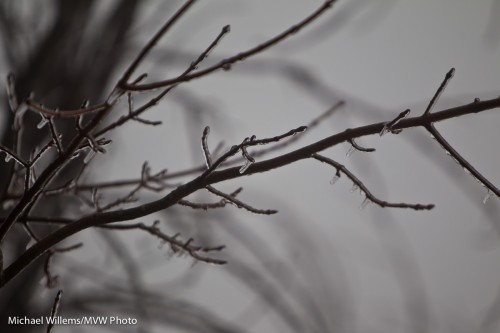
I ran a little late the other day. Because when I woke up, I saw we had had freezing rain overnight. My last days in Mono are ever more beautiful.
(You really have to see those at their original size to get the effect)
Fog is low contrast. Low contrast, as I said the other cay, can be beautiful.
A few tips:
- Expose on auto, if you like – but since this is tricky light, do be ready to turn the exposure up or down in post-processing to get exactly what you were seeing.
- Avoid creating a high contrast image by using your “levels” or “blacks” control.
- Compose carefully.
- Avoid “too-selective” focus. f/5.6 did it for me on my long lens (70-200).
And do shoot detail, too.
Nature can be beautiful, as long as you keep your eyes open for that detail; that sense of wonder that makes people write books about magic.

