Reader question

There is always pressure between “techie” questions and “art” questions. Many artistic photographer scoff at the idea of talking about technology.

But I don’t. I think that yes, sure, photography is art: but if you do not have the tools, and the knowledge of how to use them, i.e. if you do not know the craft, you will never get to the art you want to get to. And a blurry or underexposed picture is not going to be liked by anyone. So the tools and the technology are very, very important.

In that contact, let me answer a reader question I received today. Nicolas asks:

I am a photo enthusiast and take photos for my own pleasure when I travel, when I have some time to walk around or when I go to some events sports or others. So no pro, not necessity of any results to make a living, just for fun.

I have a 70-200 f4 IS telephoto lens from canon, a 18-55 not IS  and I used to have a 400d from canon.

But I broke the back screen of my camera when traveling because I just had it in a normal bag… I thought about having it repaired, but it costs too much compared to the price of a new camera.

I also thought for quite some time to get a bit better camera to improve AF, ISO and the way the camera handles since the 400d was a bit small.

But now my choices are very difficult. What camera should I go for and which lens to go with it ? I mostly take street photography or some inside photos with not that good light, and a few portraits. I really like fast lenses to create nice out of focus backgrounds. What would you recommend for my use ? I would like to stay with L lenses for future proofing and built quality.

  • 7d with 16-35 2.8 ? with 24-70 ? with 17-40 ?
  • 5d mk 2 with ?
  • 1d mk 4 ?

Anything else ?

My budget is not big at the moment, so if you would recommend the most expensive cameras that would mean wait more to save more, so no photos in the meanwhile…

Great questions.

First, of course it is not about the camera – much more about the lenses. When the picture is being taken, on two things are being used: the sensor, and the lens. The camera is just a box.

But there are several good reasons to replace your camera.

  • When it is broken.
  • When it is more than, say, 3-4 years old (by which time newer cameras have usably better, and dare I say it cooler, features).
  • When it is too small for you.
  • When you need the pro features, like the ability to write to two cards; faster shooting; extra customizability; or waterproofing.

It seems to me you hit at least several of these features. So you need a new camera.

OK, then, which one.

  • Since you travel and are an enthusiast, I would recommend against a big, heavy 1D-series camera. So, a Rebel, 50D/60D, 5D or 7D. All good.
  • I love the Rebels (like the T1i.T2i etc), but if you are ready for the next step up, a mid-range camera like a 50D or 7D seems a great choice.
  • If you need full-frame (i.e. you shoot wide angles all the time), a 5D might be indicated.

So if I were you, a 50D (which is cheaper now that the 60D has been announced) or 7D sounds great. The 7D is more modern (I have one), but also more expensive. I would only go to a 5D if the full-frame ability (even blurrier backgrounds, even lower noise, wider lenses) is important.

The 50D/60D and the 7D are both 1.6 crop cameras, so a 50mm lens works like an 80mm camera.

I agree with your choice of “L” (luxury) and “EF” (unlike EF-S, these fit on any Canon SLR) lenses, so that means things like:

  • Your current telephoto lens; great for wildlife, detail, headshots, etc
  • General walkabout/people lens: maybe a 17-40 f/2.8. The 16-35 is better but at twice the price. lenses are worth the money, but only if you have the money The f/4 is a great lens too.
  • Street: a 24mm prime (which works like a 35).
  • Portrait: 50 f/1.8 or even f/1.4 prime (which work like an 80).
  • Travel: anything in the 10-20 range, i.e. wide.

The great news is that the lenses keep their value (unlike the camera).

Personally, I would start with a wide range like the 17-40, and add a 50mm immediately for low light and portraits. Then I would add 10-20 or 24mm prime as soon as able.

Eat.

OK, do not eat quite yet.

I shoot events. All the time. It is what I love to do.

And these events are organized by corporations, or wealthy people, or governments, or charitable organizations. You name it. People like to get together. And all these people have paid a lot for the food – or sweated, making it.

And food is ephemeral: it’s there – then it’s not.

This is where photographers do a very useful job. One good photo, and that food exists forever. Like beauty, or youth.

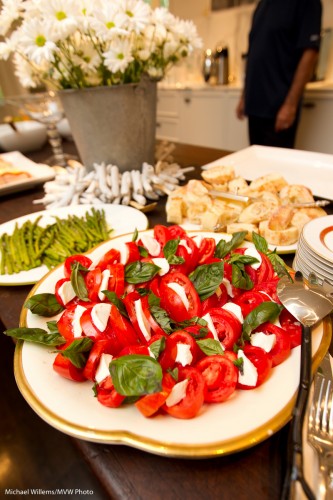
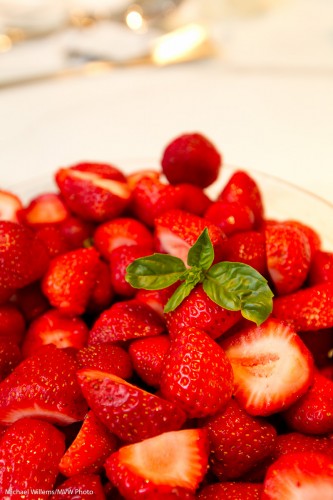
And like these delicious strawberries, which I shot at a very nice private event in Toronto on Labour Day:

Strawberries, by Michael Willems

Strawberries, by Michael Willems

There. And this too:

Food Shot, by Michael Willems

Food Shot, by Michael Willems

The way to do this:

  • Set your camera to manual exposure mode.
  • Expose two stops below ambient (choose aperture and shutter so that the meter reads -2. This might be 400 ISO, f/4, 1/60th second).
  • Make sure your aperture is fairly open (that’s the “f/4”).
  • Bounce your flash off the ceiling/wall behind you.
  • Focus on the closest part.
  • Tilt as needed.

Your images will be loved by your client. The book can now include food shots as background or detail shots. The food is now good forever. The investment is secured for all eternity. And the story is a better one: not just grip-and-grin images, but also “background”.

Learning light

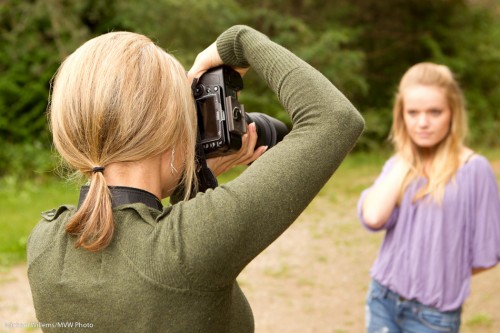
In an intensive half-day custom course, I taught my student Melony some glamour photography techniques a few days ago. From flash techniques to colour to modifiers to using a light meter to posing.

She brought her daughter as her subject, and both did excellent work.

Student shooting model

Student shooting model

(By the way, did I ever tell you to make the viewer work in interpreting an image? Yes I did. And the blurred out daughter in the background is an excellent way to do that. Don’t tell the whole story, let the viewer figure it out.)

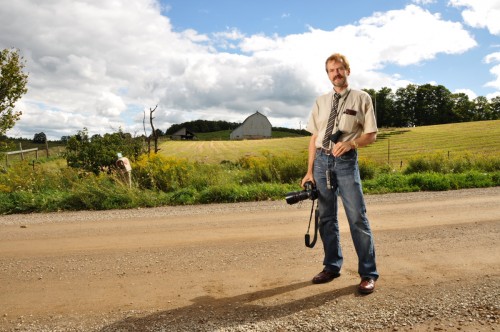
But anyway. Student Melony also kindly photographed me:

Michael Willems, by Melony McB.

Michael Willems, by Melony McB.

That is a great portrait.

And I can say that because it is the photographer who makes the portrait, in this case, more than the subject.

So how did we do this? Why does it work?

This works because:

    1. The light is good. First, Melony exposed the background properly (i.e. she did not overexpose it: exposing less is good, so that the subject, not the background, becomes the “bright pixels”). Willems’s Dictum: “Bright Pixels are Sharp Pixels”. Also known as “blurriness hides in the shadows”.
    2. Then, I am lit by the sun from the right (aided by a speedlight, but as the sun came out just at the right moment, this was no longer necessary). That gives us the nice shadow.
    3. But then, in a twist, and that twist is what does it, I am lit by a strobe with a softbox on the (camera) left – that gives the “ultra-realistic” look. Light from the back -and yet I am bright in the front.
    4. This image also show good use of appropriate props – I am holding the camera, which for a photographer is part of the story.

      Pocketwizards and a battery-powered Bowens light, as well as a speedlight, were used here.

      And kudos to those of you who spotted the other essentials, around my neck: a Hood Loupe by Hoodman, and a flash meter.

      Light makes a photo. Creative light makes it better. And it is simple. Once you know it.

      This is the sort of stuff I teach at my workshops, and Joseph Marranca and I are doing several more in October: check the schedule on www.cameratraining.ca !

      And yes, I wear a tie almost every day.

      Blog notes

      Hi there audience!

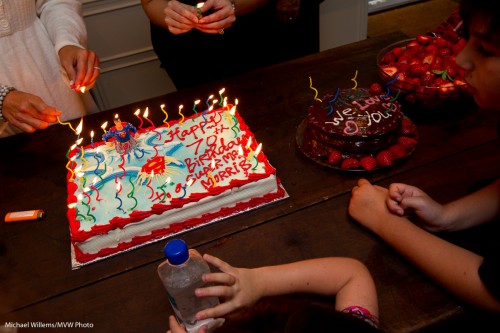
      I am just back from shooting a very enjoyable event – a birthday party. It is such fun to shoot these events.

      Cakes

      Cakes

      Four hours shooting, and two or three hours of post-production work. All great!

      More about events and how to shoot them – and what to shoot at them – in the next few days, but first, a note about why to shoot them.

      We only live a few years – “three score years and ten”, according to Leviticus. Thank G-d this is no longer the limit (the person whose birthday was being celebrated in the picture above will no doubt join me in being thankful), but even though it may be twenty years more now, there is a limit –  And then we’re gone. And we long for the days gone by.

      But when we have good photos, we remember. We mark those days, those places, those events, and those people down forever.  And in doing so, we own them forever.

      So please… have your significant events photographed. A few dollars is nothing compared to eternal memories.

      And that is why I like to help people learn photography. That is what this blog is all about: about learning the skills that will make you a really good photographer.

      This blog is, and will always remain, free. But in return, you can do something for me: spread the word. I see that I have several thousand visits a day, but I would like that to be several tens of thousands a day, or several hundreds of thousands. So please tell your friends and acquaintances; write about this blog; or link to it.

      And above all – read it, daily. I post every day and I hope you find it useful. Let’s make this community the best educated in the world. Photographically speaking of course.

      Now… I’d like to hang around – but I need to write tomorrow morning’s post!

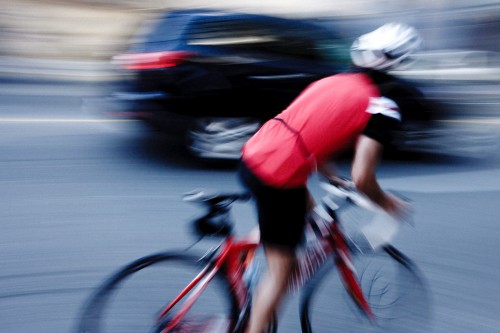
      Blur is bad. Always. Or…?

      Or is it?

      Bike, photo by Michael Willems

      Bike, Toronto, Aug 2010

      Indeed not. That is why you have a shutter speed priority (Tv/S). Sometimes you want to show motion, and you do that by blurring things.

      I took the shot above while panning at 1/15th of a second (and f/22 at 100 ISO: it was a bright day in Toronto). It shows “in a hurry”, dynamic motion much better than a “frozen” picture of the same subject would do.

      Scale carefully

      How do people see your images? Do you ever wonder?

      So maybe you shoot at a gazillion megapixels. Or at 12 megapixels. Or even at a lower number: say 6. (That would be 3,000 pixels wide x 2,000 pixels high).

      Great when you want to print. But when you want to use your image at a lower resolution, like when emailing, or posting on the Web, then what do you do?

      After you create it (whcih you always do at the highest pixel setting), you then need to “scale down” the image to the right size, that is what. And you can do it, or you can let your email program or web site do it, which is even easier.

      Easier – but not better. When you scale down an image, you can do it in many way.

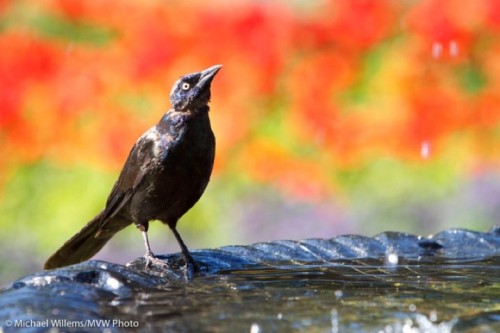
      Just now I uploaded a image to Facebook. A large-ish image. And it looked like this, after Facebook scaled it down to its required size of 720×480 pixels:

      Bird bathing, by Michael Willems

      Bird bathing (Aug 29 2010)

      (You can see it’s not great, but to really see this, you need to see it full size by clicking on it, since WordPress also reduces the size that you see there!)

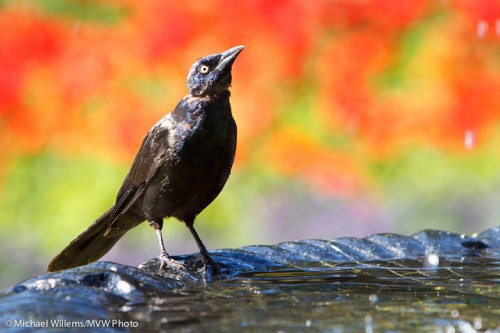
      So then I did it myself in Lightroom before uploading, to exactly 720×480. Lightroom, when scaling, first applies a proper scaling algorithm, and then sharpens the image – which you need to do, since reducing the size blurs it slightly.

      The Lightroom-scaled version looks like this:

      Bird bathing, by Michael Willems (scaled well)

      Bird bathing (scaled well)

      (Again, you need to click and see at full size. In fact, better that you save both to your desktop an then flip between them there.)

      And you will see that the version I scaled is much better than the version Facebook roughly scaled down.

      So remember: pixels are everything. When producing output, find out how many pixels wide and high it should be, and produce it in that size in Lightroom (or Aperture, or Photoshop: whatever you edit in). And sharpen as the very last step.

      Some suggested pixel sizes:

      • Facebook: 720 x 480
      • Email: largest dimension 1200 pixels
      • iPad: 2304 x 1536
      • Small email-sized: 800 pixels widest dimension

      And remember, DPI does not matter if you specify the pixels. I set it to 300, but you will see that the file is identical whatever you set it to, as long as you can specify the actual pixels (which you do, in, say, Lightroom).

      Negative Space

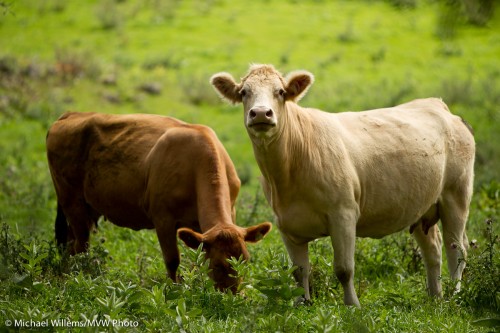
      Instead of making your subjects big, like so:

      Moo! Cows (Photo by Michael Willems)

      Moo!

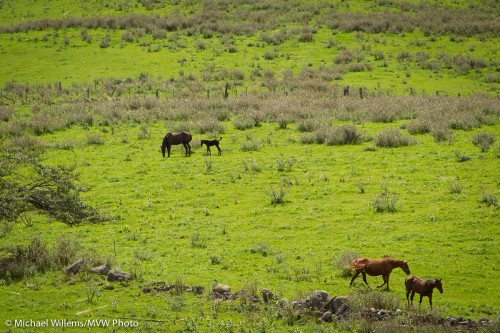
      …you can also make them small, like so, and surround them with “nothing much”:

      Horses in Mono - Photo by Michael Willems

      Horses in Mono

      We call that using “negative space”.

      The use of Negative Space is a great way to show your subject not as huge, but as interconnected with, and inhabiting, a large area.

      The negative space needs to be just that: negative space, i.e. devoid of meaningful content. It does not have to empty: just empty of information.

      Why you should not use Flash

      What? The Speedlighter.ca is telling you not to use flash?

      Yes – but I mean Adobe Flash software.

      Flash is great because it is one media-rich environment that works on every platform. But it is also bad, and increasingly not a great thing to use.

      Why?

      • It is slow to load. Making your customer wait.. those horrible progress bars: if I see one, I am gone. And I am not alone in that!
      • It is slow in performance; very inefficient (especially in playing video).
      • It is unreliable – it crashes (Steve Jobs is right in his technical objections to F;lash).
      • iPad and iPhone users cannot see it (I keep seeing sites that I cannot see – well, those sites lose me. How many people have an iPad? A lot!
      • It is all about “you”. Readers of your site want it to be about them, or at least want to see why they will benefit from spending their time there – they are less interested in seeing why you are so great.

      That is why my sites are simple HTML sites.

      Yes, I know, I lose out on some functionality and on a lot of coolness. But “it is what it is”, as they say. My sites are clean, can be read by anyone using any device, and are, I hope, more about quickly telling the reader what’s in it for him or her than just about telling the world how great I am.

      Dark

      Always carry your camera, even at night.

      I just got back from teaching, after an executive portrait shoot this morning.

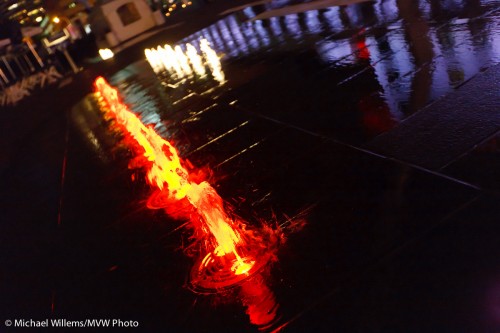
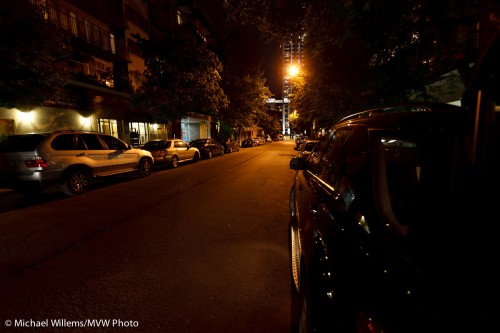
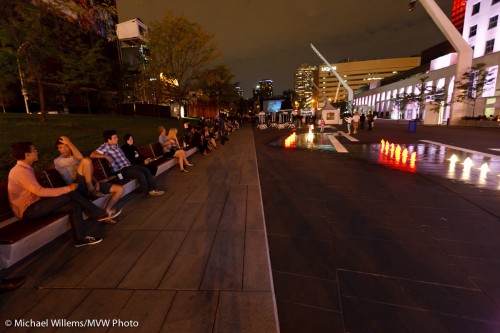
      But I want to talk not about light, but about lack of light. And how when it gets dark, you do not put away your camera. Like I carried mine, just the other night in Montreal:

      Montreal, night scene, handheld photo by Michael Willems

      Montreal, night scene, handheld (Aug 2010)

      Montreal, night scene, handheld photo by Michael Willems

      Montreal, Rue Hutchison, Aug 2010

      Montreal, "The Shining", handheld photo by Michael Willems

      Montreal, "The Shining", handheld

      All those were handheld shots.

      Tips for those:

      • Hold the camera steady!
      • Use a wide lens, since they are more forgiving of motiong
      • Make it a fast one the fastest you can get (I used a 16-35mm f/2.8 on a full-frame camera);
      • Use a high ISO if handheld (but low if using a tripod);
      • Expose down 1-2 stops (use manual, or use aperture mode and Exposure Compensation “minus”) ;
      • Shoot multiple times to make sure!

      If you do it that way, it is easy. And you will be happy with your images.

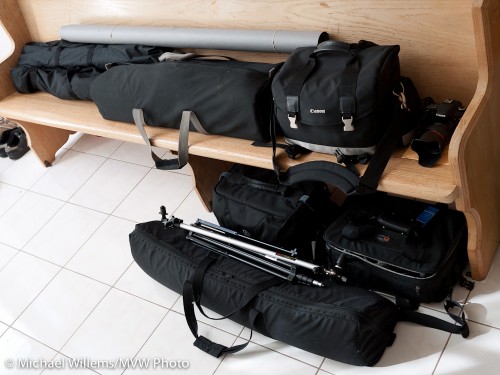
      Back trouble

      Back trouble is what I think of when I see what I carry to one shoot. And this is not even all of it:

      Michael's Gear - part of it

      Michael's Gear - part of it

      That contains:

      • Light stands
      • Lighting stuff: speedlites, pocketwizards, etc
      • Big backdrop stand
      • Small backdrop stand
      • Additional Camera gear
      • Backdrops
      • Tripod
      • Strobes

      In addition, I carry:

      • Two more cameras
      • Camera bag

      So when people wonder why a shoot costs hundreds of dollars, this is why. A photographer is prepared for everything (No power? Then use speedlights. You also want formals? Then I set up the backdrop. One camera breaks? Then I grab another. Long lens no good? Then I use a shorter one. Batteries dead? Then I grab replacements.)

      The only problem is my back. Price to pay!

      UPDATE:

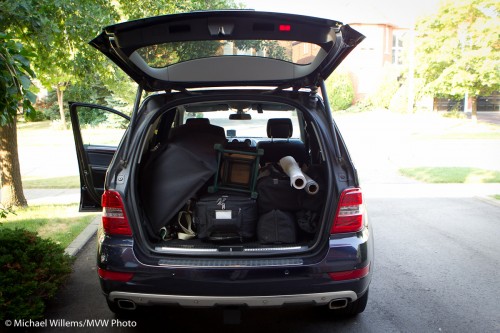
      Today, at 10:30, I shoot in an office building in Toronto, on the 35th, 37th and 38th floor. And so far, I have been unable to find an assistant for the shoot, so if you’re interested, give me a call before 10am!

      And here is my car. You can probably see why I need that assistant!

      Car full of photo gear, ready for a shoot

      Car full of photo gear, ready for a shoot