Lens reminder

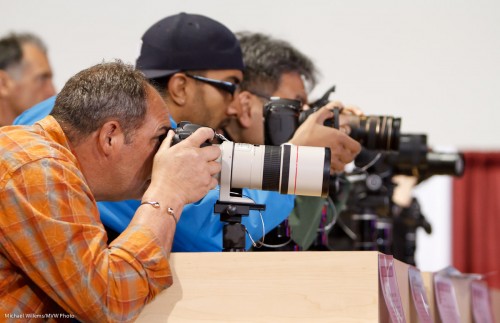
Choose your lenses wisely, like these people at the recent Imaging Show, where I spoke about lenses through the three days:

Your camera is just a box. The lens makes it into a great tool. So, be prepared to spend on your lens; and look at properties like:

  • Aperture – the lower the f-number, the better
  • Sealing against dust and moisture
  • Distortion: the lower the better, of course
  • Sharpness (both wide open and at, say, f/8)
  • Mechanical construction
  • Image Stabilization
  • Chromatic aberration
  • Resistance to flare
  • Focus system speed and noise – and accuracy
  • Consistency

These properties, and more, determine the quality, and cost, of your lens. And high cost is OK because the lens determines the shot – and a lens lasts decades, both in terms of usage and of value.

Now I am off to go shoot softball kid portraits!


Architectural

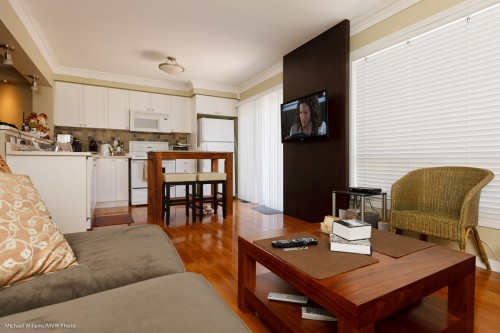
My living room prompts me to write a couple of words about indoors architectural photography:

Amberglen Court, Photo Michael Willems

To take architecture:

  1. Use a wide angle lens – 10-30mm on a crop SLR camera. That gets the rooms in.
  2. Not too wide though. If you shoot everything at 10mm, rooms will look huge, and people who see the home in real life will be disappointed. Underpromise and overdeliver is a good strategy.
  3. Focus a third of the way in – but when depth of field is not sufficient to get it all in, keep close objects sharp.
  4. Consider shooting from a lower vantage point. This makes rooms look bigger without exaggerating.
  5. Use bounced flash, if you use flash.
  6. Balance outside light with flash. Set aperture and shutter for outside, then fill rooms with flash.
  7. If that means slow shutter speeds, use a tripod.
  8. Keep the strongest verticals vertical.
  9. Compose to avoid clutter.
  10. Capture the feeling of the room.

Simple, really: these basic rules will make your architecture photos better. If you are bored today, and want a photo assignment: shoot your home indoors.


More business talk

All photographers, as I pointed out recently, should know about copyright. As reader Warren said recently in a comment on this blog:

“When a photographer shoots pictures for themselves, they own the copyright and they are the Author.[ ] If the photographer then uploads these pictures to someone else’s web site, the photographer may fall victim to the terms of use of that site and they may lose some rights. Read the terms of use!”

Very true. And potentially scary. Read what Facebook says:

“For content that is covered by intellectual property rights, like photos and videos (“IP content”), you specifically give us the following permission, subject to your privacy and application settings: you grant us a non-exclusive, transferable, sub-licensable, royalty-free, worldwide license to use any IP content that you post on or in connection with Facebook (“IP License”). This IP License ends when you delete your IP content or your account unless your content has been shared with others, and they have not deleted it.”

Ouch. Transferable? Sub-licensable? And to boot, Royalty-free? And “…on or in connection with Facebook” (my emphasis)? Geez. This post better not have a picture in it, or Facebook can use it or even resell it.

Thank God Facebook itself only allows (so far) uploads up to 720 pixels wide. Otherwise they could take my work and use it in an international ad campaign for Coca-Cola, say, for free. And this of course is why I embed my name, small but visible, in each picture I upload in Facebook.

Other sites can be as Draconian – or more so. Apple? No idea, since I have never actually read the 41-page “agreement” that you have to read and “agree to” before you can do anything (like upgrade iTunes). I am sure no-one has (lawyers excepted: they like that kind of thing).

BBC news, and other news outlets, use “user content” nowadays. That is content they do not pay for. Users are happy to work for free, and that means reporters no longer get paid, Fine, you may say – except the level and trustworthiness of the work goes way down.

So be careful with copyright. Make sure you have an explicit written agreement when shooting for someone: an agreement that gives you copyright (or that pays you very well, if you a “shooter for money” and do not end up with copyright). Photography is fun, but the equipment is not free. The time spent learning is not free, and time cannot be reclaimed. Your photos are valuable – copyright protects that value.

Working for free never works for a valuable skill that is hard to learn and expensive to use, and unless you are careful, without good agreements that is exactly what you will end up doing. My advice today: be careful where you upload photos.

 

Graduation season

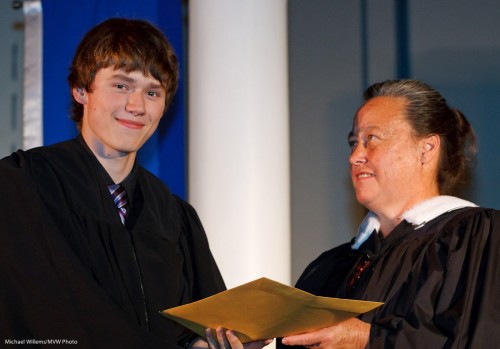
It’s graduation season. Right? So many parents are out to shoot their kids’ ceremony. High School, Grade School, Music School, University: important moments in a life; milestones that really deserve to be photographed. And understandably, you ask “how”.

A High School Grad

A High School Grad

So in that context, here’s a few tips.

You want pictures of graduation ceremonies. Both the “handing out of the diploma” and the crowd going wild. Make it into a permanent memory. Shoot context, too. Challenges: The light is likely to be somewhat low.  Your position may not be great.

Solutions: Use high ISO, a “fast” lens, and shoot lots. Be sure to get the “required” shots – like the one where your graduate is being handed his or her diploma.

Equipment:

  • SLR
  • Long lens over 100mm) for diploma shots
  • Wide lens (24-35mm) for the  crowd shots
  • Use fast lenses (“Low f-number”)!
  • Bring a flash – you may or may not need to, and be able to, use it
  • Bring a Fong Lightsphere: bounceability may be bad, so if that is the case and the light is low, the Lightsphere may be a way out.
  • Consider bringing a monopod. Just in case!

Settings:

  • Mode: Manual
  • Shutter: usually 1/30th – 1/60th sec (see meter)
  • Aperture: f/2.8 or low as as possible
  • ISO: at least 400 (at f/2.8) or 800 (at f/4) or even 1,600 (at f/5.6)
  • Drive mode: Continuous, fast
  • Focus points: Centre focus point/area
  • Focus mode: One Shot/AF-S
  • Metering: Evaluative/3D Color Matrix, or spot

Situation tips:

  • Arrive early, to get a good seat.
  • Be ready for light changes (someone turns on or off the spot lights).
  • Practice on kids who are in the line before yours!
  • Find out if “getting up” and Flash are allowed, and act accordingly.
  • Shoot wide open (largest aperture), at the highest ISO you can stand. Use the centre focus point (it’s more sensitive in low light).
  • Try to catch the graduate on the way up to receive the diploma, and on the way out with it.
  • Tell your graduate to look at you after he/she is handed the diploma. They may forget – or they may not.
  • And especially, get “the money shot”, with the graduate shaking hands and being handed the diploma.
  • Then change to wide or normal lens to catch the crowd,or perhaps “caps in the air”.
  • Catch the exit line near the beginning – not near the end, where it degrades.

These tips should be enough to get you going. And don’t forget: enjoy these once-in a lifetime moments.


Opposite to what beginners think…

A working photographer does some things differently from the way beginners might think. Like these ten points:

  1. I do not use lens filters. Unless it is raining, snowing, grubby little fingers reach out, or I am at the beach or in a sandstorm.
  2. I always use a lens hood. Even at night, even indoors. Even at night, indoors.
  3. I often use flash outside. To fill in shadows and back lit faces.
  4. I often do not use flash in dark. To allow the shutter to stay open, and to use available light.
  5. I do not have a camera bag. Just a bag for lenses, flashes, and so on.
  6. Indoors, I point my flash behind me.
  7. I avoid zoom lenses when I can. I often prefer to use primes instead.
  8. I do not install software from my camera maker. Brrrr!
  9. I do not use all the focus points – I use only one.
  10. I set ISO manually. No auto ISO for me.

As you see, the obvious is not always right. Look at how the pros do it, and see if that might work for you.


What a difference a stop makes.

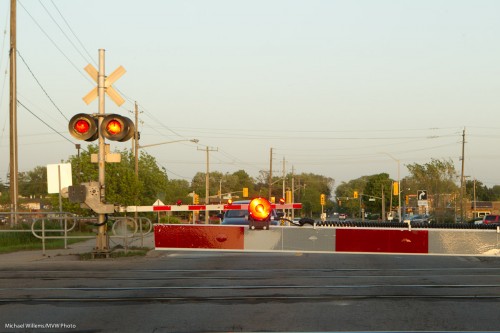
Shoot a late evening scene the “normal” way – auto white balance and exposed for a bright scene:

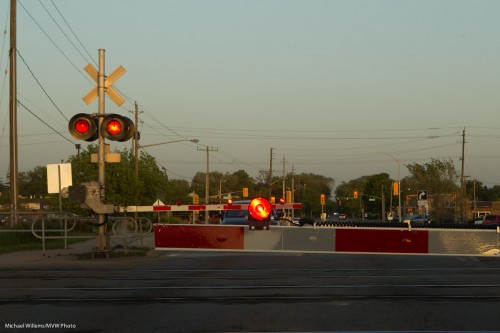
And now shoot it with shade or daylight white balance, and exposed by two thirds to a stop less:

…and you will see a huge difference. Now, do not get me wrong: it is OK to feel that one way is right, or the other way, or even a way in between. What I want you to realize, though, is that a slight exposure difference can make a huge difference in the image.

Lower exposure accentuates and saturates colours, like the red in this image, and makes skies visible rather than detail-less white.

This is why you should think of exposure as a valuable tool rather than as a hassle. And why you should always shoot RAW, so that you can make adjustments later. Not that you would plan to do that – you should pklan to get it right in the camera – but it cannot hurt to at least have the option.


Colour Combos

Using colour in your photos can make a dramatic difference – if you use it well. Three tips for you today in that regard:

Use opposing colours to add interest. Yellow and Blue is such a pair of opposing colours. Red and Green, another one. Whenever you see yellow, ask “could there be blue anywhere to contrast with this?”. Ditto for red and green. Or create your own by using flashes and gels.

Use all three primaries. Images look impressive when you have saturated reds, greens and blues in the same photo.

Saturate. By not mixing with white light, you are saturating your colours. Mixing with other white light decreases the saturation, which is why overexposing makes an image look “washed out”.

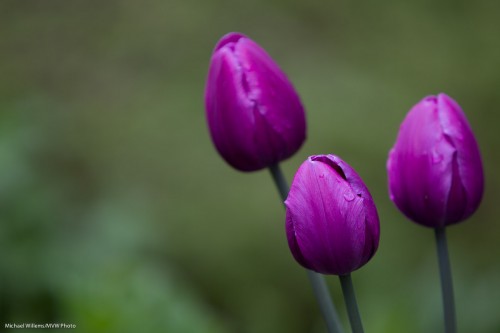
Use beautiful complementary colours – colours that go well together, like purple and green:

Simple tips that can greatly enhance the colour quality in your photographs. Sometimes, things really are simple.


Add flash to darken your photo.

Yes, you read that right: add flash to darken your photo.

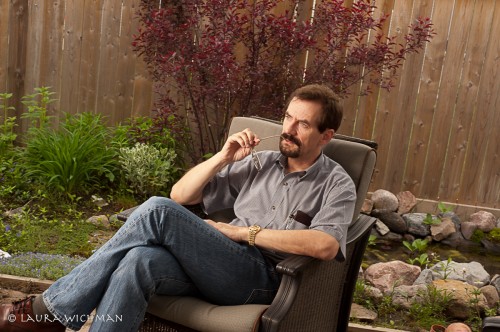
Take this image, shot as a demo for me by photographer Laura Wichman the other day:

Well exposed, well lit, all good.

But you have heard me say many times: “bright pixels are sharp pixels”. So how about if we make this more dramatic?

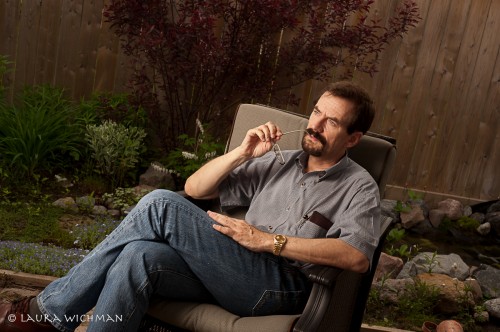
The use of flash allows us to decrease the ambient exposure (first try faster shutter speed; when you get to your sync speed, e.g. 1/200th second, then carry on and use a lower ISO setting, and finally go to a a higher “f-number”). The background now gets darker:

But because a powerful flash (Bowens, with Travel Pak battery pack, equipped with a softbox) lights me, my exposure does not need to be affected. I can remain as bright, by turning up the flash (needed only if ISO or aperture are changed).

So now we have made the background darker and hence made me the “bright pixels). Using flash to darken most of your picture, in other words.

News Flash: Photo Life Magazine June/July issue is out: in it, you will see my article “Flash: 10 Problems, 20 Solutions”. Go get your copy today, particularly if you shoot flash at events.


Direct the light

Following up from my post the other day about simple light. Remember this shot:

As I said, the bounce light was directed so that the subject’s face is lit. That is the key here.

Let me show you what would happen if I did not do that right.

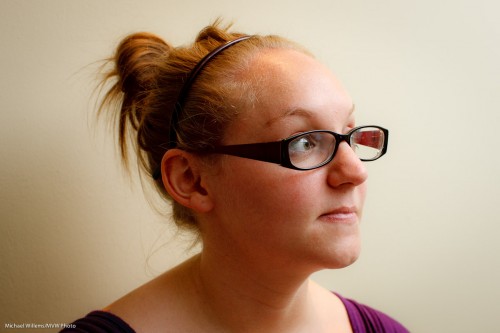
Say I just bounced the flash behind be. That would be “OK”, but no more  than that. The face would look dimensionless – flat, even:

And if I bounced behind me on the left – nowe that would be just plain wrong:

Badly shot (deliberately, and kudos to student Kayleigh for allowing me to demonstrate on her!)

Go back and look at all three – see how much better picture one is?

So the essence is: shoot not from your camera’s perspective, but from your subject’s perspective. Decide where the light should be coming from with resepect tou your subject; then direct your light to that point.