Video Tip

I use my DSLRs for video; I also teach a course I developed on shooting video with DSLR cameras (see here).

Today, a tip from that course: Audio. Audio is very important, and I recommend a few simple things:

One: turn off auto level. Set the audio recording level manually, else every time no-one speaks the noise goes up.

Two: use an iPhone in your pocket if you have no lapel microphone. An iPhone gives you great audio quality at an incremental cost of zero, if you already have an iphone.

And three: use a clapper board app such as Digislate (thank you, intern Daniel, for this one). Using a clapperboard allows you to synchronize this iPhone audio with the video from your DSLR.

Done. Professional audio from an iPhone, a simple camera, and free iMovie software. Simple, innit?


___

The special on headshots is still on. Buy this week; take the headshot in my studio by August 14, and get a pro headshiot for much less than the regular price. See http://learning.photography or scroll down to yesterday’s post.


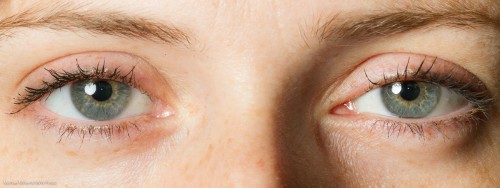
Through The Eye Of A Woman

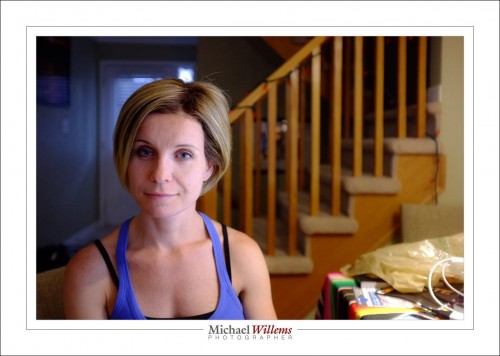
OK, maybe that title is a little silly. But it IS through the eye of a woman that I shone my flash

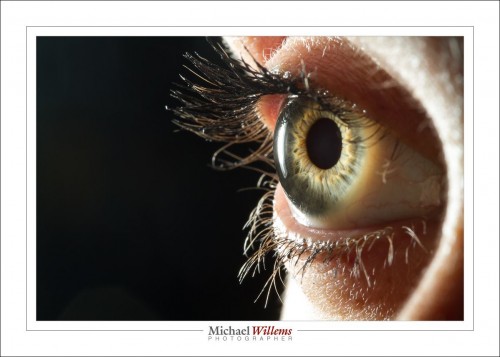
And here, lit from the back:

Macro lens, 1/80 sec, f/16, 100 ISO, hand held.

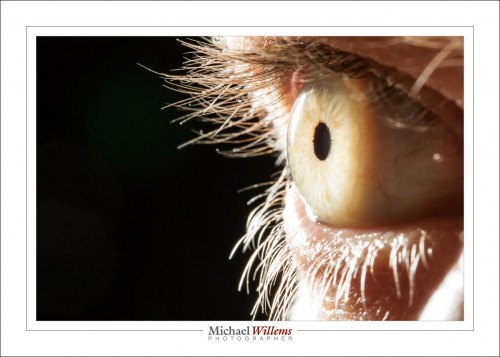
The flash was shining from the back. This can give you pretty weird effects:

My eye here looks light green, while in fact it is light blue. Back lighting can do that.

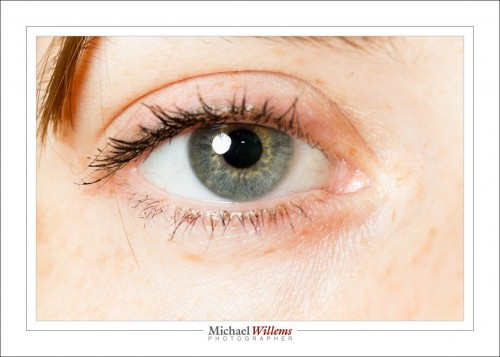
But go back to the first shot. See that? Look carefully. A little white point, in the centre of the pupil,next to the actual catch light.

This is mysterious, because I was using an off-camera flash. The on-camera flash only sends “morse code”, as it were, to the other flashes, before the shot is made.

And yet, that pin light is from the on camera flash.

Simple, actually: it is its afterglow. The flash is off, but it takes a fraction of a second to completely go out, and it is during that fraction of a second that the shot is made. Here, the proof:

See, the main flash on our left, bounced against the wall; and me and the camera including its popup flash afterglow in the centre:

And that is why you get a little pin of extra catchlight in some wireless TTL photos, even though your on camera flash is turned off.

(Thanks to Becky for the loan of an eye!)


Print.

A photo is not a photo until it is printed. And you should print your photos. Today, I am making a case for doing that.

You are reading this post because you are into photography. You are a beginner, or an advanced amateur, or a seasoned pro who would like some new techniques. Either way, you have come here to learn about something dear to your heart: making images. And for many of you—especially the beginners—this means you have hundreds, thousands, tens of thousands of images that live only on your disk drive.

Great. But that is not the whole job. You are leaving out the last step. A very important step; I would say an essential one. Creating a print from the best of those electronic files.

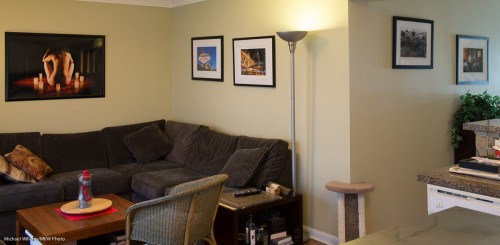
Like here, in my living room, which as you can see is decorated with one artistic nude, three travel photos, and one “selfie”:

Why is printing images so important?

For many reasons, of which I am going to mention the top six.

It is the only way to preserve the image. Digital images get lost. Let me repeat that: Digital images get lost. All information carriers (Papertape. Magnetic tape. Floppy disks. Hard disks. CDs. DVDs. CF cards. SD cards. USB keys. Every single type!) lose their information in anything from a year or two to a decade or two. I cannot stress that enough. You will lose your information. CDs, DVDs, hard disks: all of these are meant for temporary storage. there is as yet NO permanent storage solution other than cuneiform clay tablets. “The cloud” is no solution either: things get lost.

Also, even if by a stroke of luck you do not lose the data, you cannot read old media (try to read an 8″ floppy disk: I challenge you!). We may be the generation that takes more photos than any preceding generation; we are also the generation that will lose more photos than any preceding generation. This is a tragedy. Please.. print, to preserve.

They decorate your living room very nicely. There is a reason there is no hotel without prints on the wall. Prints add style, class, to your environment. Not just to hide stains: prints look beautiful on your wall and you can choose something to complement your environment (e.g. urban scenes in a country cottage, and vice versa).

Prints look much better than displays. Prints can be much larger (the nude above is 40″ wide); they can be on metallic paper (that one is); they have wonderful colour saturation, and they are, when done properly, much better than a display. Yes, printing needs to be set up properly, but it is worth doing.

They are a great way to share. Having photos on a hard drive is ok, but how often do you show them? A print on a wall is seen every time someone walks by that wall. And not just for ten seconds: for the entire evening, if you have dinner guests.

There are many possible formats. I love fold flat photo books with hard pages. There are many formats, from canvas wraps to such books: you can go wild. All this amounts to much more than just your LCD screen!

You will feel good about your skills. There is a special thrill in seeing your work large, as it is supposed to be, on your own wall. Your work instead of some IKEA artist’s work! This is an important motivator to keep shooting, as well.
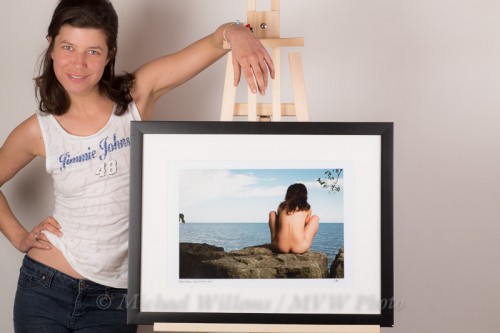
My recommendation is a strong “go make some prints from your best photos—today!”

EXTRA: TIP for readers in the Toronto area: for great prints, in a wonderful variety of types, go to Fotobox in west Toronto, on the Queensway. Tell them I sent you—they have done my large metallic prints, and I am delighted with their service, attitude, skills, quality and pricing. Fotobox, 936 The Queensway, Toronto, ON M8Z 1P4(647) 430-8499. See www.fotobox.ca. (And no, before you ask: I am not being paid for this mention.)


Low key or High Key

Definition time:

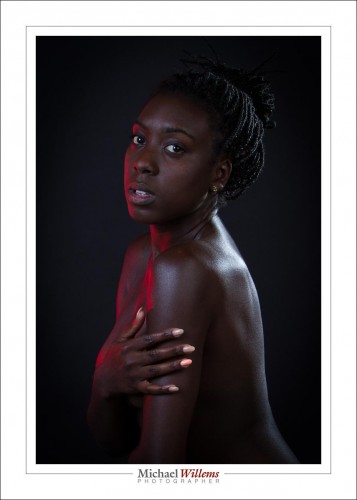
A low key photo is simply a photo that is “overall dark”. Like this one, of Serenity, made yesterday:

(Black backdrop, 200 ISO, 1/125 sec, f/8, softbox on left as main light, softbox on right as fill light, snoot behind right as hairlight, gridded gelled speedlight on left for red accent).

The nice thing is that the subject stands out because she is the only light thing; in particular, her eyes are.

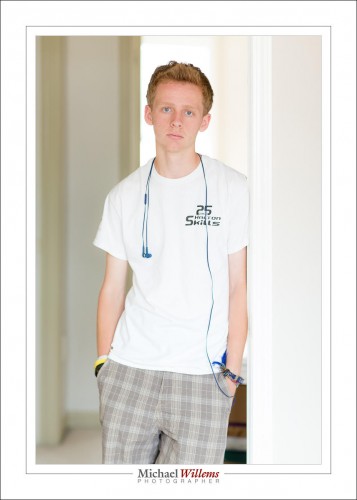
A high key photo, you guessed it, is a photo whose overall brightness is high. Like this, of intern Daniel, also made yesterday:

There you have it.

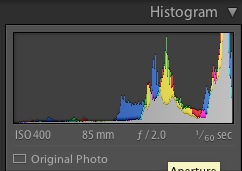
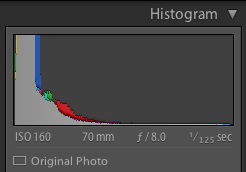
Which histogram belongs to which photo?

Answer tomorrow!


Repeat Post: DPI/LPI versus Pixels

Today a repeat post, because this happens all too often, and it happened again yesterday. People confuse the DPI setting in an image with something meaningful. News Flash: By itself, saying “300 dpi” or some such means nothing at all about the quality or size of the picture. So here goes, from 2010:


I keep hearing people say “I want this picture at 300 dpi”, or “send it to me low quality at 72 lpi”.

When talking about a given image, that by itself is meaningless!

Let me see if I can explain. I will simplify and assume that dpi (dots per inch), ppi (pixels per inch) and lpi (lines per inch) are the same. They are not, not exactly; but assume for a moment that they are, since it makes no difference for this explanation.

Folks, the dpi (or lpi) setting makes no difference to the quality of an image. Not by itself. It is just an instruction to the printer.

It is the number of pixels that makes the difference. Not the number of pixels per inch, which is just an instruction to the print device.

Let me try to explain.

Let’s start with the image. You have taken a picture. It is a certain number of pixels in size. Say, 640 pixels wide, or 1,200, or 4,500. That is the resolution of the picture. The more pixels, the higher the resolution. Very simple. So let’s say your camera is a 6 Megapixel camera – that means your image is 3000 pixels wide (3,000 wide x 2,000 high = 6,000,000 pixels, or 6 Megapixels).

When someone says “send your picture to me at 72 dpi” or “send it to me at 300 dpi” that means nothing by itself. Try it: export your photo from Lightroom (or whatever you use)  as 72 dpi, and then again as 300 dpi, and compare the two images. Identical number of kilobytes, and when viewed full size, identical detail.

DPI means “dots per inch”. So by saying “take this image and make it 300 dpi” that is just telling the printer “take this image and print it ten inches wide” (3000/300 = 10). Setting it to 72 dpi means “print it  42 inches wide” (3000/72 = 42). But it neither increases nor reduces the quality!

What people need to say if they are talking about image quality is:

  1. “Send it to me 10 inches wide at 72dpi”.
  2. Or “send it to me 10 inches wide at 300 dpi”.

Which just translates to:

  1. “Send it to me (10×72) pixels wide, i.e. I mean 720 pixels wide”
  2. or “”Send it to me (10×300) pixels wide, i.e. I mean 3,000 pixels wide”

So if you mean 720 pixels wide, or 3,000 pixels wide, why not just say that?

That is the essence. After all, it is easier to set one variable (pixels wide) than two (dpi and size); and pixels mean something real.

Unless we are printers, we are talking about it from this perspective, so we should use clear terms. Telling me “send it to me at 72 dpi” is only meaningful if you also add the inches. So be clear, and say “send it to me 3,000 pixels wide”.

Opinions

I never use others’ materials, or criticize others, but this video is interesting and this person is 100% right in his criticism of Ken Rockwell:

https://www.youtube.com/watch?v=I38q5Ad5GaM

Watch the eleven minute segment segment that starts at 39 minutes. A segment that makes me feel roughly like this:

Canon 1Dx with 85mm f/1.2 lens; 1/125 sec, 100 ISO, f/8, Off Camera Flash at 1/4 power; Pocketwizards, HonlPhoto 1/8" grid.


Why am I sharing this? Because the presenter in this video is absolutely right, and if you believe Mr Rockwell, you will be setting yourself up for failure. Take it from me: Shoot RAW. Do not use auto ISO. Use good lenses. Doing anything else is recipe for disaster.

There is opinion, and there is silly opinion, and not all opinion is valid. You are welcome here for your daily dose of valid opinion. 🙂

Thanks to Steve Jones for forwarding this segment.

TLC

Tender Loving Care… sometimes your photos need some. Meaning, some post-production editing.

I try to keep that to a minimum, for several reasons. First, I am a photographer, not a graphic artist. Second, it’s work, and I like to minimize work. Third, I like my previews “on the back of the camera” to look great, not “needs some work”.

On that subject. The camera usually has a pretty vivid preview, and people (including me) like that. But when you import the RAW image into Lightroom, you lose that: suddenly, your image looks more dull.

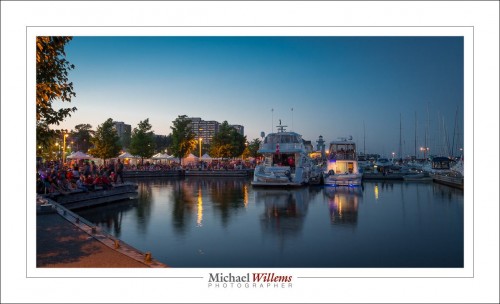
Bronte Harbour, July 1, 2014: This image was pretty good out of the camera.

This has two reasons. One: turn off in-camera “image improvement” settings. Those only for on JPG files. If you are going to edit, do it under full control in Lightroom, not in the camera under its control.

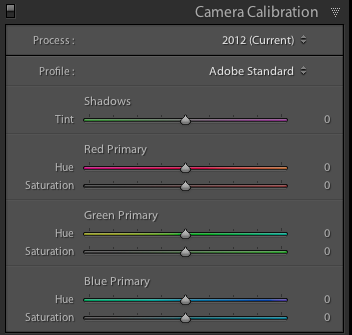
But there is another reason. By default, Lightroom converts the RAW into a preview using Adobe’s preference. In the DEVELOP module, scroll down to the last pane, “Camera Calibration:

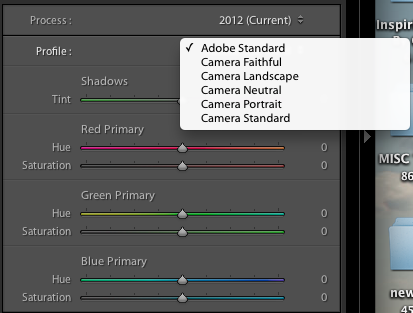
When you click on the “Adobe Standard” default, you see other options:

I usually select Camera Standard. You can make that your default. Result: images that look more like your camera preview.

Now you can do any further editing. In the image above I did four things: (1) I slightly darkened the blue sky using the HSL/Luminance blue slider; and (2) I slightly increased the saturation using the BASIC section saturation slider. Finally, (3) I added a very slight vignette after(4) cropping off the top inch. Since the original image was good and exposed well, minimal changes were needed. But they were still changes. Sometimes, a little TLC can have big results.

Learn all about Lightroom, the only game in town: come to me for a private workshop during which you learn how best to set up and use Lightroom. You will be amazed at how good your images really are.


Old skills

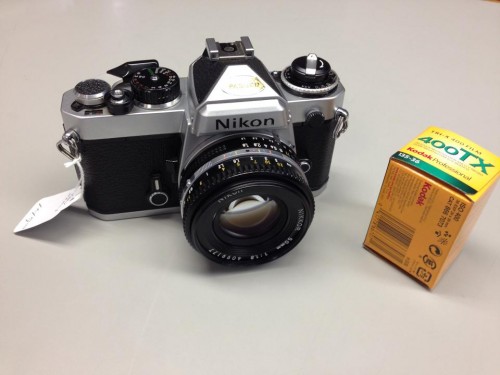
I recently mentioned here that I am shooting some film, on this:

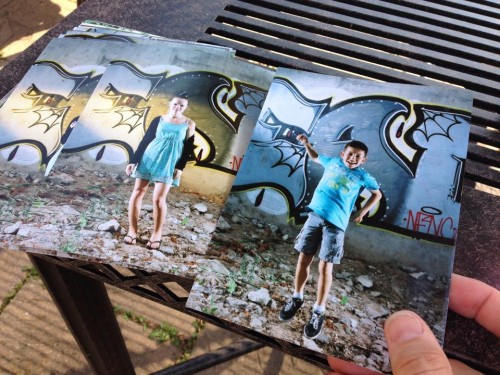
So I just got my first roll of film back, or rather the prints from it, and this leads me to say a few things.

First, I am glad I still know how to shoot film. The pictures look as good as my digital equivalents. Which is nice, considering that I have gotten used to seeing the pictures on the back of the camera after shooting. All my exposures were good, save two that were a little underexposed.

Second, I am glad that there’s still a place to buy film (Henry’s, Vistek) and a local place to print and scan film (my local Black’s at the Oakville Place mall). Print and scan, that is right: they develop, and print and/or scan C41 colour film (B&W is a little more time-consuming and expensive). Develop and print colour is around $20 for a roll of 36; scan is about another $5. Perfect! In your town there will also be places to go, still. Sparse but existing.

Third, I am used to correcting things like white balance, and I cannot do that here. So some shots are a little cool (like the ones above): well, nothing I can do on the prints. I asked for “no adjustments” and that is what I got. Daylight film lit with flash should be OK, but evidently the machine was set to a little blue.

Fourth, this is fun. Go get a camera, which will cost yo no more than $150 used, and go shoot some 400 ASA film. You can do it!

Fifth, I use my brain when cropping; stores do not always do this. I shoot 35mm film which has 4×6 aspect ratio. I printed on 5×7, so a crop is needed, or letterboxing. They cropped, but in a few shots that was done unintelligently (cropping off half my subjects in some shots).

Sixth, to be a real photographer you need to be able to shoot film. Seeing my shots I feel the real deal again. See fourth.

Seventh, prints are great to hold. All this digital stuff is great, but you know I am a great proponent of physical prints, books, wall art, and so on. Please, make prints.


So is there still a place for film? Most certainly there is. If only to ensure you can still do it. I really thought about each shot, since each click costs $1.  “They’re really good”, said the kid at Black’s. Not boasting here, but they are, and they are better than what I used to shoot when I shot film years ago.

There you have it: Digital makes you a better film photographer, and film makes you a better digital photographer.


Post-processing B/W

Toay we have so much power. So much more than in the film days, where we had toi get it all done in camera.

Now, no more. We can shoot RAW and do any desired post processing later.

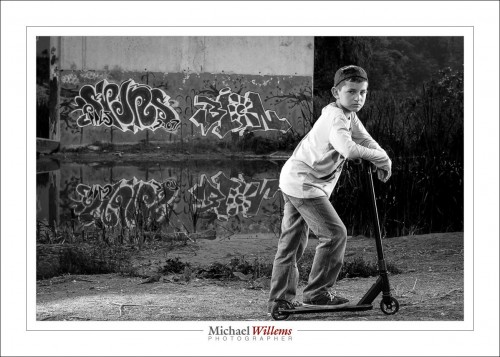
Take this image, one of the “tween and teen” shoot of the other day:

The kids’ mom and I shot that like this:

So I like the vivid colours. But what if I wanted B/W?

I would set my camera to RAW, but picture style to B/W. That way I see B/W on the back of the camera, to give me some idea.

But the moment I get home, in Lightroom I see colour again. So I go to the DEVELOP module, in within that the “HSL/Color/B&W” pane. I select B&W:

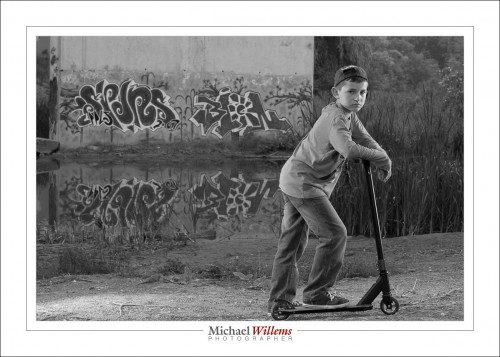
Which gives me this:

That’s nice and all, but as regular readers know, I can now set the brightness of individual colours. Why? Well, for instance, to create contrast between subject and background, or to emphasize or de-emphasize certain areas.

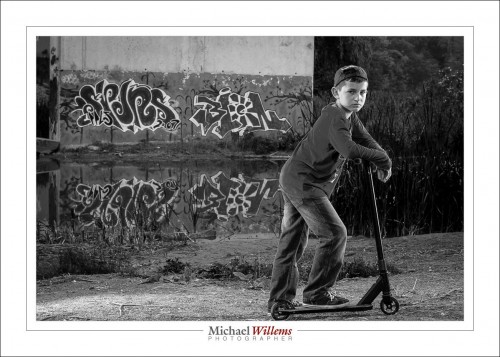
For example, I could make the shirt darker by sliding the “BLUE” slider to teh left. All blue areas (mainly the shirt) would get darker:

Be careful not to go too dark: you will see artefacts: look carefully at the edges of the shirt:

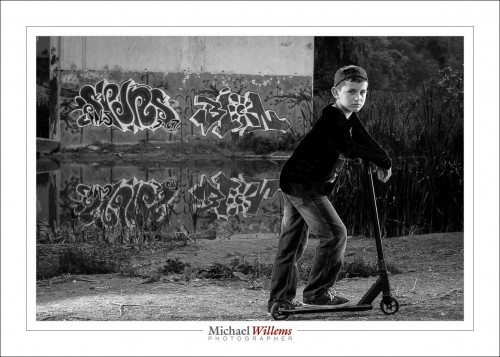
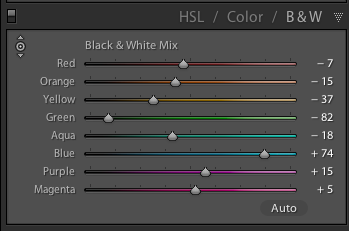
Anyway.. here, I want the shirt brighter. So I tune up blue, and then make various other small adjustments, like making green darker; all of which are aimed at making the boy stand out from the background:

Which gives me my final picture, which looks like this:

Actually, that’s not bad, especially when you consider that in Lightroom, this takes merely a minute of your time.

In the past, we would have used actual filters in front of the lens (e.g. a yellow filter would make the blue areas go darker). The problem is that you cannot readily experiment. Here, you can go crazy (though please don’t). Fun!

___

Come to me for some personal training, if you want to master these techniques. See http://learning.photography. Bring a kid or two and you get two benefits: portraits of the kids and teaching. All you need is to bribe your child in to cooperating for three hours. Easy, right?


Colour

How do you make colours pop, I was asked today?

(Fuji X100, 1/50 sec, f/2.0, ISO 1600, Velvia film simulation)

This  picture shows one of the ways: in the past it would have been “choose the right film”; today it is “choose the right film simulation”. You can do this in post-processing, or even in the camera if you shoot JPGs. The shot above simulates Velvia film. Velvia was famous for being beautiful and saturated.

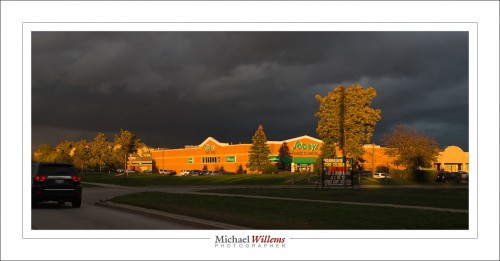
Then, be lucky, patient, or clever, and choose the right light. Like this beautiful late, late afternoon Golden Hour light on a “mainly overcast” day:

If it has been fully overcast that would have been OK too: overcast is generally better than “sunny” for saturated colours, by the way. Direct sunlight kills colours.

Next, make sure you get your white balance right. Like here, where I used custom white balance:

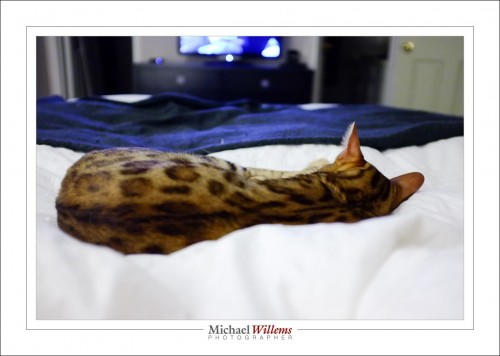
Cat Chilling

And, essentially, do not overexpose. Expose less and colours will pop. If necessary, use a flash to light up the foreground as you saturate the ambient light by slightly underexposing it.

And finally, you can do some more saturation in Lightroom… but that is a last step, that you should use judiciously, and if you do, do not go overboard.