A simple, but effective, trick

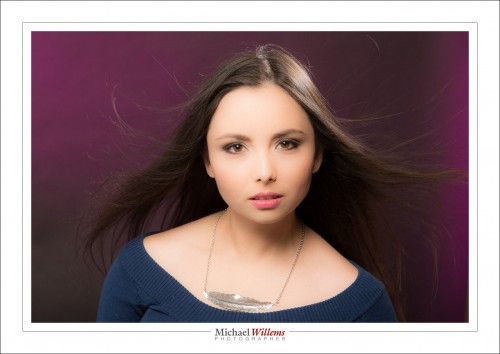
A simple trick, used by photographers the world over, is this. Can you see what we did in this shot from two days ago, a portrait of Liz Medori?

Yup, we used a fan. A simple cheap fan; I usually use an industrial fan from a home supplies store. That fan makes the hair do its wild sexiness thing, which you will see in many model photos.

And the good news: You need to know no technique for this. Even if you are a total beginner, nothing stops you from aiming a fan at your long-haired subject.

What else did I do in that photo? We had a make-up artist, Melissa T. We lit the model with one overhead softbox straight in front of her, plus one hair light aimed at us, for shampooey goodness™, plus one background light with a purplish gel aimed at the background. And I shot with a 70-200mm lens at the typical studio setting of 200 ISO, 1/125th second, f/8.

But even if you do not know what that means; go for it with the fan!

___

NOTE:  As usual, this content is brought to you free of charge. As are all the other blog posts (the entire four-year searchable archive); the articles; and things like the free book chapter from my latest book – the entire chapter on Exposure (go to http://www.michaelwillems.ca/e-Books.html and click on “download sample). Yes, in addition I sell e-books and training and photography sessions, but this content is provided free of charge.

Since this is a business, though, let me ask you to so something in return: please send this post to three friends who may be interested. That way even more people benefit from this advice and these free lessons.

Fair deal?


A Specialty Lens, Again

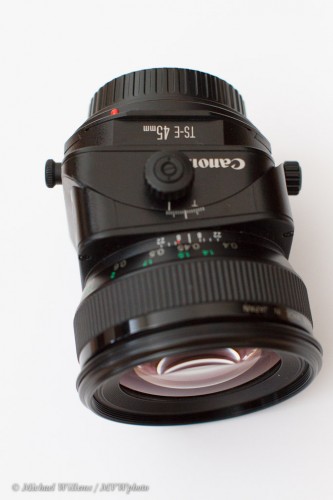
A good friend today bought a tilt-shift lens. Reason for me to talk about them again here, if briefly.

Like a traditional View Camera, a tilt-shift lens can:

  • Correct perspective distortion by shifting instead of aiming up/down.
  • Give you “dollhouse” selective focus effects.
  • Tilt the focal plane to get focus with wide apertures.

More often than not, the latter is the effect I am after, since the former two can be done in post-processing too, to a large extent. But the shifting cannot.

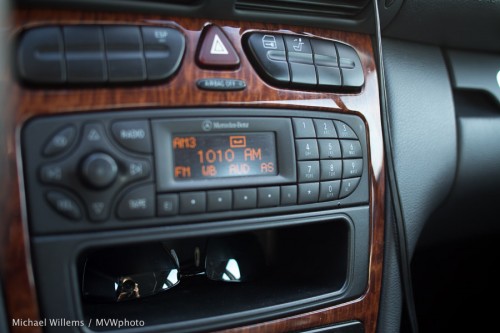
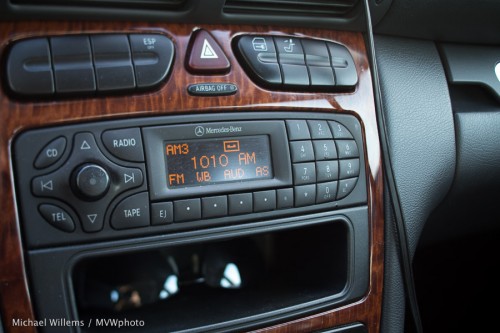
These were all taken at f/2.8. First, I focus on the nearby buttons:

Then I focus on the far buttons:

Yeah, that’s f/2.8. Selective DOPF. But only the tilt-shift allows me to focus on both buttons without going to f/11. Still at f/2.8, but I tilt the lens a few degrees and the DOF is still selective, but it rotates:

And that is why I use a tilt-shift, even if I need to expose and focus manually.

How far to tilt? I strongly recommend you read my article here. It’s full of math but even if you don’t get the math, the instructions are going to be useful: if you own a tilt-shift lens, you should be better than users who just guess ad do things by trial and error.

I’ll close by giving you three more examples, all taken at f/2.8 – the last one has both front and back objects sharp, which is impossible without a tilt-shift.

If you are a serious photographer, you might consider getting a tilt-shift – or at least renting one to see if you like it.


A thought to keep in mind

A thought for you.

Sometimes you do not have the right lens. Like, imagine you have a wide 16-35 lens:

Fine. But what if I had wanted a longer lens? I did in fact have one, but if I had not had it, I would simply crop. We sometimes forget, with all these pixels, we can crop dramatically and still be able to make a nice print. That photo above, I could crop like this:

That composition is more to my liking, and yet, it still maintains enough pixels for a print: this crop is around 2500×1800 pixels, i.e. some 4.5 megapixels: enough for an 8×10 for sure.

So next time you have a shot you wish you had had a longer lens for: Feel free to crop!


Slowly now

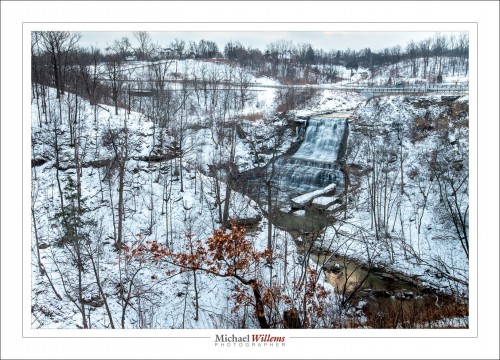
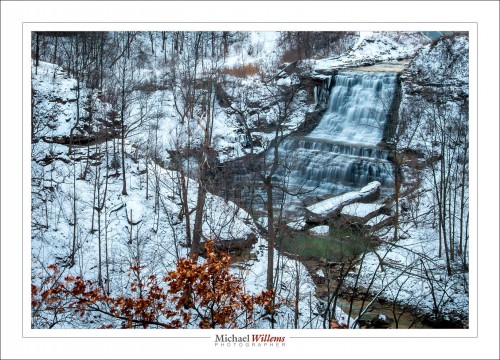
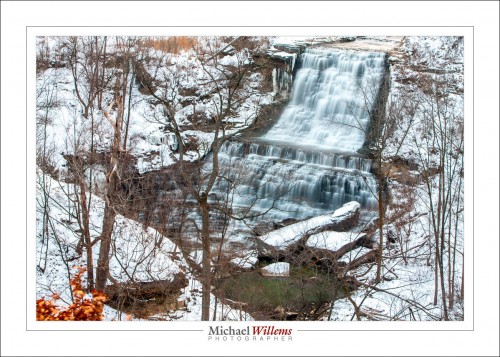
I was going to shoot some waterfall pictures yesterday. Alas: one park (Hilton Falls in Milton, Ontario) had its trails closed because of downed power lines and trees (which I discovered after paying the $14 fee, thanks, Halton Conservation), and the other waterfall, Albion Falls in Hamilton, Ontario, had its access routes closed also, but permanently, because of the danger. I had wide angle pictures in mind, but from above, which is all I could get to, they are not what I wanted, exactly. You will forgive me for that and just look at Albion Falls:

Imagine it is about minus infinity Celsius (a wicked cold wind, plus way below freezing), which is why my companion and I took only a few shots. Groan, that was freezing. I had to stop when my ears froze – literally, I felt ice inside my ear.

Now, the shot. How did I decide on settings?

I wanted a slow shutter, so I started with 100 ISO and f/16. I try to avoid apertures smaller than f/16: any larger f-number and the images tend to get a little less sharp. That would have given me a shutter speed of perhaps around a second at most: not long enough. So I used the variable ND filter, set to a dark setting, to get to 20 seconds.

And on the long lens, the 70-200, I used a polarizer, since it is all I had. That cut almost two stops from teh light, so I got to 5 seconds. Here’s one taken with that long lens:

(See the large version on my Flickr stream).

What do you need to watch out for when doing these shots: Mainly, motion.

  • Avoid moving the camera while pressing the shutter. This is worse with shutter speeds between, say, 1/15th and 2 seconds (shorter and there is no time for camera shake; longer and the little shaking will disappear compared to the rest of the exposure).
  • I had a tripod, of course, but it was too cold to go back to the car to get the sandbag I would have liked to hang from the bottom to stabilize it. So the tripod moved just a tad in the strong wind. This is worse with longer lenses, and much less noticeable with a wide angle lens.
  • The viewing platform itself moved a little, leading to a little shake too.
  • And finally: trees move in the wind over the course of a long exposure.

So of my ten pictures, three were good and sharp. Which is about what I had hoped for. Keep this in mind when shooting waterfall pictures!

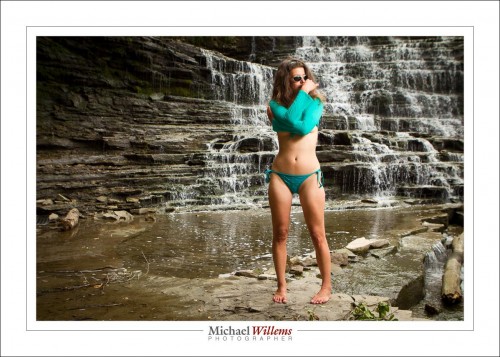
And finally, here is a model shot at the same waterfall, from 2012. Just so you seee Canada is not always cold.

I cannot wait until it is summer again.

___

Camera technique? Composition? Flash techniques? Specific situations?  I explain it all in my e-books. PDF files for viewing on computer, phone or tablet. Get them here.


ND filters

A Neutral Density (ND) filter is useful when you want to cut light. Why would you want to do that? Because

  1. You may sometimes want to create longer exposure times, and cutting light may be the only way to do it.
  2. Or because on a bright day you want a larger aperture, in order to get more selective depth of field.

Imagine you have this:

At low ISO (100) and high f-number (16) that was 1/4 second (using a tripod, of course). I used my wide angle 16-35mm lens.

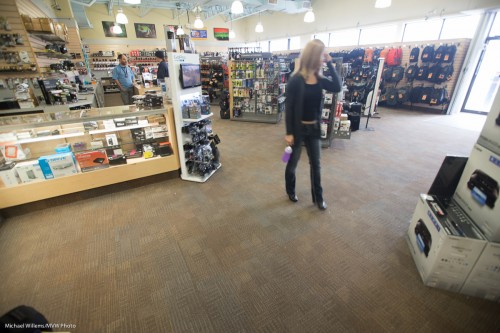
But what if I wanted a slower shutter speed than 1.4 second? For instance to make a river or a waterfall look all smooth? I cannot lower the ISO or increase the f-number (at least on this lens), so I need a trick. And that trick is the ND filter. It evenly cuts light, so then you need a faster shutter. Like here, the same shot with an ND filter:

But it looks just as bright?

Yes, because at the same time as cutting the light, I set the shutter speed to a much longer time, namely one of 5 seconds (set manually and metered by trial and error as much as by the meter, which is less accurate under these circumstances). Anyway, 5 seconds is 20 times less light than 1/4 second (since 5 sec/0.25 sec = 20). How many stops is that? It is 4.32 (roughly 4 and a third) stops less light, since 24.32 = 20. Um, high schoolers and above: you can calculate this number of 4.32 as follows:

  • 2x = 20 (base 2, since a stop is halving or doubling the light)
  • x = log2(20)
  • x = log(20)/log(2)
  • x = 1.301/0.301
  • x = 4.32

So my ND filter gave me  4.3 stops less light.

I used an 82mm Cokin variable density ND filter. One where you turn the filter to make it darker or brighter. Turn it one way and it cuts 1 stop; turn it the other way and it cuts 8 stops, says Cokin. I call “no” on that. Even at the darkest, it is not that dark, and in any case, when I am zoomed out and then go beyond 4-5 stops, this happens: (made one stop darker, i.e. 5.3 stops, now using a shutter speed of 10 seconds)

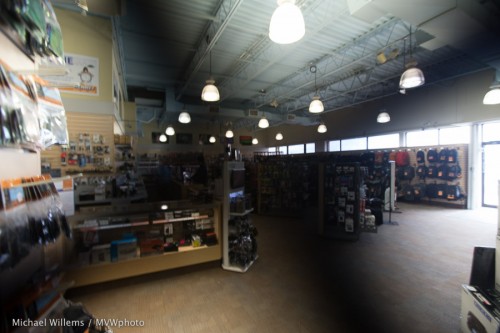
See how bottom left to top right it gets all weirdly dark? Not usable, so this filter is not really usable much beyond 4 stops with a wide angle lens.

An cheaper Cameron filter was even worse when turned all the way to the “max” mark for “dark”:

All variable filters do this as far as I know, since it is due to physics; but some are worse than others.  To avoid it, zoom in, not out, and then look through your viewfinder to see when this problem happens, and back off from there.

Another thing to watch out for is flare. The cheap filter did this, look at the bags on the top right:

And the better Cokin filter:

Not perfect, but better.

So you now know why to use neutral density filters; how to use them; and the possible pitfalls, including what to watch out for if you buy the variable variety. You may just want to get a non-variable 5x or 8x ND filter.

And you’re welcome.


Silhouette

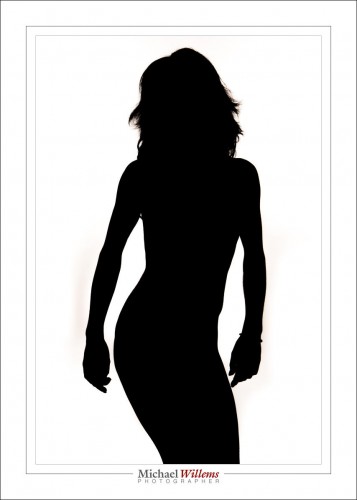
How do you do a silhouette this way?

The technique is quite simple.

First and foremost, ensure that the background is well lit. By flashes, continuous lights, or whatever. It needs to be bright. Then, ensure that none of that light falls on the subject.

Now, expose for a bright background. You could start by aiming at the background and setting your meter to +2 stops by adjusting ISO, aperture and shutter – or if you are in an automatic mode, by using exposure compensation, and then locking in that +2 exposure.

Finally, if some light did spill onto the subject, you may need to do a little post work: in Lightroom you go to the DEVELOP module, BASIC pane, and move blacks down, shadows down, and highlights up.

And that’s all. Very simple, so if you have never done silhouettes like this, go do one now.


Three Feet

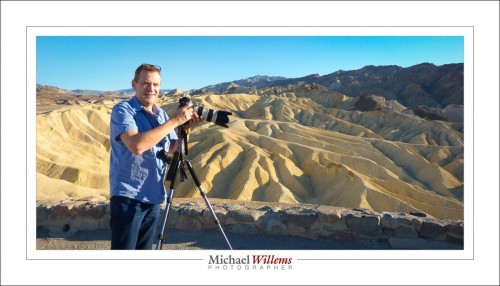
When exactly do I use a tripod, as I am doing here at Zabriskie Point, Death Valley, California?

As little as possible, because I have to carry the darn thing. Except, every time I do, it’s better.

  • I do not have to raise ISO values in order to get a fast enough shutter speed.
  • There is no motion blur (important, since even at faster shutter speeds, it CAN occur).
  • I can do panoramas.
  • I can do HDR images.
  • I can leave focus alone once it is set.
  • I can leave zoom and other compositional elements alone once set.

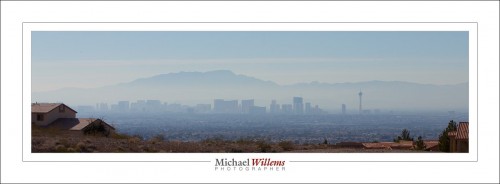
Here’s a panorama I made in Las Vegas the other day (view it at the original 3000-pixel wide size by clicking through):

You make a pano like that by:

  1. Using a tripod.
  2. Mounting the camera on the tripod so that it swings around its focal plane (i.e. mount the plate below the camera, not below the lens, as you otherwise might do with a long lens);
  3. Set manual exposure, white balance and focus (avoid days when the sun comes in and out);
  4. Avoid close by objects, except in they first and last pictures;
  5. Take pictures from left to right. Ensure that they overlap by, say, 30% (more is OK too). In this example, I took six pictures.
  6. Use software to put them together at the required size.
  7. Adjust and, where necessary, crop the final result.

What software? You could use Adobe Photoshop. Canon Photostitch, or a host of paid and free applications. I am not the best to advise on which one is best (anyone? Feel free to jump in with well-founded advice).


Through a haze, clearly

Here is the city I shall leave again when the airline has seats in a day or two:

You will notice some technique here:

Haze and foreground: I made the two houses in the foreground part of the picture. Anything hazy is OK is there is something sharp in the foreground. (I discuss this in the Impactful Travel Photography book, of course).

Panorama: I cut off the top and bottom to emphasize the strip, and to use the Rule of Thirds. (This too in the Travel book).
Enjoy your day. I am about to enjoy the last day of Nevada before I try to get on a plane, which is proving surprisingly difficult.


Timing is everything

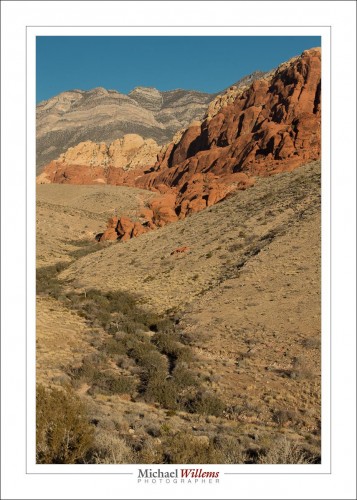
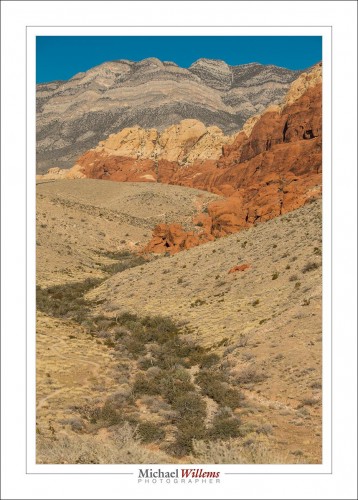
Not everything, but it is certainly something you should be aware of. Look at the difference in these two pictures of Red Rock Canyon, Nevada, yesterday morning:

Majorly different, no? And why? Because I took them about an hour apart. 9am (first) versus just before 10am (second). And that darn sun had shifted. See? Proof that it turns around the earth.

Both acceptable pictures (note the curves, and the other compositional elements described in Impactful Travel Photography?), but both different. See the differences?

Light really is very important and as a photographer you should always be aware of the nature of the light: where is it, how contrasty is it, how bright is it, what colour is it.


It ain’t all what you see

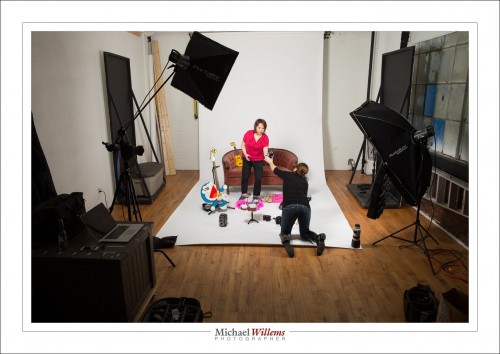
The day before yesterday, I did a shoot for a very talented photographer who is publishing her work and needs a front page. A studio shoot, and just a word about that today.

A shoot is not what it seems, sometimes. The end result is like this:

The shoot actually looked like this:

Make-up artist. Backdrop. Lights. And post work, including:

  • Making the edges of the white background pure white.
  • Filling in areas without backdrop
  • Colour change of the couch.
  • Small changes in lighting curve (dark areas, light areas, etc) to optimize the end result.

Often, also skin edits and so on, but with a young subject and a make-up artist, that was not necessary. The rest, though, was, and that is one reason you pay a photographer: attention to such detail, and expertise carrying it out, is the difference between “OK” and “good”.

Tomorrow, I am off to Las Vegas (standby flights allowing), so updates may be sporadic for a few days. We’ll see!