Oh Canada

Canada Day Special: User discount code “CanadaDay” upon checkout at http://learning.photography for 10% off all sales today. Books, shoots, courses. Today only!

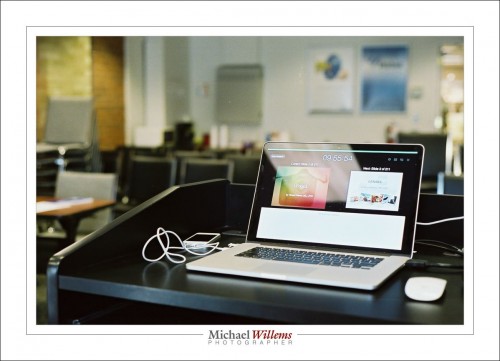
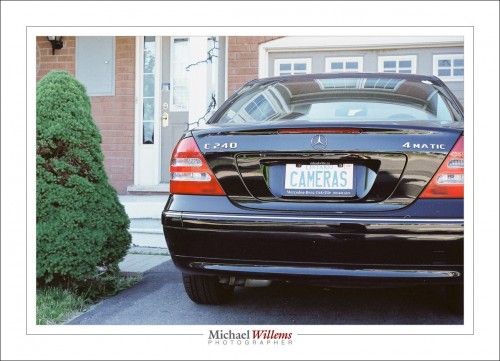
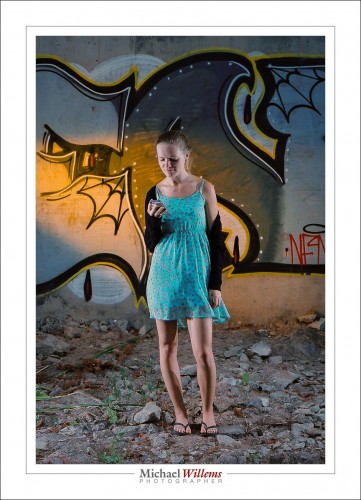
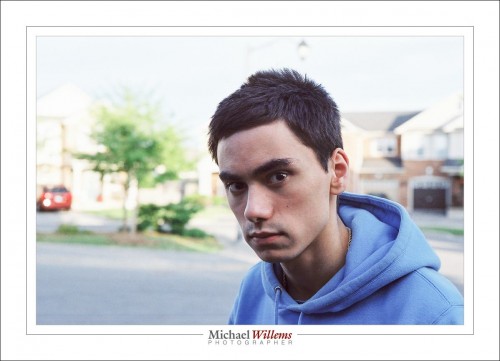
Now that that is out of the way: remember my film shoot recently? Here’s a few scanned images from that first roll. Black’s photo prints, but also scans for an extra few dollars. So here’s 400 ASA Fuji colour film and what it can do when you use proper lighting and exposure.

At Vistek, just before starting a course:

Outdoors, the car: doesn’t look like 400 ASA.

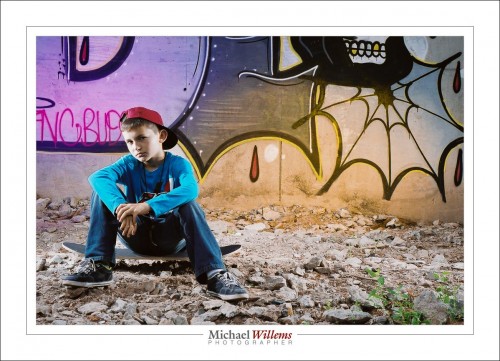
A teen shoot, using flashes. I used my digital camera as a polaroid, to ensure proper exposure; consequently, all images great on film also. Pocketwizards. 400 ASA, 1/125th sec, f6.3:

My son, handheld outdoors, centre weighted metering:

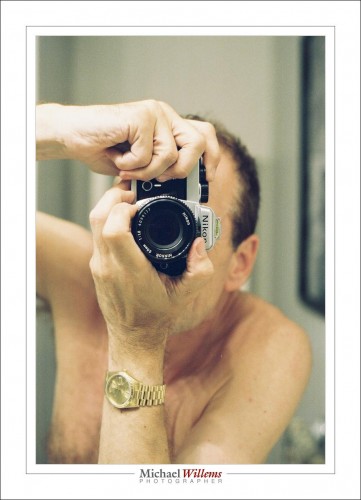
Selfie… mirrored:

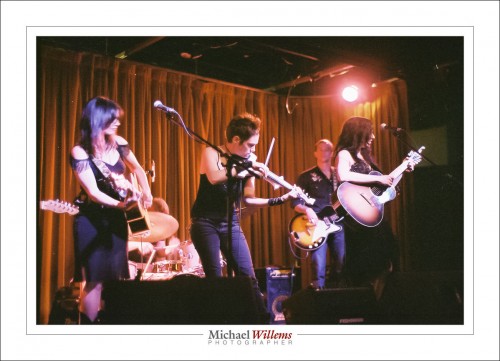
Scarlett Jane:

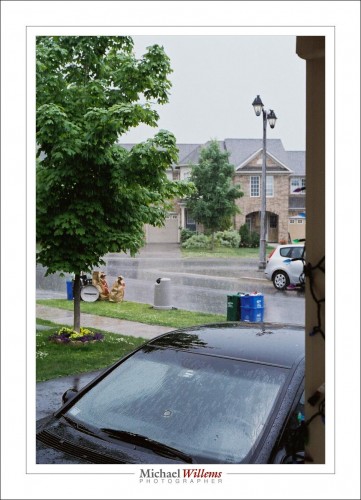
A rainy day:

And two more from the kid shoot:

All these are as good as digital images, for a mere $150 for the camera and $25 for film developing, printing and scanning. Of course, more care and attention is needed when shooting film: you cannot just shoot to see what happens. You have to be right before you shoot. But that makes you a better, more careful photographer. So.. go buy a film camera.


Situations…

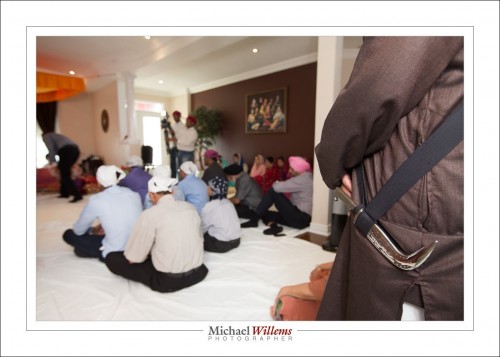
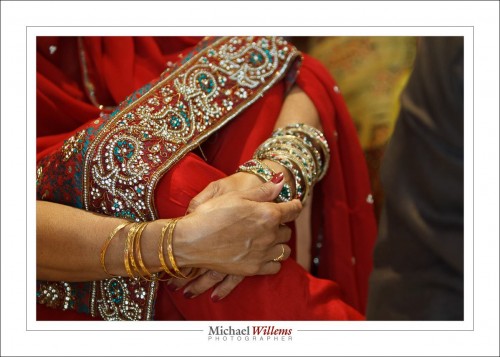
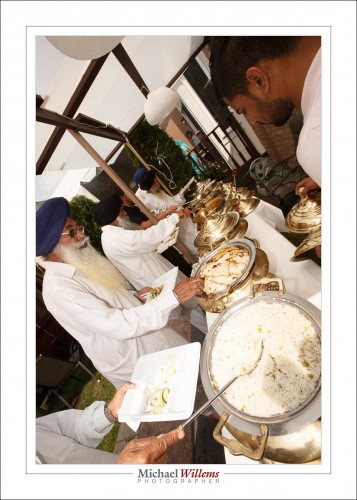
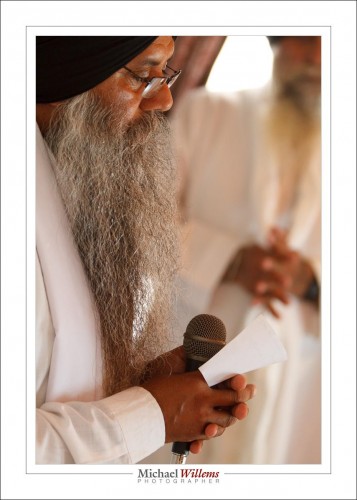
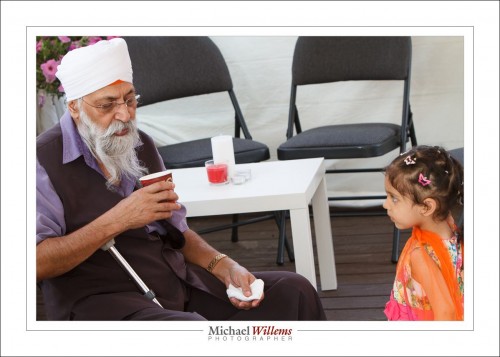
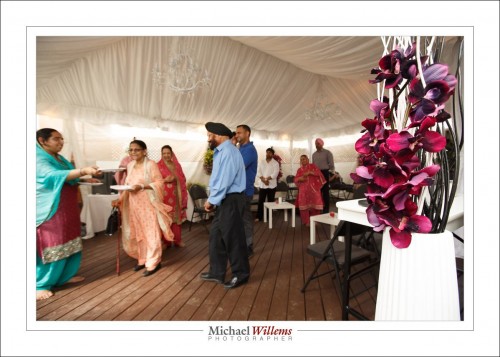
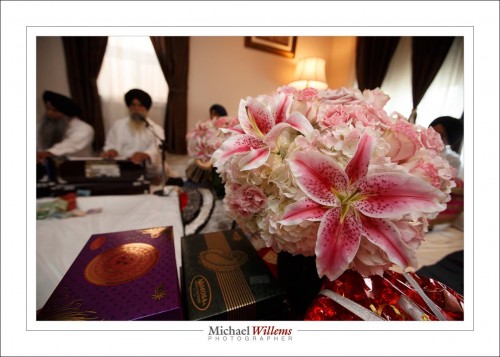
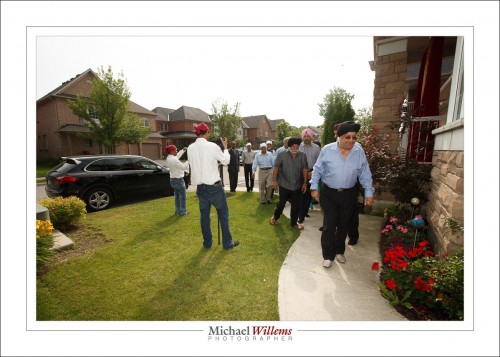
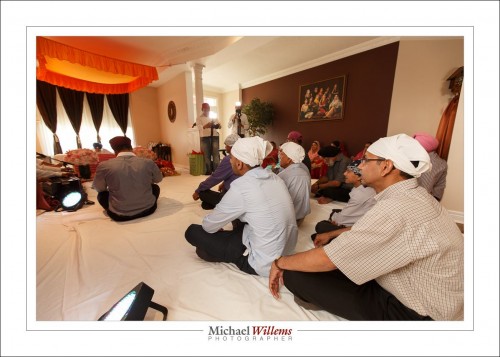
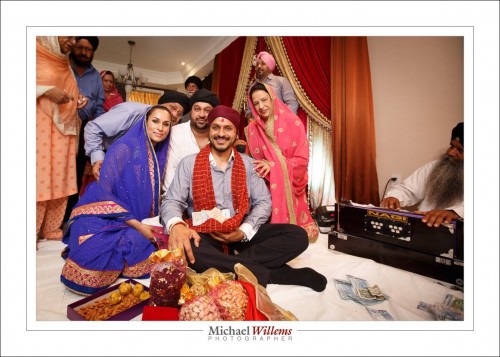
I shot a Sikh religious event today: Sagan ceremony and Akhand path. Fun, colourful people and decorations, and very nice people.

Picture 1: Can you tell it was a Sikh event?

I had two cameras: one with the 16-35mm lens, i.e. wide angle, and one with the 70-200mm lens, i.e. a telephoto lens. The challenge was that I shot in at least four different light environments: a marquee, outdoors, indoors in one room, and indoors in another room. And shooting in Manual exposure mode means a quick changing of all the variables every time you move from one environment to the next.

Indoors, the Willems 400-40-4 rule works great. Bounce the flash behind you and 400 ISO, 1/40 sec, and f/4 should give you minus 1 to minus 2 ambient light; the flash then does the rest. When using TTL, use flash compensation to adjust to taste.

In an event like this, moments are important; as is detail:

Tilting is OK if it helps you get more in, or for creative effect:

I used the wide lens as above with bounced (behind me) flash. But I used the long lens without flash. That needed 100-200 ISO outdoors, and up to 1000 ISO indoors at f/2.8—everything at f/2.8.

In practice, in a given situation, you choose values that are going to be close enough, then watch the meter and when you move, quickly yank aperture or shutter up or down to get a reading appropriate to the situation. Basically, it is a matter of getting close enough and then fine-tuning.

“Getting close” means 400/40/4 rule inside, “sunny sixteen” values outside, and whatever works (and remember the values) in other lighting situations.

In the marquee: 1/40, f/8, 800 ISO:

Storytelling images for me often involve a close-by sharp object with the story blurred in the background:

Outdoors, I used values like 1/160 sec, 100 ISO, f/8, with fill flash. Outdoors, that flash is aimed straight ahead, not bounced:

When you shoot a lot, these sorts of values will be simple. And then you can concentrate on the fun, the people, the compositions.

Event shooting is fun: learn to shoot an event like this and you can do a lot of great work. And remember: tell stories.

And: enjoy the experience, as I always do.


Old skills

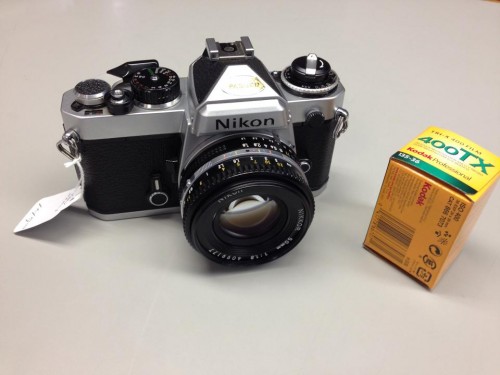
I recently mentioned here that I am shooting some film, on this:

So I just got my first roll of film back, or rather the prints from it, and this leads me to say a few things.

First, I am glad I still know how to shoot film. The pictures look as good as my digital equivalents. Which is nice, considering that I have gotten used to seeing the pictures on the back of the camera after shooting. All my exposures were good, save two that were a little underexposed.

Second, I am glad that there’s still a place to buy film (Henry’s, Vistek) and a local place to print and scan film (my local Black’s at the Oakville Place mall). Print and scan, that is right: they develop, and print and/or scan C41 colour film (B&W is a little more time-consuming and expensive). Develop and print colour is around $20 for a roll of 36; scan is about another $5. Perfect! In your town there will also be places to go, still. Sparse but existing.

Third, I am used to correcting things like white balance, and I cannot do that here. So some shots are a little cool (like the ones above): well, nothing I can do on the prints. I asked for “no adjustments” and that is what I got. Daylight film lit with flash should be OK, but evidently the machine was set to a little blue.

Fourth, this is fun. Go get a camera, which will cost yo no more than $150 used, and go shoot some 400 ASA film. You can do it!

Fifth, I use my brain when cropping; stores do not always do this. I shoot 35mm film which has 4×6 aspect ratio. I printed on 5×7, so a crop is needed, or letterboxing. They cropped, but in a few shots that was done unintelligently (cropping off half my subjects in some shots).

Sixth, to be a real photographer you need to be able to shoot film. Seeing my shots I feel the real deal again. See fourth.

Seventh, prints are great to hold. All this digital stuff is great, but you know I am a great proponent of physical prints, books, wall art, and so on. Please, make prints.


So is there still a place for film? Most certainly there is. If only to ensure you can still do it. I really thought about each shot, since each click costs $1.  “They’re really good”, said the kid at Black’s. Not boasting here, but they are, and they are better than what I used to shoot when I shot film years ago.

There you have it: Digital makes you a better film photographer, and film makes you a better digital photographer.


One more…

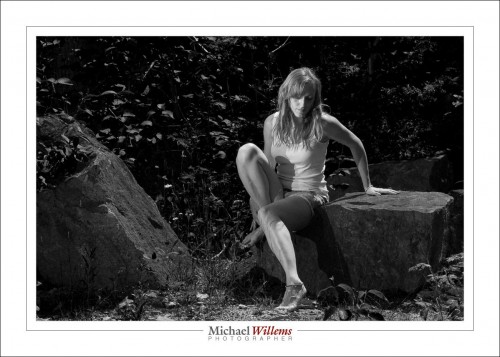
…from today’s shoot, here’s one image. A black and white image:

Why black and white? Because that enabled me to make the green really dark, and to make this beautiful young woman stand out very clearly against the dark background.

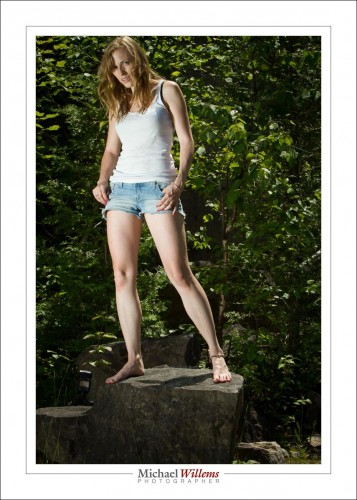
Don’t get me wrong, the colours were beautiful, because I used flashes (two of them, direct, manual, fired by Pocketwizard radio slaves).  So most of this session was made in colour.

But as you can see, the subject does not stand out against the background in quite the way that she did in the B&W picture:

Don’t be Uncle Fred: learn these techniques! How? Read this blog, and read the e-books and take some lessons: both of those available right now on http://learning.photography. Enjoy!


Post-processing B/W

Toay we have so much power. So much more than in the film days, where we had toi get it all done in camera.

Now, no more. We can shoot RAW and do any desired post processing later.

Take this image, one of the “tween and teen” shoot of the other day:

The kids’ mom and I shot that like this:

So I like the vivid colours. But what if I wanted B/W?

I would set my camera to RAW, but picture style to B/W. That way I see B/W on the back of the camera, to give me some idea.

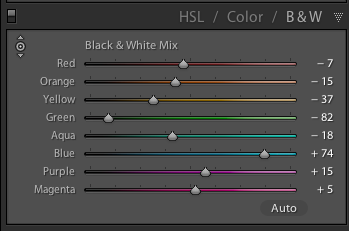
But the moment I get home, in Lightroom I see colour again. So I go to the DEVELOP module, in within that the “HSL/Color/B&W” pane. I select B&W:

Which gives me this:

That’s nice and all, but as regular readers know, I can now set the brightness of individual colours. Why? Well, for instance, to create contrast between subject and background, or to emphasize or de-emphasize certain areas.

For example, I could make the shirt darker by sliding the “BLUE” slider to teh left. All blue areas (mainly the shirt) would get darker:

Be careful not to go too dark: you will see artefacts: look carefully at the edges of the shirt:

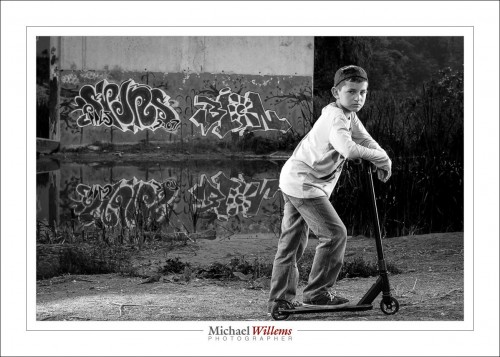
Anyway.. here, I want the shirt brighter. So I tune up blue, and then make various other small adjustments, like making green darker; all of which are aimed at making the boy stand out from the background:

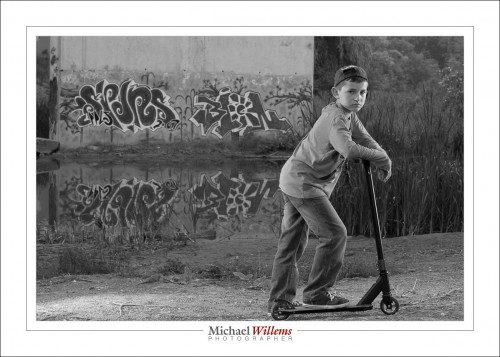
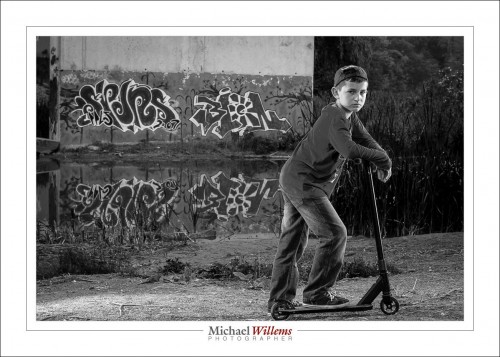
Which gives me my final picture, which looks like this:

Actually, that’s not bad, especially when you consider that in Lightroom, this takes merely a minute of your time.

In the past, we would have used actual filters in front of the lens (e.g. a yellow filter would make the blue areas go darker). The problem is that you cannot readily experiment. Here, you can go crazy (though please don’t). Fun!

___

Come to me for some personal training, if you want to master these techniques. See http://learning.photography. Bring a kid or two and you get two benefits: portraits of the kids and teaching. All you need is to bribe your child in to cooperating for three hours. Easy, right?


Before you know it.

I remember when my children were babies. Like yesterday. One day they arrive (and having put them in there in the first place, I watched them pop out too, and yes, I am sure the term “pop” is making it sound waaaay too easy); a few days later you are holding them on your shoulder while they struggle to lift their little heads. Everyone who has children will remember this. And everyone who has children will also share this experience: about three days later you blink and they have graduated university and have jobs and cars and cameras, and they help you do complicated things.

Time moves quickly. And you cannot get it back. Our time on this planet, in one of billions of solar systems in our galaxy, which itself is one galaxy among billions, is limited. We came from stars, and we shall all return to stardust very soon.

And alas, we cannot travel in time, except to “where the casement slowly grows a glimmering square” (that’s Alfred, Lord Tennyson for you, yes, he battled depression for most of his life).

We cannot travel in time… except through photography.

Which is why you should photograph your kids. Or better still, have a pro do it. Properly, artistically, in a way you can’t, unless you have read this blog and bought my e-books and practiced for 10,000 hours and bought cases full of equipment.

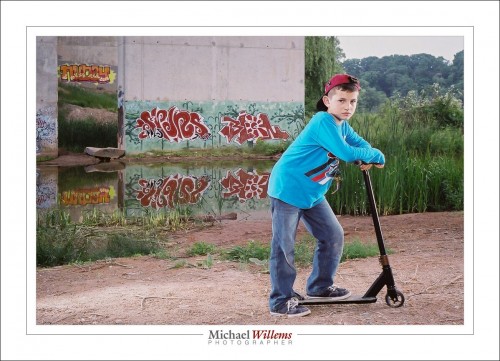
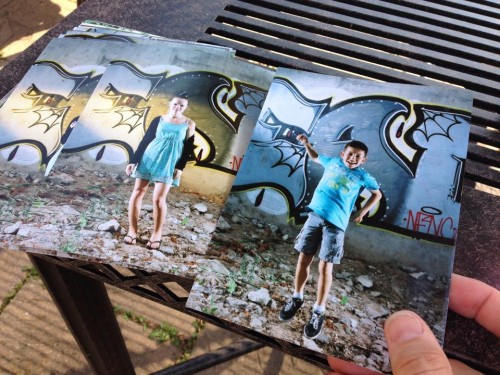
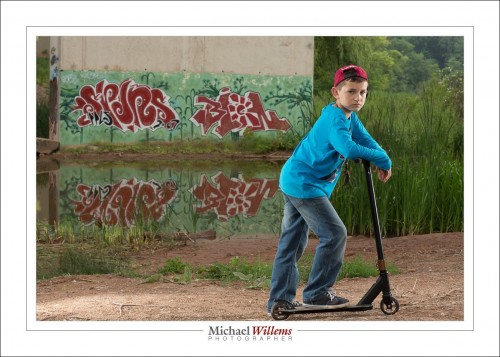
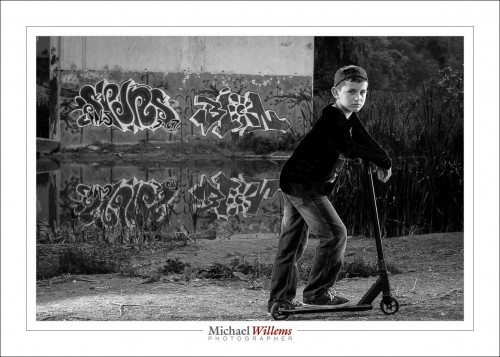
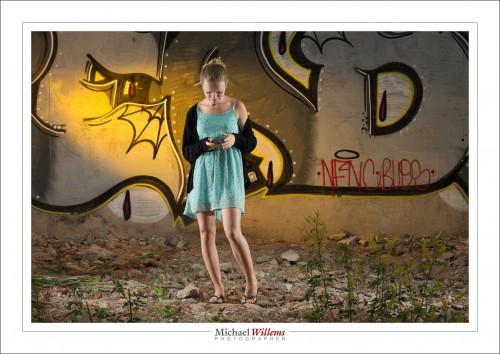
So photographing kids is what I did for a friend today. Together, we photographed her kids. One is 12, the other almost 20. And we did this in style. Outdoors, by a bridge with graffiti. Using six flashes and countless speedlights—well, six speedlights to be precise.

We pictured them doing what kids do:
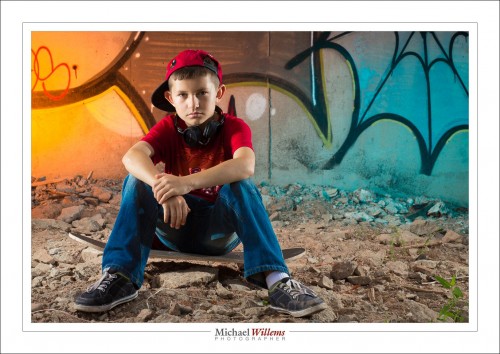
(400 ISO, 1/125 sec, f/11)
(400 ISO, 1/125 sec, f/11)

Those pictures are basically straight out of the camera (“SOOC”). And I am sure mom will like them on the wall. And later, the kids, who soon will have their own kids, will love them too. Time travel: accomplished.

I only used my 85mm f/1.2 lens (my friend used her 85mm lens too); on a full-frame camera. The shots were taken outside, during the day, under a graffiti-loaded bridge.

This is a case of “light from behind, fill from the front”, but the fill was ambient light.

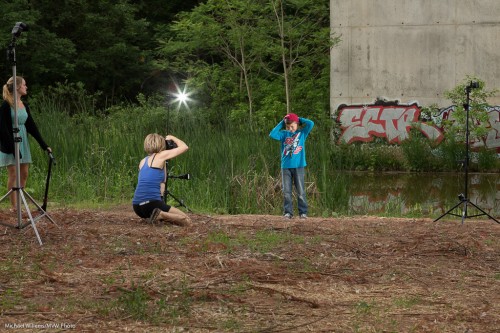
The subjects were lit with four flashes driven by Pocketwizard radio triggers. Four speedlights: two on each side, in each case on a lightstand. One high on the light stand, one lower; thus providing a vertical band of light. (One light would lead to the head being brighter than the legs, or vice versa).
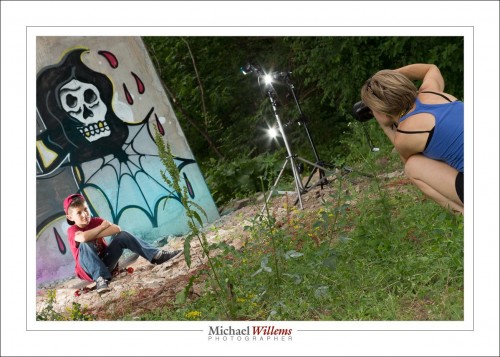
The background was lit too: we used two flashes aimed at the background graffiti, each fitted with a gel for colour. We switched up the colours regularly.

I set all flashes to manual mode, 1/4 power. 1/4 is a great starting point. At that power, f/8 should get you close. And indeed, little tuning was needed. I used the histogram to ascertain that the settings worked. I want to fill the histogram with light; I can reduce exposure later on the computer, if I choose. Also, 1/4 power means the flash can fire again rapidly and does not readily overheat.

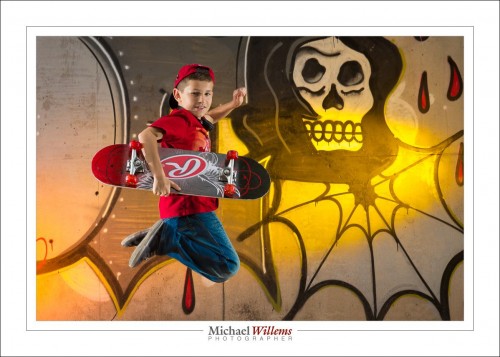
Jumps are cool:
Getting close is cool, too:
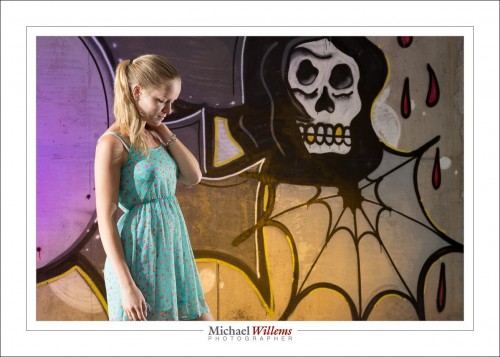
Here, we did not use a light aimed straight from the camera onto the kids, because of the close wall: a nasty drop shadow would result. But aimed the other way, across the river, the wall was far, so there is no shadow problem:
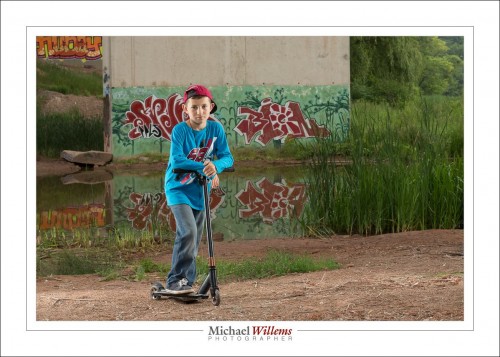
(You see the reflections? If you have bought my last two books—see http://learning.photography—you will know that you always look for reflections).

And again, side lit from behind; this time with a fill light where we were. The fill light was set to 1/8 power, plus it was moved 40% further back than the other lights were (i.e., it was two stops darker: can you work out why?)

Here’s the pullback shot:
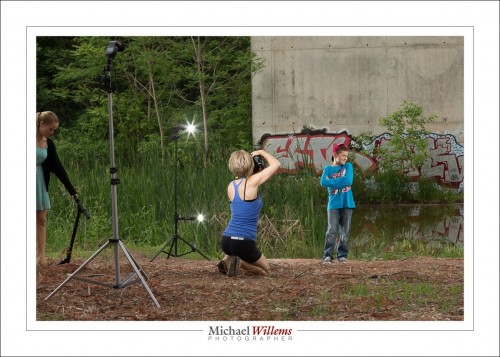
The technique described here works well, and if you master it, you will need to do very little “post” work. The images shown here are basically straight out of the camera—I took them just a few hours ago.

Last note. Why 400 ISO and 1/125 second? Because I also took some shots with my Nikon FE film camera and that has a flash sync speed on 1/125 sec and it is loaded with 400 ASA film. 🙂

_____

Now get some flashes and go wild. If you do not know how to do this, take some private training and I can teach you this stuff in a few hours. Go to http://learning.photography and book a one-on-one or small-group course now.

Alternately, just hire me to do your kids’ photos. You’ll have great pictures to remember today: once you have a photo, no-one can take today away from you. And, bonus: if you hire me, you will see how I do it and get what amounts to a free lesson along the way. Win-win.

It is truly worth doing: please, however you do it, do it and beat time at its own game.

Fit for purpose

Portraits need to be fit for purpose.

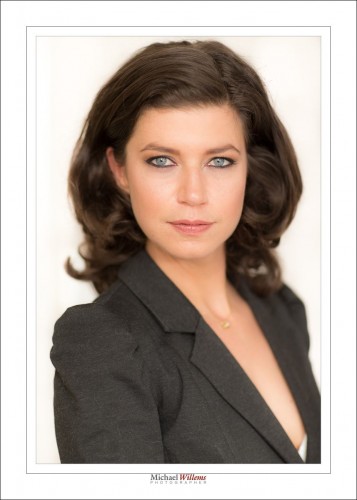
Take this picture. A résumé picture:

I have shot this model clothed, nude, in studios, outdoors, traveling: every picture is different.

A resume picture needs to be professional (the jacket, the hairdo); show beauty in the case of a woman (the overall make-up, the low cut, the eye shadow), but not excessively so; be perhaps a little sexy (the white top) but not overly so (the necklace, the businesslike jacket again). The expression should be friendly but neutral. Yes, some thinking goes into this.

As it should go into every portrait you make. Always ask:

  • What is the photo for.
  • Whom is it for?
  • What are they expecting?
  • What is the person being pictured expecting?
  • What are you expecting?
  • What demands does this put on the photo?
  • What problems need to be solved? What needs to be de-emphasized?
  • What do you want to emphasize?

If you ask yourself these questions, you will come up with answers all by yourself. Answers about clothing, setting, light, expression, and so on.

But if you do not ask, you will not come up with answers; or worse, you will come up with the wrong answers.

For those of you who are interested, after the “more” break, two civilized nudes from the very same shoot as the photo above:

Continue reading

Lighting a portrait

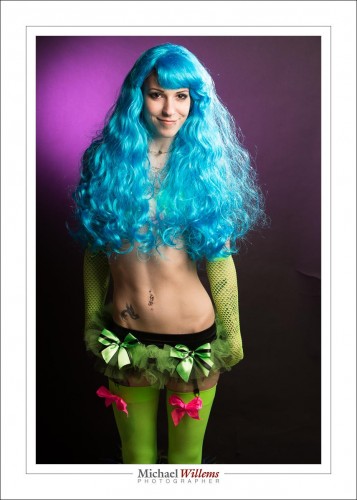
Here’s a recent portrait of model Khoral in her rave outfit:

Cool, eh.

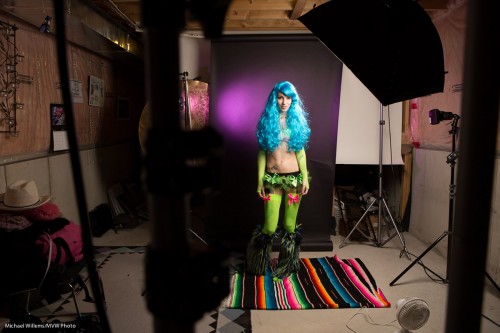
And here’s the lighting behind it.

We light each part of the picture separately. The model; the hair; and the background. Here’s how:

First, the main light, for the model. That is a softbox on a boom, close to Khoral. Why close? For two reasons, namely first that this makes it large as seen by her, and the light is therefore soft, and I can dispense with the fill light; second, that this way I do not light the background. And that is important: it needs to be dark.

Then the fill on her opposite side. I did not need it here, since the softbox is on a boom and lights her face fairly evenly. Any less light on our left and I would use a reflector, or a second light, for that side.

Then the hair. I have a light behind her on our right, aimed toward us, at a 45 degree angle. This light is fitted with a snoot, which restricts it to a narrow beam, so it lights only her hair, Shampooey goodness!

Finally, back to that background. First, I used a black backdrop. Then, the main light was close to the model so that the intensity is not high; hence., the background stays black. And only if it is black can I give it colour. Which is what I do using a flash on the left fitted with a grid, 1/4″, and a gel, purple. Why purple? Because it goes well with her hair and clothing.

And that’s it. Now all I need to do is set the lights to the right brightness, using a meter or trial and error. And then I am done, and we can shoot.

The flashes were lit by Pocketwizard radio slaves, except for the hair light which is operated by its cell (it detects a flash and goes off at the same time). The camera was set to the usual studio settings: 1/125 sec, f/8, 200 ISO.

___

Want to learn this? Come for a studio lighting session: book it now on http://learning.photography


Speed

Shutter speed is important where there’s motion.

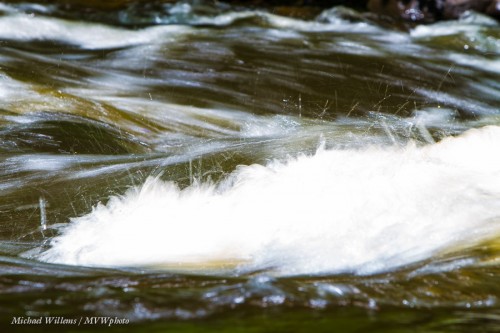
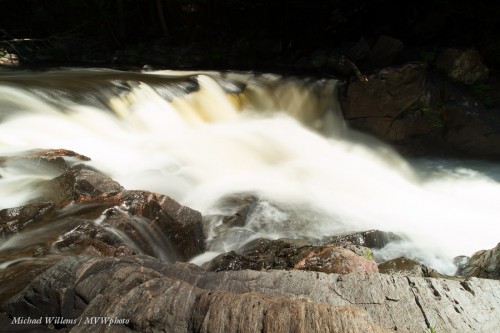
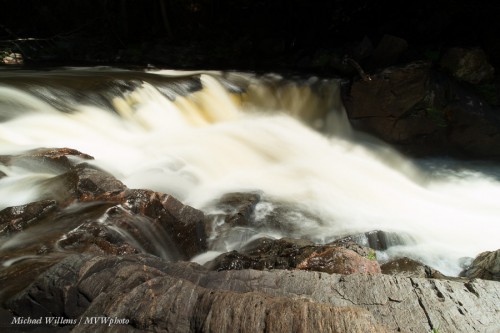
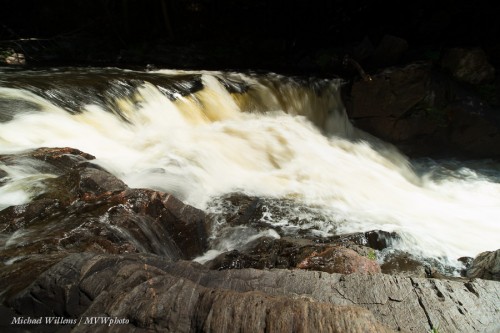
Water in rapids, Thursday, at 1/20 second:

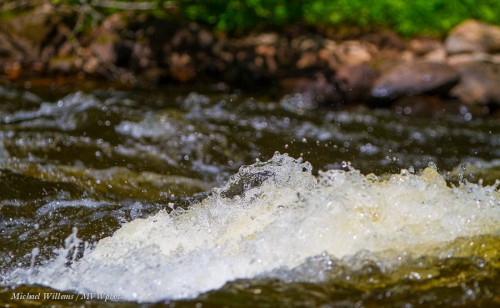
The same, but now at 1/800 second:

Which one is best? Your call!

To be a great photographer, you need to get experience with what shutter speed might be suitable for what subjects. And you can do this thanks to the fact your camera is digital: no cost. So I suggest you spend time trying many different shutter speeds.

Like here, more water, at 2 seconds:

Now, 1.6 seconds, and you can see that it is very subtly different:

At 1/13 second we see a very different picture:

There is no “correct” speed. It depends. Do you want to see detail, or smoothness? How much? And that depends on two things: what it is you are shooting, and how fast it moves. Generally speaking, a smooth surface should be shot at very slow speeds, while a textured surface needs a faster speed, so that you can see some of that texture.

Assignment: Go try to shoot something that moves, in particular a river, lake, river, stream, sea, or ocean. Have fun!

___

Have you had a look at my five e-books? All are over 100 pages long, well organized, illustrated, and a great source of information that gets you started immediately. Head over to learning.photography now!


A Business Note

[….we briefly interrupt our regular programming to bring you this message…]

SUMMER SPECIAL

I see and hear that many readers enjoy this blog. Then you will enjoy my e-books and personal training also, I am sure.

So… to thank you for being loyal readers and to encourage you to try my books and training, I have just created a limited time Summer Special: 25% off all orders over $250. The training or shoot must be booked and paid for by July 31st. The actual shoot or training may be taken any time in the future.

To benefit from this discount, head over to learning.photography and fill your cart with $250 or more of products; then on the last screen enter Discount Code ReaderLoyalty —and you are all set, the price will decrease when you recalculate. 25% can amount to a nice sum, making affordable prices even more affordable.

For example, take a course for two people (order the two-people price twice in the same cart) and you get the discount. A course for one plus the set of all five e-books would also get you there, as would a portrait shoot and the e-books—and so on.

And more importantly, books and courses will make you a better photographer. Quickly.

NEW COURSES!

When you look at learning.photography you will see new courses. Video on your DSLR and Landscape Photography among them. Go have a look. Also, many courses have been updated—they always are: as the industry changes, so do my courses.

TEACHING METHOD

The way I book courses is different from anyone else’s. Instead of me setting the schedule for my convenience, you do, at your convenience. And I make it affordable to get private, or near-private, tuition. Head on over to this article to check out the news post.


See you soon!

[….back to regular programming…]