Metering 101

Light meter at “zero” means a good picture. Right?

Wrong.

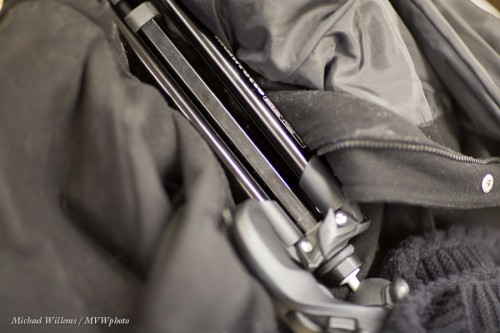
Shoot something black, filling the entire viewfinder with that object, and make sure the light meter points at “zero” as you are pointing at the subject (use the viewfinder!). Take the picture.

You get this:

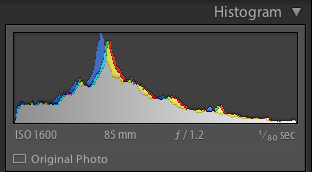
The histogram shows why this is bad:

A histogram of a black object should peak on the left (the dark side).

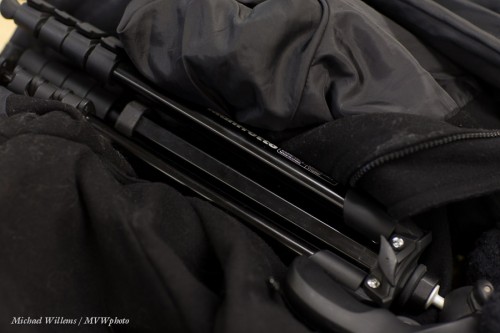
Now do it again, with the light meter pointing at –2 (minus 2):

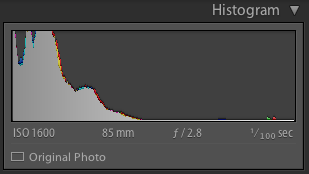
Perfect. Look, the histogram is right for this type of scene:

The moral of this post:

  • “The meter displays zero” does not equal “this will be a good picture”. It merely means “this will be a mid-grey picture, neither dark nor light”.
  • “The meter points to minus” does not equal “this will be a bad picture”. It merely means “this will be a dark picture”.
  • “The meter points to minus” does not equal “this will be a bad picture”. It merely means “this will be a dark picture”.

And there you have it. Now you understand the camera’s built-in light meter.


Ring Flash!

If, like me, you do not like Terry Richardson’s hard flash shadows (Google it…), then you prefer softer shadows. And so, traditionally, do most fashion photographers.

And they often use a ring flash for that. A flash that forms a ring around your lens. Because it is the only flash that can work great when fired straight on to the subject, as in this image of one of today’s Advanced Flash students:

Wow. Direct, unmodified flash ON camera is acceptable?

It is when you use a ring flash. And the ring flash achieves that by being a circle of flash around the front of your entire lens. So there’s not so much “no shadow” as much as “shadow everywhere”. Look at the typical “halo” shadow:

See that halo? Since the model is bigger than the camera, the shadow lines move outward. If we move the model farther from the wall, it gets even larger:

And if we move the model closer to the wall, it gets smaller, and more difficult to notice:

Also, of course, the wall is brighter (she is closer to it, i.e. it is closer to her: the Inverse Square Law doesn’t get much of a chance).

You can get donut-shaped highlights if you are close to the model. I like these. If you don’t like them, move outward a little.

So do I like ring flashes? Yup. For fashion, and for some macro work. Love them:  a great addition to the serious photographer’s kit bag.

But—one note of caution: you will get red-eye. In the images above, each eye was red, and I had to use Lightroom’s Red-eye correction feature. Which is very able and simple, so it’s no big deal. Unless you forget!


ND filters

A Neutral Density (ND) filter is useful when you want to cut light. Why would you want to do that? Because

  1. You may sometimes want to create longer exposure times, and cutting light may be the only way to do it.
  2. Or because on a bright day you want a larger aperture, in order to get more selective depth of field.

Imagine you have this:

At low ISO (100) and high f-number (16) that was 1/4 second (using a tripod, of course). I used my wide angle 16-35mm lens.

But what if I wanted a slower shutter speed than 1.4 second? For instance to make a river or a waterfall look all smooth? I cannot lower the ISO or increase the f-number (at least on this lens), so I need a trick. And that trick is the ND filter. It evenly cuts light, so then you need a faster shutter. Like here, the same shot with an ND filter:

But it looks just as bright?

Yes, because at the same time as cutting the light, I set the shutter speed to a much longer time, namely one of 5 seconds (set manually and metered by trial and error as much as by the meter, which is less accurate under these circumstances). Anyway, 5 seconds is 20 times less light than 1/4 second (since 5 sec/0.25 sec = 20). How many stops is that? It is 4.32 (roughly 4 and a third) stops less light, since 24.32 = 20. Um, high schoolers and above: you can calculate this number of 4.32 as follows:

  • 2x = 20 (base 2, since a stop is halving or doubling the light)
  • x = log2(20)
  • x = log(20)/log(2)
  • x = 1.301/0.301
  • x = 4.32

So my ND filter gave me  4.3 stops less light.

I used an 82mm Cokin variable density ND filter. One where you turn the filter to make it darker or brighter. Turn it one way and it cuts 1 stop; turn it the other way and it cuts 8 stops, says Cokin. I call “no” on that. Even at the darkest, it is not that dark, and in any case, when I am zoomed out and then go beyond 4-5 stops, this happens: (made one stop darker, i.e. 5.3 stops, now using a shutter speed of 10 seconds)
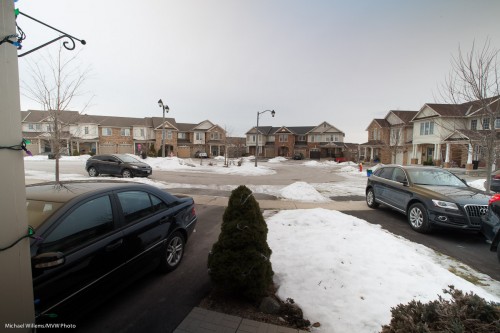
See how bottom left to top right it gets all weirdly dark? Not usable, so this filter is not really usable much beyond 4 stops with a wide angle lens.

An cheaper Cameron filter was even worse when turned all the way to the “max” mark for “dark”:
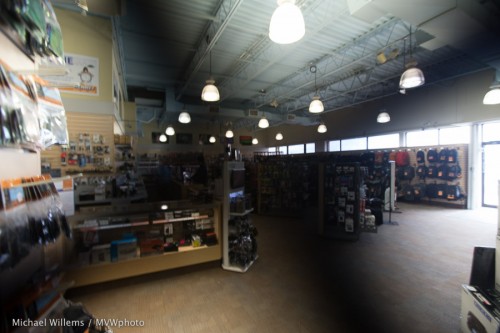
All variable filters do this as far as I know, since it is due to physics; but some are worse than others.  To avoid it, zoom in, not out, and then look through your viewfinder to see when this problem happens, and back off from there.

Another thing to watch out for is flare. The cheap filter did this, look at the bags on the top right:
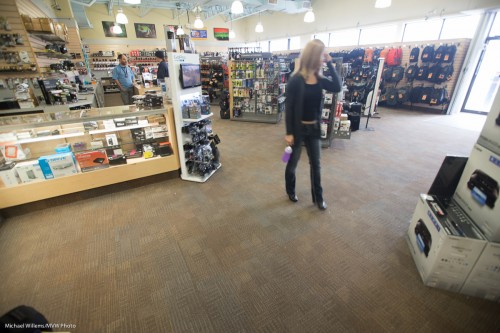
And the better Cokin filter:

Not perfect, but better.

So you now know why to use neutral density filters; how to use them; and the possible pitfalls, including what to watch out for if you buy the variable variety. You may just want to get a non-variable 5x or 8x ND filter.

And you’re welcome.


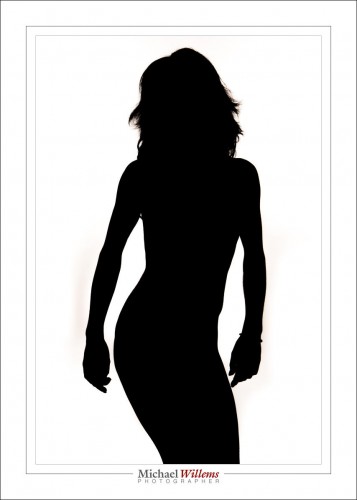
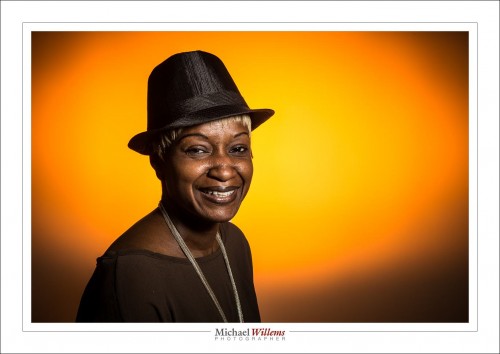
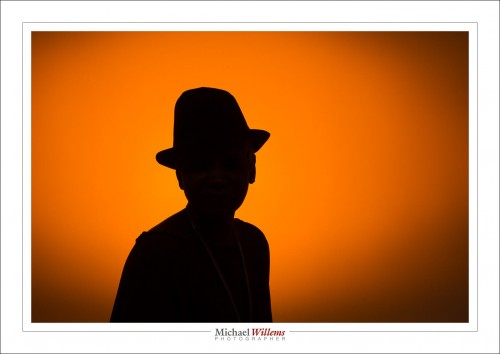
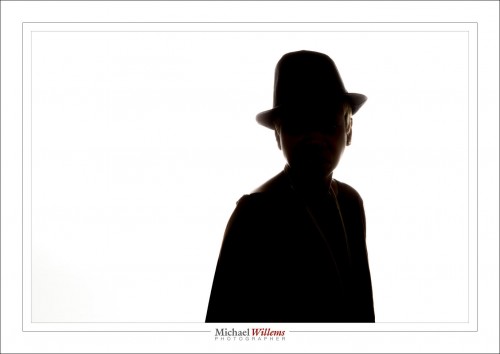
Silhouette

How do you do a silhouette this way?

The technique is quite simple.
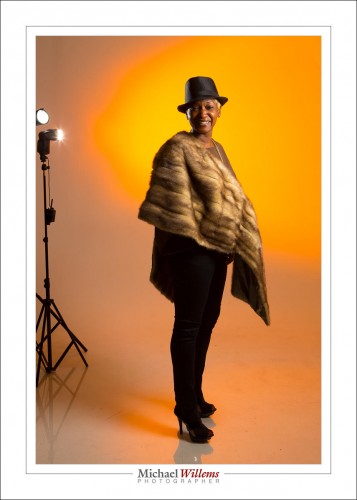
First and foremost, ensure that the background is well lit. By flashes, continuous lights, or whatever. It needs to be bright. Then, ensure that none of that light falls on the subject.

Now, expose for a bright background. You could start by aiming at the background and setting your meter to +2 stops by adjusting ISO, aperture and shutter – or if you are in an automatic mode, by using exposure compensation, and then locking in that +2 exposure.

Finally, if some light did spill onto the subject, you may need to do a little post work: in Lightroom you go to the DEVELOP module, BASIC pane, and move blacks down, shadows down, and highlights up.

And that’s all. Very simple, so if you have never done silhouettes like this, go do one now.


Timing is everything

Not everything, but it is certainly something you should be aware of. Look at the difference in these two pictures of Red Rock Canyon, Nevada, yesterday morning:

Majorly different, no? And why? Because I took them about an hour apart. 9am (first) versus just before 10am (second). And that darn sun had shifted. See? Proof that it turns around the earth.

Both acceptable pictures (note the curves, and the other compositional elements described in Impactful Travel Photography?), but both different. See the differences?

Light really is very important and as a photographer you should always be aware of the nature of the light: where is it, how contrasty is it, how bright is it, what colour is it.


Boom!

I used a simple softbox with a boom stand today for some portraits:

The softbox is held by the boom above the model’s head. And a reflector provides some fill light on the side I am on – I am shooting from the left, slightly. You can see it reflected here:

The boom means I can have the light directly above the model, in front of her, without me having to avoid the light stand.

I now get simple butterfly lighting, but I can turn into into loop lighting by slightly turning the model away from the softbox:

A simple light source like this, perhaps with a reflector, can do really cool professional light; that is why we use it for fashion and beauty shooting. Add a hair light and you have everything you need:

And once you gave simple light, you can now concentrate not on light only, but on expressions, positioning. and even, dare I say, it, a little fun in your shoots.

But whatever you do, always remember: in studio shooting, you always need to be aware of the light. Where is it, how is it, what is it. If you do that, you will know what to do.

And now it is almost 2:30AM: time for bed.


Direct can work

Another reminder, if you need one, that direct flash can work. Direct, unmodified flash. As long as it it not on the camera (with a few exceptions), this kind of hard light can be very effective for certain shots. As long as you aim it right.

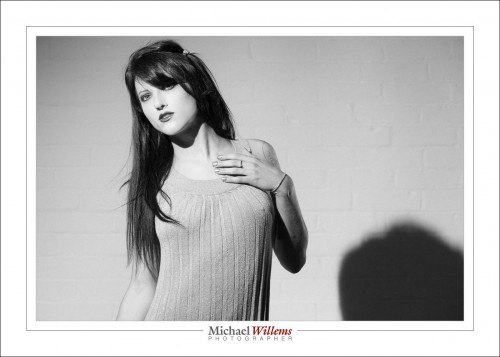
Here’s a studio photo of model Danielle from yesterday:

I wanted a shadow, and the way to get it is by using an unsoftened flash – I am using only a grid on the speedlight. Almost straight into her face: good light for a model.

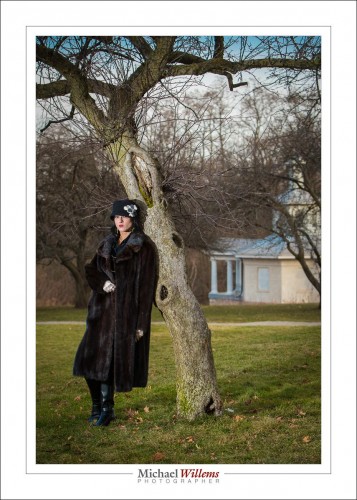
And earlier in the day, this: 1920s style.

And let me show you one more:

In all these photos, direct, unsoftened flash was good – because the flash was off camera, the model was young and had good skin, we want to brighten skin for best smoothness, and I aimed the light carefully.


Rim lighting

Remember this shot from the other day?

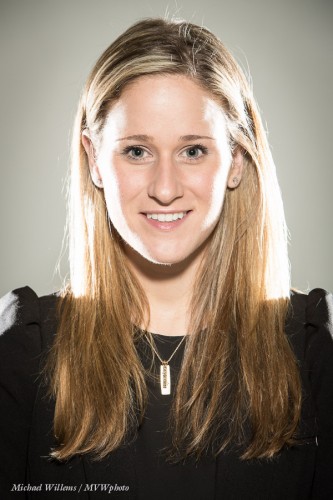
To achieve that, I use two flashes behind the subject:

  • Each one is at 45 degrees behind the head (one left, one right).
  • Snooted or gridded, to avoid light “going everywhere”. You can also use Gobos but then you need two on each flash, or more light will fall on the background.
  • Aimed carefully to not hit too low. When using snoots, be very careful as a mere millimeter up or down will often be too much.
  • Metered normally, or brighter (I like +1 stop, to “just when the blinkies start to appear).

To make sure I get ot right, I start with just the rim lights.

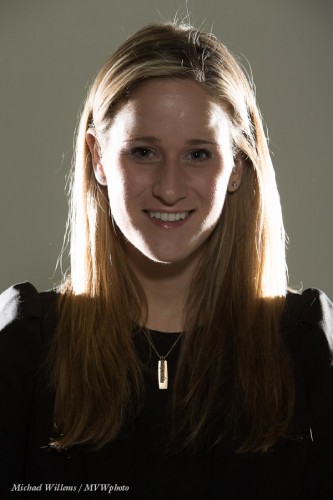
Note that of course this can only work when there’s not too much hair covering the face. When the subject has hair going forward, you get something more like this:

Still nice but it is no longer rim lighting, and hair shadows will often get in the way.

Little hair works:

(You think I should shave before doing selfies?)


Cyber-Week Sale!

Have you always wanted to be able to create proper portraits? Like this self-portrait, which I made minutes ago (in minutes)?

Of course that is not the only “proper portrait”: there are almost as many portrait styles as there are photographers. But they do have one thing in common: the photographer knows light. And often, that means the photographer knows flash.

And that’s probably not the only thing you have always wanted to be able to photograph. But it has just eluded you except for some lucky hits.

Well, I am here to help. As you know, I am a full-time pro and educator, and I have two ebooks available: the Photography Cookbook, a book with 52 “photographic recipes”: quick start settings and tips that get you good pictures immediately in various situations, from “fireworks” to “graduation ceremonies”. And the Pro Flash Manual, a guide to using flash: from knowing nothing to producing creative pro work. Both books are PDFs without DRM, and they retail for $19.95 each.

If you do not yet own the two books, go get them now. Because I really want you to learn these things, I have a Cyber-Week Offer: this week, get both books for the price of one. That is 50% off, for one week only.

To take advantage of this offer, all you need to do is head on over to http://www.michaelwillems.ca/e-Books.html and order either one of the books. Do not order both – order just one, and for that price of $19.95 I will send you both. Go do it now; enjoy the holiday period with your camera; and astonish your family and friends with your sudden expertise!


Studio Tip

Look at these photos from yesterday’s studio lighting workshop to see how light makes a picture different.

Here’s Roxy with one gridded flash on the left, giving us split lighting; and one gridded and rust-colour gelled flash aimed at the background. Both are speedlights driven by Pocketwizards and set to manual power. The image is a little desaturated; otherwise SOOC (“straight out of camera”).

Here. a softbox on our right (s small Honl photo softbox), and the same background light. Just two flashes!

Now let’s turn off the softbox flash:

Now kets’ light up the background more, to get wraparound lighting:

And back to normal, but now with an additional snooted flash for rim lighting on our left:

Here’s two of those flashes visible. Note also the reflection: a plexiglass sheet she is standing on. Note, I “Lightroomed” out the edges of that plexiglass, which took only seconds. Otherwise, like all, SOOC.

Can you see how each shot looks different depending just on light? It behooves you to learn about light, it really does, since with light you can translate a vision into reality. That’s what this is about!

___

Talking of learning: Season shopping? Get a personalized gift certificate for 3 hours private coaching with Michael for your loved one. Available now!