Quick! Flash!

Speedlighter.ca. Speedlighter. Speedlighter!

So yeah, let me talk about speed for a moment. Speed as in “fast exposure speed, in order to freeze movement”. Fast exposure speed = short exposure time. 1/2 second is a long exposure time, i.e. a slow exposure. 1/1000 second, on the other hand, is a short exposure time, i.e. a fast exposure.

So how so you get a fast exposure time? One of two ways, it turns out. Either one of:

  • A short shutter time, or
  • A short light flash.

You see, what matters is the duration during which the light reaches the sensor. Whether that is short because the shutter only opens for a short time or because the light itself only flashes for a short time makes no difference at all. It is the same thing. A short exposure.

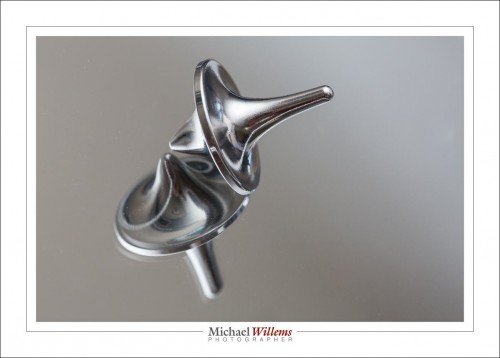
So let’s say I’m taking a fresh picture of a rapidly spinning spinning top. And let’s say further that I want to freeze the motion, to see the spinning top detail. Since I’m using a flash, I cannot use a fast flash shutter speed; The fastest I can go with my 5D camera is 1/200 of a second. So I’m going to have to achieve a fast exposure by using a short flash of light.

Fortunately, that is exactly what a flash fires. At full power it fires a flash of about 1000th of a second, or 1/4000 second at 1/4 power. Nice. Assuming that ambient light plays no role, your effective shutter speed is now nice and fast: 1/4000 second.

But not fast enough:
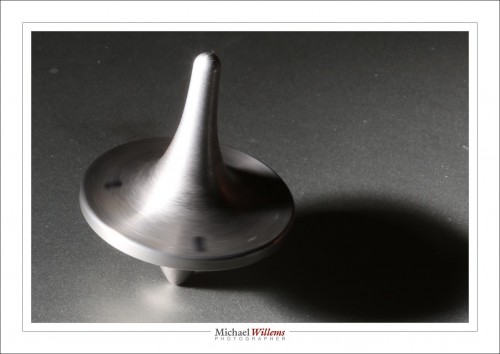
20161205-mw5d1909-1200
(1/200 sec, 400 ISO, f/32, 1/4 power flash)

OK, it’s still blurry, because it is spinning rather fast, so even 1/4000 second cannot freeze that motion. Now what?

The solution is in the sentence above: “At full power it fires a flash of about 1000th of a second, or 1/4000 second at 1/4 power”.

Because how does a flash set its power? Simply by shortening the time that it is on. Full power means 1/1000 second on a typical flash (small or large). Any longer and it overheats and burns out. So:

  • Half power means 1/2000 second, half the time.
  • Quarter power means a quarter of the original time, so 1/4000 second.

Oh wait. So “lower power flash” means “shorter duration flash”?

Yes! So if I set the flash to 1/128 power, I get an effective exposure time of 1/128,000 second. That’s like a really, really fast shutter:
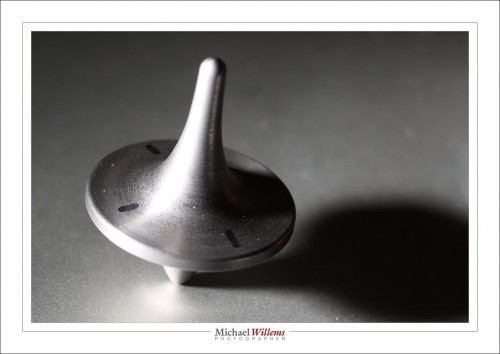
20161205-mw5d1908-1200
(1/200 sec, 400 ISO, f/5.6, 1/128 power flash)

Now, as you see, with an effective exposure time of about 1/128,000 second, the top’s motion is completely frozen. So while my shutter speed is unchanged, it does not matter. The light is only on for 1/128,000 second. So that is my effective shutter speed.

The lesson? To freeze motion, use low power flash. The lower the better.


Available light

Yes, available light rocks! Beautiful, colourful, soft, and so on. But when a photographer says “I am an available light photographer” or “I am a natural light photographer”, that usually means “I don’t know flash”.

Because it is often in the mixing of available light and flash light that things get interesting. Certainly in daylight.

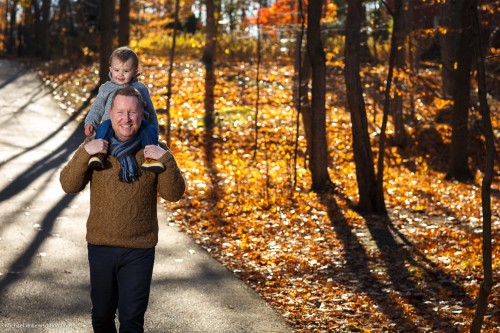
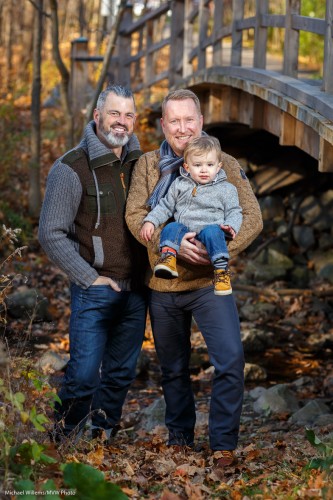
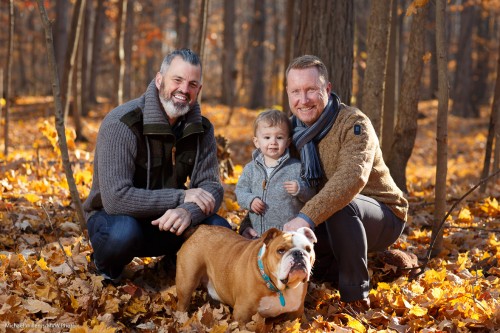
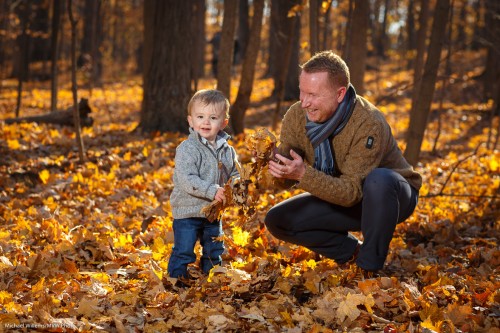
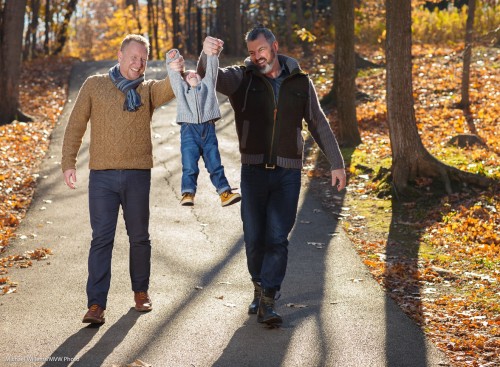
Also–hiring a pro pays. Yes, you can get it done cheaper by Uncle Fred, but would you get pictures like these, from yesterday’s family shoot? (Hint: “no”.) A few hundred dollars and you have memories for life:

20161113-1dx_1945

20161113-1dx_1853

20161113-1dx_1819

20161113-1dx_1891

20161113-1dx_1935

If you can see these pictures, there’s plenty of available light. But had I not had my assistant hold the flash off the side near the subjects, they would have been silhouettes! Or I could have exposed for the subjects – in that case, a very bright, blown out background–with very little colour.

So you hire a pro for this. Right equipment (that super sharp lens); Right technique:

You have heard this from me before:

  1. Use the magic outdoors formula, and only vary f-number.
  2. Use long(-ish) lens (85mm prime in this case).
  3. Subjects away from the sun: means no squinting and the sun becomes hair-light.
  4. Fill with flash, off to the side for modelling.avoiding “flat” look.
  5. Flash fired in this case with radio triggers (Pocketwizards), and on manual, 1/8 power, with Honlphoto 12″ softbox (click on the small ad on the right to order, and use code word “willems” to get an additional 10% off).

BUT THERE IS MORE. If I print, I ensure that the print is perfect. Permanent photo paper. Pigment printing (not dye, which can fade). If a face is too pale, I selectively increase colour saturation in the face. And so on. That takes time, and it is exactly what Walmart et al do not do.

All this is what I teach in my live or online workshops: contact me to learn more, or see http://learning.photography .

And take some fall pictures, or have me do it!


Today’s pics

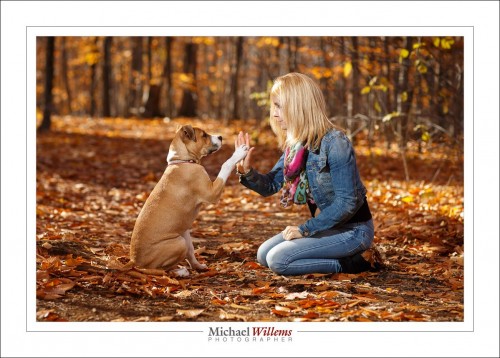
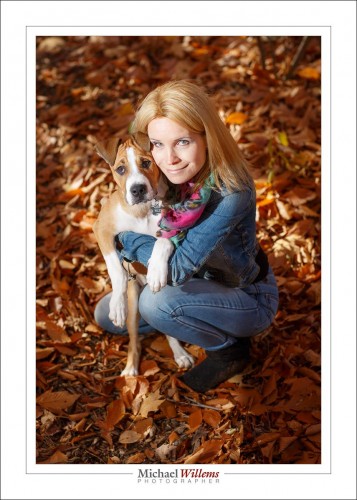
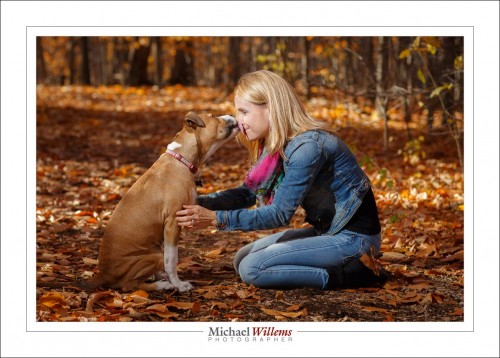
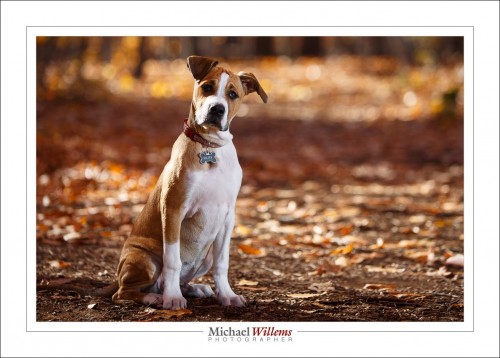
I was hired to take some fall pictures of a woman and her dog today.

Like these:

20161110-1dx_1771-1024

20161110-1dx_1783-1024

20161110-1dx_1758-1024

20161110-mw5d1613-1024

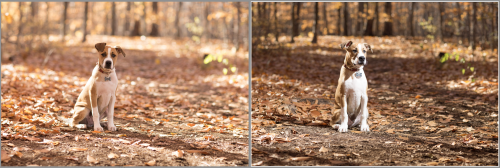
In pictures like this one challenge is that the dog is the same colours as the background. That’s where (off-camera) flash comes to the rescue. That allows me to make the subjects brighter, and the background dark. And the sun is the hair-light. (all that is what I teach in my courses and books).

Lenses: 85mm f/1.2 and 70-200 f/2.8. Camera Settings: 100 ISO, f/3.2, and 1/250 to 1/400 sec.

1/400 sec? Impossible. That’s beyond the camera’s “sync speed”. But actually: very possible; you just don’t get the entire picture being lit. Which is sometimes fine.

And finally: a no flash/flash comparison:

screen-shot-2016-11-10-at-15-23-44

Remember Willems’s Dictum: Bright Pixels are Sharp Pixels.


If you like sharp and crisp…

…then use flash. And if you use flash, then use it off camera.

Flash is crisp and sharp. Or rather, using flash leads to crisp photos because:

  • Contrast is perceived as crisp sharpness.
  • Flash lasts 1/1000 sec or less, and that means your effective shutter speed is 1/1000 sec or less.

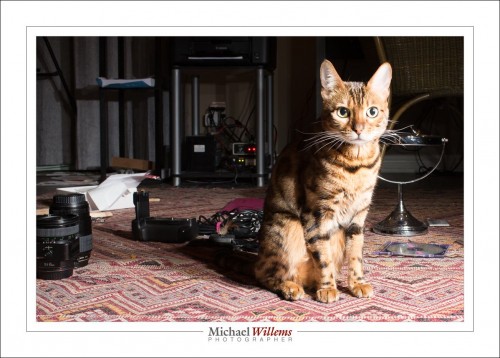
Like this:

20161015-mw5d1454-1024

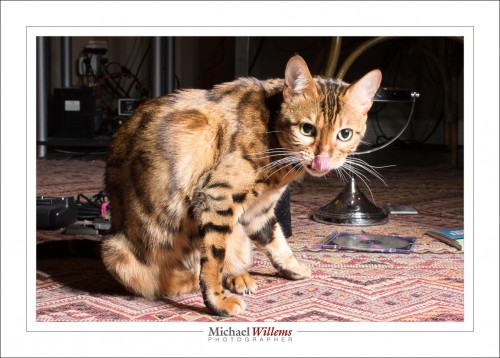
Alternately…

20161015-mw5d1455-1024

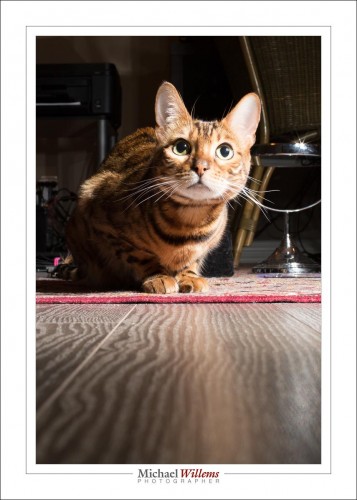
Maybe better: close to the ground to get a ‘cat’s eye view’:

20161015-mw5d1463-1024

1/30 sec at f/11, 400 ISO. Meaning, the ambient light basically disappears. The photo is crisp because although the shutter is slow, ambient light does basically nothing and the flash speed (1/16,000 sec, because the flash is set to 1/16 power) is the effective shutter speed.

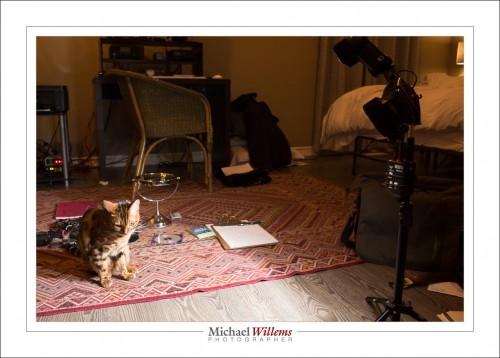
…all of which is made like this:

20161015-mw5d1461-1024

The flashes are on the right: three flashes fired by one pocket wizard.  Note that in this last image, I used a very slow shutter speed (several seconds, if I recall correctly) in order to show some of the ambient scene.

Anyway: can you see how much more lively and “real” these images look than a simple “even lighting” image, such as a “natural light” image that some photographers proudly boast is their only source of light?

One more thing to note: I am using three flashes connected via a three-flash mount (see yesterday’s post). With no softening modifier such as an umbrella or a softbox. The take-away lesson from this: When using off-camera flash, a softening modifier is not always needed.  

Fun with Colours: flashes, gels, mirrors.

The things some people do in their bedrooms in private! In preparation for tomorrow’s hands-on flash course I outfitted some flashes with coloured gels tonight. 

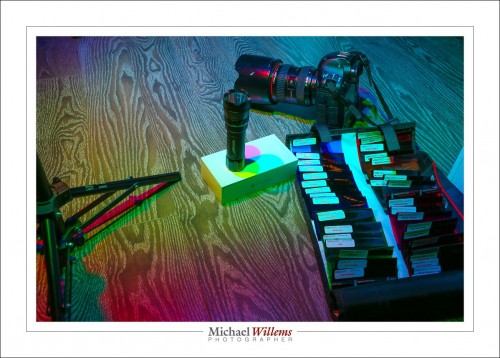
I used Honlphoto gels, seen bottom right here in a double wrap:

20161015-mw5d1420-1024

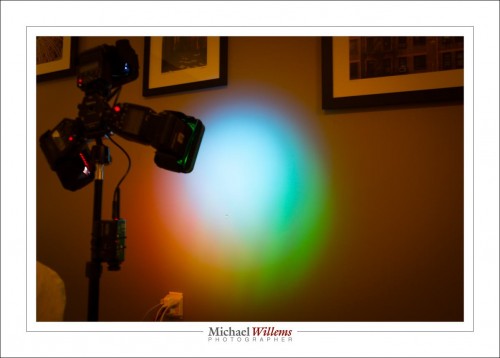
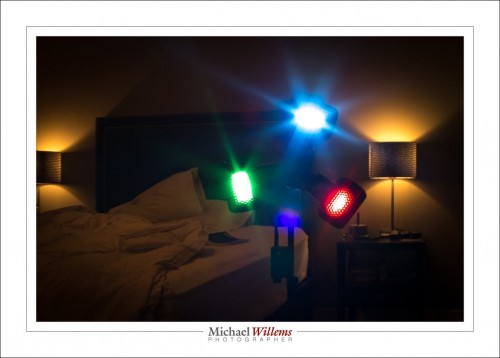
I had three flashes mounted on a stand that uses one radio trigger (like a Pocketwizard) to fire all three flashes (thus saving two radio triggers). I have discussed this three-way mount here before. I also used grids (also Honlphoto) to get three separate light circles.

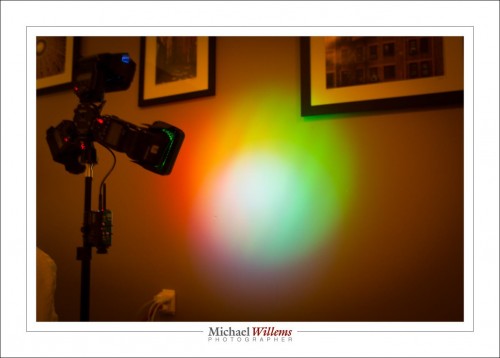
As said, where all three flashes mix, you get white. After you get the ratios right, that is: the gels take light (also discussed here in a recent post) and you may need to turn one or two of them up to compensate.

Once you are done, you get white. You see it here in the centre:

20161015-mw5d1444-1024

And here:

20161015-mw5d1449-1024

TIP: To get the ratio right, you look at the RGB histogram. The peaks for red, blue and green need to be at the same distance from the edges.

Looking at the flashes you see the three colours I chose:

20161015-mw5d1450-1024

Red, Green and Blue. Surprise, surprise!

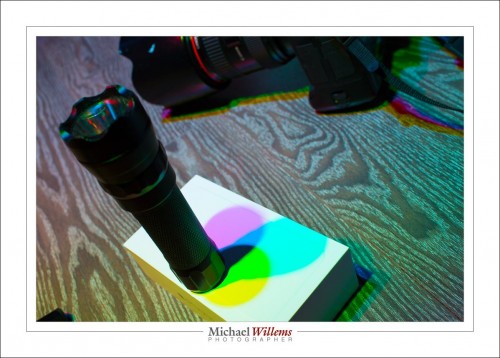
You see, when these colours mix, that once you get the ratios right, you get white overall. But when only two of them mix you get “in between” colours, which include cyan, yellow, and magenta:

20161015-mw5d1421-1024

So now you know why you see RGB and CYMK (where “K” means “Black”) as two alternate ways to mix several basic colours!

I also had unrelated flash fun, of course. f/32:

20161015-mw5d1408-1024

And my spinning top:

20161015-mw5d1389-1024

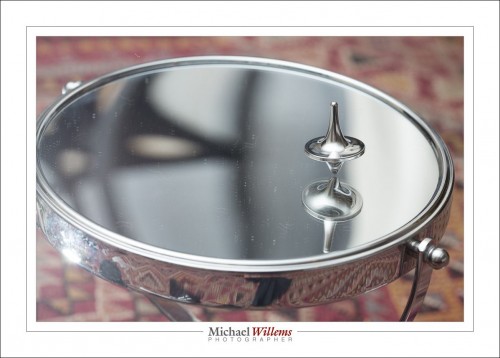
On a concave mirror, that is:

20161015-mw5d1400-1024

The moral of this post?

You should have fun with your photography, and explore, and try out different things. How many of you have gels, and how many of you have used these to mix light in different ways? That’s how you learn about light. So for those of you not coming to tomorrow’s course: go have fun, And sign up for the one after the next one: tomorrow and next week are full up, but 6 November still has a few spots open.

Any way you do it: learn about light, and have fun.


PS for Honl modifiers, which I strongly recommend, go to this link and use discount code “Willems” at checkout to get an additional 10% off.


Taking A Cat Snap

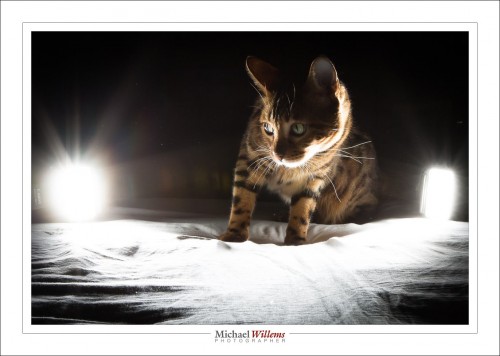
As seen in the previous post: Mau, just now:

20161012-mw5d1272-1200

So what are the salient technical points of this photo?

  1. I have two flashes aiming toward the camera and toward Mau Mau from the back, providing back- and rim lighting.
  2. Back- and rim lighting provide “3-D” modelling and drama, and light the whiskers well.
  3. But the white bedsheets (and I!) reflect enough back so there is some forward lighting also.
  4. Camera: manual mode, 100 ISO, 1/200 sec, and f/22:
  5. So that is the “darkest” possible ISO, the “darkest” possible shutter speed (“sync speed”), and the “darkest” possible aperture this lens offers; alll this to completely kill the bright ambient light (and at this close distance the flashes are super bright, so that’s not a problem).
  6. I used a Yongnuo YN622C-TX wireless controller on the camera, and a YN622C connected to each one of the flashes.
  7. These flashes have to be 430EX MkII or 580EX or 600EX, or equivalent: the old 430EX with the switch does not work here. Much as I like the switch, this is a situation where electronically setting the wireless mode is a must have.
  8. Although this setup supports TTL, I used manual power setting for the flashes, 1/16 power worked fine in this case (trial and error). Manual power setting is the way to go, if you have any control over the environment.
  9. You should lose any filters you may have on the lens: they will often increase flare to an unacceptable level. They certainly will not make the picture better.
  10. The lit eye is in sharp focus; of course at f/22 there is quite a lot in focus. Eye and whiskers are essential.

As you see, beyond the obvious, rather a lot of thinking can go into a simple picture. And few of these are “the only way to do it”. That is why photography is such a cool artistic endeavour.

So if few of those are “must do this way” points, why list them?

Because it is more important that you think about all these things than what you think about them. In other words, an analytical approach to photography helps you create repeatable art, where a photo works a certain way because you want it to, rather than “by accident”.


Lightroom Bug with Sierra

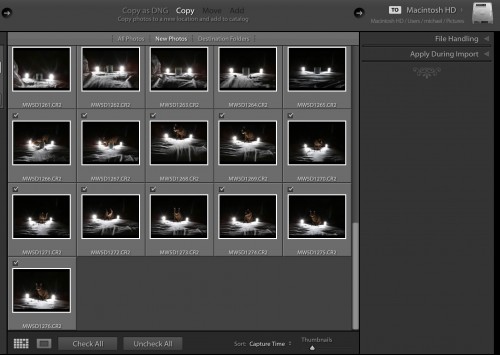
If you have upgraded your Mac to Sierra, the new OS, Lightroom may show a bit of a bug in the Import module.

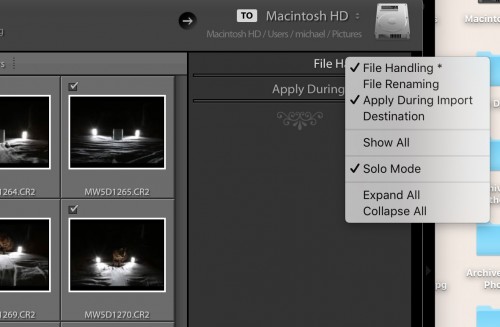
When trying to import, you see this dialog:

screen-shot-2016-10-12-at-12-34-21

A few things are missing there, aren’t they? “File Renaming” and in particular, the essential “Destination” dialog is missing.

The solution? For now, until the bug is fixed, just right-click on one of the two that do show, File Handling or Apply During Import:

screen-shot-2016-10-12-at-12-34-52

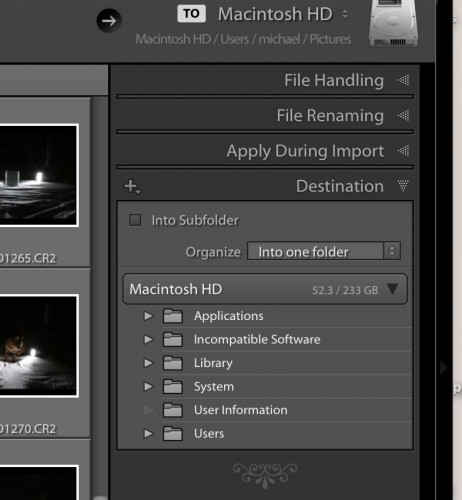
…and then click on the two missing dialogs, “File Renaming” and “Destination” to activate them, so a tick mark appears next to them too.

You now see all four again, and you can set your destination as always:

screen-shot-2016-10-12-at-12-35-10

So although this little bug is annoying, it is easy to bypass.

Now to celebrate, here is Mau Mau, surrounded by (and lit by) two flashes:

20161012-mw5d1272-1200

Taken at 100 ISO, 1/200 sec, and f/22, with the flashes set to 1/16 power, using a Yongnuo YN622C-TX on the camera and a YN622C connected to each one of the the flashes.


High Key Flare

Since a student today asked me about “High Key”, I thought perhaps I would share a repeat of a 2014 post. As well as pointing out the “search” field in www.speedlighter.ca, a rather useful resource. Anyway, without further ado, here’s the 2014 post:


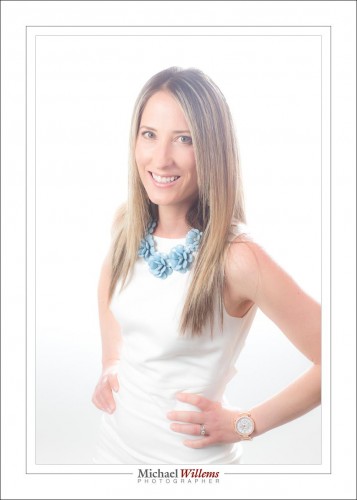
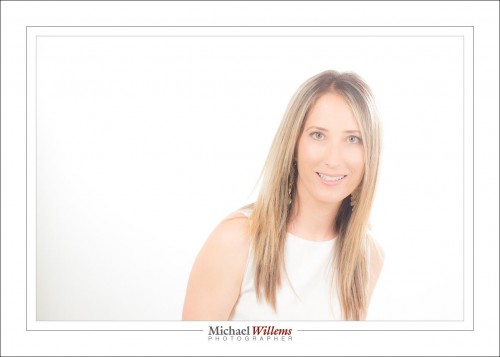
I did a portrait session yesterday, of another photographer, the talented and beautiful Tanya Cimera Brown.

Tanya wanted a high key portrait with blown out background and flare. A portrait that looks like it was taken in front of a bright window.

Flare, eh? Like this?

Yes, like that.

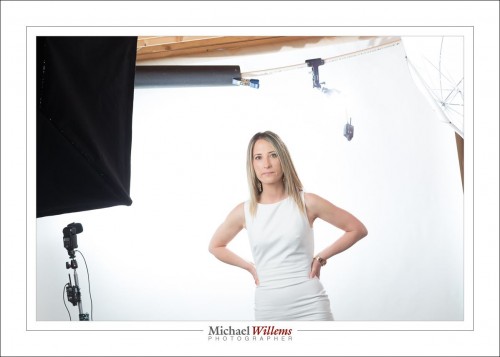
So how did I get that?

Flare is basically “lens imperfections with strong incoming light”. Like bright back light. It gets worse with some lenses (like the 70-200) and conditions (like filters). But instead, I used my 85mm lens. Not much flare there.

So I did it like this:

Five flashes: Softbox, umbrella, hair (strobes); then background, flare (speedlights). Flare? Yes, see that speedlight hanging down? Hardly visible? That is because it is shining toward me. And that with the bright background (speedlight left) gives me what I want, if my lens is in its light.

Done. A bit of logic always works. Logic rocks! Here’s one more.


Little things.

I taught a 2-hour presentation in London, Ontario on Thursday night. The London Camera Club made me feel welcome, and was very receptive to my message about flash photography. Lots of members bought my e-books, and several signed up for my flash courses on 16 and 23 October.

(Both courses are now full: if you wanted to take part, send me an email: I will repeat the workshop again in the next weeks, if there’s demand).

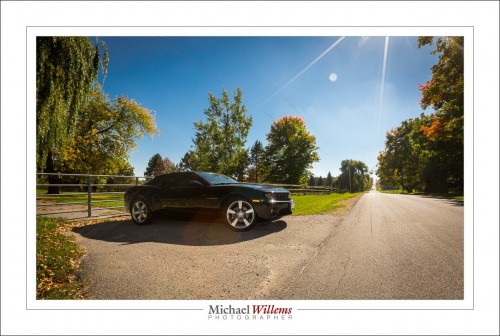
Nows for tonight’s tech tip. Look at this image from today, when I was shooting a horse farm in Adjala, Ontario:

20161007-mw5d1126-1024

I shot against the sun, so I used a flash to light up the Camaro—else, the wheel would be dark.

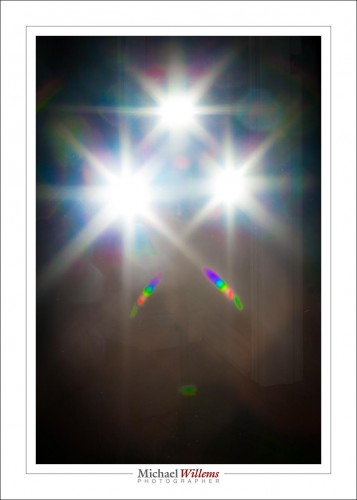
Consider the star-shaped reflection in the bumper. And there’s the star shaped sun rays. Why the star shape?

The answer is simple:

If you want a distinct star shape in your hot spots, stop down to a small aperture (high f-number).  So this was shot at f/16.  And one more tip: shooting against a light source like this, leave off your “protective” lens filters. Otherwise you will not get this: all you will get instead is flare. 


Near London? Come see me 6 Oct 2016

Do you live west of Toronto? Anywhere near London, Ontario?

Then see www.londoncameraclub.ca – you can hear me talk about flash tomorrow night (or tonight, depending on when you read this), Thursday Oct 6, 2016. Come hear some advanced tips and tricks and come meet me. 7:30pm; $10 charge for non-members of the club.

Also keep in mind, 23 October, another small (5 people max, some spaces left) hands-on Flash workshop. See the meetup.com web site.

Now back to my presentation.No rest for the wicked.