Solution to many problems: ISO

As you know, an exposure is determined by three factors:

  1. Aperture: the larger (ie the smaller the f-number), the more light gets in.
  2. Shutter: The slower the shutter, the more light gets in.
  3. ISO: the higher the ISO, the less light is needed.

So from this “triangle”, the following follows: if you want higher shutter speeds, either lower the f-number or increase the ISO.

And increasingly, the latter is an option.

In the last day or two, I shot the following as JPG images (imagine, me shooting JPGs) in the X100 camera. View them at original size (click, then click on the “full size” link (where it says “Full  Size = 1200×800”), then view that on your Mac or PC at full size).

Now realize, all I did to these is crop a little in a few cases, and resize for these web images – other than that I did not touch them. They were shot as JPG files with standard settings: no extra noise reduction or anything else. Just standard.

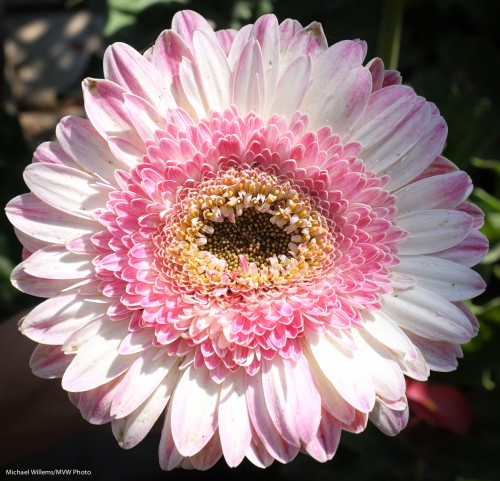
First… 800 ISO used to be high. Now it gives you this on a point-and-shoot. Admittedly, the Fuji X100 point and shoot:

X100: Flower at 800 ISO (Photo: Michael Willems)

Indistinguishable from a 100 ISO image of just a few years ago!

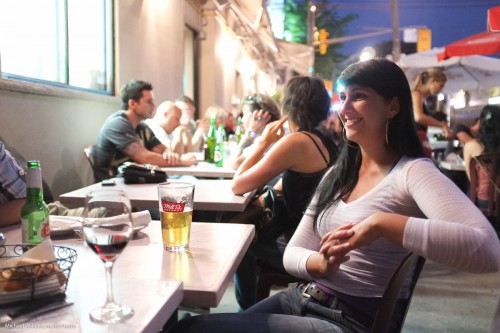
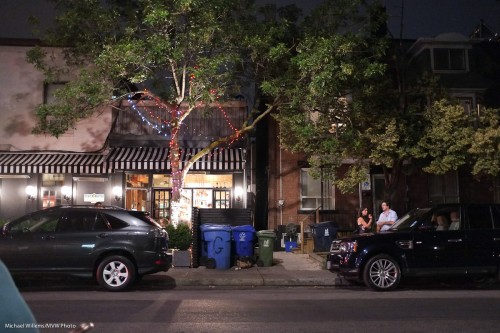
320o ISO used to be impossible. Now look at this:

Little Italy, 9 July (3200 ISO X100 photo: Michael Willems)

(1/15th sec at f/2, 3200 ISO).

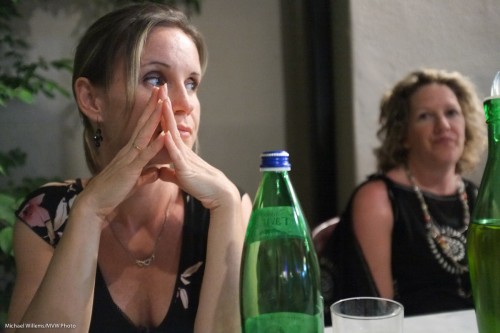
Little Italy (X100 Photo: Michael Willems)

(1/20th sec at f/2, 3200 ISO).

Little Italy, 9 July (3200 ISO X100 photo: Michael Willems)

(1/15th sec at f/2, 3200 ISO).

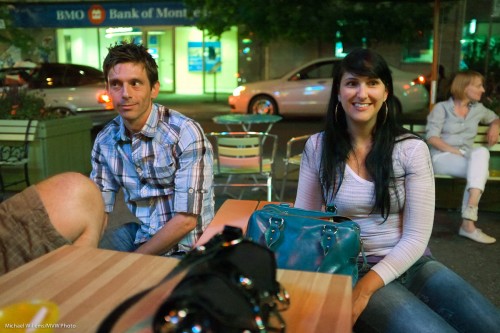
Couple in Little Italy, 9 July (3200 ISO X100 photo: Michael Willems)

(1/80th sec at f/2, 3200 ISO).

Wow, what quality! Surprised to see the pic, the couple remarked “but I did not see you flash”. Yes, that is a big benefit of high ISOs.

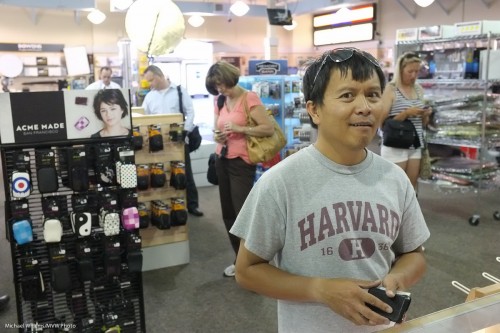
And let’s take it up one more notch. Here’s 6400 ISO:

3200 ISO: X100 owner in Mississauga (Photo: Michael Willems)

Wow. That is 6400 ISO? Yes it is. Can I make an 8×10 print from that? You bet, and more.

So what does this mean?

It means that I can now shoot at 3200 and above wherein the past 800 was the absolute limit. That is 2-3 stops of extra light.

This in turn means that with a fast moderate wide angle lens I can now shoot pretty much in the dark: an outdoors restaurant, where amazingly, the camera actually sees more than I do, and it does it with great quality.

So, with the right equipment you no longer need to be afraid to shoot at high ISO values. And that means hand-held night photography now becomes a real option. I urge you to take advantage of that. See how far your camera can go and use it.

The making of a group shot

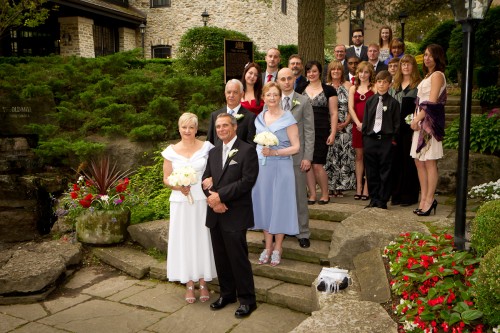
I shot this at a wedding the other day: a group shot featuring bride and groom Pat and Jim, relatives , maid of honour, and best man.

Pat and Jim Wedding (Photo: Michael Willems)

How did I shoot this? I thought it might be good to go through the process that went into creating a shot like this.

Setting

The day was ideal for photography (bright overcast). So I had lots of options at The Old Mill in Toronto. But therein lies a problem: which one to choose, out of hundreds? So I decided to look for…

  • Background: A nice, full, non-distracting and darker background.
  • Context: the background should say something about the event: it supports the image so it should provide context (notice the venue’s sign).
  • Colour: I want some colour. The flowers provided this.
  • Space: A space large enough to pose over 20 people.
  • 3-D: Preferably some various levels (e.g. steps).

Steps give you an automatically full background, so these steps were the chosen spot.  So far. so easy.

Arranging

I would often do a sit-stand-lean arrangement, but in this case, all standing is OK.  Arranging 21 people takes time and by the time you tell the last person what to do, the first person has turned around again. So speed is of the essence. I arranged bride and groom, best man and maid of honour, and from there on much of the rest fell in place and only minor adjustments were needed.

I then arranged them so I could see them all. This takes a fair amount of doing, because people move – my experience shooting sports clubs came in handy.

Now I told the group to relax – I would be doing test shots, so no worries yet – and to all breathe in deeply, and then all to breathe out at once. I demonstrated this. Silly, and silly is good, it relaxes people.I avoid saying “Smiiiiile…!” – it brings out the worst fake smiles in people, especially in men.

Then I watch body language and go, “checklist-fashion” through everyone, to see any awkwardness. If I see any, I ask them to adjust.

Technical

I used a slightly wide angle lens on my Canon 1D Mk4 body – the 24-70 f/2.8 set to 33mm effective focal length, meaning not very wide (distortion) but wide enough, giving me the following benefits:

  1. The ability to get it all in.
  2. Extended depth of field.
  3. Tolerance of slow shutter speeds.

I first of all exposed for the background. I wanted it to look nice and dark. This emphasises the people, and it also allows background colours to become saturated.

So I set my camera to:

  • f/7.1 (which gave me enough depth of field, which I needed with 8 rows of people!);
  • 1/80th second, which is fast enough for a 35mm lens hand held;
  • Getting a  dark background (between -1 and -2 on the light meter) now necessitated 800 ISO, which is great on today’s cameras. This also enabled the flash to reach far.

I then used my on-camera 580EX II flash to light the people.

On-camera, from the speedlighter? Yes, outside you can get away with it. If I had had more or more annoying shadow I would have used my Honl Photo softbox.

And there you have it. Simple shot, took a minute to make, and with little or no post work.


Simplifying and diagonals

In a photo:

  • Simplifying is good. Often very good.
  • Diagonals can also be very good.
  • The Rule of Thirds is also often very good.
  • Tilting the camera is a way to simplify.
  • Tilting is also a way to create diagonals.
  • And to help you get to the Rule of Thirds.

So it stands to reason that if you tilt and simplify a the same time, you may end up with some reasonable images.

A few examples from the other day – taken with the Fuji X100, which is still a great toy. As you learn more about it it gets better.

Because this camera has a fixed lens (35mm, full frame equivalent) you end up tilting instead of zooming in and out – and this makes your pictures better.

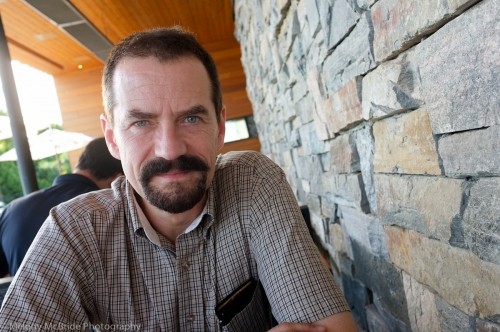
Here’s me, the other day – and look at the texture and converging diagonals:

Michael Willems (Photo: Melony McBride)

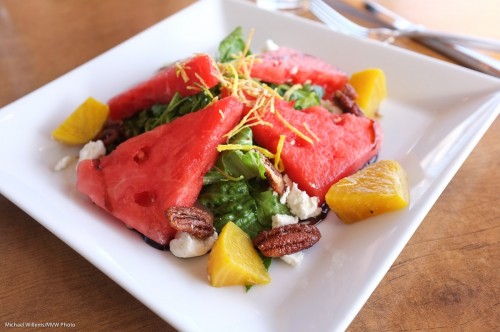
Here’s a salad, served with colour and texture – and with a blurred background that “tells a story by making the viewer put it all together”:

Salad (Photo: Michael Willems)

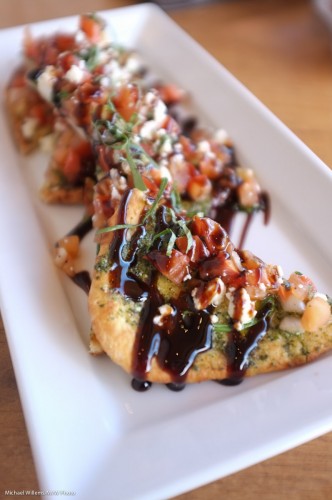
And a few more food and drink snaps:

Bruschetta (Photo: Michael Willems)

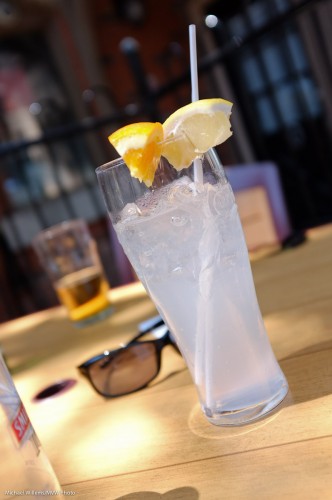
Cheers (Photo: Michael Willems)

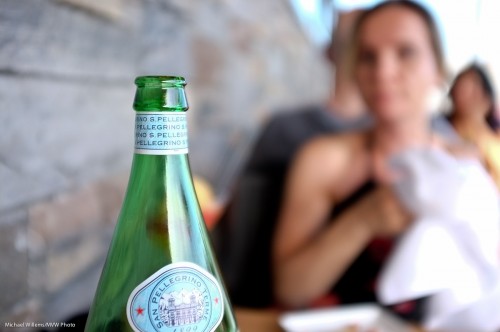
Acqua Minerale (Photo: Michael Willems)

And a non-food snap: the best calculator series ever made (you do not need an “=” button!)

HP11C (Photo: Michael Willems)

Can you see a pattern emerge?

Here’s your homework. Go shoot some pictures:

  • With a 35mm lens length (real 35, i.e. use 24mm on a crop camera).
  • Tilt to simplify or to get diagonals or to be able to compose with the Rule of Thirds.
  • Shoot at wide open aperture (low “f-number”).
  • Get close.
  • Use high enough ISO to get non-blurry images.
  • Use available light.

And have fun!


When you get a new camera…

…you need to learn to use it. Its instructions. Its strong points and weaker points. Its do’s and dont’s. Its quirks, even.
I am learning to use my Fuji X100:

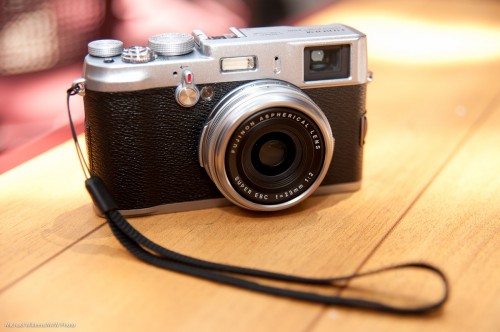
Fuji X100 (Photo: Michael Willems)

It will take me a few days of use until I fully “get” it – its instructions (cannot use the optical viewfinder for close focus); when it does not accurately focus; when exposure is off; how it displays pre- and post-shot; how best to focus (in manual, I can use the AE-L/AF-L button to focus, which I only just discovered!), and so on.

Let’s start with a few snaps taken during a nice downtown Oakville “getting to know the camera” walk today. All these were shot as JPGs, and post-editing in Lightroom was minimal – a little cropping, perhaps a slight exposure tweak, that sort of thing.

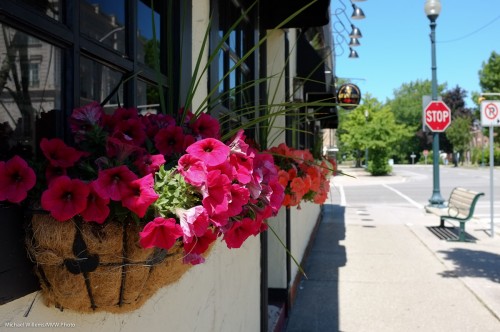
Oakville Scene (Photo: Michael Willems)

Oakville Scene (Photo: Michael Willems)

Oakville Scene (Photo: Michael Willems)

Oakville Scene (Photo: Michael Willems)

Oakville Scene (Photo: Michael Willems)

Oakville Scene (Photo: Michael Willems)

Oakville Scene (Photo: Michael Willems)

Oakville Scene (Photo: Michael Willems)

Quality is excellent. Results are good.

In using the camera today, I found a few issues I have to work on. Namely:

    1. I have to get quicker at the “switch to EVF (electronic viewfinder) if you want to focus closely” thing.
    2. Switching focus points. I switched to “let camera select focus points” half way, since I was not quick enough switching. Next time, manual focus plus the AE-L/AF-L button to pre-focus!
    3. When does the camera refuse to focus? And when does it miss, and focus on the background instead of on the object I am clearly pointing the focus spot at?  I am not 100% clear yet, so this needs a little more work too.
    4. I have to get more familiar with shutter speed limitations: at what ISO is it limited to what shutter speed? This needs to be second nature to me.
    5. Exposure is sometimes unpredictable, or at least seems so when looking pre- and past-shot. In fact looking at the results, they seem good, if somewhat hot in the highlights – forgiveable on a bright sunny day at 2pm. So maybe on a crazy bright day like today I just shoot and ignore the previews and post-views.

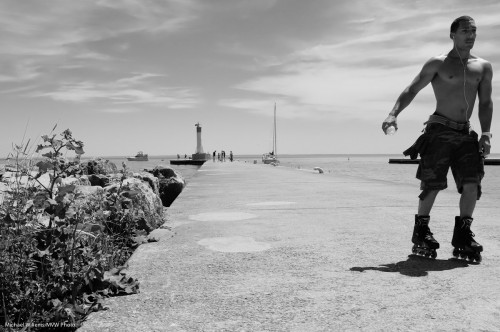
      And here is my favourite of the day, because it shows clearly what you can do with a little camera: people do not even notice you. Not even Mr Muscles here:

      Oakville Scene (Photo: Michael Willems)

      (Click and see it at large, original size to see the full effect.)

      The Degas-like composition is due less to my artistic input than to the fact that the camera was just fast enough for me to capture him before he skated out of the frame.

      The pedagogical point of this post: when you get a new piece of equipment, whether it is a camera, a set of lights, a flash, or a lens, do not be discouraged too quickly. Learn its quirks and benefits and how to best use it.
       

      Chipping away…

      Let us continue to chip away at learning flash.

      Today, more background information. A quick note now on how Canon and Nikon, the two brand leaders, handle exposure differently. (Others follow either Canon or Nikon).

      What shutter speeds are allowed by the camera when you are using a flash ?

      Shutter speeds can be restricted by the camera for two reasons:

      • To protect the user from shaky pics, a slow speed is sometimes denied.
      • To prevent bad flash photos, a fast shutter speed is also sometimes denied.

      But Canon and Nikon do this differently – and it helps to know how your camera works. So here goes.

      SLOW SHUTTER SPEED RESTRICTIONS:

      Shutter speed mode:

      • Canon: None. You set what you like.
      • Nikon: None. You set what you like.

      Manual Mode:

      • Canon: None. You set what you like.
      • Nikon: None. You set what you like.

      Program Mode:

      • Canon: no speeds slower than 1/60th second will be used
      • Nikon: no speeds slower than 1/60th second (adjustable on some cameras) will be used. Except if “Slow Flash” is selected: then, any speed including very slow ones can be chosen by the camera.

      Aperture Mode:

      • Any speed including very slow ones can be chosen by the camera.
      • Nikon: no speeds slower than 1/60th second (adjustable on some cameras) will be used. Except if “Slow Flash” is selected: then, any speed including very slow ones can be chosen by the camera.

      So there you have it – markedly different behaviour by both cameras.

      Clearly, from the above you can see that:

      On Canon:

      • Program mode is not ideal when using indoors flash (you might want slower shutter speeds to allow lighter backgrounds)!
      • Aperture mode is not ideal when using indoors flash (you might get a 1-second shutter if the background is dark, which you do not want!)

      On Nikon:

      • Program mode or Aperture mode without “slow flash” enabled are not ideal when using indoors flash (you might want slower shutter speeds to allow lighter backgrounds)!
      • Program mode or Aperture mode with “slow flash” enabled are not ideal when using indoors flash (you might get a 1-second shutter if the background is dark, which you do not want!)

      Which is why I use manual when using flash indoors, when ambient light is low.


      FAST SHUTTER SPEED RESTRICTIONS:

      • Canon: when the flash is detected, no speed faster than the flash sync speed (typically 1/200th second) is allowed, except if “High-Speed Flash” is enabled on the flash. This, however, drastically reduces the maximum available flash range.
      • Nikon: when the flash is detected, no speed faster than the flash sync speed (typically 1/250th second) is allowed, except if “Auto FP Flash” is enabled in the camera’s flash menu. This, however, drastically reduces the maximum available flash range.


      All these Flash articles are excerpts from my signature four hour “Advanced Flash” course, in which you learn all these concepts in a hands-on, interactive session.


      Uncle Fred to Uncle Mike

      A repeat of a favourite subject – repeated here because it is so important. Namely – avoiding “being Uncle Fred”.

      I see a lot of snaps like this, when I look at people’s photos:

      Ouch. OK, I took that – but only, I assure you, to demonstrate the point.

      What is wrong with that image?

      Other than everything, you mean? (Photographically speaking: the kind volunteer student is fine).

      • The subject is in the centre.
      • She is small in the image
      • The image is cluttered
      • I shot down at her
      • I exposed the image badly
      • I have bad “tension points”, where I cut off feet, etc.

      So then I did it properly.

      I chose a subject and got close. Chose a long lens (the 70-200, a portrait favourite). Then got closer (by zooming in as well as by getting physically closer). Got down to their level instead of shooting down. Avoided clutter. Shot at f/4 to blur backgrounds. Used the rule of thirds – his face is centered one third from the top.

      Bingo:

      Same light. Same room. Same time.

      View the original image (click!), and then view at the original large size, to see how good that is.

      You see, sometimes it’s just about composition. “Filling the frame” often dramatically improves images.


      Simple outdoors portraits recipe

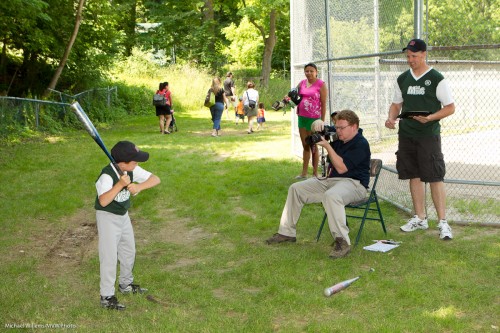
      When I do outdoor portraits, I often use big flashes, softboxes, light stands, and umbrellas. But sometimes, like today when I was shooting baseball kid portraits all day, I use just a camera, a lens and a simple on-camera flash.

      Unmodified, on-camera flash? Surely that is anathema to what a pro does?

      Nope – not necessarily. When conditions are right, you can do this, and get well-lit portraits.

      The following example, which shows this, has a less-than-ideal background, but I was just testing my light. Here’s photographer Ray:

      To shoot a portrait like this (or rather, to shoot 500-odd of them, as I did today), I do the following if the light is changeable.

      First, equipment and setting:

      1. If at all possible, find a spot where your subject is out of direct sunlight. Direct sunlight is harsh and horrible. If sunlight is unavoidable, at least turn your subject away from it.
      2. Find a dark, green background (i.e. like above, but without the fence – which you can be assured I did for today’s real shots!).
      3. Use a camera with a lens in the range of 50-150mm.
      4. Use an on-camera external flash, aimed straight at the subject. Since I am mixing with available light, this is allowed.
      5. Make sure I shoot from the subject’s head’s level (I avoid shooting down or up too much).
      6. I try to ensure the flash light the subject’s face. I avoid shadows (from, say, baseball bats, or from hats). I watch carefully for glasses causing reflections.

      Now to the camera settings. I now usually:

      1. Set my white balance to “flash”.
      2. Set my ISO to 200 (as a starting point).
      3. Set my camera to shutter-speed priority mode.
      4. Select 1/200th second
      5. Set my exposure compensation to -1 stop, as a starting point.
      6. Now I aim and focus. I check the aperture chosen by the camera. I want something around f/5.0-f/6.3. If I get too small a number, say below f/4.0, then I lower the shutter speed – all the way to 1/60th second if I have to – and if that is not enough, I increase the ISO. If I get too large a number, say above f/7.0, I increase the shutter to the maximum sync speed (1/200th-1/250th second on most cameras) and then decrease the ISO if I can.

      Now take a test shot and see. Adjust as needed. I regularly keep checking my aperture. And if the background gets too bright or dark: well, exposure compensation will adjust the background’s brightness.

      Notes:

      • On a Nikon camera, be careful: exposure compensation will also alter your flash brightness (for some odd reason only known to Nikon engineers), so unless you want this, you may need to apply opposite flash compensation (e.g. when using -1 exposure compensation to lower the background’s brightness, you may want+1 flash compensation to keep the flash the same).
      • On a Nikon, also ensure you know whether you have “TTL” or “TTL-BL” selected on the back of your flash.
      • On any camera, since you are using TTL, i.e. the auto flash mode, use flash compensation as needed. Darker subject: you may need to go down. Lighter subject: go up. See yesterday’s post!

      Why Shutter-Speed priority (S/Tv)?

      Because outdoors light can change drastically from moment to moment. Indeed, I prefer to use manual, if light is consistent. In that case instead of exposure compensation. I use the meter and set my ISO, shutter and aperture such that the meter indicates -1 stop, then test and adjust as needed.

      Here’s Ray doing what I am talking about here:

      So that’s a lot of stuff to watch!

      Yes, it’s a lot of work, and it requires a good understanding of exposure and what regulates it (I know some good courses – just sayin’).

      And I see a lot of parents take their children’s snaps. Invariably, they fail to use their flash, which leads to poorly lit photos. Even before you do formal training, you now know better – now go practice.


      Beginners’ rules of thumb: Exposure

      When shooting in auto modes (P, A/Av, S/Tv etc), you will need to adjust exposure often. How? Quick rules of thumb for you today.

      What to adjust. If the non-flashed part of your pic (what’s lit by available light) is too light or too dark, use exposure compensation (the plus/minus symbol). If the flashed part of your picture (what’s mainly lit by your flash)  is too light or too dark, use flash exposure compensation (the plus/minus symbol with a lightning symbol next to it, or adjustable via the menu).

      How to adjust. If what you see is too dark, use plus. If what you see is too light, use minus.

      How to predict. When shooting a very dark subject or scene (coal mine), you will need minus. When shooting a very light subject or scene (snow scene), you will need plus.


      CQ CQ CQ

      Yes, I have hobbies, too. Like this:

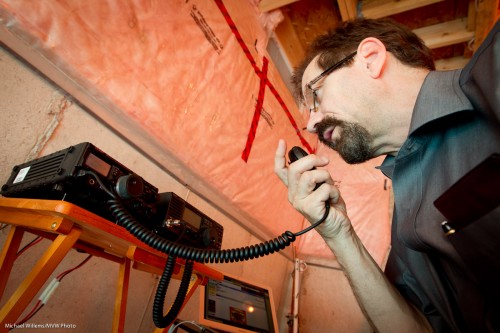
      Michael Willems VA3MVW (Photo: Michael Willems)

      Yup, I am a licensed radio amateur, VA3MVW. That’s me a little while ago this evening, on a QSO (a call) with another amateur or two elsewhere in the world.

      I used a wide angle lens (see yesterday’s post), and I lit this self-portrait with a flash. Bounced, using TTL. Wide angle to get those wonderful diagonals. I was holding the camera in my other hand, and had the camera select a focus point – I seldom do that but in this case it makes sense, since no-one is looking through the camera.

      But I did not use just one flash. That would give me this:

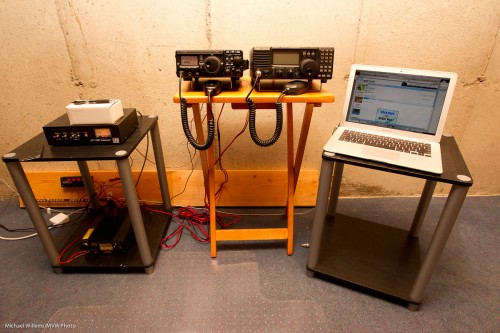
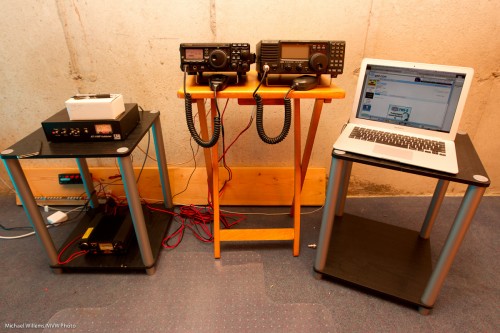
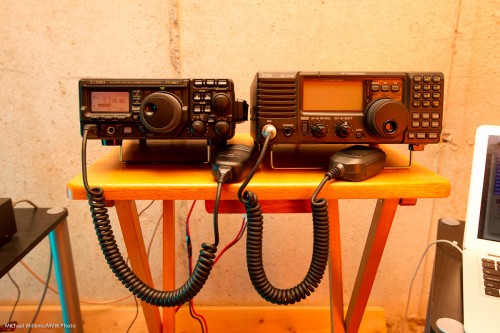
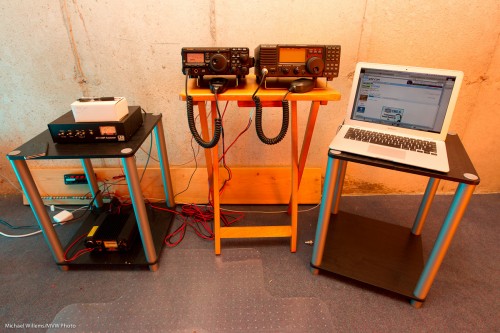
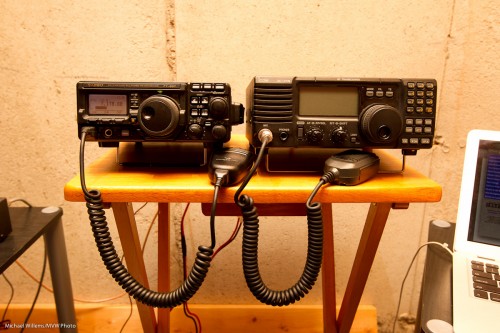
      Station VA3MVW (Photo: Michael Willems)

      Nothing wrong with that. But I wanted to give the picture more dimension, more modelling, more of a live feel. Like this – compare the tables’ legs:

      Station VA3MVW (Photo: Michael Willems)

      Or even more:

      Station VA3MVW (Photo: Michael Willems)

      I used a 580EX flash on the camera, bounced behind me, and two off-camera  430EX flashes, each equipped with a Honl Gel (one greenish and one yellowish – some of the artistic colours I really like) attached to a Honl Photo speed strap.

      I often add a splash of colour. Instead of this:

      I happen to like this:

      Now look again at the image on the top, and you will see the same orange-like colour (left) and blue-like colour (right) – subtle but it is there.

      A little colour adds a lot, methinks. And with small speedlights, a little knowledge, and simple flash modifiers, this takes mere seconds to shoot.