Coming up… taking requests!

As you all know, I teach!

I love to share, and I love to teach.

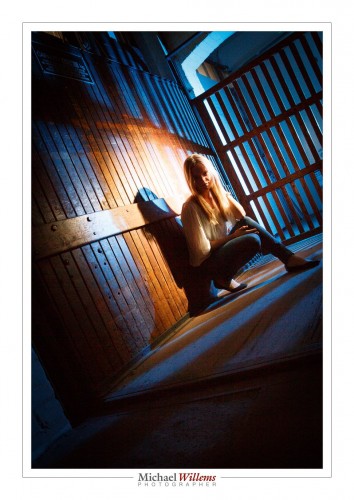
A lot of that teaching takes place in my friend Sam’s wonderful and fully equipped studio at www.hamiltonstudio.ca. Because it is easy driving distance from both the Toronto area, and because it is affordable (I don’t want you to have to pay a penny more than needed), and because unlike a lot of Toronto studios,  it is easy to reach from the freeway. But most of all, because it is ideal for teaching. A cool place, an old warehouse.  You will see the courses listed at www.cameratraining.ca. Here’s a pic we shot at the studio:

Sam is a TV- and video-pro: next to photography, TV is what he does for a living.  So here’s some good news: we are adding video to the arsenal of teaching tools. As a complement to the in-person teaching and the e-books.

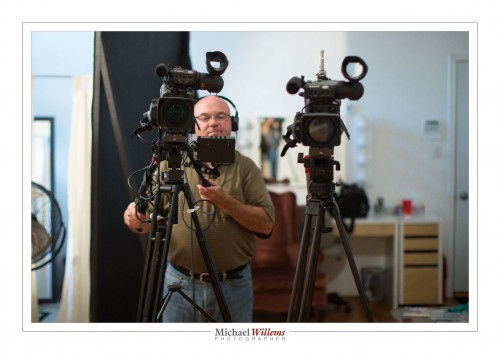
Here’s Sam, filming me today, using his pro gear:

That shot was taken how? I was in a hurry because I was talking to the camera, and I did not want to look away from the camera for more than a fraction of a second. And there is no strong back light or anything else that makes auto-exposure hard. So I used Aperture mode, at 3200 ISO. I used a 50mm lens. At f/1.6 (after all, I want to blur the background), that gave me 1/320th sec shutter speed, which is plenty fast to not get a shaky picture.

I think you will like the videos a lot, by themselves or as a complement to in-person training. Some will be very long, some in between, and some will be short “tips and tricks” videos, of a minute of two. You will see them start to appear in the next weeks and months: stay tuned.

But do better than staying tuned. Take part in the process. I would like to know what short (or indeed, long) subjects you would like me to talk about. Send me your requests, and if I can fit them into the schedule, I will do so. Often, subjects are easier explained by a live human than by printed words: think about those subjects. Anything mystify you? Anything you still do not quite “get”? Here’s your chance to ask me to explain in person! Not quite the same as being in my live courses and workshops, but not a bad alternate – especially if used as a complement. So let me have your requests. Please Email me with a subject line that contains “VIDEO IDEA”. Let’s have some fun!

I shall look forward to your ideas!

End notes:

  • My sons tell me “no-one uses tape anymore” for anything, and no-one under 30 knows what it even is. Not true – check these cameras. And check a live studio. Plenty of tape. The same is true of film – ask Quentin Tarantino if he films “digital”.Take that, boys!
  • For those of you who read yesterday’s post, there is a blog post about yesterday’s Picture Change opening here, on the Photosensitive blog!
  • I plan to be in Las Vegas, NV this weekend and for a few days afterward – anyone there who wants to meet up, learn something, have me shoot anything, or anything else at all: drop me a line!

 

Picture Change

Today marked the opening of the six-month Picture Change exhibit by Photosensitive, a collective of Canadian photojournalists.

An amazingly well organized exhibit, which will run in 6 different locations in Toronto until the end of the year. I was honoured to be chosen to be one of the 100 photographers who each submitted an image.

As a photographer, I feel it is my job to tell stories with images. A picture, as they say, paints a thousand words: a good picture has a unique ability to convey an enormous amount of information, feeling, fact, and subtlety, all in one go, but most importantly: to show that things aren’t simple, and to make the viewer think.

I usually bring my skills to bear on portraits, art, weddings, local news, and more. From local news in Oakville to corporate headshots in Toronto to weddings in Jamaica. And those are worthy endeavours, and I love doing them, they’re why we still have photographers – but they’re not why I became interested in photography, way back in 1869 (All right, 1969).

Growing up in the Vietnam era, in the era of hippies, student protest, and Life magazine, I learned so much from photos, and I felt strongly that photos could change society for the good. Photographers of that era did change society, and they did it not by imposing viewpoints, but by forcing people to think.

And that power has not gone. Thank God, its still here. As much as in the 60s, photos can bring nuance into news. The nuance that “headline sound bites” so badly lack. In sound bites and headlines, everything is black or white. A photo can show that isn’t that simple. Pictures have a unique power. The Mona Lisa says more than a dozen books about Mona Lisa.

And it seems to me that today, we need photography more than ever before. Especially now that newspapers are on the decline, photographers are being fired, now that photojournalists are being let go everywhere, now that there’s no more Life magazine, and now that more and more of us get our news in short video clips and in shorter soundbites. A few years ago I asked 18 people in an office: “who reads a newspaper here?”. The answer: just one, and it wasn’t even a national newspaper.

In that world, I often think all that saves us is the power of a photo to speak 1,000 words; and that is a power which cannot be taken away. Words may be cut, but images remain.

As a photographer, I think I have the duty to help people see the complexities. It was for that reason that In 2007-2009, I did a photographic project called “IV – Intravenous”about drug addiction, to do just that, to bring nuance into the societal debate.

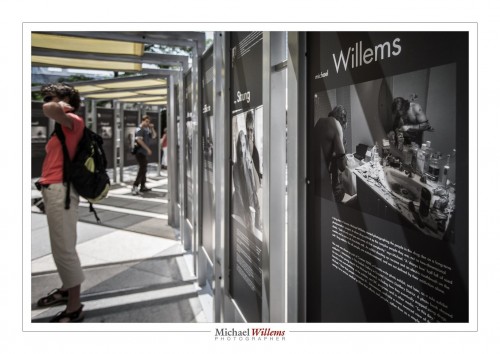
And that is why I was so very honoured to be asked to join the Picture Change project with my photo of a Toronto drug user. A photo (see above) that shows complexities most of us haven’t even considered.

This is my first project with Photosensitive, a collective I have admired for years; and I certainly hope it will not be my last.

I say that because I am very impressed by the work here, and I hope that if you have a chance, you will go see it, or at least get the book. I say it especially because if we are to make society better, we need social engagement, we need photography skills, we need photographers, and we need projects like Picture Change that bring them all together.

Finally: an outdoor exhibit like this is one thing that makes Toronto a great city. What better way to spend your lunch hour than to go see some great photographs?

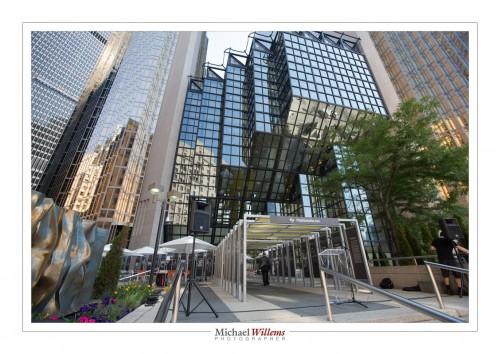
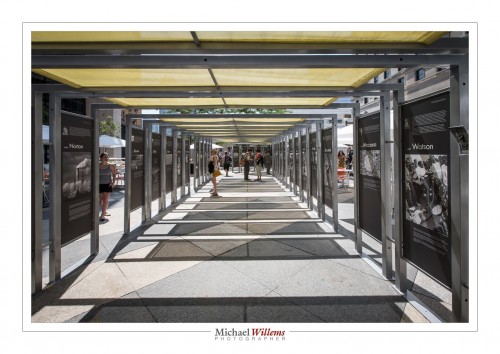
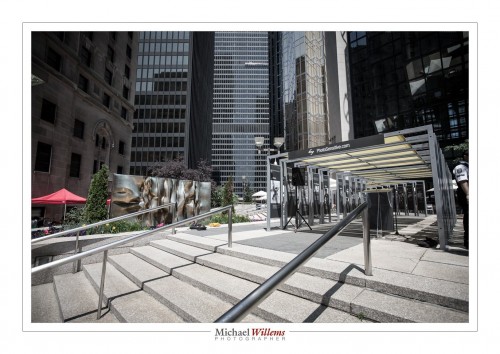
Tech note: I used a 16-35mm wide angle lens for these images. But you were able to guess that from the photos, right?


Photo Walk; 25 Aug 2013

Yes, an Oakville walk: Sunday 25 August 2013… 1-5pm; you can go to www.cameratraining.ca to book now, or send me an email to reserve your spot. 10 students max!

I chose Oakville to ensure a good location with a mix of urban, people, buildings, plants, nature, lake, and much else. We shall cover everything from basics to advanced camera use, motion, colour, composition, lenses, you name it. Bring an SLR camera and whatever lens or lenses you have!


Photo walk

Anyone near Oakville, Ontario: interested in a four-hour photo walk with me? If so, let me know and I will set one or two up in Oakville in August.

This will be four hours of walking and learning and review of basics, including camera use, composition, problem solving, flash, lens choices, and much more. Everything from basic stuff, aperture, focus, manual mode, to people techniques. Maximum ten students.

We’ll do it in August and/or September on a weekend: I am thinking Sunday, or if you prefer, a weekday. Cost $125-$175 per student depending on interest level.

Let me know your day preference in August and September, any other preferences. Email me at michael@michaelwillems.ca or leave feedback here.

Michael

Dessert.

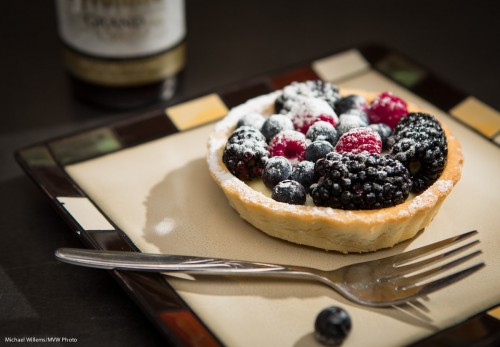
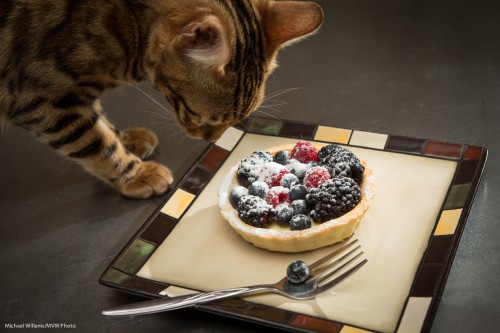
My student Rhonda left me an excellent meal after the food photography session Friday, and she even included a wonderful dessert, so I thought I would picture this dessert for you, before eating it just now:

Yeah, call me unconventional: I am having it with a strong Belgian beer. What of it?

I shot at 100 ISO, 1/200th sec, f/8 or less.

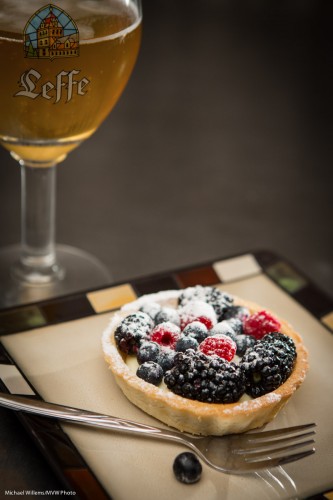
Here, one more, now with a little reflection off the fork, by keeping the back flash lower. I made sure I kept the stem of the beer glass vertical:

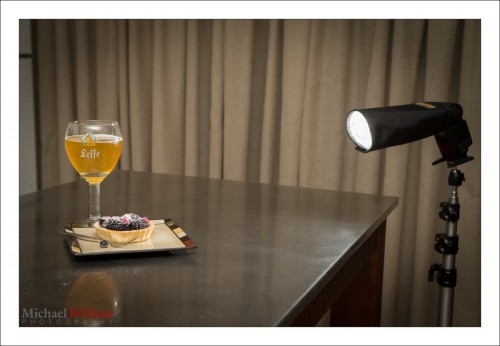
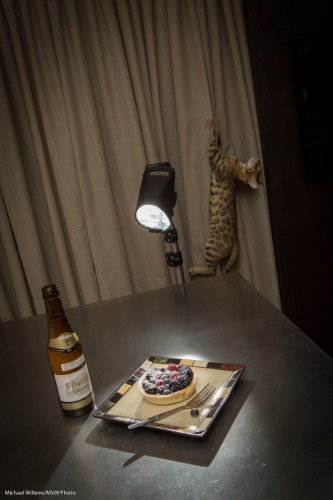
Here’s how I shot that. One flash on the camera bounced off the ceiling, and one behind, fitted with a snoot, aimed at me, using wireless TTL, with the A:B ratio set to 4:1:

But what do I go through when shooting this? This, for instance: having to fend off unwanted attention from two beautiful Bengal felines.

And worse, this:

Poor curtains.

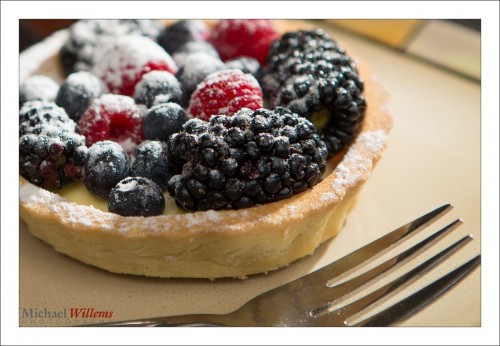
It’s all about the detail. Yum:

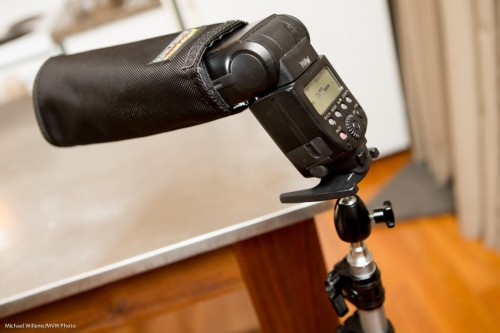
And talking of detail, here’s how you mount a remote flash. Working up from the bottom, I used:

  1. A light stand.
  2. A ball head.
  3. The flash foot (your flash comes with one!), screwed onto the ball head.
  4. The speedlight, set to remote TTL mode.
  5. A Honlphoto speed strap.
  6. Attached to that, the Honlphoto 12″ snoot.

That all looks like this:

…and away you go.


Nom nom!

Food.. food… food. Few pleasures in life as good, and blogger Rhonda of professional Toronto-area food blog http://oliveandruby.com/ knows this well, and makes it her mission to share her food insights, knowledge and recipes with the world. If you like food, this is a recommended blog.

But Rhonda is not only a food expert: she is a wonderful person, and she is very intelligent to boot. It all shows in her blog.

And in her photos. This year, Rhonda has been spending some time with me to hone her skills in food photography. How else to convey the quality of food but by great photos?

It’s not just necessary – it is also fun. Food photography is fun because it includes all of the following:

  • Composition insight.
  • Technical camera skills.
  • Technical flash skills.
  • Knowledge of flash modifiers.
  • Light skills.
  • Storytelling.
  • Post-production skills.
  • Planning.
  • Improvising.
  • Studio photography.

So while it seems simple (“prime lens… aim… click”), it is far from that. It’s pretty much “if you can shoot food, you are a pro”… and not even all pros can shoot food.

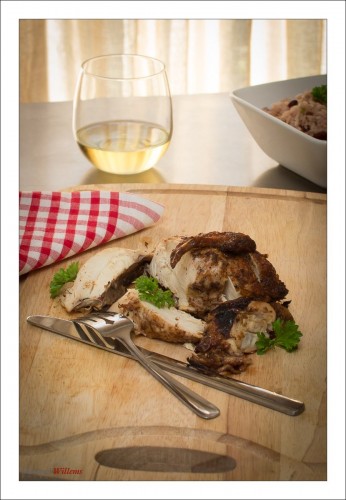
But Rhonda can. Look at the excellent work she produced today, under my guidance and with my feedback. First, a pro photo of her Jerk chicken:

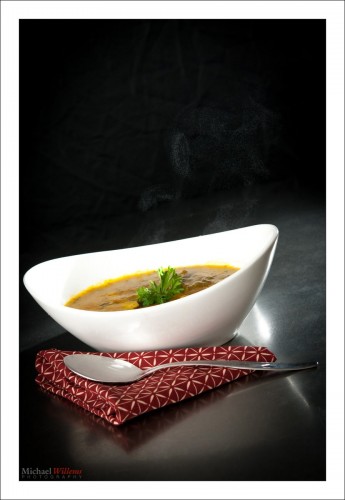
…and then, a pro photo of her excellent soup. Look carefully, you will see that even some of the steam is included:

These compositions did not come out of nowhere. First, of course, Rhonda spent forever (that’s my careful estimate) cooking the food.

And then the compositions. They started with, first, a full discussion of the work she had done to date. Photo critique (not criticism: critique!) is a fantastic way to learn, which is why I like to take an hour or so as part of these types of lessons to do just that. People know their own answers if they ask their own questions. Questions like: “how could I have made this even better?”, and “is every element of this image supporting the story?”.

Critiquing and shooting in one session together is also a great way to learn because you discuss, and often debate, every decision made. Why is that flash there, not here? Why is that flash at quarter power, not half? Why aim forward, not backward? What do we do to see the steam? Why f/4 one time, and f/16 the next time? How does a light meter work?

These decisions involve some complex thinking, and there are many decisions to be made – in food photography, nothing is accidental. It is good to discuss these points at length, and private coaching is a great way to do this.

My top ten tips for food photography are:

  1. Keep it simple. Ask “is every element in the picture needed?”.
  2. Think colour!
  3. Think light!
  4. Get close and fill the frame
  5. Decide what should be in sharp focus, and what need not be.
  6. Crop carefully: put a lot of thought into this.
  7. Keep it simple.
  8. Keep it simple.
  9. Keep it simple.
  10. Keep it simple!

The equipment? That was simple too, today. A Nikon D90 with a 60mm micro lens (a macro lens, to non-Nikonians) and two simple flashes; one bounced off a white ceiling, and one as a “slave cell” follower. And a tripod. A Honlphoto 12″ snoot. And Adobe Lightroom.

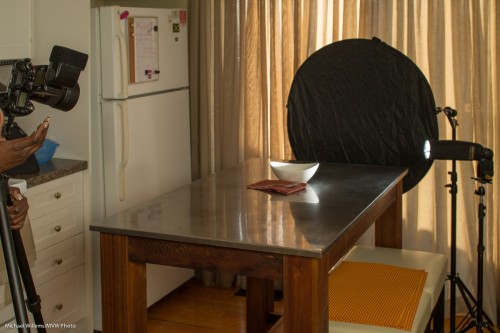
One of our setups

But it’s not just what you use – it’s how you use it. If you learn how to improvise, you can handle those pesky issues that will always, inevitably, crop up!

Like that steam. After the soup did not produce enough, we used two little cups of boiling water placed right behind the soup bowl. That, and a flash with a snoot behind the food aimed forward toward us, and a black background (as you see, a simple black reflector on a stand), and a setting that nixed all ambient light, and manual for all settings, camera as well as flash. Easy once you know.

Finally… from my perspective, the best part of food photography?

I get to eat the food.


Street

This blog is about photography, not just about cameras. So just for fun, today here’s a few random shots from me, all taken in the last few years. Just to show that regardless of modes and other technical issues, you can get interesting photos anywhere, if you just keep your eyes open.

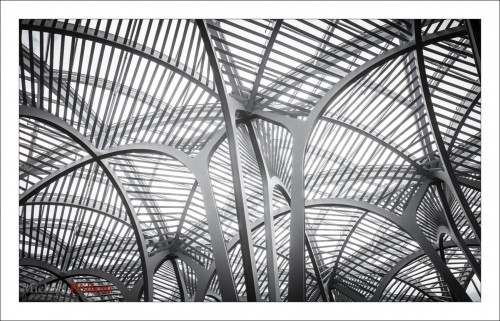
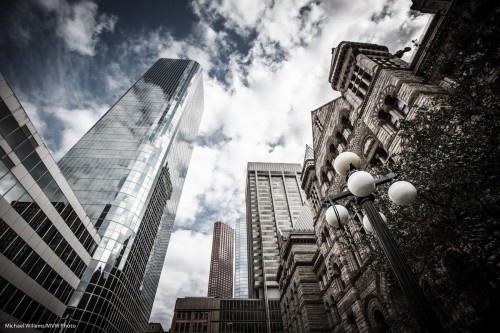
The roof in a downtown office/mall building:

Next, outdoors, an edited picture from a single RAW file. We like reflections…!

A Rickards Red beer, in an outdoors bar the day before yesterday…:

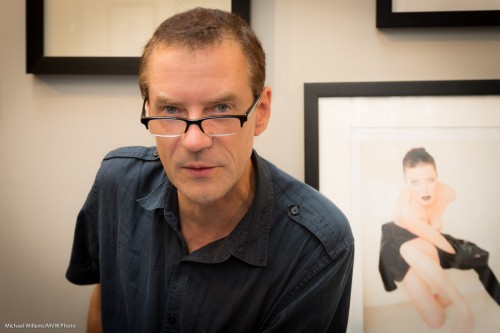
And here’s me, at an art exhibit I held at The Distillery last year, with my model in the background:

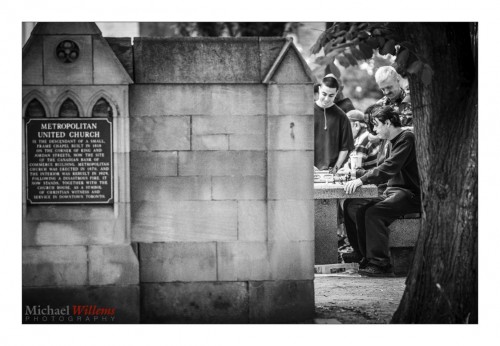
And finally, an image I really like, of a group of people (are they Russian, I wonder?) playing chess in a church garden:

That image almost screams to be black and white, doesn’t it?

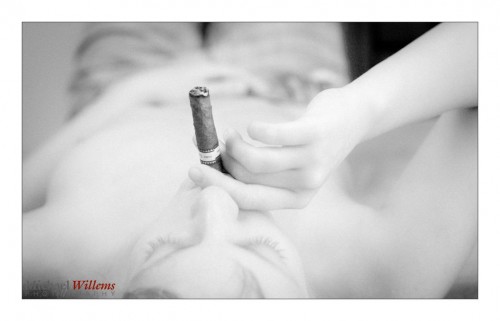
And finally, a studio shot of a few years ago, a girl smoking a Cuban cigar (yes, in Canada we are allowed to smoke those: our government does not tell us what cigars we are and are not allowed to smoke):

All these are snaps in the sense they are pretty simple in technical terms. But they are not snaps in any other sense: these images show me somethings about Toronto. For me, they show a snapshot of my life as it was in the past year or two.

Time travel, which is all a photo can do, and when a photo does this for you, it is a successful image.

And never forget, you need the techie stuff I teach in this blog, it is essential; but you are here for photography, not for that techie stuff. Learn the techie stuff so that it goes away for you: if you know it, it stops taking a significant part of your mindshare. It’s a means, not an end.


Photo-graphy

Photography has at its root the word Photo, “light”. It’s so often all about the light.

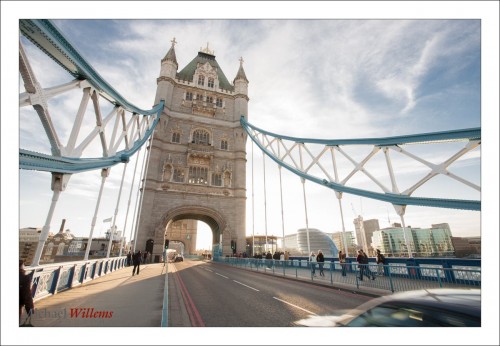
Here is London’s Tower Bridge, a few years back, from the north side:

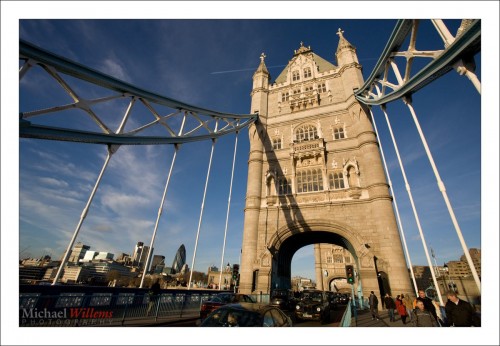
And here it is again, exactly five minutes later, under identical conditions, but seen from the other (south) side:

Those look like they were taken on different planets, or were seriously enhanced in software. But no, they were not: they were both simple images shot “as they were”.. the difference is the direction of the light. Need I say more?

So when you make (not take – make!) a picture, one of the first things you should do is look at the light. Where is it coming from? Where would you like it to be coming from? Is there any way you can change it, perhaps by moving yourself, or moving or reflecting the lights, or using additional light?

Try it, and see how much difference it makes.


Composition tip: Negative Space

Another reminder of a basic composition tip: negative space.

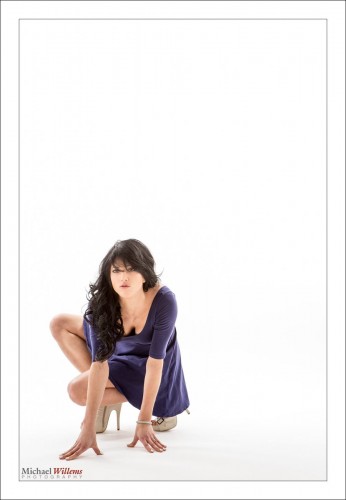
Negative space means space that is devoid of information. Empty, or perhaps with a subject or pattern or texture that is “all the same”. Your subject stands out against that space:

Your subject’s essence, isolation, even loneliness can be emphasized by this. Using Negative Space also, of course, allows you to get a nice off-centre composition.

Try to use this technique sometimes: you do not always need to fill the frame, and where isolation is called for, negative space can be just the recipe you need.


No Meter? No Problem

In studio shoots, you use a flash meter.

But if you do not have one, can you do it? Sure you can. Here’s a trick:

  1. Set up your lights. Guess the light’s power setting.
  2. Get a grey card, and hold it in the exact spot where your subject will be, aimed half way between the light and the camera, as your model may be.
  3. Set focus to manual (we are worried here about exposure, not focus!)
  4. Fill the viewfinder entirely with the gray card (be sure not to block the light)
  5. Click.

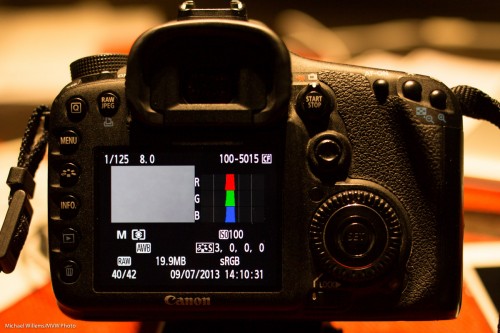
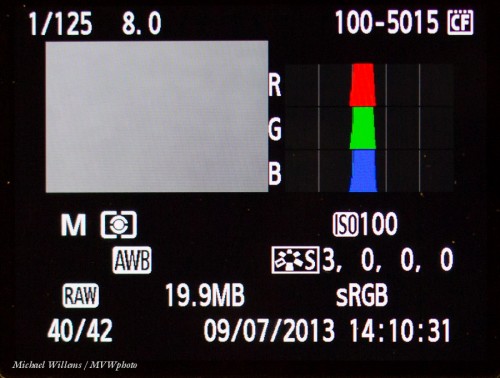
Now review the pictures. Press INFO or DISP, or hit UP/Down, until you see the view that includes the histogram.

Now here’s the trick. A good picture has the histogram peak (or peaks) in the centre. So if you see this, you are ok:

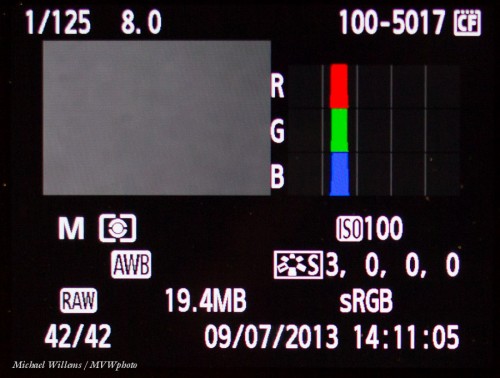
What if you see this, a histogram on the left side:

That means you are underexposing. You need to turn up the flash power and try again:

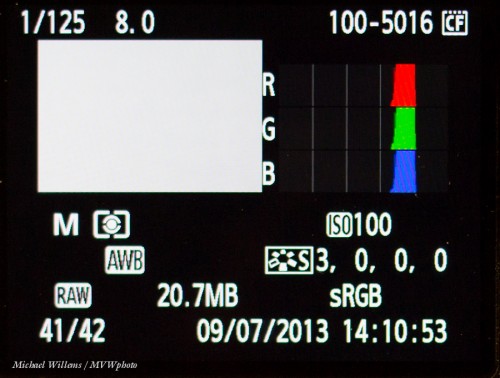
And if you see this, the histogram on the right side:

The histogram is on the right; you are overexposing: turn down the flash power, wait a few seconds so it can dump its excess charge, and try again.

As soon as you are in the centre, take a real shot and check – you should be OK. And you metered it – and all without a light meter!