Wide angle diffuser tip

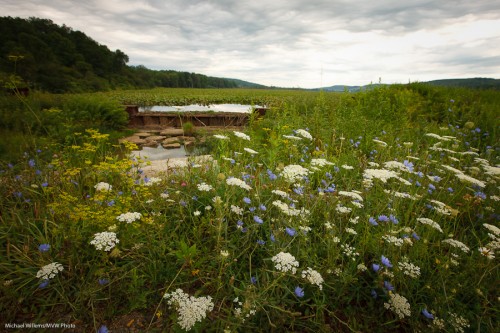
Tip: if you use a wide angle lens – and I hope you are, because you will get pictures like this, that look very three-dimensional, with the scene “wrapping around you”:

Upstate New York (Photo: Michael Willems)

…then you need to know about your flash’s wide angle diffuser.

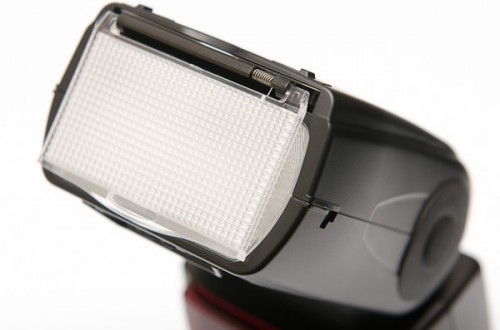
This is the piece of plastic that you can pull out, that looks like a diffuser:

It looks like a diffuser, but it is not. All it does is make the light go to a wider angle, when you are using a lens wider than the flash’s internal zoom mechanism can handle. Else, you would get vignetting.

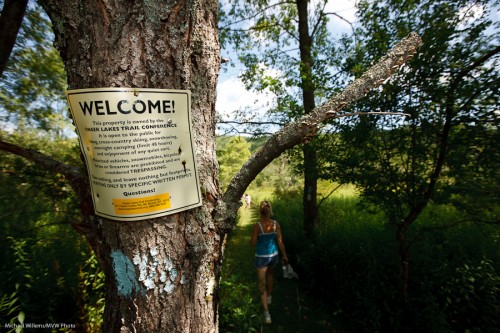
When you shoot with a lens wider than around 24mm (on full frame), you need it to ensure the entire picture is lit. Like in this 16mm (on full frame) image, the sign would not be lit if I had not used the adapter.

Upstate New York (Photo: Michael Willems)

But here comes tip 2: you can also choose not not use it, when shooting with a wide lens. This might be a good choice if you want vignetting, or if you are short of power, like on a sunny day, and your subject is in the middle. Then why waste power lighting up the side?


Outdoor Flash technique

In today’s lesson in my ongoing master flash course, a word or two about outdoor fill flash.

First: you need it, quite often, and for various reasons:

  1. To fill in dark areas on those bright sunny days;
  2. To brighten the foreground subject and get a darker background subject (i.e. to make your subjects “bright pixels”, which you have heard me say many times is a Good Thing, since Bright Pixels are Sharp Pixels);
  3. To add a catch light in the subject’s eyes.

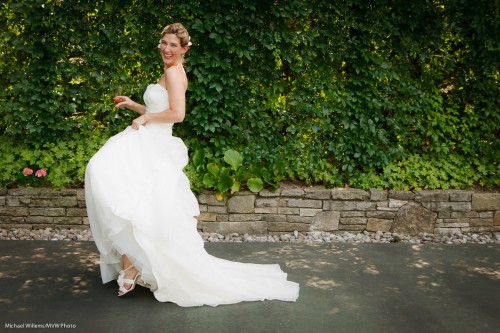
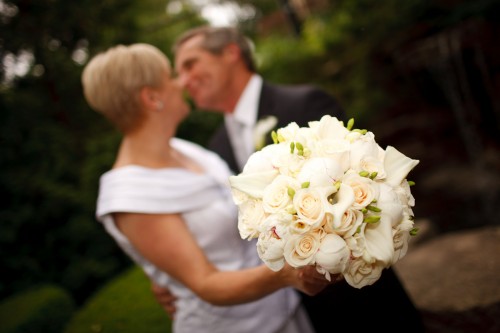
So what techniques are best to get pictures like this, at the wedding I shot the other day?

Trish at her wedding (Photo: Michael Willems)

Trish at her wedding (Photo: Michael Willems)

When deciding on modes and techniques, look for where the issues may be; the constraints. The need to stay clear of these will help you decide the most appropriate modes and settings.

The issue in using on-camera flash outdoors is that (and follow the deductive reasoning here, step by step):

  1. I want the darkground to be darker than the subject, as said above (especially when it is dark, like these plants).
  2. Outside being well lit by our local star (that would be the sun), I can achieve that by means of a low ISO and small aperture.
  3. But these will both reduce flash effectiveness! Exactly what I do not want on a bright day.
  4. But fortunately I can also do it by selecting faster shutter speeds – these do not affect flash.
  5. Until, that is, I get to the flash sync speed – beyond that, if I exceed that I can either no longer us flash at all, or I go to high-speed flash (Nikon: Auto FP flash), and that decreases the flash effectiveness enormously.

Ergo: my shutter speed should be at my flash sync speed (1/250th second on my 1Ds Mark III) before I start reducing ISO and increasing the f-number.

Ergo: I need to chose a mode where I set the shutter speed.

Ergo: Only Shutter Priority (Tv/S) or Manual mode will do. QED.

A common technique for finding a good fill-flash starting point when using an on-camera TTL flash in variable outside light:

  • Tv/S exposure mode (Shutter priority).
  • Select your camera’s flash synch speed (if unsure, select 1/200th second).
  • Exposure compensation: -2 stops.
  • Aim at your subject and check that aperture is somewhere around f/5.6. If not, change ISO until it is.
  • Flash compensation: if and as needed (do a test shot. On a Nikon, and when shooting a bright white dress, you may need it, up (+). At other times, down (-) may be called for).

A common technique for finding a good fill-flash starting point when using an on-camera TTL flash in more predictable light (as on the day I shot the picture above):

  • M exposure mode (manual mode).
  • Select your camera’s flash synch speed (if unsure, select 1/200th second).
  • Set Aperture (Av) until your meter reads -2 stops.
  • Aim at your subject and check that aperture is now somewhere around f/5.6. If not, change ISO until it is.
  • Flash compensation: if and as needed (do a test shot. On a Nikon, and when shooting a bright white dress, you may need it, up (+). At other times, down (-) may be called for)

The shot above was made in manual mode at 1/200th second at f/5.6, ISO 400.

Joseph Marranca and I will be teaching Advanced Flash as part of the “Advanced Creative Lighting” workshop we teach on August 13 in Millgrove, Ontario . Click here to learn more.


The making of a group shot

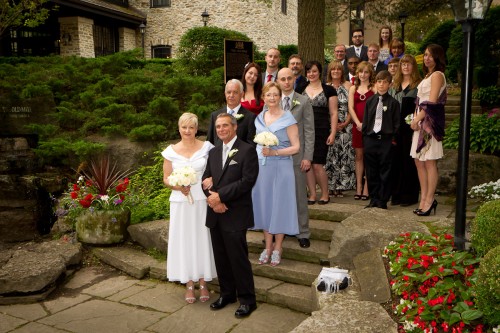
I shot this at a wedding the other day: a group shot featuring bride and groom Pat and Jim, relatives , maid of honour, and best man.
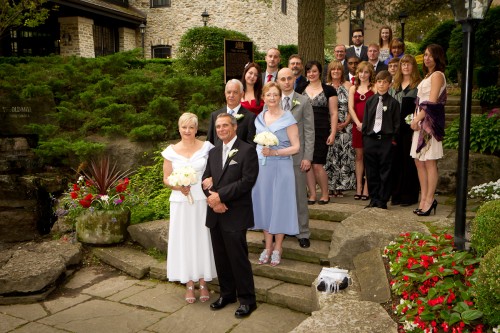
Pat and Jim Wedding (Photo: Michael Willems)

How did I shoot this? I thought it might be good to go through the process that went into creating a shot like this.

Setting

The day was ideal for photography (bright overcast). So I had lots of options at The Old Mill in Toronto. But therein lies a problem: which one to choose, out of hundreds? So I decided to look for…

  • Background: A nice, full, non-distracting and darker background.
  • Context: the background should say something about the event: it supports the image so it should provide context (notice the venue’s sign).
  • Colour: I want some colour. The flowers provided this.
  • Space: A space large enough to pose over 20 people.
  • 3-D: Preferably some various levels (e.g. steps).

Steps give you an automatically full background, so these steps were the chosen spot.  So far. so easy.

Arranging

I would often do a sit-stand-lean arrangement, but in this case, all standing is OK.  Arranging 21 people takes time and by the time you tell the last person what to do, the first person has turned around again. So speed is of the essence. I arranged bride and groom, best man and maid of honour, and from there on much of the rest fell in place and only minor adjustments were needed.

I then arranged them so I could see them all. This takes a fair amount of doing, because people move – my experience shooting sports clubs came in handy.

Now I told the group to relax – I would be doing test shots, so no worries yet – and to all breathe in deeply, and then all to breathe out at once. I demonstrated this. Silly, and silly is good, it relaxes people.I avoid saying “Smiiiiile…!” – it brings out the worst fake smiles in people, especially in men.

Then I watch body language and go, “checklist-fashion” through everyone, to see any awkwardness. If I see any, I ask them to adjust.

Technical

I used a slightly wide angle lens on my Canon 1D Mk4 body – the 24-70 f/2.8 set to 33mm effective focal length, meaning not very wide (distortion) but wide enough, giving me the following benefits:

  1. The ability to get it all in.
  2. Extended depth of field.
  3. Tolerance of slow shutter speeds.

I first of all exposed for the background. I wanted it to look nice and dark. This emphasises the people, and it also allows background colours to become saturated.

So I set my camera to:

  • f/7.1 (which gave me enough depth of field, which I needed with 8 rows of people!);
  • 1/80th second, which is fast enough for a 35mm lens hand held;
  • Getting a  dark background (between -1 and -2 on the light meter) now necessitated 800 ISO, which is great on today’s cameras. This also enabled the flash to reach far.

I then used my on-camera 580EX II flash to light the people.

On-camera, from the speedlighter? Yes, outside you can get away with it. If I had had more or more annoying shadow I would have used my Honl Photo softbox.

And there you have it. Simple shot, took a minute to make, and with little or no post work.


Flash types

A quick note for you all –  a reminder since I have said this before.

It is important, when using flash, to distinguish between the types of flash and their use. As follows:

[1] Flash is the only light.

Example: studio.

  1. You want ambient light to be invisible
  2. So you use low ISO, small aperture and fast shutter
  3. You probably use manual flash and a light meter.
  4. E.g. in a studio you may use 100 ISO, f/8, 1/125th second

[2] Flash is the main light, but there is bright ambient light also.

Example: person in an office with a window behind him with a bright outsoors scene

  1. You want ambient light to look great – that may mean dimming it
  2. So you use manual mode (or exposure compensation, minus) to turn down the background until you are happy.
  3. Then, and only then, do you worry about (and turn on) the flash.

[3] Flash is the main light, but there is dark ambient light you’d like in the image

Example: A party indoors.

  1. You want ambient light to look great – meaning it should show!
  2. So you use high ISO, open aperture and slow shutter
  3. You probably use TTL flash
  4. Example: indoors party: 400-800 ISO, 1/30th second, f/4

[4] Flash is merely fill light

Example: Outdoors, a backlit subject

  1. You want the flash to not be too bright
  2. So you turn it down by using flash compensation, minus. Start at -1 to -2 stops.


A methodical approach works: once you realize what situation you are shooting, the rest follows simply and quickly. Failure to do this leads to much confusion. If you don’t know where you are going, you will not get there (paraphrasing Yogi Berra).


Edge lighting tip

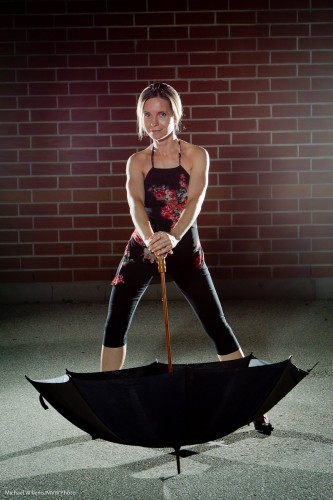
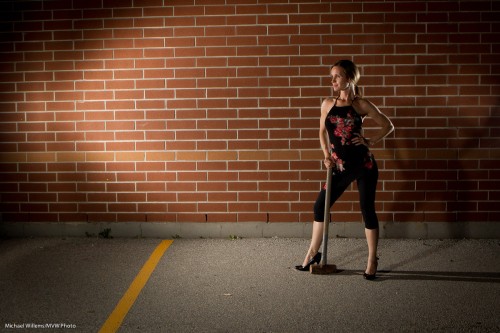
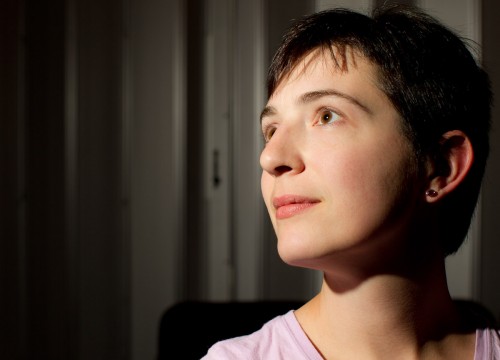
When you are using rim lighting, like in this shot of this evening…:

Mel McBride (Photo: Michael Willems)

Then I would give you a few tips:

  1. Do. It’s good. Look how well it shows off round shapes like arms and legs. It makes them look round, rather than flat, which is what they would look like if you lit them just from the camera’s direction.
  2. Light from behind – 45 degrees behind the subject aimed forward.
  3. Fill from the front. Watch for shadows behind your subject.
  4. Watch for shadows in general. You may like them. Or you may like only one of them. Or none. All good, as long as you watch for them, and feather the lights you do not want throwing a shadow, or use snoots or grids or gobos – or soften them in the case of the front fill light (I used a Honl Traveller 8 softbox).
  5. A little flare, as in this shot, can be okay. Don’t go crazy, but do not be afraid. I often include lights and flare: love them when done well.
  6. If you want flared lights to show like stars, use a small aperture, like f/8 or f/11.
  7. If you are using TTL, which is fine, then do use manual at least for the rim lights. Using TTL for those makes little sense, as this light is very hard indeed to measure in camera.
  8. And for manual flash, know how light works. The Inverse Square Law is very important. To get half the light, increase the flash-subject distance by 1.4 (the square root of two). That sort of thing. Yes, math.

Oh and when you have a wall, you can use it, of course. Like here, wher I have made oneof the rim lights into the main light:

Controlling light is fun, and is remarkably easy. And Photography is all about the light.

(Joseph Marranca and I are teaching another Creative Lighting course, this time in Fort Erie, just over an hour from Oakville, on July 23. Stay tuned or drop me a line!)


Chipping away…

Let us continue to chip away at learning flash.

Today, more background information. A quick note now on how Canon and Nikon, the two brand leaders, handle exposure differently. (Others follow either Canon or Nikon).

What shutter speeds are allowed by the camera when you are using a flash ?

Shutter speeds can be restricted by the camera for two reasons:

  • To protect the user from shaky pics, a slow speed is sometimes denied.
  • To prevent bad flash photos, a fast shutter speed is also sometimes denied.

But Canon and Nikon do this differently – and it helps to know how your camera works. So here goes.

SLOW SHUTTER SPEED RESTRICTIONS:

Shutter speed mode:

  • Canon: None. You set what you like.
  • Nikon: None. You set what you like.

Manual Mode:

  • Canon: None. You set what you like.
  • Nikon: None. You set what you like.

Program Mode:

  • Canon: no speeds slower than 1/60th second will be used
  • Nikon: no speeds slower than 1/60th second (adjustable on some cameras) will be used. Except if “Slow Flash” is selected: then, any speed including very slow ones can be chosen by the camera.

Aperture Mode:

  • Any speed including very slow ones can be chosen by the camera.
  • Nikon: no speeds slower than 1/60th second (adjustable on some cameras) will be used. Except if “Slow Flash” is selected: then, any speed including very slow ones can be chosen by the camera.

So there you have it – markedly different behaviour by both cameras.

Clearly, from the above you can see that:

On Canon:

  • Program mode is not ideal when using indoors flash (you might want slower shutter speeds to allow lighter backgrounds)!
  • Aperture mode is not ideal when using indoors flash (you might get a 1-second shutter if the background is dark, which you do not want!)

On Nikon:

  • Program mode or Aperture mode without “slow flash” enabled are not ideal when using indoors flash (you might want slower shutter speeds to allow lighter backgrounds)!
  • Program mode or Aperture mode with “slow flash” enabled are not ideal when using indoors flash (you might get a 1-second shutter if the background is dark, which you do not want!)

Which is why I use manual when using flash indoors, when ambient light is low.


FAST SHUTTER SPEED RESTRICTIONS:

  • Canon: when the flash is detected, no speed faster than the flash sync speed (typically 1/200th second) is allowed, except if “High-Speed Flash” is enabled on the flash. This, however, drastically reduces the maximum available flash range.
  • Nikon: when the flash is detected, no speed faster than the flash sync speed (typically 1/250th second) is allowed, except if “Auto FP Flash” is enabled in the camera’s flash menu. This, however, drastically reduces the maximum available flash range.


All these Flash articles are excerpts from my signature four hour “Advanced Flash” course, in which you learn all these concepts in a hands-on, interactive session.


One Thousand

This is my one thousandth post here in speedlighter.ca!

Tonight, I and my second shooter shot a wedding. We came back with nice shots like this:

And this next one, inspired by Mel. Remember, as I have said here many times, an out-of-focus background can make the viewer look and work out what is happening – and this makes the picture better. “Telling the story by not spelling it out“:

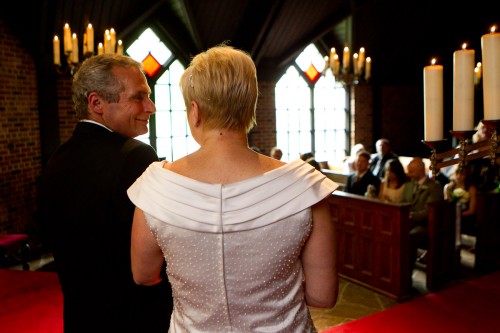
But the chapel.. oh boy.  It was dark. And I mean… dark. As in “1600 ISO, f/2.0, 1/30th second” kind of dark. Except the couple had a pair of very bright lights shining straight down onto their heads from the ceiling. Oh, and yes, bright light from one side’s windows. A very challenging environment – but we still came back with nice shots:

More about this in future days. Let’s just say for now that:

  1. You should not be afraid to use a high enough ISO.
  2. You ought to try several options. There’s seldom “just one”.
  3. Slow shutter is needed? The use it. even if some images may not be sharp.
  4. Use a fast lens. Faster.
  5. Flash not an option? Then use aperture, ISO and shutter to get there.

And now off to sleep for a few hours before going back to another shoot. And tomorrow, 1001 – leaving me feeling a little like Scheherazade.


Take your flash off camera

The best way to improve your flash images is to take your flash off the camera.

As I did here in last night’s Mastering Flash class:

Student, lit with flash (Photo: Michael Willems)

You see, that is direct flash – unmodified. Off-camera, using remote TTL (or I could have used a cable).

So yes, it can easily be done – as long as the flash light axis is not the same as your lens axis. Straight into a woman’s face from above is light we love – but crucially, straight into her face does not mean straight from your camera’s perspective!

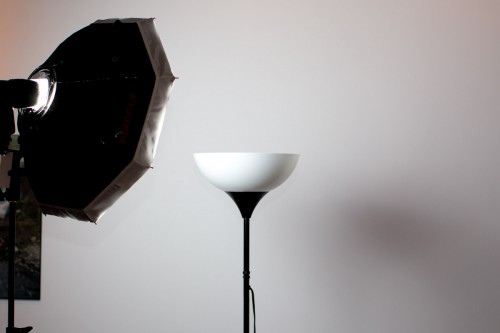
Now, do not get me wrong: modified is great. Like with a small softbox:

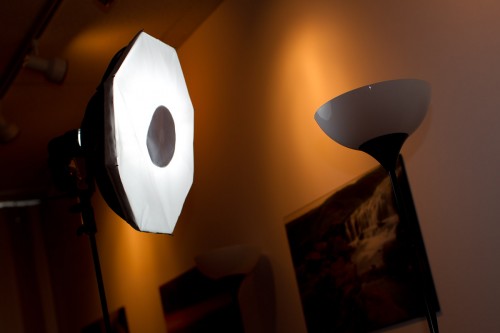
Which from the front looks like this (note the dark circle that prevents light spots):

Which, when combined with a second flash camera right to add edge/hair light, gets me this, of another kind student volunteer in last night’s class:

Student, lit with flash (Photo: Michael Willems)

Simple, no? Just remember:

  • Axis of light <> axis of lens.
  • TTL is fine, if you know how it works.
  • Wireless TTL works very well indeed indoors (and with clever management can be used outdoors also).
  • Keeping it simple often works well.

Simple. With just one or two flashes and a modern cameera you can produce excellent work. (Once you know how it all works, and that is we come in!)


Simple outdoors portraits recipe

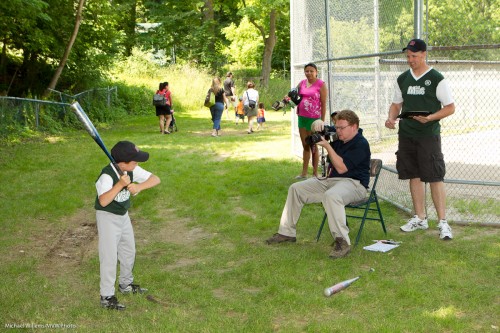
When I do outdoor portraits, I often use big flashes, softboxes, light stands, and umbrellas. But sometimes, like today when I was shooting baseball kid portraits all day, I use just a camera, a lens and a simple on-camera flash.

Unmodified, on-camera flash? Surely that is anathema to what a pro does?

Nope – not necessarily. When conditions are right, you can do this, and get well-lit portraits.

The following example, which shows this, has a less-than-ideal background, but I was just testing my light. Here’s photographer Ray:

To shoot a portrait like this (or rather, to shoot 500-odd of them, as I did today), I do the following if the light is changeable.

First, equipment and setting:

  1. If at all possible, find a spot where your subject is out of direct sunlight. Direct sunlight is harsh and horrible. If sunlight is unavoidable, at least turn your subject away from it.
  2. Find a dark, green background (i.e. like above, but without the fence – which you can be assured I did for today’s real shots!).
  3. Use a camera with a lens in the range of 50-150mm.
  4. Use an on-camera external flash, aimed straight at the subject. Since I am mixing with available light, this is allowed.
  5. Make sure I shoot from the subject’s head’s level (I avoid shooting down or up too much).
  6. I try to ensure the flash light the subject’s face. I avoid shadows (from, say, baseball bats, or from hats). I watch carefully for glasses causing reflections.

Now to the camera settings. I now usually:

  1. Set my white balance to “flash”.
  2. Set my ISO to 200 (as a starting point).
  3. Set my camera to shutter-speed priority mode.
  4. Select 1/200th second
  5. Set my exposure compensation to -1 stop, as a starting point.
  6. Now I aim and focus. I check the aperture chosen by the camera. I want something around f/5.0-f/6.3. If I get too small a number, say below f/4.0, then I lower the shutter speed – all the way to 1/60th second if I have to – and if that is not enough, I increase the ISO. If I get too large a number, say above f/7.0, I increase the shutter to the maximum sync speed (1/200th-1/250th second on most cameras) and then decrease the ISO if I can.

Now take a test shot and see. Adjust as needed. I regularly keep checking my aperture. And if the background gets too bright or dark: well, exposure compensation will adjust the background’s brightness.

Notes:

  • On a Nikon camera, be careful: exposure compensation will also alter your flash brightness (for some odd reason only known to Nikon engineers), so unless you want this, you may need to apply opposite flash compensation (e.g. when using -1 exposure compensation to lower the background’s brightness, you may want+1 flash compensation to keep the flash the same).
  • On a Nikon, also ensure you know whether you have “TTL” or “TTL-BL” selected on the back of your flash.
  • On any camera, since you are using TTL, i.e. the auto flash mode, use flash compensation as needed. Darker subject: you may need to go down. Lighter subject: go up. See yesterday’s post!

Why Shutter-Speed priority (S/Tv)?

Because outdoors light can change drastically from moment to moment. Indeed, I prefer to use manual, if light is consistent. In that case instead of exposure compensation. I use the meter and set my ISO, shutter and aperture such that the meter indicates -1 stop, then test and adjust as needed.

Here’s Ray doing what I am talking about here:

So that’s a lot of stuff to watch!

Yes, it’s a lot of work, and it requires a good understanding of exposure and what regulates it (I know some good courses – just sayin’).

And I see a lot of parents take their children’s snaps. Invariably, they fail to use their flash, which leads to poorly lit photos. Even before you do formal training, you now know better – now go practice.


Add flash to darken your photo.

Yes, you read that right: add flash to darken your photo.

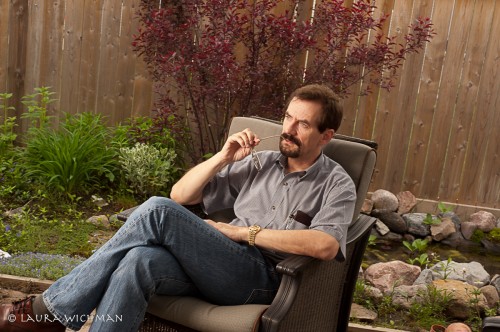
Take this image, shot as a demo for me by photographer Laura Wichman the other day:

Well exposed, well lit, all good.

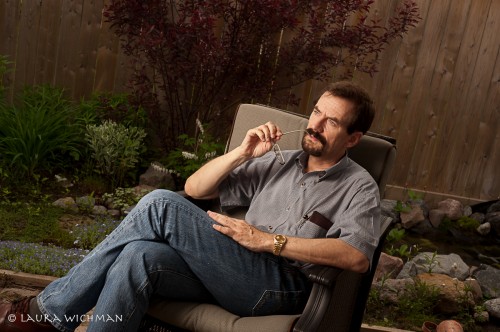
But you have heard me say many times: “bright pixels are sharp pixels”. So how about if we make this more dramatic?

The use of flash allows us to decrease the ambient exposure (first try faster shutter speed; when you get to your sync speed, e.g. 1/200th second, then carry on and use a lower ISO setting, and finally go to a a higher “f-number”). The background now gets darker:

But because a powerful flash (Bowens, with Travel Pak battery pack, equipped with a softbox) lights me, my exposure does not need to be affected. I can remain as bright, by turning up the flash (needed only if ISO or aperture are changed).

So now we have made the background darker and hence made me the “bright pixels). Using flash to darken most of your picture, in other words.

News Flash: Photo Life Magazine June/July issue is out: in it, you will see my article “Flash: 10 Problems, 20 Solutions”. Go get your copy today, particularly if you shoot flash at events.