Portrait tip

A quick tip or two – a few things to keep in mind when shooting studio portraits.

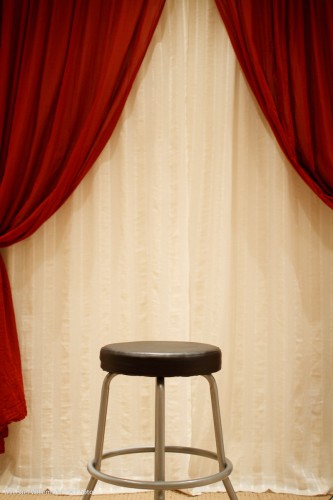
Like this one of my assistant Matt at this morning’s location shoot (where Matt kindly stood in for the subjects prior to their arrival, while we measured and adjusted the lights):

When shooting a studio portrait like this, there are a few things to keep in mind. These include:

  • Be sure you get a catch light in the eyes (usually from your main light)
  • If your subject wears glasses, do not turn their head too much.
  • Also, make sure the glasses do not reflect light. If they do, move your light source or ask the subject to aim their head very slightly down.
  • Ask your subject to move their head a little each time, and thus take various shots. I usually try to get at last four images – even the same look when shot seconds apart will lead to a different picture each time.
  • Ensure the ties, collars, etc, are well adjusted. You cannot do it over when you look at the pictures at home.

That was the quick tip of the day. Quick five tips, really.

Classic Portraits

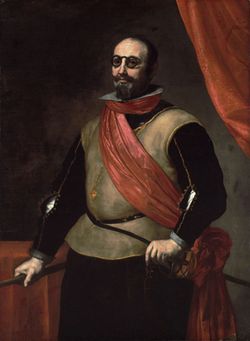
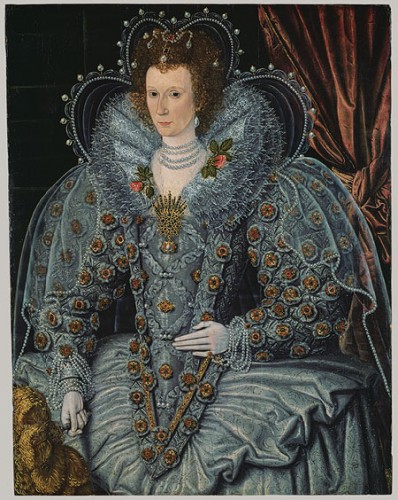
Here’s one tip for classic portraits: you can use classic backgrounds.

In the 17th century, that meant an elegant drape behind the subject, to provide:

  1. Nice texture;
  2. Elegance;
  3. A sign of wealth and comfort;
  4. A nice curve.

Somewhat like this:

1630 - portrait

You do wonder how people walked around in those Halloween costumes. But anyway, back to backdrops. Why not do that today?

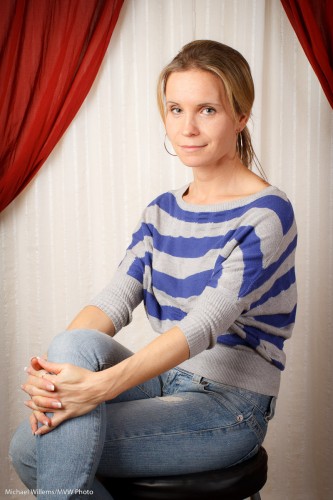
My student Melony built this in her home studio.

Home Studio Backdrop System

Against a wall, two curtain rods: the back one with white curtain hanging from it, and the front one with red curtain. Both operable independently so you can open or close either or both. Easy, and it is not in the way of normal use of the room.

And with proper, light and white balance, this results in portraits like this:

Student Melony in home studio

That kind of setting is very suitable for family portraits. Even in 2010. Many times, I much prefer this to a standard white or black backdrop, or to a muslin.

I might even say especially in 2010. Tip: go to an art museum if you want to see great portraits.

How did we light that portrait?

  1. A softbox to camera left
  2. A fill light behind me to camera right

Questions?

  • Why a softbox? Because it does not spill light everywhere, like an umbrella. Umbrella = safe; softbox = more controllable, and hence more for art.
  • Why the fill light? Because without it, even in a small studio, the non-lit side of your subject can get a bit dark.
  • And if the light is too bright even at the lowest setting? Move it back.
  • Could we have used a reflector instead of a fill light? Absolutely.
  • But will you sometimes want a roll of paper for a neutral, simple background? Of course. Having a drape does not mean you have to use it every time.
  • What kind of lens were you using? A prime (fixed) 35mm lens on a crop camera (the Canon 7D). That means effectively a 50mm lens, which is perfect for half body portraits like this.

So, a classic portrait does not have to be complicated: a few simple tools and you have great options.

Home Studio Needs

A reader’s spouse just asked me:

My spouse had a few photography lessons with you and I am considering getting him some equipment to begin setting up a basic photography studio in our home.  Since it’s a Christmas gift, I didn’t want to ask him or her directly what he or she would need and was hoping you could give me some advice regarding the brands and equipment he or she  would need.

Sure, I would be delighted to help. Here’s what I think you need for a home studio.

Always:

  1. A camera, of course.
  2. A suitable lens (maybe a 24-70, or a prime 50mm lens. For available light it needs to be a fast lens, like an f/1.8; for studio, the speed does not matter. For a big studio, get a 70-200 – but at home you are unlikely to have enough space).
  3. Some kind of background. For simple portraits, this can be a white wall. Or an air mattress blown up as a nice patterned background. Or anything else improvised.

Then, if you want a proper background:

  1. A stand kit – these are very affordable at Henry’s: they consist of two stands and  three crossbars. all in one case. Mine is a Cameron kit and I recall I paid somewhere between $100 and $200 for it.
  2. A roll of paper to roll down from the stand kit (I like grey, since you can make it any colour you like). Wider is better but you need space, plus the ability to transport it home, so you may want to choose narrow.
  3. Alternately, you can use a curtain (or two), hung down from a curtain-rod you attach to the wall just below the ceiling.

For available light portraits:

  1. That 50mm prime lens I mentioned. Or a 24 or 35mm prime lens. Now the lens needs to be fast (have a low F-number, like 2.8 or lower).
  2. A reflector (it can be one of those that folds up when not in use).
  3. A stand for the reflector, so you do not have to hold it.
  4. A window that faces away from the sun (e.g. a north-facing window).

For studio portraits:

  1. A backdrop, again, as above.
  2. A main light. Like a Bowens light (avoid Opus, but pretty much all others are great. For a home studio 200 Ws may be enough, though normally I would try to go with 400 Ws just in case.).
  3. These lights come with stands, usually. If not, you need to add a stand.
  4. A reflector, as above.
  5. A way to connect a flash cable to your camera. The light should come with a cable, and if the camera has a PC-type flash connector output, you are set. If not, a small converter from hotshot to flash connector is all you need to add.

That is the minimum. But to do it well, you may want some of the following added:

  1. Preferably, a second light.  Fortunately, many lights come in kits of two, like the excellent Bowens Gemini kits.
  2. A light meter (this needs to be a flash-meter).
  3. Two Pocketwizards to fire a flash (any other flashes can be slave-cell followers).
  4. One or two additional lights. These can even be speedlights, as long as you can fire them. Four lioghts is ideal, but not necessary of course.
  5. Modifiers – like grids, snoots and gels. If you use speedlites (small flashes) you can keep this simple: use the  Honl Photo range of small flash modifiers. That’s what I do.
  6. A tripod.

Here are two previous posts that may be helpful:

Does this help at all? I bet many of you, with Christmas just a month away, will be thinking similar thoughts.

Softly softly.

Much of what we do as photographers is to soften light. Meaning make the shadow less harsh.

You do that by making the area that emits the light larger with respect to the subject.

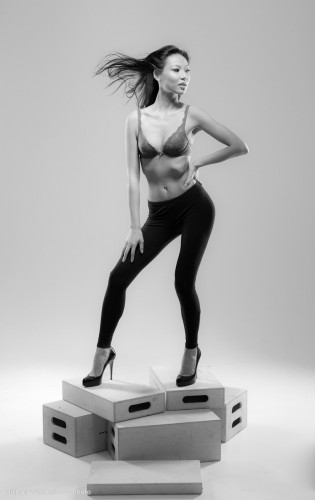
Look at this recent studio image:

Model on apple crates

Model on apple crates

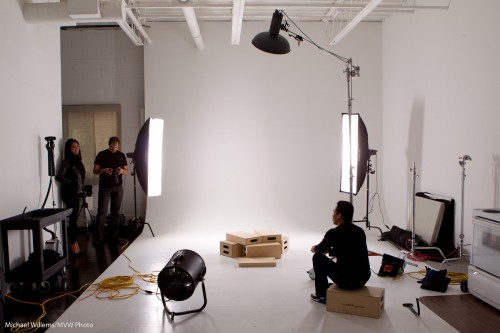
For a picture like this, straight out of the camera, you would (and we did) use studio lights like this:

Studio with lights

Studio with lights

A beauty disk and two strips. All designed to direct light, but especially to make the light source larger.

(Do you see how the two strip lights also throw a wonderful lit vignette onto the background?)

Joseph and I teach this kind of lighting (see www.cameratraining.ca).

I am also teaching for the next three days: pretty much all day Friday, Saturday and Sunday at the Henry’s Digital Imaging Show at the International Centre. Come see the show: worth every minute!

Colour has to be real

Right?

Um, no, of course not: colour is a tool for you to use in your artistic endeavors.

And colour can be anything you like.

A few nights ago, I though I would see how long it would take me to recreate a lighting setup that my friend Dave Honl (yes, he of the excellent Honl Photo modifiers) did recently. So I looked at his shot and put it together the same way he shot it, in exactly 20 minutes:
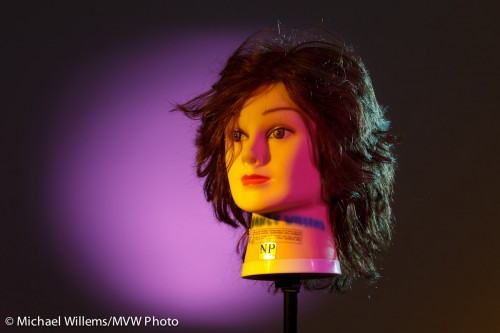
Fun with gels, Photo Michael Willems

Fun with gels

That is including:

  • Setting up four light stands.
  • Connecting four flashes (3x 430EX, 1x 580EX) to Pocketwizards using Flashzebra cables.
  • Mounting these on the light stands using ball heads etc.
  • Equipping the key light with a 1/4″ grid and an Egg Yolk Yellow gel.
  • Equipping the fill light with a 1/4″ grid and a Follies Pink gel.
  • Equipping the hair light with a small snoot and a Steel Green gel.
  • Equipping the background light with a long snoot and a Rose Purple gel.
  • Setting the power levels correctly (by trial and error, combined with histogram: key light = 1/4 power, fill=1/8, hair=1/8, background=1/16).
  • Setting the camera up correctly (I used the 7D and set it to manual, 100ISO, 1/125th, f/6.3).

Huh? Egg Yolk Yellow, a crazy bright colour, to light the face? Are we crazy?

No, just having fun. Yes, of course Dave could have made his shot using no colour. Here’s what the same shot looks like without the gels. (Of course I switched the camera to an aperture one stop tighter, namely f/9, to compensate for the extra light once I removed the gels):
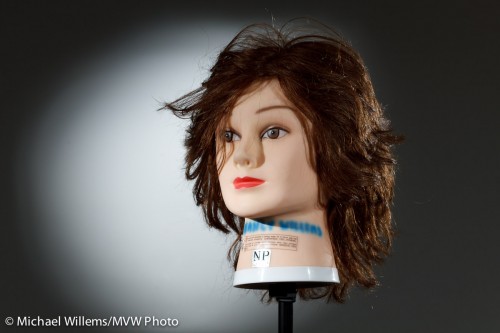
Grids and snoots, photo Michael Willems

Grids and snoots

Yeah, nice, and appropriate for a corporate head shot. But compared to the previous, it is kinda boring, no? So next time you shoot someone, unless they are a law firm executive, you might have fun and try some colour. You don’t need to go crazy and use four colours, but a splash here and there can really help your picture come alive.

By the way, what was the colour of the backdrop?

White.

Remember the following equation:

White – light = black

Similarly, in practice, black + enough light = white.

And finally, a real person: my son Daniel (“sigh, not again, Dad”):
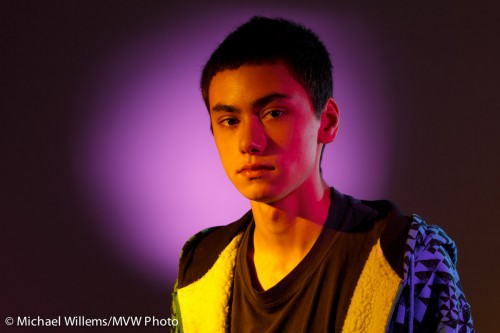
Daniel, photo Michael Willems

Daniel in colour

But here’s the thing. After seeing it, he grinned and said “Rad.”. That‘s a first!


Studio tips

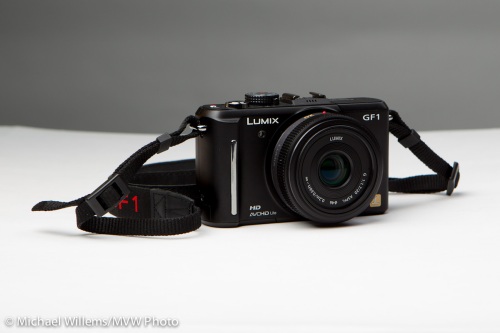
Two studio/product lighting tips for you, prompted by me shooting a few product shots just now for upcoming reviews. Shots like this:

Panasonic GF1, photo Michael Willems

Panasonic GF1, photo Michael Willems

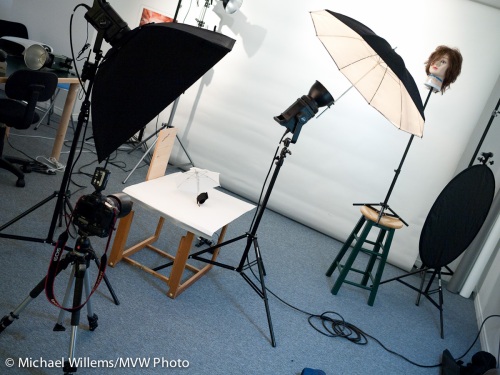
That was taken here:

Product Photo

Product Photo Setup

Which, when seen from behind, looks like this:

Product Setup

Product Setup, with background flash

So what are the tips?

First, avoid stray light, especially on your background. Saturation means “how little white light is mixed in”. A saturated colour has no white mixed in. An unsaturated colour has much white mixed in.

So use a grey backdrop if you can, or just use distance and directional light. Of course since I am using an umbrella and a softbox, much light will stray. So I keep the background far away (you all remember the inverse square law).

So, not this:

Product, too much background light

Product, too much background light

But more like this.

Product, less background light

Product, less background light

Then set your camera to what you like (f/9 and 1/125th for me), and get the background right.

First take a picture with no flash, to ensure that is black; then shoot while activating the background light only. Now get the flash power right: too little and you get a dark background; too much and it turns white. For me, I found this about right:

Product, only background light

Product, only background light

Then you get the rest right, i.e. set the right power for your main lights, and finally, shoot the shot.

Second tip: always use a brush or compressed air to clean your product. Otherwise, hours of photoshopping will result.

Studio Settings

A few words to get you started on studio portrait setups.

When you are shooting in a “studio” (i.e. controlled) setting, your camera settings might be, as I recently pointed:

  • Camera on Manual
  • 100 ISO
  • Auto ISO disabled
  • 1/125th sec
  • f/8
  • “Flash” white balance

Why as small as f/8?

Because lower aperture numbers than 5.6 can give you too selective a depth of field; and with most lenses, higher numbers than f/8 create diffraction, meaning slight blurriness. If you like sharp, stick to f/8 or perhaps f/5.6.

You also use f/8 or similar because studio lights are powerful. (Someone the other day searched for “how to shoot wide open with studio light” – often, the lights are so bright even on their lowest settings that the only way to do that  is to use a neutral density filter on your lens).

And lenses?

For portraits, I use 50-200mm. Smaller focal length (like 50-70 on a full frame camera) makes a woman’s body smaller (if I shoot at head height). Larger makes the nose smaller, but can make the body slightly bigger. I.e. larger gives you no distortion, but sometimes ever-so-slight distortion is exactly what you want. My favourites are:

  • 24-70 2.8L
  • 70-200 2.8L IS
  • 50mm f/1.4 (for use on the 7D, or for body shots on the 1D Mark IV or 1Ds Mark III)
  • 35mm f/1.4 (for environmental portraits)
  • 100 mm f/2.8 macro (yes, a macro lens is a great portrait lens)

But you can keep it simple! A Canon Digital Rebel or Nikon D90 with a 50mm f/1.8 lens, for instance, will allow you to take great razor-sharp studio portraits. It’s all about the light!

Tip of the day

When shooting a subject in a studio or studio-like setting, ensure that there is always music playing in the background. It sets the mood and avoids awkward silences as you grapple with your equipment and test settings and light.You will get a much more relaxed shoot.

Yesterday snap

Just one image from a portrait shoot of a very nice realtor, yesterday:

Lit with a Bowens key light in a softbox, an Opus fill light into an umbrella, an Opus hair/kick light with snoot, and for the background, a 430EX speedlite with Honl gel (fired through a Pocketwizard).

I like tilting realtors a little, for that contemporary dynamic look.

A few portrait pointers

Today, a few quick portrait pointers.

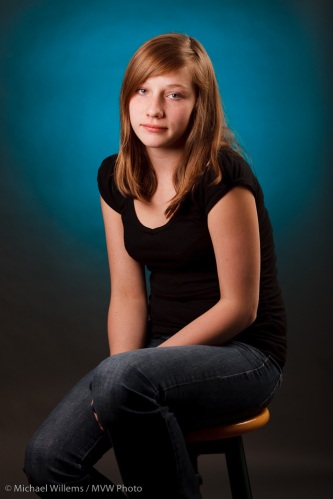
Here’s a picture from a very recent portrait shoot:

Why did I shoot this the way I did? What went into the decisions? I thought it might be good to share some of my thoughts.

  • I used a standard key/fill light arrangement, with the key light a small softbox aiming straight into the face, and the lower-powered fill light an umbrella-mounted flash on camera right.
  • I ensured the positioning of the key light gave me a catch light in the eyes.
  • I used a low-powered hair light in a snoot.
  • I selected a dark background (grey paper) so that I could emphasise the subject.
  • I used a background light with a Honl grid, so get that nice oval shaped light behind the girl.
  • I also used a Honl gel from the “Hollywood” and “Autumn” sets. I chose the blue-ish colour for its subtlety and for the way it so nicely contrasts with the girl’s hair and skin colour.
  • I took many pictures with the girl in many poses – mainly her own natural poses. Here, I particularly liked the S-curve in the pose and the triangular shapes in her legs. “S”-curves and triangles are good!
  • Finally, the bit of the stool that is visible and lit provided balance with the other yellow colours.

Every shoot is different, but here you see some of the decisions that can go into a portrait.