Grueling GUIs

I always marvel at the lack of sense when engineers (or perhaps marketing departments?) design numbingly dumb user interfaces. All through our lives.

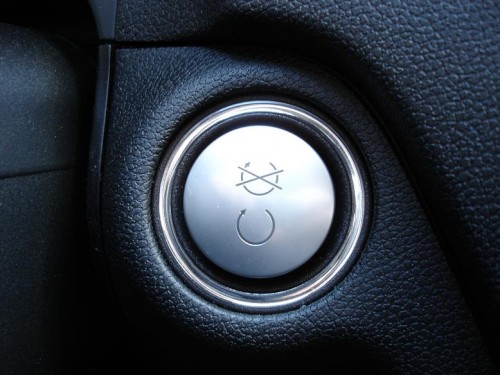
Start/Stop or Stop/Start? Babylonian confusion reigns

Things like:

  • A “no right turn on red” sign used to say “no right turn on red”. Now it is a picture with a traffic light showing red, and an arrow underneath that, and a line through the arrow. Such pictograms are not optimal in conveying meaning: they  make you waste brain cycles on working out what they mean. If you mean “no right turn on red”, just say that, not code that the reader has to decipher.
  • The keyless on/off switch in the American Mercedes Benz M-class says “ENGINE START / ENGINE STOP”. On the Canadian version, pictured above, alas, we get the pictogram combo in the picture above: an almost complete circular arrow above, and a similar almost complete circular arrow with a line or two through it, below. Or the other way around if you insert the key fob the wrong way – there’s no guide as to how it goes. Huh? (Personally, marketers, I could not care less about Quebec: I do not want to waste my time working out what these things mean.)
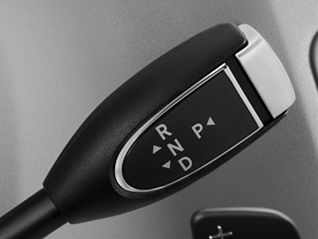
  • And Mercedes’s gear lever – also so confusing I am amazed it has not yet led to lawsuits. See below.
  • And the button for closing the rear lid has two buttons – one of which says STOP, followed by a pictogram. Huh? I have never not hesitated before closing the lid. And that is dumb. I have these cycles only once in a lifetime, guys, don’t make me waste them.
  • Same for the front and rear window heater buttons we all have in our cars. Anyone else here never know whether the square one is front, or whether the slightly trapezoid symbol means front? So help me God, I have been driving over 30 years and still do not (and will never) know. Tell me FRONT HEAT and REAR HEAT. If aircraft had these stupid icon symbols, do you have any idea how many terrible crashes we would see every week?

In aircraft, sense often prevailed. In WW2, when inexperienced pilots flew, the engineers who made aircraft changed the flap lever to look like a flap, and the gear lever to look like a wheel. Now that is clever.

To make sense, that "P" should be on the left!

And why this ramble about dumb interfaces? Because cameras have them too.

  • Nikon menus with tabs on the left: no-one gets that, Nikon. And worse – more functions than screen space, so there is a scroll bar. Only no-one knows it’s a scroll bar. The local Nikon rep once said “no-one has ever told me that”. Well, I have trained 10,000 more people than Mr Nikon there, and let me tell you, I am right and he is wrong. That interface is dumb.
  • Nikon and scales that are the wrong way around (+ 0 – rather than the usual – 0 +).
  • Sony and its incredibly poorly designed menus where one tab turns into three tabs when you scroll right.
  • Canon’s terminology – “AI Servo” (really. “AI Servo”. We discuss artificial intelligence and servo motors in consumer devices, in a world where most people cannot multiply 1,000 x 1,000) and “One shot”, when you mean “Continuous focusing” and “Lock focusing”. Who on earth designed this jargon!
  • Canon and Nikon and the interfaces on the flashes – I have been operating SB-x00 and 430/580 EX flashes for many years and the interfaces with all the buttons that do multiple things depending on the order you press them in still make me tut-tut-tut.
  • Fuji with dials that all turn the wrong way… anticlockwise for higher ISO and exposure, and clockwise for lower ISO and exposure.

The list goes on, and on. So if you sometimes think you must be dumb for not getting it: you are not dumb. If the system seems confusing, that is because it is confusing. A truism, perhaps, but it’s true. (* Yes, that was humour).

The sad thing is that this poor design is avoidable. A few focus groups should do it. Or at least hiring a competent UI designer. Cancel a few corporate lunches and you get your money back.

I await the day that Apple designs a camera. Of course it will only be able to be operated in Apple’s prescribed manner, and you will need annual licenses to use it – but at least it will be logical.

What other poor design have you seen in cameras? And how would you improve it?


Lightroom tip: Recovery

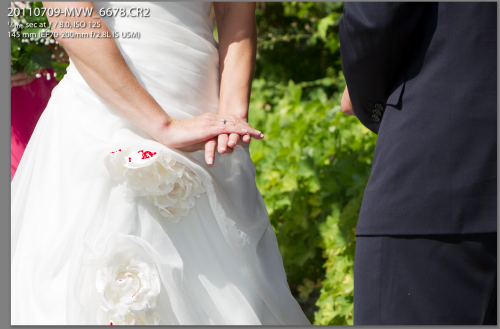
Yesterday I shot a wedding in broad hard daylight. That prompts me to write about a convenient Adobe Lightroom control you will need: recovery. Here’s how you use it.

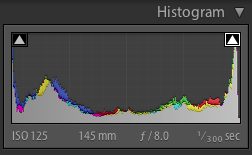
Look at the image. Then, in Lightroom’s DEVELOP module, turn on the highlights warning (on the histogram, click the right little arrow):

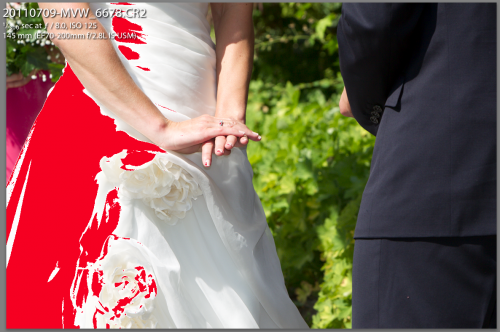
You now see the overexposed areas where there will be total loss of detail:

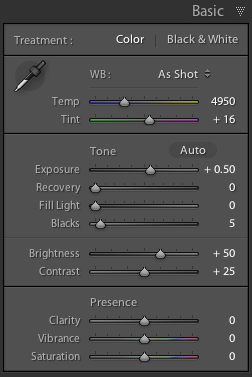
This is how the “basic” edit area looks:

Assuming you were sensibly shooting RAW, you can fix this.

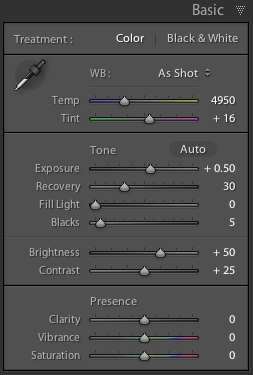
In that “basic” area, drag the “recovery” slider to the right until the red almost disappears:

Now you see this:

And that means there is now detail in the dress. In the immortal words of George W. Bush: “Mission accomplished”.

Discussion:

Q: Why all the way to the right? A: Since the dress is pure white, we want its brightest bits to show extremely, totally, white. Hence the adjustment until the dress is only just showing some highlights.

Q: Could we have done this in camera? A: Yes, by decreasing exposure, but then we would have lost all detail in the dark areas. By slightly overexposing the very brightest areas and then fixing this, we are using the full dynamic range available to use – with the camera in RAW mode.

Q: Could we have done this by just dragging down exposure and increasing fill? A: Yes, perhaps – but in pictures where a small area is blown out totally – sunny day pics – the “recovery” slider is often the quickest, most convenient way to solve these issues. And speed matters when you have 300 images to finish!

Q: Doesn’t a high-end camera provide for this? Some kind of a highlights mode? A: Some do – but only if you shoot JPG, which kind of defeats the purpose of it all.


Solution to many problems: ISO

As you know, an exposure is determined by three factors:

  1. Aperture: the larger (ie the smaller the f-number), the more light gets in.
  2. Shutter: The slower the shutter, the more light gets in.
  3. ISO: the higher the ISO, the less light is needed.

So from this “triangle”, the following follows: if you want higher shutter speeds, either lower the f-number or increase the ISO.

And increasingly, the latter is an option.

In the last day or two, I shot the following as JPG images (imagine, me shooting JPGs) in the X100 camera. View them at original size (click, then click on the “full size” link (where it says “Full  Size = 1200×800”), then view that on your Mac or PC at full size).

Now realize, all I did to these is crop a little in a few cases, and resize for these web images – other than that I did not touch them. They were shot as JPG files with standard settings: no extra noise reduction or anything else. Just standard.

First… 800 ISO used to be high. Now it gives you this on a point-and-shoot. Admittedly, the Fuji X100 point and shoot:

X100: Flower at 800 ISO (Photo: Michael Willems)

Indistinguishable from a 100 ISO image of just a few years ago!

320o ISO used to be impossible. Now look at this:

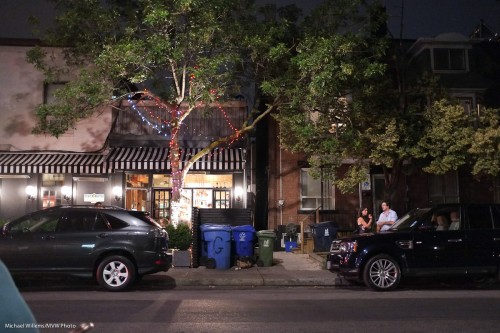
Little Italy, 9 July (3200 ISO X100 photo: Michael Willems)

(1/15th sec at f/2, 3200 ISO).

Little Italy (X100 Photo: Michael Willems)

(1/20th sec at f/2, 3200 ISO).

Little Italy, 9 July (3200 ISO X100 photo: Michael Willems)

(1/15th sec at f/2, 3200 ISO).

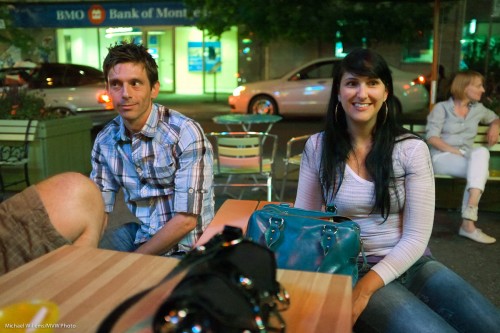
Couple in Little Italy, 9 July (3200 ISO X100 photo: Michael Willems)

(1/80th sec at f/2, 3200 ISO).

Wow, what quality! Surprised to see the pic, the couple remarked “but I did not see you flash”. Yes, that is a big benefit of high ISOs.

And let’s take it up one more notch. Here’s 6400 ISO:

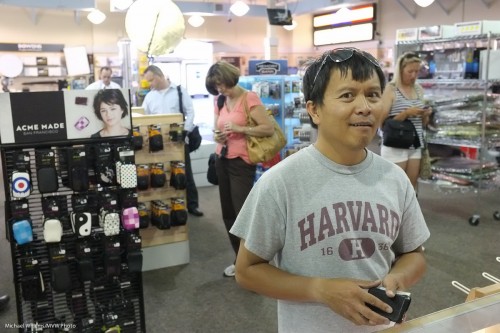
3200 ISO: X100 owner in Mississauga (Photo: Michael Willems)

Wow. That is 6400 ISO? Yes it is. Can I make an 8×10 print from that? You bet, and more.

So what does this mean?

It means that I can now shoot at 3200 and above wherein the past 800 was the absolute limit. That is 2-3 stops of extra light.

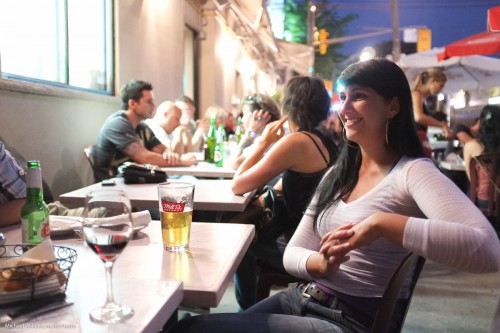
This in turn means that with a fast moderate wide angle lens I can now shoot pretty much in the dark: an outdoors restaurant, where amazingly, the camera actually sees more than I do, and it does it with great quality.

So, with the right equipment you no longer need to be afraid to shoot at high ISO values. And that means hand-held night photography now becomes a real option. I urge you to take advantage of that. See how far your camera can go and use it.


Tip of the day

Tip of the day: Do not use lens caps when using your camera.


Lens caps are designed to protect your lens when it is in storage. They are not designed for use when you are using the camera. For obvious reasons: you want to see through your camera.

Amateur photographers think you “must” use a lens cap. Whatever indoctrination has driven them to this I do not know, but it does make me smile when I see people remove the lens for every shot, and then immediately put it back. A pro never does this: the moment the lens goes on the camera, the lens cap goes in the bag. Liberate yourself, and do the same.

If you feel like protecting your lens, use a clear filter (that too is something the pros seldom do, but there are times when it is useful, so I will get back to this in a later post).

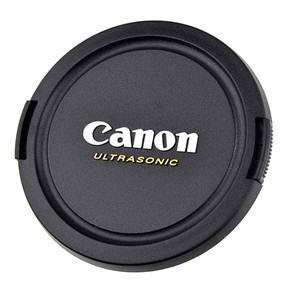
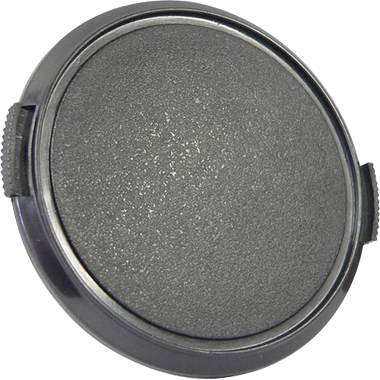
If you feel you must use a lens cap, then at l;east do yourself a favour and use a generic lens cap:

These generic lens caps have two advantages:

  1. They do not cost $40 to replace. Instead, they cost around $8.
  2. They do not shout out “EXPENSIVE LENS. WEALTHY PERSON. STEAL ME!”.

Little things like this make all the difference, so you can concentrate on what is really important.


Kid hauler

Snap of the day, five minutes ago:

Kid Hauler (Photo: Michael Willems)

Kid Hauler (Photo: Michael Willems)

Or “Mom of size crossing in front of van whose owner has four kids, a dog and a soccer ball, and who thinks that buying foreign puts you out of a job”. I wonder if he ever considers how much of a job he would have if Americans stopped buying his Oakville-built Fords. Or how Walmart mom would pay for things if Walmart and China did not exist, and everything would be five times the price.

Snaps

Today, Joseph Marranca and I were checking out the location for one of our next “Creative Light” workshops, this one to be held on August 13 at a beautiful location near the African Lion Safari park near Burlington/Hamilton. We will do great creative shots there with those who join.

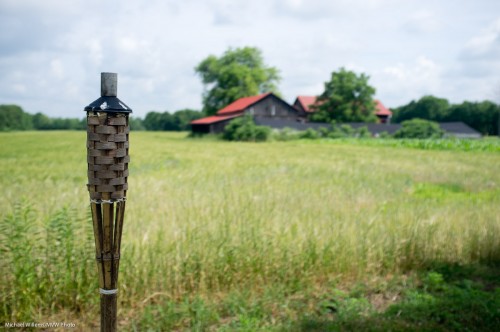
The setting is agricultural, as this snap shows:

Agriculture (Photo: Michael Willems)

Great setting for creative photography – we could not hope for more.

But wait. Wouldn’t that shot be better with nicer light?

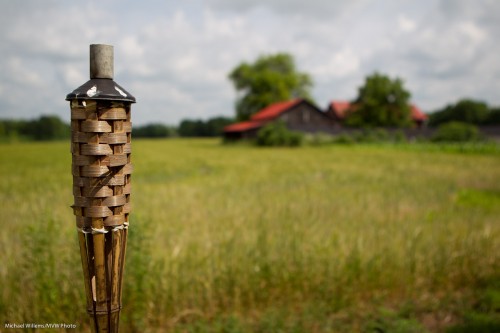
Yes it would! And that is one reason I always carry speedlights. With speedlights, you need not rely on nature to give you light. As it happens, nature did, so I did not need lights: moments after that shot, the sun appeared. But if it had not, I would have needed flash to get a shot like this:

Agriculture (Photo: Michael Willems)

I would have simply used a 580EX speedlight off camera, with a 1/2 CTO Honl Photo gel fitted with a 1/4″ grid. I promise you would not have been able to tell this from the shot above. And at the course we will use light for truly creative purposes.

A couple more snaps. That’s what they are, but even in snaps you try to be creative.

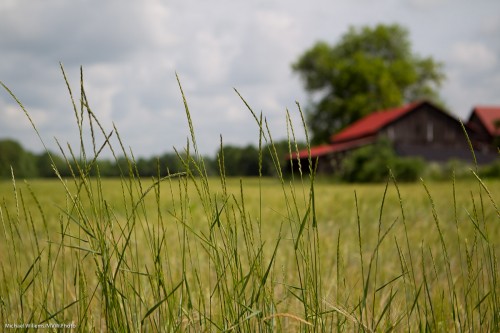
Blurred backgrounds that tell the story.. I like those:

Agriculture (Photo: Michael Willems)

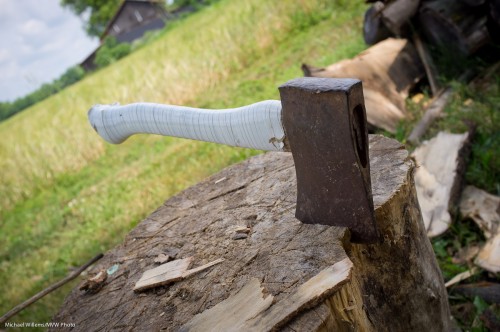
I also like large detail that you can use to tell a story. We’ll talk about props at the course. Props like this axe:

Axe (Photo: Michael Willems)

More about props in future posts!


The making of a group shot

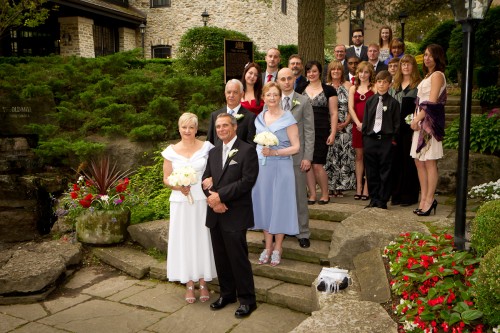
I shot this at a wedding the other day: a group shot featuring bride and groom Pat and Jim, relatives , maid of honour, and best man.

Pat and Jim Wedding (Photo: Michael Willems)

How did I shoot this? I thought it might be good to go through the process that went into creating a shot like this.

Setting

The day was ideal for photography (bright overcast). So I had lots of options at The Old Mill in Toronto. But therein lies a problem: which one to choose, out of hundreds? So I decided to look for…

  • Background: A nice, full, non-distracting and darker background.
  • Context: the background should say something about the event: it supports the image so it should provide context (notice the venue’s sign).
  • Colour: I want some colour. The flowers provided this.
  • Space: A space large enough to pose over 20 people.
  • 3-D: Preferably some various levels (e.g. steps).

Steps give you an automatically full background, so these steps were the chosen spot.  So far. so easy.

Arranging

I would often do a sit-stand-lean arrangement, but in this case, all standing is OK.  Arranging 21 people takes time and by the time you tell the last person what to do, the first person has turned around again. So speed is of the essence. I arranged bride and groom, best man and maid of honour, and from there on much of the rest fell in place and only minor adjustments were needed.

I then arranged them so I could see them all. This takes a fair amount of doing, because people move – my experience shooting sports clubs came in handy.

Now I told the group to relax – I would be doing test shots, so no worries yet – and to all breathe in deeply, and then all to breathe out at once. I demonstrated this. Silly, and silly is good, it relaxes people.I avoid saying “Smiiiiile…!” – it brings out the worst fake smiles in people, especially in men.

Then I watch body language and go, “checklist-fashion” through everyone, to see any awkwardness. If I see any, I ask them to adjust.

Technical

I used a slightly wide angle lens on my Canon 1D Mk4 body – the 24-70 f/2.8 set to 33mm effective focal length, meaning not very wide (distortion) but wide enough, giving me the following benefits:

  1. The ability to get it all in.
  2. Extended depth of field.
  3. Tolerance of slow shutter speeds.

I first of all exposed for the background. I wanted it to look nice and dark. This emphasises the people, and it also allows background colours to become saturated.

So I set my camera to:

  • f/7.1 (which gave me enough depth of field, which I needed with 8 rows of people!);
  • 1/80th second, which is fast enough for a 35mm lens hand held;
  • Getting a  dark background (between -1 and -2 on the light meter) now necessitated 800 ISO, which is great on today’s cameras. This also enabled the flash to reach far.

I then used my on-camera 580EX II flash to light the people.

On-camera, from the speedlighter? Yes, outside you can get away with it. If I had had more or more annoying shadow I would have used my Honl Photo softbox.

And there you have it. Simple shot, took a minute to make, and with little or no post work.


Simplifying and diagonals

In a photo:

  • Simplifying is good. Often very good.
  • Diagonals can also be very good.
  • The Rule of Thirds is also often very good.
  • Tilting the camera is a way to simplify.
  • Tilting is also a way to create diagonals.
  • And to help you get to the Rule of Thirds.

So it stands to reason that if you tilt and simplify a the same time, you may end up with some reasonable images.

A few examples from the other day – taken with the Fuji X100, which is still a great toy. As you learn more about it it gets better.

Because this camera has a fixed lens (35mm, full frame equivalent) you end up tilting instead of zooming in and out – and this makes your pictures better.

Here’s me, the other day – and look at the texture and converging diagonals:

Michael Willems (Photo: Melony McBride)

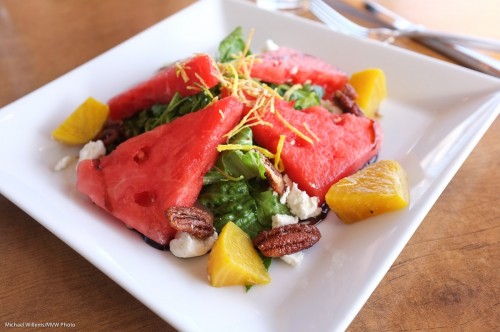
Here’s a salad, served with colour and texture – and with a blurred background that “tells a story by making the viewer put it all together”:

Salad (Photo: Michael Willems)

And a few more food and drink snaps:

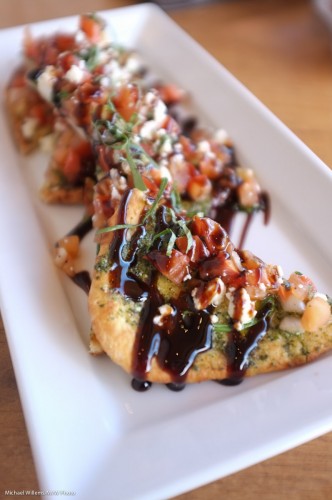
Bruschetta (Photo: Michael Willems)

Cheers (Photo: Michael Willems)

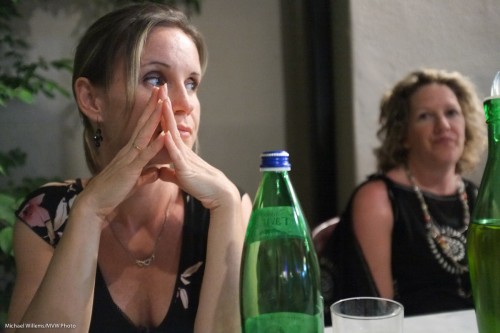
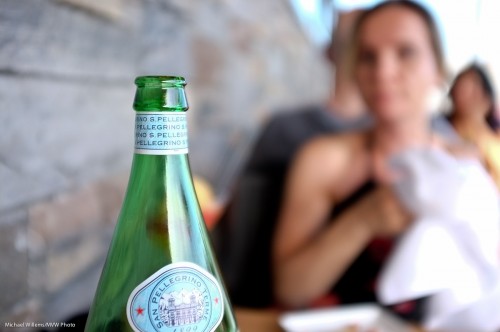
Acqua Minerale (Photo: Michael Willems)

And a non-food snap: the best calculator series ever made (you do not need an “=” button!)

HP11C (Photo: Michael Willems)

Can you see a pattern emerge?

Here’s your homework. Go shoot some pictures:

  • With a 35mm lens length (real 35, i.e. use 24mm on a crop camera).
  • Tilt to simplify or to get diagonals or to be able to compose with the Rule of Thirds.
  • Shoot at wide open aperture (low “f-number”).
  • Get close.
  • Use high enough ISO to get non-blurry images.
  • Use available light.

And have fun!


Flash types

A quick note for you all –  a reminder since I have said this before.

It is important, when using flash, to distinguish between the types of flash and their use. As follows:

[1] Flash is the only light.

Example: studio.

  1. You want ambient light to be invisible
  2. So you use low ISO, small aperture and fast shutter
  3. You probably use manual flash and a light meter.
  4. E.g. in a studio you may use 100 ISO, f/8, 1/125th second

[2] Flash is the main light, but there is bright ambient light also.

Example: person in an office with a window behind him with a bright outsoors scene

  1. You want ambient light to look great – that may mean dimming it
  2. So you use manual mode (or exposure compensation, minus) to turn down the background until you are happy.
  3. Then, and only then, do you worry about (and turn on) the flash.

[3] Flash is the main light, but there is dark ambient light you’d like in the image

Example: A party indoors.

  1. You want ambient light to look great – meaning it should show!
  2. So you use high ISO, open aperture and slow shutter
  3. You probably use TTL flash
  4. Example: indoors party: 400-800 ISO, 1/30th second, f/4

[4] Flash is merely fill light

Example: Outdoors, a backlit subject

  1. You want the flash to not be too bright
  2. So you turn it down by using flash compensation, minus. Start at -1 to -2 stops.


A methodical approach works: once you realize what situation you are shooting, the rest follows simply and quickly. Failure to do this leads to much confusion. If you don’t know where you are going, you will not get there (paraphrasing Yogi Berra).


Edge lighting tip

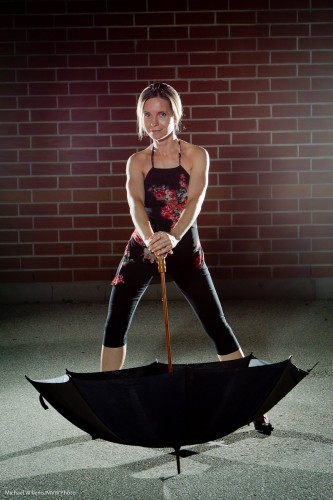
When you are using rim lighting, like in this shot of this evening…:

Mel McBride (Photo: Michael Willems)

Then I would give you a few tips:

  1. Do. It’s good. Look how well it shows off round shapes like arms and legs. It makes them look round, rather than flat, which is what they would look like if you lit them just from the camera’s direction.
  2. Light from behind – 45 degrees behind the subject aimed forward.
  3. Fill from the front. Watch for shadows behind your subject.
  4. Watch for shadows in general. You may like them. Or you may like only one of them. Or none. All good, as long as you watch for them, and feather the lights you do not want throwing a shadow, or use snoots or grids or gobos – or soften them in the case of the front fill light (I used a Honl Traveller 8 softbox).
  5. A little flare, as in this shot, can be okay. Don’t go crazy, but do not be afraid. I often include lights and flare: love them when done well.
  6. If you want flared lights to show like stars, use a small aperture, like f/8 or f/11.
  7. If you are using TTL, which is fine, then do use manual at least for the rim lights. Using TTL for those makes little sense, as this light is very hard indeed to measure in camera.
  8. And for manual flash, know how light works. The Inverse Square Law is very important. To get half the light, increase the flash-subject distance by 1.4 (the square root of two). That sort of thing. Yes, math.

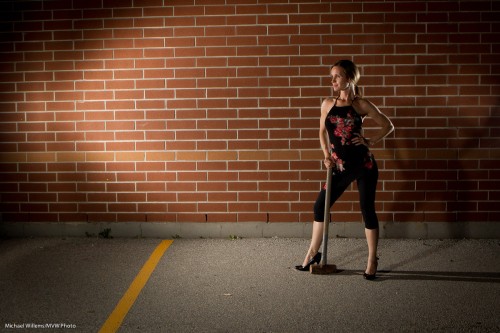
Oh and when you have a wall, you can use it, of course. Like here, wher I have made oneof the rim lights into the main light:

Controlling light is fun, and is remarkably easy. And Photography is all about the light.

(Joseph Marranca and I are teaching another Creative Lighting course, this time in Fort Erie, just over an hour from Oakville, on July 23. Stay tuned or drop me a line!)