Outside flash

As a result of yesterday’s shoot, reader Franklin asked:

Michael, I often use my flash for outdoor portraits.  Since I don’t have anywhere to bounce the flash, I often point it straight at my subject.  In many cases, I end up having to deal with the oily, overexposed skin highlights mentioned in your previous post.  Any tips you could offer to create soft, natural looking skin tone would be greatly appreciated.

Great question. Yes, outdoors flash can be challenging, so here are my tips.

  • First, outdoors you can sometimes bounce. A wall, for instance, can provide a wonderful soft ounce area. If possible, try that first. (A Gary Fong Lightsphere may make this easier if there are some small things that light could bounce off. Like people, trees, a car, a fridge, you name it. The Fong Lightsphere throws light everywhere so it sometimes works.)
  • Second: next, try to soften the light. I often use a Honl Photo Traveller 8 softbox for this. Sometimes a Honl bounce card.
  • Third: the direction of the light is important. One reason outdoor flash can look unnatural is that the flash is shooting from where the camera is. If you can take it off the camera, using an off-camera flash cord like the ones of Flashzebra.com, you will get much more natural light. Shoot with the light coming from above (even a foot), and at an angle.
  • Fourth: I often add some colour, like a quarter CTO or half CTO filter, to warm up the flash. This removes much of the objective (see yesterday’s picture).
  • Finally: it is allowed, even a good thing, to shoot with direct flash outside. And Photoshop or Lightroom can help remove the nasty skin highlights. Sometimes this is just the price you pay!

I hope that helps!

Reader post

Joel, a reader who came on a recent Creative Urban Photography walk with me, says the following – and I thought it worth it posting this today, to emphasise what I have said before:

Just circling back after the Urban Photography walk in Oakville that I did with you and the group on Oct. 23rd.
Despite the rain, it was a nice blend of technique and discussion.  I putzed around after we wrapped up down by the waterfront.

I had been on the fence about purchasing a flash after the Henrys show, but spending an afternoon with the Speedlighter had me sold.   Your quick demo about flash compensation and CTO was enough to push me over the edge.

[…for Canon users: Joel then points out there are cheap deals on for the 430EX: price match the Adens Camera offer at $274.99. I believe Henry’s also has a great offer on this flash…MW]

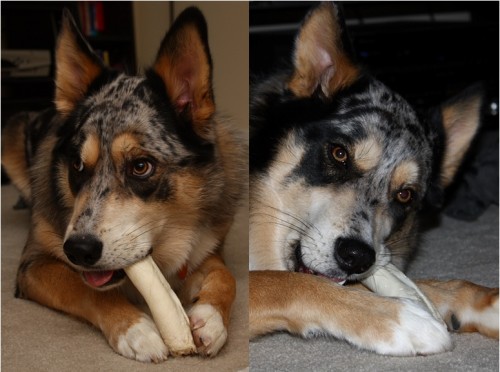
Not that you need any proof yourself, but I took a quick comparison shot (attached) to bring back to the camera guys here at work.  Images are unedited (but very compressed).  Left side is bounced behind me with the 430, right side is standard pop up flash.  Both shot at ISO 100 in my poorly lit living room at night.  Very happy with it and excited to learn more.  Keep posting on your speedlighter site – lots of good advice…

Thanks, Joel. Here’s your two shots:

Bounced vs Straight

Bounced vs Straight

(Click to see them larger).

As you can see,

  • The bounced shot is much warmer (note, if due to wall colour it is too warm, this is easily adjusted with one little tweak in Lightroom).
  • Its shadows are softer. Look at the dog on the right and at the annoying shadow on our right.
  • Its background is not inky black, unlike the direct image’s background.
  • The catch lights are more natural (the straight image has an unnatural looking tiny catch light right in the centre of the pupil; the bounced image has a much more natural looking and much more naturally positioned catch light).
  • The dog looks more natural in the left image. On people, this would be even more dramatic: the right image would have oily, overexposed skin highlights. The dog’s hair helps shield us from this.

Images like this are taken as follows:

  1. Attach the flash to the camera.
  2. Turn it on, and ensuring it is set to TTL mode (its default).
  3. Use program mode on the camera; or manual (preferred for more advanced users) or even “night portrait” mode.
  4. Turn the head so it points 45 degrees upward behind you.
  5. Shoot!

Joel adds, in a follow-up email:

Camera is Canon XSi.  Standard Kit Lens 18-55 EF-S. I’ve never seen this level of detail out of my equipment before.  It was so sharp that when zoomed in, you can see my kitchen in his eye.  Like you said – ‘A bright pixel is a sharp pixel’  J

Exactly. That is Willems’s Dictum: “Bright Pixels are sharp pixels”. Noise, grain, cockroaches and bedbugs all hide in the dark areas.

All this is subject of my next November 20 all-day course (see www.cameratraining.ca) – you will learn these techniques and many more, and go home with some great portfolio shots using a professional model.

Speed lit

Since this blog is called “speedlighter”, and I kind of specialize in lighting, I thought I might do a quick post on quick lighting.

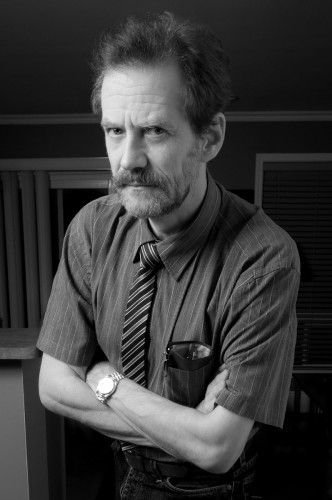
Today, I had a student shoot me, and her dog, using one studio light (a 400 Ws Bowens light). To do this you need to do the following:

  1. Set up a light on a stand;
  2. Add an umbrella;
  3. Shoot near a wall which acts as the reflector (that is why one light is enough!);
  4. Connect the light to the camera using, for example, a cable;
  5. A light meter to measure light and hence to help you set the flash’s power;
  6. Set your camera to f/8, 1/125th second, 100 or 200 ISO;
  7. Now meter to that (i.e. adjust the light until the meter read f/8).

The first test shot should be without flash, and should be black.

Then, connect the flash cable and shoot:

Michael Willems

Michael Willems

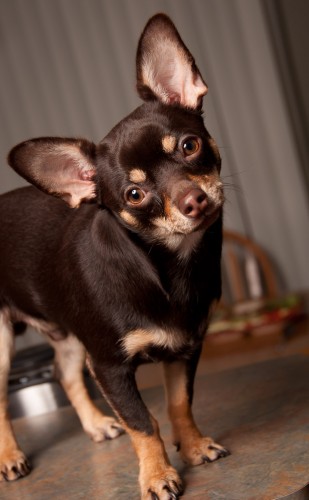
And then, after that test shot, the object of tonight’s shoot, which was not me, alas:

Duke Dog

Duke Dog

Cute, eh?

Note the simple composition, blurred background, the excellent composition and tilt (see Friday’s post), and note the catchlight from the umbrella in Duke’s eyes. (If we had shot through an umbrella, the catchlight would be even more simple, round).

Flash method

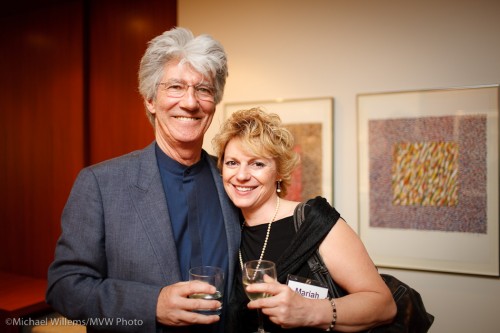
Let me reiterate a simple flash method for camera-aware (i.e. “grip-and-grin”) people pictures at events (like receptions, parties, etc).

  1. Set your camera to “manual”.
  2. Attach your flash.
  3. Bounce your flash off the ceiling or wall just behind you if you can. If you cannot do this, use a reflector (like a Honl reflector) or worst case a Fong sphere. Think about where you bounce in terms of returned light direction.
  4. Use a wider angle lens (say 35mm). I love my 35mm prime on the 1Ds for this type of photo.
  5. Start at these settings: 400 ISO, 1/30th second, f/4
  6. With those settings, aim at an average part of the room (not dark, not light). Watch your light meter. It should read roughly -2 stops. If it reads more, like zero stops, go to a faster speed. If it reads less, go to a wider aperture (and if you cannot then a higher ISO or even a slow speed).

The result will be good.

Grip and grin

Grip and grin

Note that you may, in dark environments, have to go to slow speed and wide open aperture even at high ISO.Watch the light meter and aim for -2 stops ambient light when aimed at an average room area. In a dark night club I may occasionally be shooting at f/1.4, 1/15th second, 1600 ISO!

Accountants of the wild frontier

Today was a good example of n event shoot.

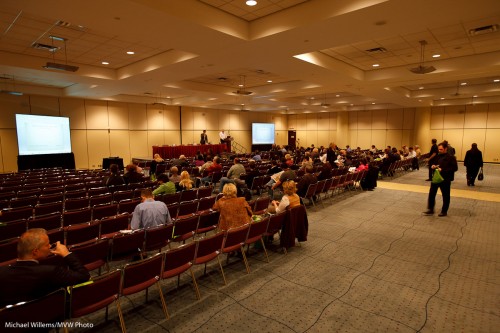
Colleague Joseph and I got to the Metro Toronto Convention centre to shoot a few hundred accountants pointing laser pointers at the ceiling. A very un-accountant-like event!

So we set up ladders and camera with the light just right. We use a combination of ambient and gobo’d flash. Test shots of the room looked like this:

Convention hall

Convention hall

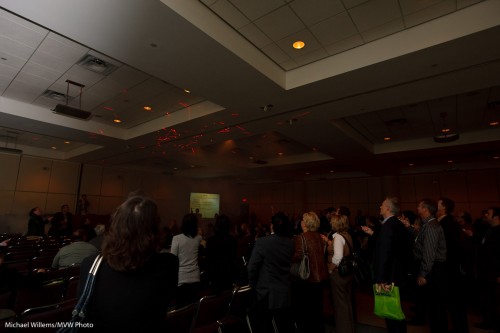
The event starts. And as the fog machine we had arranged starts and on command, the accountants’ laser pointers aim… unexpectedly, someone dims the lights to just about zero.

So we get this:

Convention hall

Convention hall, lights dimmed

No time to say anything: we only have moments to shoot.

So I quickly had to:

  • open up the lens to f/2.8,
  • shoot at 1/15th second,
  • at 800 ISO,
  • I quickly set the flash to 1/16th power manual and bounced behind me (if I had had more time I would have gone up to 1/8th power),
  • ….and then at home, push the exposure another stop!

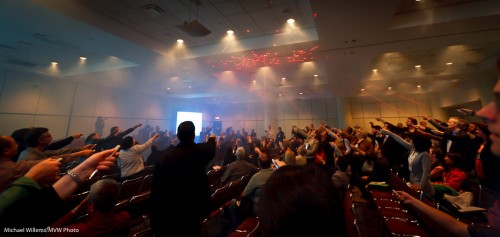
In the end, this gives this:

Convention hall with lasering accountants

Convention hall with lasering accountants

Not too shabby eh? Ever seen such a fun group of accountants?

The moral of this post: you have to be quick on your feet and problem-solved instantly when someone is hiring you for a shoot. You cannot come home with excuses: need photos instead.

And it never hurts to shoot RAW.

Side lighting

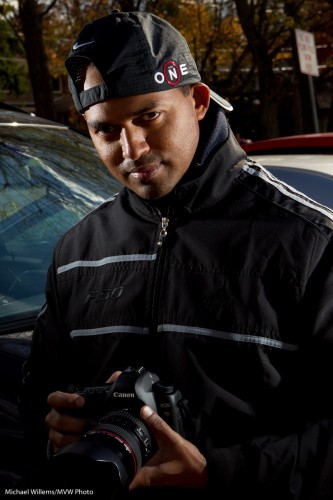
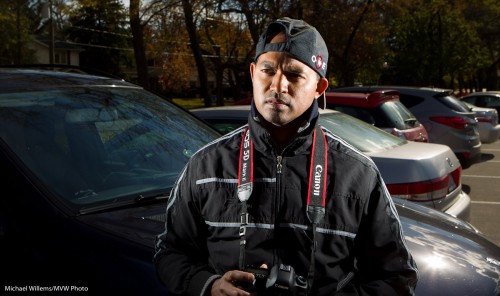
Look at this picture, of a photographer student I shall call “Rapper MA” (although he is not a rapper of course – it is just the look and the light and the hat!):

Edge-lit Photographer (Photo: Michael Willems)

Edge-lit Photographer

This was made in bright sunny daylight.

How did I light it?

  • Camera on manual
  • 100 ISO, 1/160th second.
  • Now set aperture to expose for the background. In this case f/13.
  • Use two flashes, left and right, slightly behind the subject.
  • Flashes on stands, aimed at subject.
  • Connected to Pocketwizards via Flashzebra cables.
  • Pocketwizard on the camera.
  • Set power to that aperture (using the light meter). Adjust shutter/aperture as needed.

That’s how.

Here’s one more illustration with a bit more background:

Edge-lit Photographer (Photo: Michael Willems)

Edge-lit Photographer

Small speedlites can overpower the sun. That is why this site is called “speedlighter”. Have fun with your speedlights!

Light creatively

After last Sunday’s Creative Lighting workshop, and working up to next week’s Henry’s Digital Imaging show, at which I will be presenting for three days, I am thinking about light. As I always do.

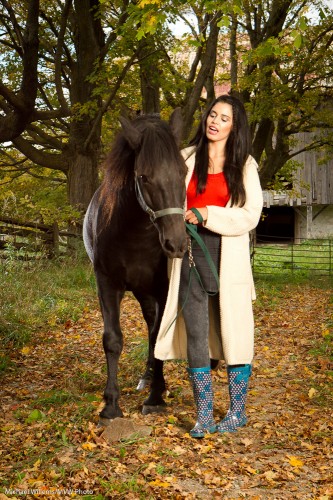
Look at this shot from last weekend: model and friend:

Model and horse

Model and horse

Lit by natural light?

Not on your life.

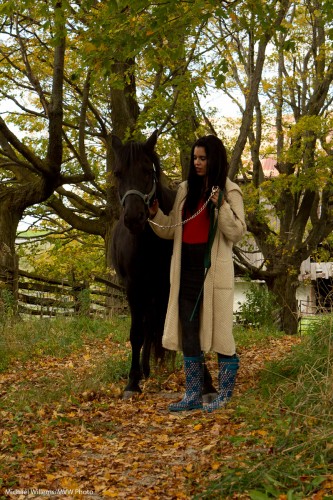
Here is what they look like in available light:

Horse and model - available light

Horse and model - available light

Now you see why we use softboxes, kicker lights, and so on.

Used in the first shot:

  • Softbox with a monolight, to our right.
  • Small speedlite with Honl grid, to our left – see the sheen on the horse’s coat?
  • Pocketwizards (2x) and Flashzebra cable (1x)

Simple, innit?

Well, maybe not that simple, until you are shown. Come take a full-day lighting workshop and I will teach you this, and come see me at the upcoming Henry’s show also, where I will do tethered portrait shooting to demonstrate all this.

Portrait note

One more from Sunday’s course.

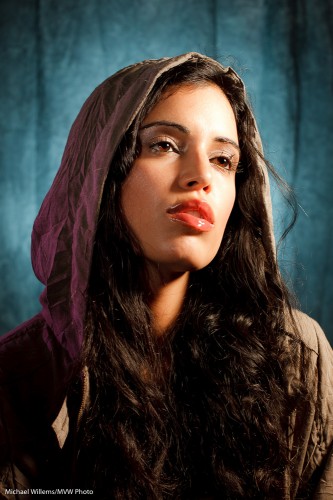
This time, a portrait of model Tara that I made to help explain multiple flash TTL. Straight out of the camera it is:

Multiple-flash TTL lighting

Multiple-flash TTL lighting

How was this made?

With a small Traveller 8 softbox on the main light, a gridded gelled flash for the background, a snooted flash for the fill light, and a gridded gelled flash for the edge light.

Four speedlights, and all using TTL.

A few things to remember in such portraits:

  • You need a catch light in the eyes.
  • Set your white balance to “flash”.
  • If you have space, longer lenses are good (in this case, though, I use a 50mm prime lens).
  • Avoid the ambient light doing any work: choose 1/125th second at f/5.6 or f/8, say; and be sure to disable “Auto ISO”.
  • Lighting is all about what you do not light: avoid bathing the room in photons. Think about what you light, and how.
  • With Canon’s e-TTL or Nikon’s CLS/iTTL, you only get two or three groups of light. So if you have four lights, some of them will have to be in the same group. My fill and edge light are thus both in group “B”.

Keep those in mind and your portraits will be well lit.

A shot from the course

At the Mono “Creative Light” workshop,  we do different portfolio shots every time.

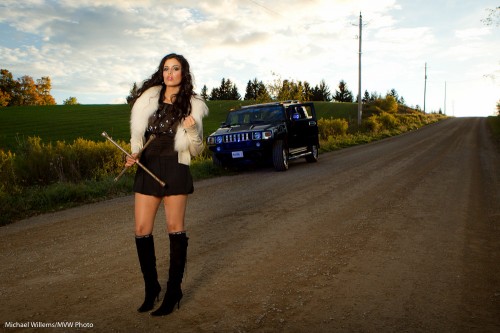
So imagine our delighted on Sunday when a student turned up in a Hummer. This was immediately put to use by model Tara:

Tara Elizabeth and Hummer

Tara Elizabeth and Hummer

That was lit how?

This is how: with a softbox, to our left. And a small speedlight to our left aimed straight at the car – with a blue Honl gel. Both were fired using pocketwizards (the speedlite using a Flashzebra cable). Metered using a light meter, of course.

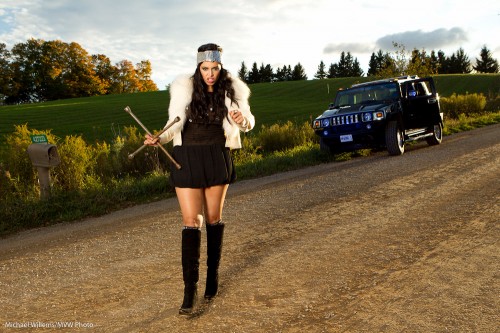
Here is an alternate take:

Angry Tara Elizabeth, with Hummer

Angry Tara, with Hummer

That was taken just a few minutes before. Can you see how every minute counts when shooting in beautiful late day light?

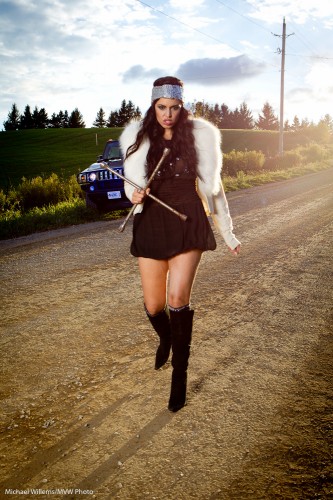
Okay, one more. Just to show that lens flare – which should normally be avoided – can sometimes be OK:

Angry with tire iron

Angry with tire iron

You avoid flare by:

  • Using a lens hood
  • Shielding the lens with your hand
  • Avoiding lens filters
  • Pointing slightly away from the light source

Have fun!

Yum

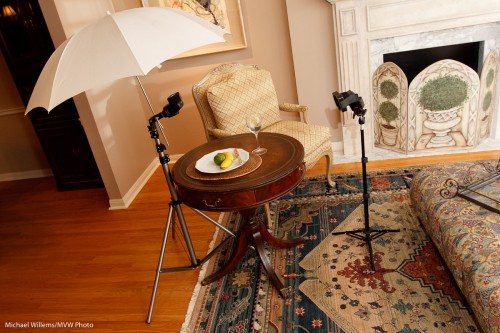
Today, I have a quick starting point for food photography for you.

Food Photography

Food Photography

  • Lighting: small speedlights are good.
  • Use one umbrella on top, and one gridded light from behind to add accent (and to light the steam. If there is steam, try to use a dark background)
  • You may want to shoot from a low angle.
  • Blur out backgrounds.
  • These backgrounds can contain a cup or glass, cutlery, etc.
  • Prepare the food: If you have no food stylist, you are it. Every detail counts. Make it look great. Add some “green stuff”. Use a brush with oil to make surfaces shiny and yummy.

And do not forget to eat the food, afterward.

Indian Food Photography

Indian Food Photography

(Although you would be surprised how many food shoots use fake food. Ouch!)

One more, for good measure (I shot these for West of the City magazine early this year).

Indian Food Photography

Indian Food Photography