Heeere, fishy fishy fishy!

Today I had the pleasure of seeing a wonderful live coral reef aquarium in Oakville – a world class aquarium, one with live coral reef flown in from Indonesia that sort of thing. You will be able to, I think, see more pictures soon on its owner’s web site, but I thought I might say a few words about shooting aquariums here.

Fish

A Fish.

Hence, my ten tips.

The following things immediately occurred to me. In no particular order:

  1. Use existing light – avoid flash if you can (reflections, loss of contrast).
  2. Shoot perpendicular to the glass. Glass distorts.
  3. Look for contrasty subjects first of all – make life easy for yourself.
  4. Ensure your shutter speed is rapid enough to freeze motion.
  5. Use a higher ISO if you must, but try to keep it down if you can.
  6. Look for opposing colours, as in the shot I made above.
  7. Be ready to enhance contrast in Lightroom. Sea water and glass will reduce your contrast, and there is little you can do, so be ready to fix afterward if you have to.
  8. Shoot lots of detail before trying the bigger shots.
  9. Avoid wide angle lenses as these will not shoot perpendicular to the glass. Use longer lenses (macro lenses, even).
  10. Use Manual mode: once you sort out the light, it will stay constant.

The above shot was made as follows:

  • 24-70 lens set to 70mm on a full frame camera (so a 50mm would do if you had a crop camera).
  • I was in manual mode
  • I used f/5.6 and 1/60th second
  • My ISO was 200. Fast enough to freeze the fish motion (if not the fish); slow enough for great quality.

In a later post, more on the overview/large/wide shots, but for now this ought to get you started.

I would love to spend a week shooting that particular aquarium, by the way.  Exciting. And the photographic opportunities. Wow!

Grain

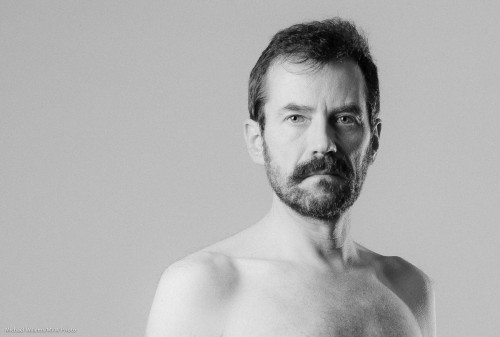
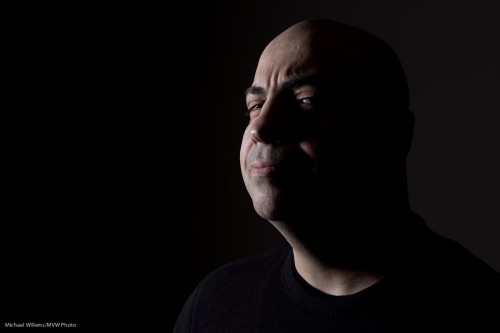
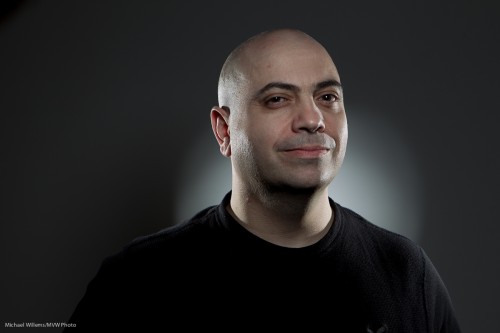
I recently, while preparing for a commercial shoot, took a few self-portraits. Including this one:

Michael Willems, Photogrpaher (self portrait, December 2010)

Michael Willems, Photographer (self portrait)

As always, click to see it large. (You really do need to see this one at original size to see the full effect.)

To do a portrait like this, I did the following – and I thought it might be useful for me to share the thought process:

  • I decided I wanted black and white, and to shoot it that way.
  • I set up the right studio lighting. I used a softbox on camera left; an edge light on camera right at the back; and a fill light using an umbrella on camera right in front.
  • I metered for these lights, with a fairly high key:fill ratio. In other words, I wanted the less-lit part of my face to be much less lit. To get this, I set the fill light around three stops darker than the main light.
  • That in turn allowed me to set up an edge light, to show the contours of my face.
  • I set up a white background.
  • I positioned myself at a distance from the background that would ensure a grey (rather than black or white) background.
  • I set up the main light, in a softbox, such that I would get nice catch lights in my eyes.
  • I pre-focused (on a chair), then set the camera to manual, and then used the camera’s timer to take the shot.
  • I used a horizontal layout, to create enough “negative space”, by using the rule of thirds (i.e I did not put myself in the “Uncle Fred” position right in the middle).

Finally, in post-production I added some film grain. This is one of Lightroom 3’s Develop module’s “Effects”, and it is one I really like. Tri-X film, anyone?

I am about to set up the same setups for Saturday’s workshop. Deciding on lighting is a photographer’s major job!

Yesterday’s workshop

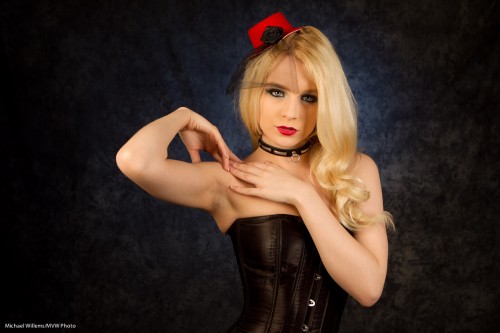
Yesterday’s workshop was “the art of shooting nudes”. Joseph Marranca and I and a roomful of students went through theory and practical tips first, then made a number of shots. Like this one:

Kassandra Love (Photo: Michael Willems)

Mono, Ont., 2 April 2011: Kassandra Love

This pretty picture makes me want to mention a few points, namely:

  • Yes. You can use a muslin background. It can be cool. A lot of people think “Oww, that’s Sears, and boring, and for old people. Not so… but you need to light it properly. That means “not light it all over”. You keep it dark, mainly.
  • Then you light a little with a gridded light. That’s the circle of light behind Kassandra.
  • That gridded light is gelled blue – blue goes well as a contrasty colour against white (really, “orange”) skin.
  • White balance is important. That skin should be the colour you want it. In this case I made it warm. A “desaturated” look (where, using Lightroom’s HSL pane in the Develop module you desaturate red and orange) would also have done well. Matter of taste.
  • The eyes must be sharp.
  • We shot at f/8, 1/125th second, 100 ISO.
  • Props and the subject are important also. The hat with the lipstick work well here.
  • The model is lit with softboxes, thus ensuring soft light and soft shadows.
  • They are positioned so as to give me a nice catch light in the eyes.

Simple light (three strobes: one on each side with a softbox, and one with a grid to light the background)can make interesting and artistic images.

The One Minute Portrait

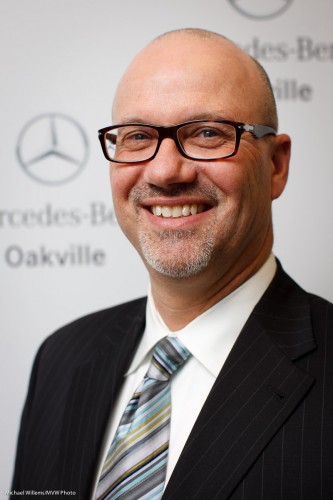
Today, my friend Steve at the car dealership asked me to do a quick headshot snap of his managing director.

No time to think: right now!

Never to be one to shy away from a challenge, I quickly did the following:

  1. Move to the available backdrop with corporate logo.
  2. I used my Canon 1Ds MkIII with a fast prime lens, the Canon 50mm f/1.2L.
  3. Quickly, as we walked to the backdrop I put a flash on it: a 580EX II speedlight.
  4. Looking around, I saw a white ceiling above me so I knew I could bounce the flash off that ceiling.
  5. I ensured I bounced the flash 45 degrees up behind me, so that the light would come from “in front” of the subject. At a slight angle to my left, so as to aim light onto his face straight on from a 45 degree up-angle. Now this is important. If I had aimed up, or even worse, in front of me (a classical beginner’s mistake!), then this gentleman would have had raccoon eyes, reflective glasses, and a shiny head. If I had aimed straight behind me I would have had “broad lighting”: also not what I wanted.
  6. To mix a bit of ambient light, I set my camera to manual, and selected 1/100th second at f/2.2 at 100 ISO. I did a test shot.
  7. I found that this mixed too many different colours for my liking (flash and tungsten and fluorescent), so I decided to go “flash only”. To do that, I selected 1/250th second at f/4.0 at 100 ISO. That made sure no ambient light took part: the light was all flash. The open aperture at f/4.0 gives me that beautiful bokeh: the creamy softness of the background.
  8. I used TTL (through-the-lens automatic) flash metering, and in view of the white background, I selected a flash exposure compensation (“FEC”) setting of +1 stop.
  9. I positioned the subject at a slight angle.
  10. Now I did my second shot. Checked it on the back. Bingo, all good. Catchlight, check. Sharp, check. Exposure, check. Loved it. Took a few more just for safety’s sake.

That is ten steps in less than one minute. As an event and news photographer, I have to be quick. “Hang on while I think” is never acceptable when photographing executives.

The result is below, and I think you will agree it is a shot that, especially when you click through to see it at original size (you like sharp? I give you sharp!) cannot easily be distinguished from a studio shot.(I really encourage you to click though a few times until you have the full size pic, then view it at full size).

Managing Director Mark LeRoeye

Managing Director Mark LeRoeye

All that in one minute!

If I had had time? I might have tried softboxes, a longer lens, and even more different angles. But I would have produced roughly the same. As a photographer, I need to be able to think on my feet. As you will have to – so my advice: practice a lot, until these things become automatic.

Just like in flying airplanes, where engine failure automatically results in the pilot going through a sequence like “trim up – turn with wind – look for field – check fuel switch – check primer locked – check main switch on – mags left/both/right/both – carb heat on – mixture rich – check oil T&P – check fuel sufficient – line up – use flaps if needed – brief passengers – radio mayday – main switch off”. No more complex, and no less complex, than what I did for this shot.

Practice makes perfect, they say. In photography, practice makes consistent.

Keep your eyes open

Sometimes even experienced photgraphers poverlook something.

At the corporate shoot the other day, my assistant and I set up a group shot (one of several, in addition to individual portraits).

For this shot, we:

  • Designed the shot.
  • Set up the room.
  • Set up the lights and modifiers.
  • Tested the light after metering.
  • Both remarked on how we should shut the door to avoid reflections and to simplify the shot.
  • Positioned the chairs .
  • Called in the group, and did the shot:
A corporate group, positioned around a conference table

Corporate group around a conference table

So we both failed to notice the open door!

No worries, this is rough out of the camera and I can post-produce it out, just as I will crop a little from the top. And the light and positioning are good. But it goes to show, attention matters.

It also goes to show, in an odd way, why you need to do this properly by using pros.

  • Yes, both pros overlooked something here, but for both me and my assistant a failure to notice something like this is the exception, plus we can make the shot good in post. An inexperienced photographer will make mistakes like this in many shots.
  • It shows how annoying little oversights like this are.
  • It shows how simplifying your shot is such an important element of a good shot.

So my piece of advice for today: pay great attention to ways you can simplify the photo. Remove any extraneous items.Position yourself for simplicity. Do this consistently, and your photos will be good, and the odd oversight can be forgiven and fixed.

Assignment with lights

The other day, I gave a student an assignment: shoot a picture where, using dramatic light, you tell a story, using flash. This means not lighting parts is as important as lighting them. And it means that you tell the story by not showing things as much as by showing them.

Here is her resulting image:

"Broken Hearted", By Mel McBride

She used TTL flash. The main light (on our right, of course) was an SB-900 with a Honl Photo Traveller 8 Softbox, and the hairlight is an 8″ snooted SB600.

So using TTL, Melony would have:

  • Used flash exposure compensation (minus!) to ensure not too much light.
  • Positioned the lights carefully.
  • Watched the shadows.
  • Avoided lighting the background – hence the snoot andf the carefully aimed softbox.
  • Thought about her story!

And that last point is important: what you shoot is actually as important as how you shoot it! And what you shoot is determined by how you shoot. Complicated? No, simple, actually.

The story: a depressed teenager with an iPhone – you can guess the blanks, I think?

A job well done. Those of you who like assignments: do the same. A dramatically lit image that tells a story. See how you do!

Nice day

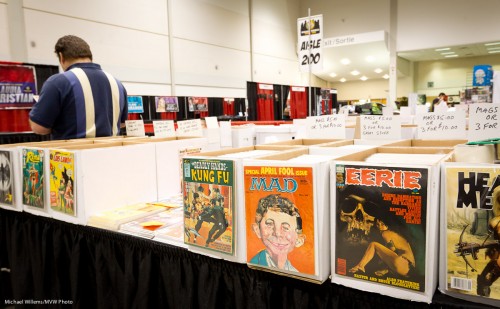
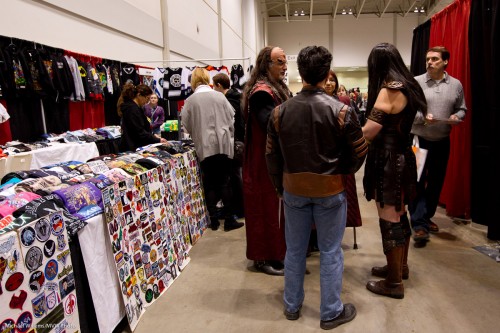
Today, I shot some pictures at Comic Con 2011 in Toronto.

Comic Con Toronto (Photo: Michael Willems)

Comic Con Toronto

What lens did I  use for that?

Wide. 21mm (actually 16mm, but on a 1.3 crop factor camera, so that is equivalent to a “real” 21mm). That is how you get this feeling of depth. We call this technique “close-far”. The wide angle lens is greatly under-appreciated. But not by me.

Comic Con Toronto (Photo: Michael Willems)

Eerie!


Comic Con 2011, Toronto

Are those Klingons? (Comic Con 2011, Toronto)

At Comic Con, I met up with photojournalist David Honl and Hollywood actress Claudia Christian, who was signing autographs. Claudia is best known for her role in “Babylon 5”, but she has appeared, and today appears, in many, many movies, TV movies and TV series (including appearances in classics such as “Dallas”, “Columbo”, Quantum Leap, Matlock,  and “Murder, she wrote”).

(If you are near the UK: go meet her. Claudia is organizing a big event August 13-14 in London: see www.ClaudiaConUK.com )

Techie photo details: All I used today was my 1D MkIV with the 16-35mm f/2.8 lens. Manual is the mode to use of course. I used available light, and also used some fill flash on several of the shots – namely on the portraits.

It’s all about…

….what you do not light.

Here is a shot of impromptu model George, who was on the course:

David Honl and I lit George from the side with a single 430EX flash using a Traveller 8 softbox, during the”Advanced Flash” workshop Dave helped me teach Saturday in Toronto.

This shot illustrates the “it’s more important to think about what you do not light” principle you often hear me mention.

The following shot illustrates another principle: “light from the sides, fill from the front”. Here, we are lighting George with two 430EX speedlights, each with a 1/4″ grid, from the side. Another gridded speedlight is aiming at the background, and a final speedlight, in a Traveller 8 softbox, is aimed at his face.

We used manual flash for all these shots, and the flashes were connected to pocketwizards via Flashzebra cables.

Since we are using only flash (ambient plays no role), the settings are the standard 100 ISO, f/8, 1/125th second.

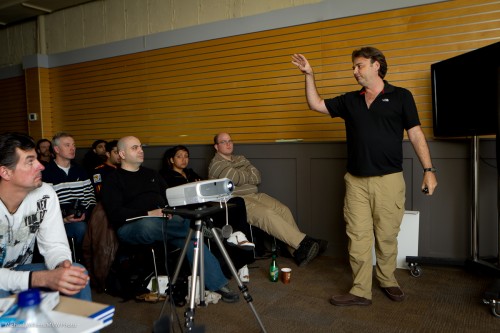
All these shots can be set up in just a couple of minutes, as Dave is explaining here to some of the students in this packed workshop:

If you were one of those students, I hope you’ll add some comments here about what you found most useful or most fun. I know many of you read this blog daily!

Lunch time!

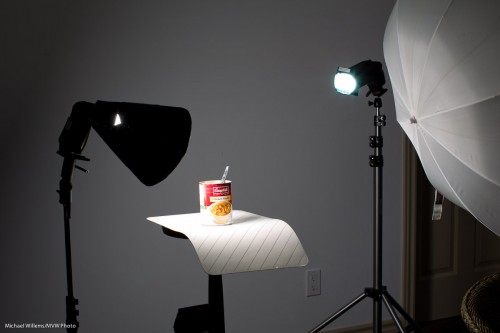
And when you are a photographer like me, you may take that as a photo op. I cannot even look at a can of soup without thinking “Hmmmmm….”. In terms of photos.

And that leads to this quick setup:

The remainder of lunch about to be photographed with speedlights (Photo: Michael Willems)

The remainder of lunch about to be photographed

That setup was a TTL setup, to save me time. (Connecting Pocketwizards and so on would take a few minutes. Hey, I was hungry – what can I say).

I have, here:

  • Main light, on our left, a 430 EX II speedlight with a Honl Photo Speed Snoot
  • Edge light, a second 430 EX speedlight with a Honl Photo Speed Snoot and a blue/green gel.
  • The umbrella is merely being used as a reflector, to fill in the right a little.
  • A striped place mat for the subject to sit on.
  • A wall, far enough away to be dark, as background.

The camera is a 1D Mark IV with a 580EX II speedlight on it.

And that gives me…:

Lunch, lit with speedlights in wireless TTL mode (photo: Michael Willems)

Lunch, lit with speedlights in wireless TTL mode

So now to bed quickly: I am teaching “Advanced Flash” with Guest Star David Honl (yes, that David Honl) today Saturday 11am-3:30pm in Toronto.

The Social Network

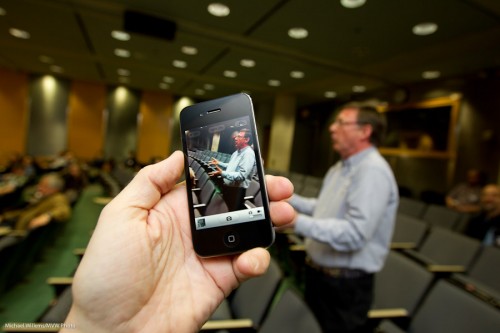
Sunday I spoke at a large Social Media show in Toronto – one of the world’s biggest, at Ryerson University.

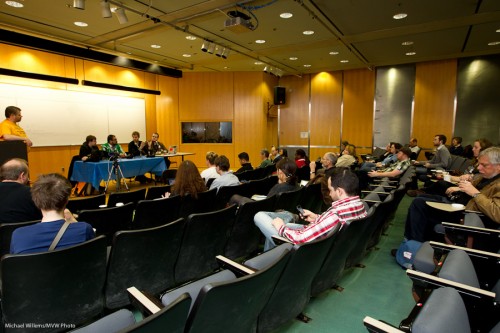
Peter West talking in a social media forum (Photo: Michael Willems)

Peter West talking in a social media forum

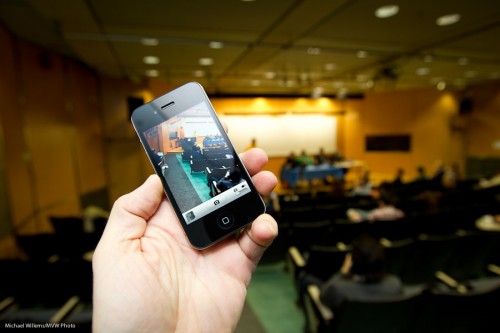
With my friend Peter West, pictured above in an image that stresses the importance of iPhotography, I talked to an audience about photography for social media. Small World: Ren Bostelaar and Mark Shannon, two of my Henry’s friends, were also on several of the forums, as well as in my audience.

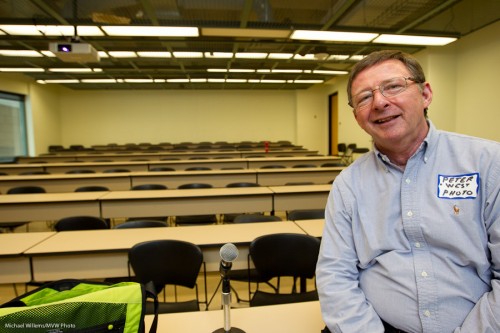
Peter West at Ryerson, before a Social Media workshop (photo: Michael Willems)

Peter West at Ryerson, before a Social Media workshop

The interest (and, um, yes, the room filled before we started) shows that social media are interesting to, and understood by, not just young people but also people as old as 25.

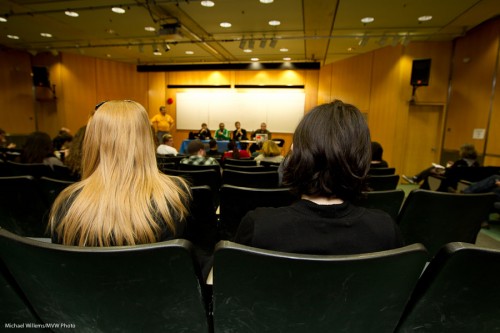
Social networking Forum (photo: Michael Willems)

Social networking Experts at work

Okay, I kid. Peter and I are at least 30.

My talk was not just a 45-minute photography lesson. I had two additional main themes:

  • You can do a lot on an iPhone. You can compose well, focus where you want, and even expose on a chosen point.
  • Social media (like this blog post) are just better with photography.

When some people say photography is dead, I do not believe it at all. When others say “everyone can now do it”, I do agree – but only if they learn at least some of the same skills I, and every other professional photographer, had to learn.

Social Media Forum (photo: Michael Willems)

Social Media Forum

For the images above, I used a fairly standard recipe:

  • Camera on Manual mode
  • Flash in TTL mode, aimed behind me, 45 degrees up
  • 400 ISO
  • 1/80th second at f/3.5

Those settings gave me an exposure reading just over a stop below zero on the meter – meaning the background is just over a stop below ambient, and the flash lights up the rest, namely mainly what’s in front of me.

Social Networking Panel (Photo: Michael Willems)

Social Networking Panel

And I think you may agree those pictures tell the story better than just words would.