Ready.. aim (flash)… shoot!

An event shoot the other night prompts me to point out how important it is to bounce your flash into the right place.

When you shoot an event, you:

  1. Set your camera to a good starting point: Manual mode, 400 ISO, f/4.0 and 1/30th sec.
  2. Use the right lens: perhaps 35mm prime (on a full-frame camera, or 24mm prime on a crop camera).
  3. Aim your flash roughly behind you.
  4. Fire.

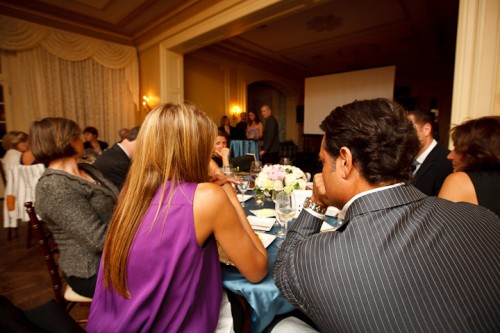
That gives you images like this:

You now adjust aperture, shutter and ISO according to ceiling height, available ambient light, background colour, and “how you like it”. For a neutral, normally lit background you want your in-camera meter to read roughly -2 stops when taking an average reading. So take a test shot, adjust where needed, and carry on.

Fine. But where exactly do you aim?

You aim the flash:

  1. Where you want the light to come from. Usually this means behind you.
  2. And it should throw light into your subject’s face, not onto the back of their head.
  3. This flash bounce area must be outside the image area.
  4. And it must have a nice bounce surface (not too far, not too coloured).

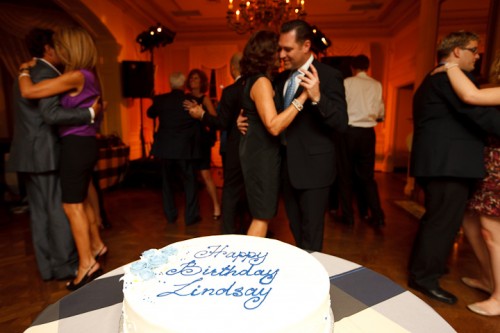
If you do not get the bounce area right, you get this, where I got it wrong (I aimed the flash too far forward):

Instead of this, where I did it right (I aimed it behind me):

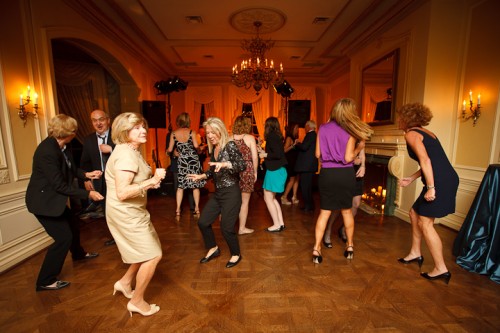
Because I aimed correctly, the wall behind me became a big virtual umbrella, and cast natural light throughout the room, not mainly into one area like in the previous shot.

Another couple of shots from the event:

I like warm backgrounds. That’s my style.

Dancing in dark rooms is hard to capture. Shoot a lot.

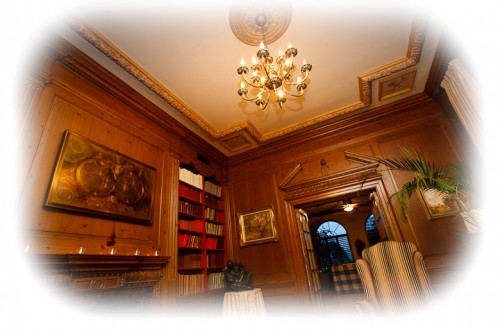
Yes – you can shoot in wood-paneled rooms too, but it can be challenging.

Want to read more? Watch out for the June/July issue of Photolife Magazine, with my article on “Flash: 20 problems, 10 solutions”. It should be in the stores any day now.

 

More self-portrait, and notes

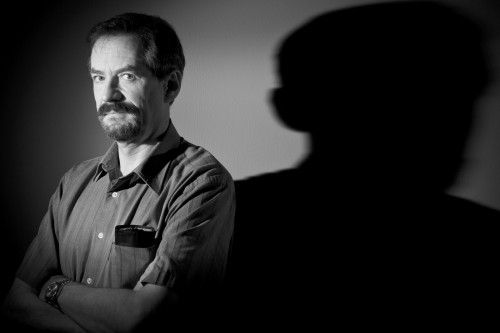
Here, another self portrait: “self with shadow”.

I want to point out a few compositional things about this image:

  • Black and white allows me to concentrate on the subject (that would be me), not the colours.
  • Contrast is important, so I carefully positioned myself to cast the right light so my face and head stand out.
  • I composed so the entire shadow fits.
  • The image uses a typical rule-of-thirds composition.
  • In what may look like a break from tradition I am facing out of the frame (but I am looking in so it is OK).

As you can see, even in a simple two-light portrait, some thought is applied to make it good. And some trial and error. Note that some post cropping and rotating is OK if you cannot get it right in the camera.

One more tonight:

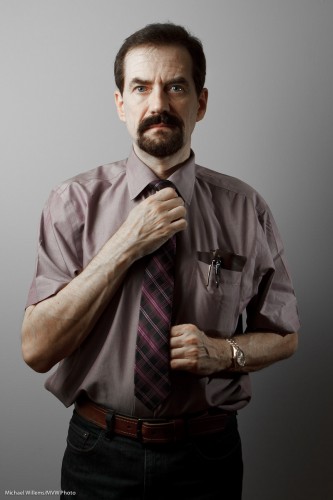
Here as you see I have desaturated red and orange slightly using “HSL” in Lightroom. Less drama, to, since I am now using an umbrella rather than a grid. So the umbrella casts light onto the background.

These self portraits are fun and I urge you to do one, using off-camera light (flash or natural).


Designing a one-light self portrait

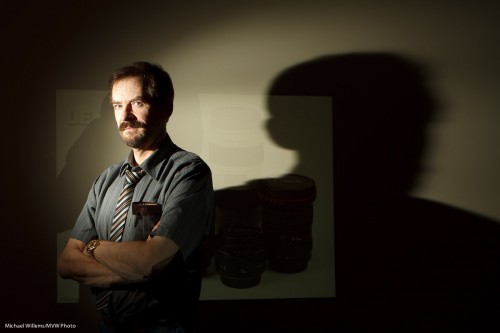
Here is a self portrait, and the process that went through my head making it. I thought that would be good to share. Here’s how to make a dramatic self-portrait in ten steps.

  1. First, I thought “let’s do a quick self portrait, indoors, lit by simple TTL flash”.
  2. I then thought “But let’s make it off-camera flash”.
  3. I went on to think “I want a dramatic image, so let’s use only flash light: available light should play no role”.
  4. To achieve that, I set my camera to manual exposure,  1/125th second, f/5.6, ISO 100. I took a test shot: black. Good, just what I wanted.
  5. Next, I aimed a single 430EX flash in slave mode at the wall diagonally from the side.
  6. Next, I attached a 1/4″ Honl Photo grid to the flash to avoid lighting up the whole wall; instead, I cast a nice parabola. That grid is my most used accessory, I think.
  7. I added a projected image of a set of lenses, only just visible.
  8. Now I put myself into that parabola: light straight into my face. Diagonal to the camera.
  9. I selected an almost-standard lens length (28mm on a Canon 7D, meaning a “real” 45mm) and off-centre composition, with a heavy shadow dramatically cast by me onto the wall.
  10. Finally, to take the shot I would have used a tripod, but since I had a student available, I asked her to shoot for me (Kayleigh, you know who you are).

And the result? Here it is.

Photographer Michael Willems

Photographer and educator Michael Willems, Oakville, 16 May 2011

(For best results, click and  view at original size)

What do you think? Me to a T, eh? This entire shot took just a few minutes to set up. You can do this too!


Internet on

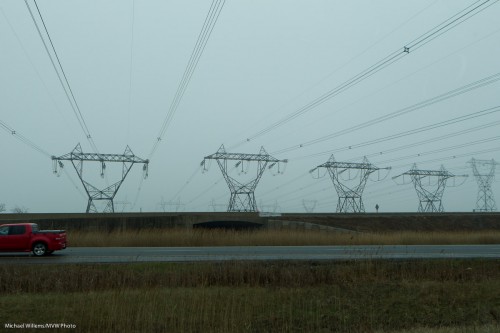
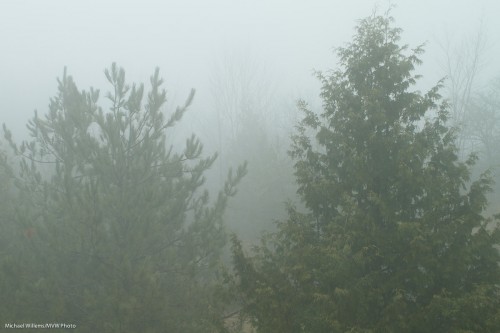
But the weather is still dreary here. All of this spring it has been around freezing, and it is grey like this:

Those images show me, though, that our environment can be especially beautiful in dreary weather. If like me you live in Ontario, you may want to go for a walk, and shoot some pictures.

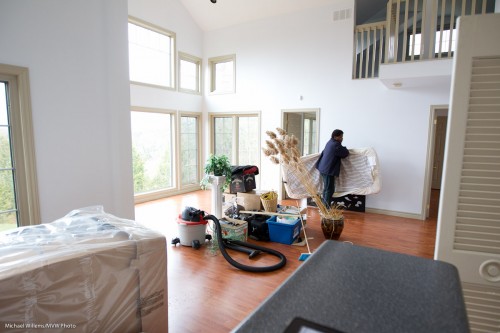
Anyway – in here I have nice weather. “In here” is in my new abode. Those of you who did workshops in Mono  will miss this location. Here, as it is being emptied:

So, no more Mono workshops, known for shots like this:

However: good news. Because of my closer proximity, there will be more workshops than before. And while not in the same location, they will be in great locations also. So stay tuned to hear more. As soon as I have finished unpacking!


How now, green screen?

Why do we use a “green screen” background to shoot subjects sometimes?

Here’s why. The simple colour (usually a specific green, though it could be blue or some other colour) can be replaced easily by a new background.

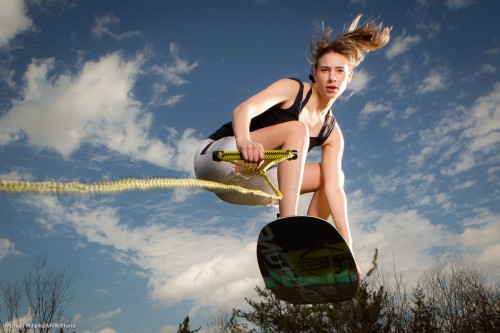
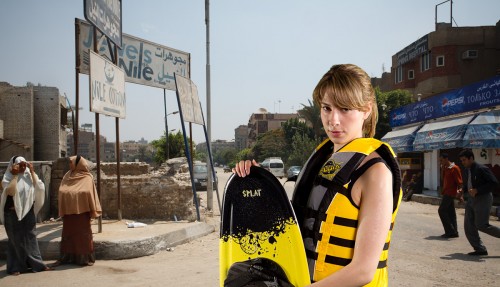
Say I want to shoot a wakeboarder in Egypt. Makes sense, the desert, wakeboarding, right? So to do this, I can fly her and a bunch of lights to Egypt.

Or, I can do the following instead.

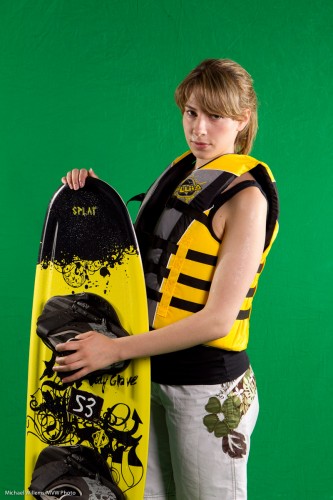
First, shoot her against a green screen background:

Jenna Fawcett against a green screen (Photo: Michael Willems 2011)

Jenna Fawcett against a green screen

Then go to Photoshop (not that I like Photoshop – I do not, but for serious manipulation work like this it is the standard) and do the following:

  1. Open the photo in Photoshop.
  2. Select ‘Color Range…’ from the ‘Select’ menu.
  3. After the Color Range dialog box comes up, click on the eyedropper tool, drag the ‘Fuzziness’ slider to around 30, check the ‘Invert’ checkbox, choose ‘Grayscale’ from the ‘Selection Preview’ popup and make sure the ‘Selection’ radio button is pressed.
  4. With the eyedropper tool, click in the green area of the image. You should see much of the green area as white, and the rest of the image (which gets selected) as black. If there are still areas of the green screen which are not white (e.g. wrinkles in the backdrop), hold down the Shift key and click on them with the eyedropper until all of the green area is selected.
  5. If there are still pixels here and there that are white, you can lower the Fuzziness until it is easier to click on the areas. You can use the ‘Refine Edge’ dialog from the ‘Select’ menu.
  6. Once you’re satisfied with your selection, click ‘OK’.
  7. You should see the object you are trying to select selected. If there are any problem areas (i.e. you see scrolling ants in areas inside or outside your selection that shouldn’t be selected), use the lasso tool (hold down Shift or Option (Mac)/Control (Windows) to add to or subtract from the selection) to make your selection perfect.
  8. Now you are ready to remove the green screen. Make sure you’re working with the proper layer, and, if you are on the ‘Background’ layer, double-click it and click ‘OK’ to make it into a normal layer, then select ‘Inverse’ from the ‘Select’ menu to reverse the selection.
  9. Now press the ‘delete’ button or select ‘Clear’ from the ‘Edit’ menu to remove the selection.
  10. The edges of your object/person may have a slight ‘halo’ around them. Clean them up by selecting ‘Layer>Matting>Remove White Matte’ or ‘Layer>Matting>Defringe…’; usually 1-3 pixels will do the trick.
  11. Now you can put any background you would like behind your cut-out object. I select ALL in the first image, then COPY, then I open the second image, and select PASTE. Now I scale, rotate, etc.

Now you get this:

Jenna Fawcett in a virtual Egypt (Photo: Michael Willems 2011)

Jenna Fawcett in a virtual Egypt

(Go to full screen to see the detail.)

Much cheaper than flying to Egypt. No? And it took only a  minute or two. If you have never tired “green screen”, you might find it occasionally fun or necessary.


Making it seem easy.

A student wrote to me just now, about last Saturday’s workshop, “You and Joseph make it look so easy!”.

He means things like turning this well-conceived but not-very well made available light snapshot…:

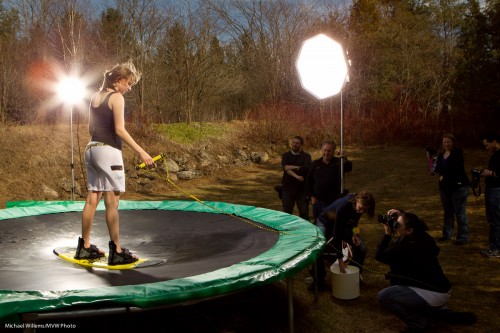
…into this creatively lit art photo:

That was from the workshop last Saturday. And yes, we shot this in the camera like that – it’s not Photoshopped.

Our student is underestimating himself, and based on past performance I am sure he did great – but his point is well taken. Experience makes everything seem easy. Brain surgery, too (one day I must ask  brain surgeon).

How do you learn? My teaching uses the following methodology:

  1. You learn by understanding technical basics.
  2. Then you build on those in a step-wise manner – logical progression is key here. Build understanding, one fact at a time. Only when you “get” one fact, move on to the next level, that builds on the previous.
  3. Then you lean how these principles and technologies apply in real life: i.e. what situations they address.
  4. Then you practice. This is when you really learn. During, and after, this practice, of course you continually go back to step 1 and review the fundamentals – and it is at this point that they will all eventually click into place.

That is behind my basic teaching (“learn the camera”), and my advanced teaching, in particular the “Advanced Flash” and “Event Photography” signature courses. And it is also behind the practical workshops Joseph Marranca and I teach to small groups of students.

Sometimes this teaching can seem a bit much. So many facts to learn! But compare this to driving a car, which is also complicated. Or try riding a bicycle.

An image is the confluence of moment, subject, and light. So, the key to the shot above is:

  1. Know the technical aspects of your photography (without that, all else fails);
  2. Come up with the concept;
  3. Ensure you have equipment;
  4. Ensure you have model, setting and props;
  5. Design the right lighting – the key step in this image;
  6. Execute!

On the workshops, we do everything from step 1 to 6. The shots above are made by everything coming together. Without the idea – nothing. Without model and props – nothing. Without technical skills – nothing. Without equipment – nothing.

So how did we make that shot?

We rented a boat, and… oh wait. No lake.

So we used the following:

Not something you set up in ten minutes, of course. But when you do it, and it all comes together, the images are great.


Beauty

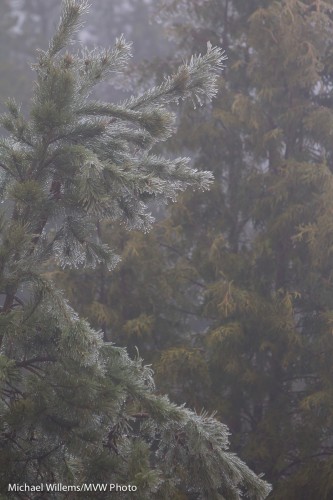
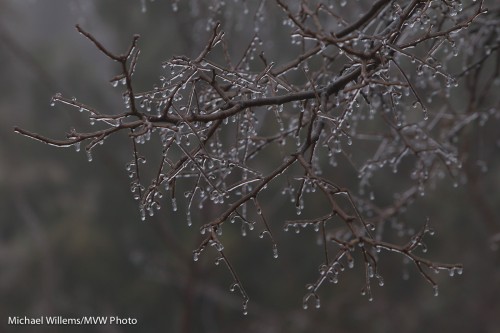
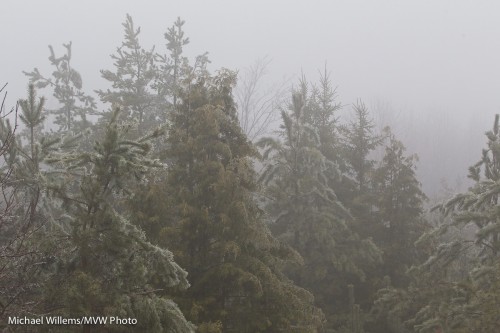
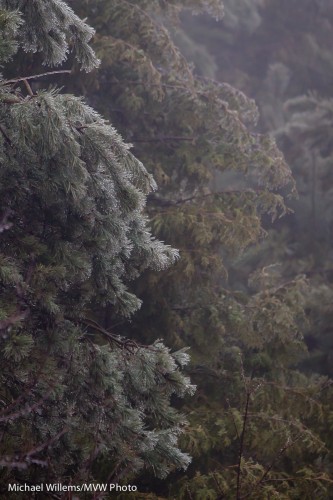
I ran a little late the other day. Because when I woke up, I saw we had had freezing rain overnight. My last days in Mono are ever more beautiful.

Mono foggy morning, after freezing rain

(You really have to see those at their original size to get the effect)

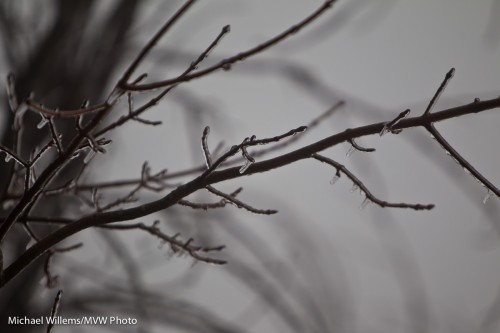
Mono morning, after freezing rain

Fog is low contrast. Low contrast, as I said the other cay, can be beautiful.

Mono foggy morning

A few tips:

  • Expose on auto, if you like – but since this is tricky light, do be ready to turn the exposure up or down in post-processing to get exactly what you were seeing.
  • Avoid creating a high contrast image by using your “levels” or “blacks” control.
  • Compose carefully.
  • Avoid “too-selective” focus. f/5.6 did it for me on my long lens (70-200).

Mono foggy morning, after freezing rain

And do shoot detail, too.

Mono foggy morning, after freezing rain

Nature can be beautiful, as long as you keep your eyes open for that detail; that sense of wonder that makes people write books about magic.


A quick product recipe

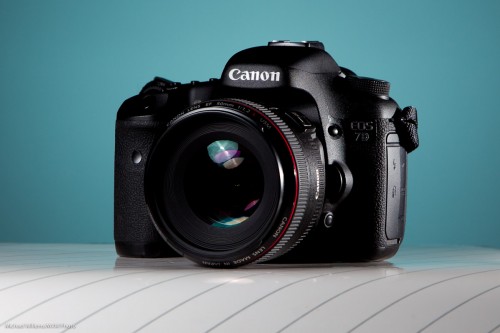
Here again is a quick product flash recipe using small flashes, since many of you have asked me.

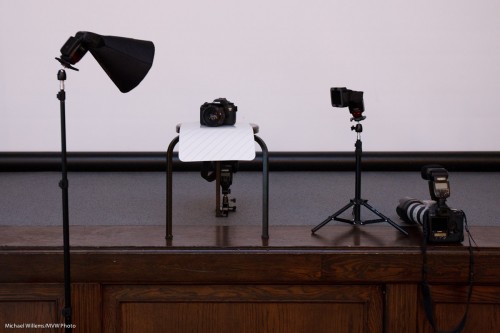
Step by step, then:

ONE. Find a neutral background.

TWO. Now find a stool, plus a surface for the product, preferably a sloping one. Put the product on the surface, with the background behind (far enough – the farther the better, usually), and do a sanity check. Look ok?

THREE. Add a main light. For this, use a flash with a modifier. I used a Honl Photo softbox in yesterday’s Three Minute Shot. Put this on a light stand, close to the product (close means larger, hence softer; it also means less light falls onto the background. This is important if you want to color it or leave it dark.)

FOUR. Add a fill light or edge light. I use a speedlight with a grid. Aim this at the product’s other side. In my case, slightly from behind.

FIVE. Add a background light. Again, I use a speedlight with a grid. Aim this at the background. I added a gel to the light: steel green seemed a nice colour.

Simple, no? This looked like this, in yesterday’s Three Minute Shot setup:

%2</p

—-

POST: Oh I hate this. I wrote a LONG blog post here, with TEN points, and then some more. And it seems to have vanished. And at midnight, I am not going to rewrite it.

But at least let me share the resulting shot:

Sigh!

Turkey shooting season

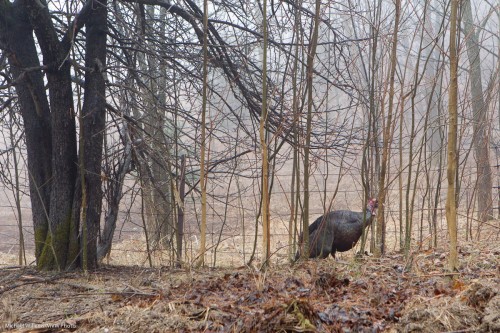
Man, the turkeys are wild out here in Mono. So I encountered this guy the other day, on my way home (I am informed he is a tom):

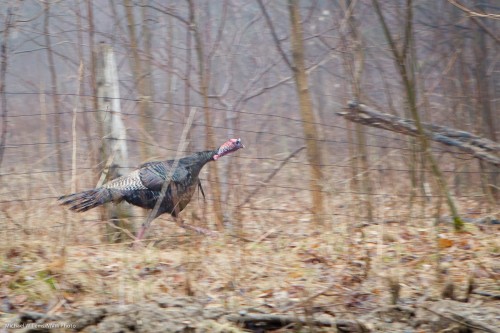
He is trying to get away from my car, but the fence prevents this. He runs and runs but the fence never ends. Brains are not the strongest suit for these birds, apparently. His girlfriends, incidentally, did run the right way, and they got away much more easily.

So I pan – in other words, I follow him with my camera as I shoot. That results in a blurred background and a fairly sharp bird:

In the original of image two, I had fairly low contrast: it was a very foggy day. Plus I was moving. Plus the bird was moving, too. I therefore did a little post work in Lightroom – a few seconds worth:

  • Exposure up half a stop;
  • “Blacks” to +25;
  • Slight white balance tweak to bring it to what I saw.

That was all I need to make a low-contrast image into an acceptable shot.

Sometimes you cannot capture what you want in the camera, and in those cases, as long as it not a news image, a little post work is, I think, allowed. (Click and view original size to see the real image, as always.)

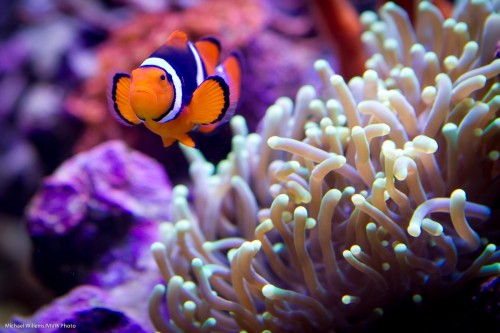
Finding Nemo

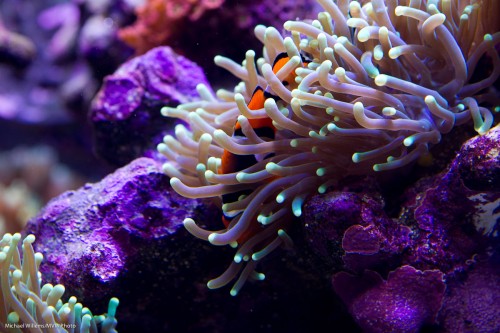
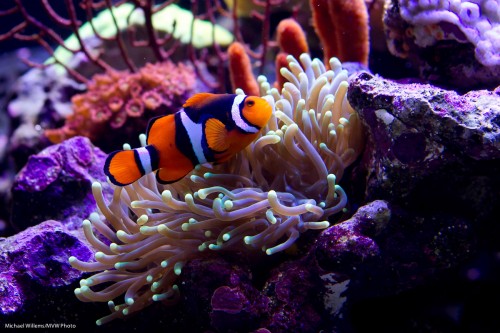
Found him:

He was hiding in these coral polyps. Which is, I understand, exactly what these fish do.

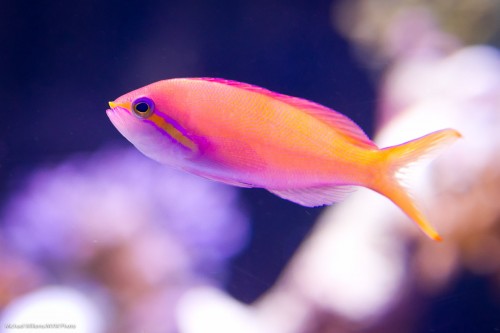
Today, in other words, some more aquarium shooting, and a few more tips on the same.

This time, on the camera settings:

  • Lens: I used a 24-70mm lens set to 70mm for most shots. On a 1.3 crop camera this gave me 90mm effective length. A 100mm macro lens would have done nicely, too.
  • Exposure mode: The mode to use is manual (although you could use program or aperture mode, since an aquarium probably does not vary all that much).
  • ISO: I shot at 800 ISO, which was a nice compromise between quality and speed.
  • Shutter speed and aperture: I used a shutter speed around 1/200th second and an aperture of f/5.6. At the chosen ISO of 800, this gave me a meter reading slightly below zero, and hence, well exposed pictures. An aquarium can be fairly bright, which is a good thing. The setting of f/5.6 (or f/4 in some images) gives me some depth of field, and 1/200th second gives me the ability to somewhat freeze motion.
  • Focus area: I set the focus area to one focus spot, and pointed that point at the main interest point in the picture – the fish’s eye.
  • Focus mode: I set the focus mode to AI Servo (AF-C for Nikon users). That way you can shoot moving objects.
  • Drive mode: I set the drive mode to continuous.
  • White balance: I used “Daylight”, since this aquarium was lit by sunlight-type light. Failing that, use “Auto” white balance.

Now that we are all set up, we shoot. A lot.

A few more tips:

  • We try to get as close to the glass as we can. This minimizes the imperfections of the glass.
  • The glass, of course, is clean.
  • Room light is dimmed as much as possible.
  • We may want to stabilize the camera e.g. with a monopod.
  • Avoid picturing too many artificial things (equipment) if you can.
  • Shooting perpendicular to the glass (see previous post on aquariums), since this preserves quality and minimizes the need to do any post-processing.

Remember that when using AI-Servo (AF-C) to shoot moving objects (or fish), you will be lucky if one third of your pictures are razor sharp even when you are experienced and have everything going for you. If you get one in ten extremely sharp, be happy.

At the same time – do not be too critical. If you print at 5×7 or even 8×10, you will not notice a slight blurriness.

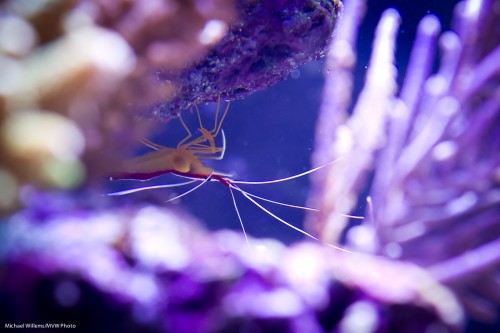
Nemo’s friend:

Prawn pregnancy:

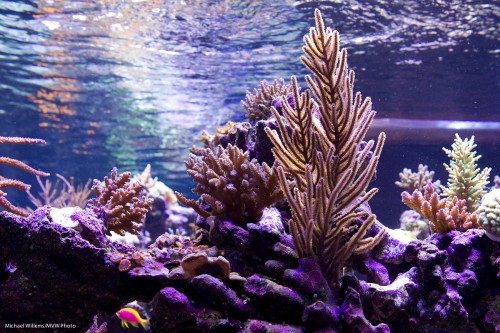
Nice reflections on top:

And finally, one more shot of our friend little Nemo:

Next week, a few more tips on photographing aquariums. In the mean time, if you have access to an aquarium, be prepared to spend a lot of time coming up with great shots. It’s worth it – an aquarium is a truly fascinating place, where nothing is ever the same.